If you’re looking to give your wooden surfaces a flawless and natural finish, staining with wood putty can be a game-changer. Wood putty is a versatile material that can fill imperfections, cracks, and holes in wood, providing a smooth surface for staining. By using a stainable wood putty, you can easily match the color and tone of the surrounding wood, creating a seamless and professional-looking result. In this article, we will explore the process of staining wood putty and the benefits it offers for enhancing the appearance of your woodwork.
Enhancing the Appearance: How to Stain Wood Putty for a Flawless Finish
When it comes to woodworking projects, filling gaps and cracks with wood putty is a common practice. Wood putty is a versatile material that helps create a smooth and seamless finish. However, when using wood putty, it’s important to also consider its appearance. Raw wood putty is often lighter in color and can stand out against the surrounding wood. To achieve a flawless finish, staining the wood putty is essential. In this section, we will guide you through the process of staining wood putty for an enhanced and cohesive look.

Materials You Will Need:
- Wood putty
- Stain
- Stir stick
- Cloth or brush
- Sandpaper
- Painter’s tape (optional)
Step 1: Preparation
The first step in staining wood putty is to prepare the surface. Start by ensuring that the wood putty is completely dry. If any excess putty is present, gently sand it down until the surface is smooth. This will help the stain adhere evenly to the wood putty.
Step 2: Choose the Right Stain
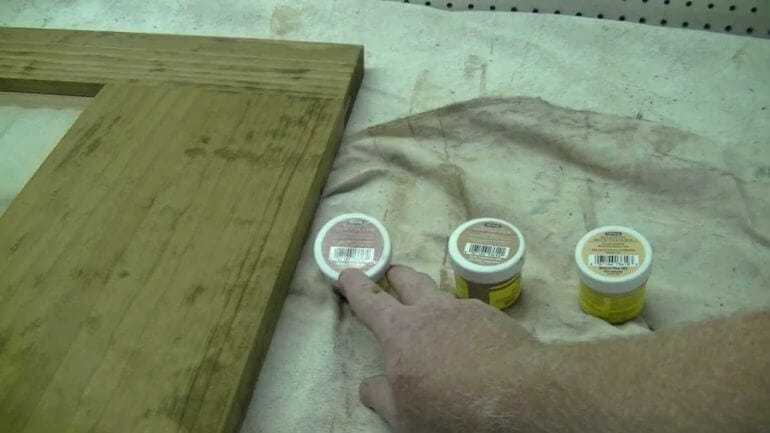
Next, choose a stain color that matches or complements the surrounding wood. It’s essential to select a stain that is specifically designed for wood surfaces. Consider the type of wood you are working with and test the stain on a small, inconspicuous area to ensure it achieves the desired color.
Step 3: Apply the Stain
Before applying the stain, thoroughly stir it using a stir stick to ensure an even distribution of color. Use a cloth or brush to apply the stain to the wood putty. Start by dabbing a small amount of stain onto the putty and gradually blend it into the surrounding wood. Take care to apply the stain evenly and in the same direction as the wood grain for a natural look.
Step 4: Wipe off Excess Stain
After applying the stain, allow it to sit on the wood putty for the recommended time specified on the stain’s packaging. Then, use a clean cloth to gently wipe off any excess stain. This will help achieve a more uniform and polished finish.
Step 5: Finishing Touches
If necessary, repeat the staining process to achieve a deeper or richer color. Once you are satisfied with the color, allow the stain to dry completely according to the manufacturer’s instructions. If desired, you can also apply a clear topcoat or varnish to protect and enhance the stained wood putty.
In summary, staining wood putty is a crucial step in achieving a flawless finish in woodworking projects. By following the steps outlined above and taking your time to ensure even application, you can seamlessly blend the wood putty with the surrounding wood for an enhanced appearance. Remember to choose a stain color that complements the wood and test it on a small area before applying it to the entire surface. With proper preparation and attention to detail, you can achieve a professional and cohesive finish that showcases your woodworking skills.
Step-by-Step Guide: Staining Wood Putty to Match Your Furniture or Flooring
Wood putty is a versatile material used to fill gaps, cracks, and holes in wood surfaces. While it can provide a smooth and seamless finish, the standard putty color may not always match the color of your furniture or flooring. In such cases, staining the wood putty can help you achieve a cohesive and aesthetically pleasing look. Follow this step-by-step guide to learn how to stain wood putty to match your furniture or flooring.
Step 1: Prepare the Wood Surface
Before you begin staining the wood putty, it is essential to prepare the wood surface properly. Start by cleaning the area around the putty, removing any dust, dirt, or debris. Use a soft cloth or brush to ensure a clean surface for the stain to adhere to.
Step 2: Select the Right Stain
Choose a stain that matches the color of your furniture or flooring. Consider the type of wood you are working with, as different woods may absorb stain differently. Test the stain on a small, inconspicuous area to ensure the color is a close match before applying it to the wood putty.
Step 3: Apply the Stain
Using a small brush or cotton swab, apply the stain to the wood putty. Start with a thin layer and build up the color gradually, allowing each layer to dry before applying the next. Take care not to apply too much stain at once, as it may result in an uneven or blotchy finish.
If the wood putty is recessed, you can use a putty knife or a plastic scraper to level it with the surrounding wood surface before staining. This will ensure a smoother and more seamless look once the staining is complete.
Step 4: Blend and Feather the Stain
To achieve a natural and seamless appearance, blend the stained wood putty with the surrounding wood. Use a clean, soft cloth to gently feather the edges of the stain, blending it into the wood surface. This helps to create a smooth transition between the stained putty and the rest of the wood.
Step 5: Allow the Stain to Dry and Cure
Once you have achieved the desired color and blend, allow the stain to dry completely. Follow the manufacturer’s recommendations for drying time, as it may vary depending on the type of stain used. Avoid touching or placing any objects on the stained area until it has fully cured to prevent smudging or damage.
Step 6: Protect and Seal the Stained Putty
To ensure the longevity of the stained wood putty, protect it with a sealant. Apply a clear coat or varnish over the stained area, following the product instructions. This will help to protect the stain from wear, moisture, and other elements, preserving its color and finish over time.
Step 7: Maintain and Touch Up as Needed
Regularly inspect the stained wood putty for any signs of damage or wear. If necessary, touch up the stain to maintain its color and appearance. Follow the same steps outlined above to re-stain the putty and blend it with the surrounding wood surface.
Summary
Staining wood putty is a simple yet effective way to ensure a seamless and cohesive look between the putty and your furniture or flooring. By following this step-by-step guide, you can achieve a color match that enhances the overall aesthetic of your wood surfaces. Remember to prepare the wood surface, select the right stain, apply it carefully, blend and feather for a natural appearance, allow the stain to dry and cure, protect with a sealant, and maintain the stained putty as needed. With these steps, you can easily transform the appearance of your wood putty and create a visually appealing finish.
Choosing the Right Stain: Tips for Selecting the Perfect Shade for Wood Putty
Wood putty is a versatile material used to fill in cracks, gaps, and imperfections in wood surfaces. Once the putty is applied, it needs to be stained to match the surrounding wood for a seamless finish. However, selecting the perfect shade of stain for wood putty can be a daunting task. In this section, we will provide you with some useful tips to help you choose the right stain color for your wood putty.
1. Consider the Type of Wood
The first step in choosing the right stain color for wood putty is to consider the type of wood you are working with. Different wood species react differently to stains, and the natural color of the wood can influence the final stain color. For example, if you are working with a light wood such as pine, lighter stain shades will work best. On the other hand, darker wood species like mahogany or walnut can handle deeper, richer stain colors.
2. Test the Stain on a Sample Piece
Before applying the stain to the wood putty directly, it is essential to test it on a small, inconspicuous area or a sample piece of wood. This will allow you to see how the stain color interacts with the wood putty and ensures that you achieve the desired result. Keep in mind that the color may appear slightly different once applied to the putty, so testing is crucial.
3. Consider the Desired Look
Think about the overall look you want to achieve with your wood project. Are you aiming for a natural, rustic appearance, or do you prefer a more modern and sleek finish? Keep in mind that lighter stain shades tend to highlight the natural wood grain and imperfections, while darker shades provide a more dramatic and uniform look.
4. Match Stain Colors
If you are working on a project where you need to match existing wood surfaces, such as hardwood floors or furniture, it is important to select a stain color that closely matches the existing wood. Bring a small sample of the wood or a picture of the desired color to the store to help you find the closest match. Mixing different stain colors may also be necessary to achieve the desired result.
5. Consider the Finish
Aside from the color, it is also important to consider the finish of the stain. Stains come in various finishes, such as matte, satin, semi-gloss, and gloss. The finish can significantly impact the final appearance of the wood putty. Matte finishes tend to provide a more natural and subtle look, while glossier finishes can give a more polished and shiny appearance.
6. Consult with Professionals
If you are unsure about which stain color to choose for your wood putty, do not hesitate to seek advice from professionals. Visit a local woodworking store or consult with a woodworker or interior designer who can provide valuable insights and recommendations based on their experience. They can help you navigate through the various options and suggest the best stain color for your specific project.
In summary, selecting the right stain color for wood putty requires careful consideration of the type of wood, testing the stain on a sample piece, considering the desired look, matching stain colors, choosing the appropriate finish, and consulting with professionals if needed. By following these tips, you can achieve a flawless finish and enhance the overall aesthetic appeal of your wood project.
Expert Tips: Techniques for Achieving a Seamless Stain on Wood Putty
Wood putty is a versatile material that can be used to fill gaps, cracks, and holes in wood surfaces. It is commonly used in woodworking projects to achieve a smooth and seamless finish. However, when it comes to staining wood putty, achieving a seamless look can be a bit challenging. In this section, we will discuss some expert tips and techniques that can help you achieve a seamless stain on wood putty.
1. Choose the Right Wood Putty
The first step to achieving a seamless stain on wood putty is to choose the right product. There are different types of wood putty available in the market, each with its own characteristics. It is important to select a wood putty that is specifically designed for staining. Look for a putty that is stainable and matches the color of the wood you are working with. This will ensure a better color match and a seamless finish.
2. Prepare the Surface
Before applying the wood putty, it is crucial to prepare the surface properly. Start by cleaning the wood surface to remove any dirt, debris, or old finish. Sand the area around the hole or crack to create a smooth and even surface. This will help the wood putty adhere better and blend seamlessly with the surrounding wood.
3. Apply the Wood Putty
When applying the wood putty, it is important to apply it in thin layers. Use a putty knife or a flexible plastic scraper to spread the putty evenly over the damaged area. Avoid applying too much putty at once, as it can result in an uneven surface. Instead, apply thin layers and allow each layer to dry before applying the next. This will help you achieve a smoother and more even finish.
4. Sand the Putty
Once the wood putty has dried, sand it gently to remove any excess putty and to create a smooth and even surface. Start with a coarse-grit sandpaper and gradually move to a finer-grit sandpaper. This will help you achieve a seamless transition between the putty and the surrounding wood.
5. Test the Stain
Before applying the stain to the entire surface, it is important to test it on a small, inconspicuous area. This will help you determine if the stain matches the color of the wood putty and the surrounding wood. Adjust the stain if necessary to achieve a better color match.
6. Apply the Stain
Once you are satisfied with the color match, apply the stain to the wood putty using a brush or a cloth. Apply the stain in thin coats, allowing each coat to dry before applying the next. This will help you achieve a more even and seamless stain.
7. Seal the Stained Wood
After the stain has dried, it is important to seal the stained wood to protect it and enhance its durability. Apply a clear sealer or a varnish over the stained wood using a brush or a cloth. This will help seal the stain and provide a smooth and glossy finish.
In summary, achieving a seamless stain on wood putty requires careful preparation, application techniques, and attention to detail. By following the expert tips and techniques mentioned above, you can achieve a smooth and flawless finish that blends seamlessly with the surrounding wood.
Common Mistakes to Avoid When Staining Wood Putty for a Professional Look
Wood putty is a versatile material that is commonly used to fill in gaps, holes, and cracks in wooden surfaces. It is often necessary to stain the putty to match the color of the surrounding wood for a seamless finish. However, staining wood putty can be tricky if not done correctly. In this section, we will discuss some common mistakes to avoid when staining wood putty to achieve a professional look.
1. Not Preparing the Surface Properly
One of the most common mistakes when staining wood putty is not preparing the surface properly. Before applying any stain, it is crucial to ensure that the putty is clean and free from dust, debris, and any previous finish. Use a clean cloth or brush to remove any loose particles and wipe the surface with a mild cleaner or denatured alcohol. This will help the stain adhere evenly and prevent any blotching or uneven coloration.
2. Using the Wrong Type of Stain
Choosing the right type of stain is essential for achieving a professional look when staining wood putty. There are two main types of wood stains: oil-based and water-based. Oil-based stains penetrate deeper into the wood and provide a richer color, while water-based stains dry faster and are more environmentally friendly. Be sure to select a stain that is compatible with the type of wood putty you are using and consider the desired finish before making a choice.
3. Applying Too Much Stain
One common mistake that can ruin the appearance of stained wood putty is applying too much stain. Excessive application can result in a thick and uneven coat, leading to an unnatural and messy look. To avoid this, apply the stain in thin layers using a brush or cloth. Start with a small amount and gradually build up the color until the desired shade is achieved. Remember, it is easier to add more stain than to remove excess stain.
4. Neglecting to Test the Stain Color
It is always a good idea to test the stain color on a small, inconspicuous area before applying it to the entire surface of the wood putty. This allows you to see how the stain interacts with the putty and the surrounding wood, ensuring that you achieve the desired color. Additionally, different types of wood putty may react differently to the stain, so testing beforehand can help you avoid any unwanted surprises.
5. Skipping the Sealer
Applying a sealer after staining wood putty is crucial to protect the finish and enhance its durability. The sealer acts as a barrier, preventing moisture and other elements from penetrating the wood and causing damage. It also helps to maintain the color and prevents the stain from fading over time. Choose a clear sealer that is specifically designed for use on stained wood surfaces and apply it according to the manufacturer’s instructions.
In summary, staining wood putty requires careful preparation and attention to detail. By avoiding these common mistakes, you can achieve a professional-looking finish that seamlessly blends the wood putty with the surrounding surface. Remember to prepare the surface properly, choose the right stain, apply it in thin layers, test the color beforehand, and seal the stained wood putty to protect and enhance its appearance.

FAQs
Can wood putty be stained?
Yes, wood putty can be stained. However, it may not absorb the stain as well as natural wood, resulting in a slightly different color. It is recommended to test the stain on a small inconspicuous area before applying it to the entire surface.
Conclusion:
In conclusion, wood putty can indeed be stained, making it a versatile option for various woodworking projects. By using a suitable wood stain, you can easily match the color of the putty with the surrounding wood. This allows for seamless repairs and a flawless finish. Additionally, stained wood putty can enhance the overall aesthetics of your project by creating a uniform and cohesive appearance.
Whether you are filling gaps, cracks, or imperfections in your woodwork, staining the wood putty ensures a professional and polished look. It is important to follow the manufacturer’s instructions for both the putty and the stain to achieve the desired outcome. With the ability to stain wood putty, you have the freedom to create flawless and stunning woodworking masterpieces.