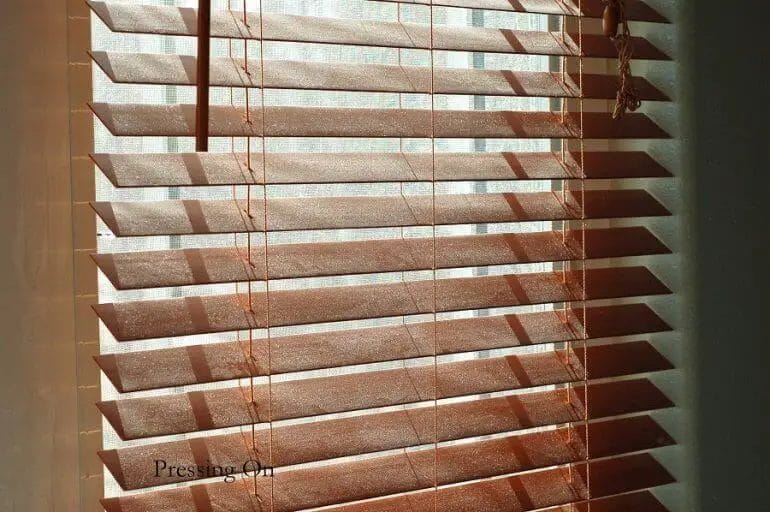
Faux wood blinds are a popular window treatment option that can add style and functionality to any space. Made from durable materials such as PVC or composite wood, these blinds offer the look of real wood without the maintenance. But can you paint faux wood blinds? The answer is yes! With the right preparation and materials, you can easily customize your faux wood blinds to match your decor or give them a fresh new look. Read on to discover the step-by-step process of painting faux wood blinds and create a personalized window treatment that perfectly complements your space.
Transforming Your Blinds: A Guide to Painting Faux Wood Blinds
Are you tired of the same old look of your faux wood blinds? Do you want to give them a fresh new look without having to buy new ones? If so, painting your faux wood blinds can be a great solution. In this section, we will guide you through the process of painting your blinds to transform them into something stylish and unique.

Materials Needed
Before you start painting your faux wood blinds, make sure you have the following materials handy:
- Painter’s tape
- Sandpaper (fine-grit)
- Primer
- Paintbrush or roller
- Paint in your desired color
- Paint tray
- Drop cloth or old sheets
- Clean cloth
- Optional: Clear coat or sealant
Step 1: Prepare the Blinds
The first step in painting your faux wood blinds is to prepare them properly. Start by cleaning the blinds with a damp cloth to remove any dust or dirt. Allow them to dry completely before proceeding.
Next, use painter’s tape to cover any areas that you do not want to paint, such as the strings or the mechanism that controls the blinds. This will ensure that only the slats of the blinds get painted.
Step 2: Sand and Prime
Using fine-grit sandpaper, gently sand the surface of the blinds. This will help the paint adhere better to the surface. After sanding, wipe away any dust with a clean cloth.
Once the blinds are sanded, apply a layer of primer. This will create a smooth surface for the paint and help it adhere better. Allow the primer to dry according to the manufacturer’s instructions.
Step 3: Paint the Blinds
Now it’s time to add some color to your blinds. Choose a paint color that matches your desired look and pour it into a paint tray. Using a paintbrush or roller, apply an even coat of paint to the slats of the blinds, making sure to cover all surfaces.
Allow the first coat of paint to dry completely and then apply a second coat if necessary. This will ensure a more opaque and even finish. If you prefer a distressed or weathered look, you can lightly sand the edges of the blinds after the paint has dried.
Step 4: Optional Clear Coat
If you want to add extra durability to your newly painted blinds, you can apply a clear coat or sealant. This will protect the paint from chipping or peeling over time. Follow the manufacturer’s instructions for the clear coat and allow it to dry completely.
Step 5: Reinstall the Blinds
Once the paint and clear coat have dried, carefully remove the painter’s tape. Now you can reinstall the blinds in their original location. Take your time to make sure they are properly aligned and functioning correctly.
Summary
Painting your faux wood blinds is a great way to transform their look and give them a fresh new appearance. With the right materials and proper preparation, you can achieve a professional-looking finish. Follow the steps outlined in this guide to successfully paint your blinds and enjoy a stylish and unique window treatment in your home.
DIY Project: Revamping Faux Wood Blinds with Paint
Faux wood blinds are a popular choice for window treatments due to their durability and affordability. However, over time, they can start to look outdated or worn out. If you’re looking to give your faux wood blinds a fresh new look, revamping them with paint is an excellent DIY project that can transform the appearance of your windows. In this section, we will guide you through the step-by-step process of revamping your faux wood blinds with paint.
Materials Needed
Before you begin, gather the following materials:
- Faux wood blinds
- Sandpaper (medium-grit)
- Cloth or sponge
- Primer
- Paint (latex or acrylic)
- Paintbrush or roller
- Newspaper or drop cloth
- Painter’s tape
Step 1: Preparation
Start by removing the blinds from the window. Lay them flat on a covered surface, such as a newspaper or drop cloth, to protect the surrounding area. Next, use sandpaper to lightly sand the surface of the blinds. This will create a rough texture that allows the paint to adhere better. After sanding, wipe away any dust or debris with a cloth or sponge.
Step 2: Priming
Applying a coat of primer is essential to ensure a smooth and long-lasting finish. Use a paintbrush or roller to evenly apply the primer to the blinds. Be sure to cover all surfaces, including the slats and the headrail. Allow the primer to dry completely according to the manufacturer’s instructions.
Step 3: Painting
Once the primer is dry, it’s time to paint your faux wood blinds with the color of your choice. Start by stirring the paint well to ensure an even consistency. Apply the paint in thin, even layers, using a paintbrush or roller. Be mindful not to apply too much paint at once, as it can lead to drips or uneven coverage. Allow each coat of paint to dry before applying the next one. Multiple thin coats will result in a more professional finish.
Step 4: Finishing Touches
After the final coat of paint has dried, inspect the blinds for any imperfections or touch-up areas. Use a small paintbrush to fix any spots that may require additional paint. Once you are satisfied with the overall appearance, allow the blinds to fully dry and cure before reinstalling them.
Tips and Considerations
Here are some additional tips and considerations to keep in mind during the revamping process:
- Choose a high-quality paint that is specifically formulated for use on wood surfaces.
- If desired, you can add a clear protective sealant over the painted blinds to enhance durability.
- Consider using painter’s tape to protect any areas you don’t want to be painted, such as the ladder cords.
- Experiment with different paint colors to match your interior decor or create a bold statement.
- Take your time during each step to ensure a smooth and professional-looking finish.
In summary, revamping faux wood blinds with paint is a rewarding DIY project that can breathe new life into your window treatments. By following these steps and being mindful of the tips provided, you can achieve a fresh and stylish look for your blinds without breaking the bank. So, grab your supplies and get ready to transform your windows with a little paint and creativity!
Add a Pop of Color: Painting Techniques for Faux Wood Blinds
Are you tired of the plain, ordinary look of your faux wood blinds? Do you want to add a touch of personality and style to your window treatments? Look no further! With just a few simple painting techniques, you can transform your faux wood blinds into stunning, custom pieces that will make a statement in any room.
Before you begin, it’s important to gather all the necessary materials. You will need:
- Faux wood blinds
- Paint in your desired colors
- Paintbrushes
- Painter’s tape
- Drop cloths or newspaper to protect your work area
- Sandpaper
- Primer (optional)
- Clear sealant or varnish
Step 1: Prepare the Blinds
Start by removing the blinds from the window and laying them on a flat surface. Remove any dust or dirt by wiping them down with a damp cloth. If your blinds have a glossy finish, lightly sand them to create a rough surface. This will help the paint adhere better.
Step 2: Prime (optional)
If you want to ensure a smooth and even paint application, you can apply a coat of primer to the blinds. This is especially helpful if you’re painting a darker color over a lighter shade. Primer will also help the paint last longer and resist chipping.
Step 3: Tape and Protect
Next, use painter’s tape to mask off any areas you don’t want to paint, such as the ladder cords and the mechanism at the top of the blinds. Cover the surrounding area with drop cloths or newspaper to protect it from paint splatter.
Step 4: Paint
Now comes the fun part – painting! Choose your desired color(s) and start applying the paint to the blinds. You can use a small brush for more intricate designs or a larger brush for broader strokes. Experiment with different techniques, such as sponge painting, stenciling, or even freehand designs. Let your creativity shine!
Remember to apply thin, even coats of paint and allow each coat to dry completely before applying the next. This will help prevent drips and ensure a smooth finish. If you want to add multiple colors, make sure to let each color dry before moving on to the next.
Step 5: Seal and Protect
Once you’re satisfied with the paint job, it’s time to seal and protect your newly painted blinds. Apply a clear sealant or varnish to the blinds to protect the paint from fading or chipping. This will also make them easier to clean and maintain.
Step 6: Reinstall and Enjoy
After the sealant has dried, carefully remove the painter’s tape and reinstall the blinds in your window. Step back and admire your handiwork! Your faux wood blinds have now been transformed into a beautiful focal point that adds a pop of color and personality to your space.
In summary, painting your faux wood blinds is a simple and cost-effective way to add style and character to your window treatments. With a little creativity and the right materials, you can turn plain blinds into works of art. So why settle for boring when you can have beautiful? Get started on your painting project today and enjoy the vibrant new look of your windows.
Step-by-Step: How to Paint Faux Wood Blinds Like a Pro
If you’re looking to update the look of your faux wood blinds, painting them can be a cost-effective solution. Whether you want to match them with your room’s decor or give them a fresh new color, painting faux wood blinds is a simple and rewarding DIY project. In this section, we will guide you through a step-by-step process to help you achieve professional-looking results.
Materials You Will Need:
- Faux wood blinds
- Tape measure
- Drop cloth or newspaper
- Painter’s tape
- Sandpaper (fine-grit)
- Primer
- Paint (latex or acrylic)
- Paintbrush or roller
- Paint tray
- Screwdriver
- Old cloth or sponge
Step 1: Prepare the Area
Start by removing the blinds from the window. Lay them flat on a drop cloth or newspaper to protect the surface from paint splatters. Use a screwdriver to remove any hardware or attachments that may be attached to the blinds. This will make the painting process easier and prevent any unwanted paint drips.
Step 2: Clean the Blinds
Before painting, it’s important to clean the blinds to remove any dust or debris that may affect the finish. Use a damp cloth or sponge to wipe down each slat, making sure to remove any grime or residue. Allow the blinds to dry completely before proceeding.
Step 3: Sand the Blinds
To ensure proper adhesion of the paint, lightly sand the blinds using fine-grit sandpaper. This will help create a smooth surface and remove any glossy finish. Be gentle while sanding to avoid damaging the blinds.
Step 4: Apply Primer
Priming the blinds is essential to achieve a professional-looking finish. Apply a thin coat of primer using a brush or roller, making sure to cover each slat evenly. Allow the primer to dry according to the manufacturer’s instructions.
Step 5: Paint the Blinds
Once the primer is dry, it’s time to apply the paint. Choose a high-quality latex or acrylic paint in your desired color. Stir the paint thoroughly and pour it into a paint tray. Use a brush or roller to apply an even coat of paint to each slat. Work in small sections, starting from the top and working your way down.
Step 6: Let the Paint Dry
After painting, allow the blinds to dry completely before handling or reattaching them. Follow the paint manufacturer’s instructions for drying time, as it may vary depending on the type of paint used. Avoid touching the blinds until they are fully dry to prevent smudging or marring the finish.
Step 7: Reattach the Blinds
Once the paint is dry, reattach any hardware or attachments that were removed earlier. Use a screwdriver to secure them in place. Carefully hang the blinds back in the window, making sure they are level and operating smoothly.
Step 8: Enjoy Your Newly Painted Blinds
With the blinds back in place, step back and admire your handiwork. You have successfully painted your faux wood blinds to give them a fresh new look. Enjoy the updated appearance and the sense of accomplishment that comes with completing a DIY project.
In summary, painting faux wood blinds is a straightforward process that can transform the look of your windows. By following these step-by-step instructions and using the right materials, you can achieve professional-looking results and enjoy a custom look in your home.
A Fresh Look for Your Windows: Painting Faux Wood Blinds for a Stylish Upgrade
Faux wood blinds are a popular choice for window treatments due to their durability and affordability. However, over time, the color and finish of these blinds can become outdated or faded. If you’re looking to give your windows a fresh new look without replacing the blinds altogether, painting faux wood blinds is a fantastic option.
In this section, we will guide you through the process of painting your faux wood blinds, allowing you to achieve a stylish upgrade that complements your interior decor. Let’s dive in and explore the steps involved in this DIY project.
Gather Your Materials
Before you begin, it’s essential to gather all the necessary materials. Here’s a list of what you’ll need:
- Faux wood blinds
- Painter’s tape
- Fine-grit sandpaper
- Primer
- Paint (acrylic or spray paint)
- Paintbrush or paint sprayer
- Dust sheet or newspaper
- Drop cloth
- Optional: clear sealant or topcoat
Prepare the Blinds
Begin by preparing the blinds for painting. Follow these steps:
- Remove the blinds from the window and lay them on a flat surface, such as a table or floor. Place a dust sheet or newspaper underneath to protect the surface.
- Use painter’s tape to cover any areas you don’t want to paint, such as the mechanism or cords.
- Lightly sand the blinds with fine-grit sandpaper. This will help the primer and paint adhere better to the surface.
Prime the Blinds
Next, apply a coat of primer to the blinds. Primer helps create a smooth and even surface for the paint to adhere to. Follow these steps:
- Choose a primer specifically designed for the material of your blinds, such as wood or plastic.
- Apply a thin and even coat of primer using a paintbrush or paint sprayer. Ensure that you cover the entire surface of the blinds.
- Allow the primer to dry completely before moving on to the next step. Refer to the product instructions for drying times.
Paint the Blinds
Now comes the fun part: painting the blinds in your chosen color. Follow these steps:
- Select a paint color that complements your interior decor and personal style. Consider using acrylic paint or spray paint for an even and smooth finish.
- Apply the paint using a paintbrush or paint sprayer, ensuring that you cover the blinds evenly. Start with thin layers and allow each coat to dry before applying the next one.
- If you prefer a distressed or weathered look, you can use a dry brush technique to lightly brush on a second color or create texture.
- Once you’re satisfied with the color and finish, allow the paint to dry thoroughly before rehanging the blinds.
Apply a Sealant (Optional)
If you want to protect the painted surface and enhance its longevity, you can consider applying a clear sealant or topcoat. Follow these steps:
- Choose a sealant or topcoat specifically formulated for the type of paint you used.
- Apply a thin and even coat of sealant using a paintbrush or spray applicator. This will help protect the paint from scratches and fading.
- Allow the sealant to dry completely before reinstalling the blinds.
Reinstall the Blinds
Once the painted blinds are completely dry, it’s time to reinstall them on your windows. Follow these steps:
- Remove the painter’s tape and any protective coverings from the blinds.
- Carefully rehang the blinds in their original position, ensuring that they are aligned and level.
- Test the functionality of the blinds by operating the cords and tilt mechanism.
In Summary
Painting faux wood blinds is a fantastic way to give your windows a stylish upgrade without breaking the bank. With just
Frequently Asked Questions
Can you paint faux wood blinds?
Yes, you can paint faux wood blinds. Start by cleaning the blinds thoroughly. Then, lightly sand the surface to create a better adhesion for the paint. Apply a primer and let it dry before painting with your desired color. Finish with a clear sealant for added protection.
Conclusion
In conclusion, painting faux wood blinds is a great way to refresh your window treatments and give them a new look. Whether you want to match the blinds to your room’s color scheme or update them with a trendy shade, painting can be a cost-effective solution. By following the proper preparation and painting techniques, you can achieve a professional and durable finish. Remember to clean the blinds thoroughly, sand them to create a smooth surface, and use a high-quality paint and primer specially designed for faux wood surfaces. With a little time and effort, you can transform your blinds and enhance the overall aesthetic of your space.
So, go ahead and unleash your creativity by giving your faux wood blinds a fresh coat of paint. Not only will this allow you to customize your window treatments, but it will also breathe new life into your decor. Whether you choose a bold and vibrant color or opt for a more subtle tone, painted faux wood blinds can instantly elevate the style and ambiance of any room. So don’t hesitate to pick up a brush and start transforming your blinds into a statement piece that reflects your personal style and adds a touch of uniqueness to your home.
