When it comes to staining wood, the number of coats you apply can greatly impact the final look and durability of the finish. Generally, it is recommended to apply at least two coats of stain to achieve a rich, even color. However, the number of coats can vary depending on factors like the type of wood, desired intensity of color, and personal preference. Applying multiple thin coats allows for better absorption and a smooth, professional finish. Ultimately, experimenting with different coat numbers and techniques will help you achieve the desired result for your wood staining project.

Choosing the Right Stain for Your Wood Project
When working on a wood project, one of the most important decisions you’ll need to make is choosing the right stain. The stain you choose will not only affect the appearance of your wood but also its durability and longevity. With so many options available, it can be overwhelming to make a decision. In this section, we will guide you through the process of selecting the perfect stain for your wood project.

1. Consider the Wood Type
The first step in choosing the right stain is to consider the type of wood you are working with. Different wood species absorb stain differently, resulting in varying degrees of color intensity. Some woods, like oak and mahogany, are known for their natural grain patterns, which can be enhanced by using a transparent stain. Others, like pine and poplar, have a more consistent texture and may require a different type of stain to achieve the desired look.
2. Determine the Desired Color
Next, think about the color you want to achieve for your wood project. Stains come in a wide range of colors, from light and natural to dark and rich. Consider the overall aesthetic of your project and the desired mood you want to create. Lighter stains tend to highlight the natural beauty of wood, while darker stains can add depth and richness. It’s also worth noting that some stains have a hint of red, yellow, or brown undertones, so be sure to test the stain on a small, inconspicuous area before applying it to the entire piece.
3. Assess the Transparency Level
Transparency is another important factor to consider when choosing a stain. Transparent stains allow the natural grain and texture of the wood to show through, while semi-transparent and solid stains provide more coverage and can hide imperfections. If you want to showcase the wood’s natural beauty, opt for a transparent or semi-transparent stain. For a more uniform appearance or to cover up flaws, a solid stain may be the better choice.
4. Consider the Application Method
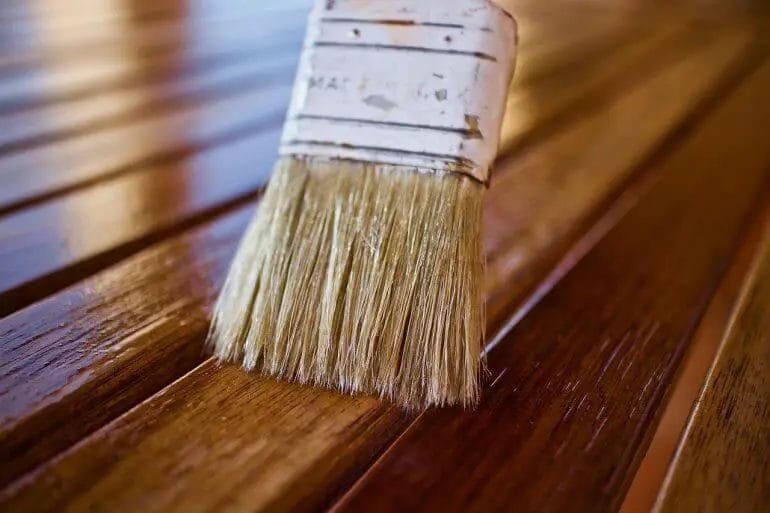
Another factor to consider is the application method. Stains can be applied using a brush, cloth, or spray. The method you choose will depend on the size of your project, the type of wood, and your personal preference. Brushes and cloths allow for more control and precision, while sprays can be quicker and more efficient for larger surfaces. Be sure to follow the manufacturer’s instructions for the best results.
5. Test Before Applying
Before applying the stain to your entire wood project, it’s crucial to test it on a small, inconspicuous area. This will give you a better idea of how the stain will look on your specific wood type and help you make any necessary adjustments. Apply the stain and let it dry completely before assessing the color and transparency. If you’re satisfied with the results, you can proceed with staining the rest of your project.
6. Consider Protective Coatings
Lastly, don’t forget to consider protective coatings for your stained wood. Clear topcoats, such as polyurethane or varnish, can help protect the wood from moisture, UV rays, and everyday wear and tear. They can also enhance the stain’s color and provide a smooth, durable finish. Make sure to follow the manufacturer’s instructions for application and drying times.
Choosing the right stain for your wood project can make all the difference in achieving the desired look and ensuring its longevity. By considering the wood type, desired color, transparency level, application method, and protective coatings, you’ll be well on your way to selecting the perfect stain. Remember to test before applying and enjoy the process of transforming your wood into a beautiful, customized masterpiece.
Applying Stain on Unfinished Wood: Step-by-Step Guide
Staining unfinished wood is a great way to enhance its natural beauty and protect it from damage. Whether you’re working with a new piece of furniture or refinishing an old one, applying stain can transform the look of the wood. In this guide, we’ll walk you through the step-by-step process of applying stain on unfinished wood.
1. Prepare the Wood Surface
The first step in applying stain is to prepare the wood surface. Start by sanding the wood with fine-grit sandpaper to create a smooth and even surface. Be sure to sand along the grain of the wood to avoid any scratches or damage. Once the wood is sanded, use a damp cloth to remove any dust or debris.
2. Choose the Right Stain
Next, choose the right stain for your project. Stains come in a variety of colors and finishes, so consider the look you want to achieve. If you’re unsure, test the stain on a small, inconspicuous area of the wood to see how it will look. Remember to stir the stain thoroughly before applying to ensure an even color.
3. Apply the Stain
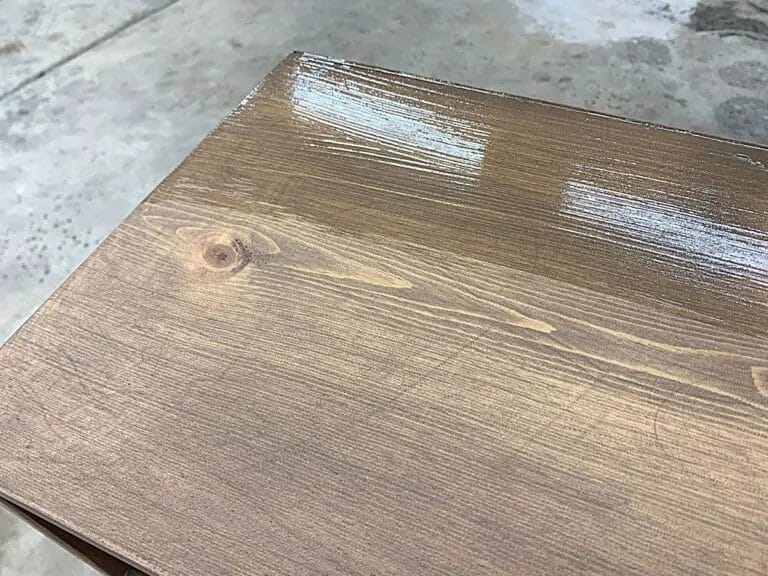
Now it’s time to apply the stain. Start by using a brush or rag to apply an even coat of stain to the wood. Work in small sections, following the direction of the wood grain. Be sure to apply the stain evenly and avoid leaving any drips or puddles. Allow the stain to penetrate the wood for the recommended time specified on the product label.
4. Wipe off Excess Stain
After the stain has had time to penetrate the wood, use a clean cloth or rag to wipe off any excess stain. This will help to ensure an even finish and prevent any blotches or streaks. Again, work in the direction of the wood grain and be thorough in removing any excess stain.
5. Allow the Stain to Dry
Once you’ve wiped off the excess stain, allow the wood to dry completely. This can take anywhere from a few hours to overnight, depending on the type of stain and the humidity of your environment. Avoid touching or moving the wood during this time to prevent any smudging or damage to the finish.
6. Apply a Second Coat (Optional)
If you desire a deeper or darker color, you can apply a second coat of stain. Follow the same steps as before, ensuring an even application and wiping off any excess stain. Keep in mind that multiple coats may result in a darker finish, so test the stain on a small area first to determine the desired outcome.
7. Seal the Stained Wood
Once the stain has dried, it’s important to seal the wood to protect the finish. Apply a clear topcoat or sealer, such as polyurethane or varnish, using a brush or rag. Again, work in small sections and follow the direction of the wood grain. Allow the sealer to dry completely before using or handling the wood.
8. Maintain the Stained Wood
To keep your stained wood looking its best, it’s important to properly maintain it. Avoid placing hot or wet objects directly on the wood, as this can damage the finish. Regularly dust the surface and clean up any spills or stains promptly. If needed, you can apply additional coats of sealer over time to refresh the finish.
Summary
Applying stain on unfinished wood is a simple process that can greatly enhance the beauty of the wood. By following these step-by-step instructions, you can achieve a professional-looking finish and protect the wood for years to come. Remember to properly prepare the wood surface, choose the right stain, apply it evenly, wipe off excess stain, allow it to dry, and seal the finished wood. With proper maintenance, your stained wood will continue to impress with its natural beauty.
How Many Coats of Stain Do You Need for a Beautiful Finish?
If you are planning to stain wood surfaces, you may be wondering how many coats of stain you need to achieve a beautiful finish. The number of coats required can depend on several factors, including the type of wood, the desired color intensity, and the quality of the stain you are using. In this section, we will explore the factors that influence the number of coats needed for a flawless finish.
Type of Wood
The type of wood you are working with plays a significant role in determining the number of coats of stain required. Some woods, such as pine or oak, have a more porous surface, which can absorb stain unevenly. In such cases, you may need to apply multiple coats to achieve a consistent and rich color. On the other hand, hardwoods like maple or cherry may require fewer coats due to their dense and less absorbent nature.
Desired Color Intensity
The desired color intensity is another factor to consider when deciding on the number of coats of stain. If you are aiming for a lighter shade, a single coat may be sufficient. However, if you prefer a deeper and more pronounced color, additional coats may be necessary. It’s important to note that the color of the wood surface will influence the final result, so testing the stain on a small, inconspicuous area is always recommended.
Stain Quality
The quality of the stain product also plays a significant role in the number of coats required. Higher-quality stains often contain more pigments, allowing for better color saturation with fewer coats. Cheaper or lower-quality stains may require additional coats to achieve the desired finish. It’s advisable to choose a reputable brand and consider reading customer reviews or seeking recommendations to ensure you are using a high-quality stain.
Application Technique
The technique used to apply the stain can also impact the number of coats needed. Applying the stain with a brush, cloth, or sponge can result in different levels of coverage and absorption. When using a brush, ensure even application and consider back-brushing to prevent streaks or unevenness. Additionally, sanding the wood surface before staining can help open up the pores and improve stain absorption, potentially reducing the number of coats required.
Summary
When it comes to achieving a beautiful finish with stain, the number of coats required can vary depending on the type of wood, desired color intensity, stain quality, and application technique. While some projects may only require one coat, others may benefit from multiple coats to achieve an even and vibrant appearance. Remember to test the stain on a small area and make adjustments based on your preferences. With careful consideration and attention to detail, you can achieve a stunning finish that enhances the natural beauty of the wood.
Tips for Achieving a Professional-Looking Stained Wood Surface
Staining wood is a popular technique used to enhance its natural beauty and give it a professional look. Whether you’re working on a small DIY project or a larger woodworking endeavor, achieving a flawless stained wood surface requires attention to detail and proper technique. In this section, we will discuss some essential tips to help you achieve a professional-looking stained wood surface.
Choose the Right Wood
The first step in achieving a professional-looking stained wood surface is to choose the right type of wood. Different woods absorb stain differently, so it’s important to select a wood species that is known for its stain-absorbing qualities. Woods like oak, cherry, maple, and mahogany are popular choices for staining due to their consistent and attractive results. Make sure to avoid woods with high resin content, as they can prevent the stain from penetrating evenly.
Prepare the Wood Surface
Properly preparing the wood surface is crucial for a smooth and even stain application. Start by sanding the wood with progressively finer grit sandpaper to remove any imperfections and create a smooth surface. Make sure to sand along the grain of the wood to avoid scratching it. After sanding, remove any dust or debris using a tack cloth or a soft brush. This will ensure that the stain adheres properly and produces an even finish.
Test the Stain Color
Before applying the stain to your project, it’s essential to test the color on a small, inconspicuous area of the wood. This will allow you to determine if the stain color is what you envisioned and if it complements the wood species. Keep in mind that the final color may vary depending on the type of wood and the number of coats applied. Adjustments can be made by experimenting with different stain colors or by diluting the stain with a compatible solvent.
Apply the Stain Evenly
When applying the stain, it’s crucial to do so evenly to achieve a professional look. Start by stirring the stain thoroughly to ensure an even consistency. Use a brush or a clean cloth to apply the stain, working in the direction of the grain. Apply the stain in thin, even coats, allowing each coat to dry completely before applying the next. Avoid applying too much stain at once, as it can lead to a blotchy appearance. Instead, build up the color gradually until you achieve the desired depth.
Seal the Stained Wood
After the stain has dried completely, it’s important to seal the wood to protect the finish and enhance its longevity. Select a compatible clear coat or topcoat that suits your project’s requirements and desired level of sheen. Apply the clear coat using a brush or a sprayer, following the manufacturer’s instructions. Allow the sealant to dry between coats, and sand lightly with fine-grit sandpaper for a smooth finish. Multiple coats may be required depending on the desired level of protection.
Maintain and Care for the Stained Wood
Once you have achieved a professional-looking stained wood surface, proper maintenance and care are essential to preserve its beauty. Avoid exposing the wood to excessive sunlight, moisture, or temperature fluctuations, as these can cause damage and fading over time. Regularly dusting and cleaning the wood surface with a soft cloth will help maintain its appearance. If necessary, apply a fresh coat of sealant or touch up the stain to refresh the look and protect the wood.
Summary
Achieving a professional-looking stained wood surface requires careful preparation, attention to detail, and proper technique. By choosing the right wood, preparing the surface, testing the stain color, applying the stain evenly, sealing the wood, and maintaining its care, you can achieve a flawless finish that showcases the natural beauty of the wood. Follow these tips to ensure a professional result and enjoy the timeless elegance of stained wood in your projects.
FAQs
How many coats of stain should I apply on wood?
The number of coats of stain to apply on wood depends on the desired color intensity and the type of wood. In general, it is recommended to apply at least two coats of stain, allowing each coat to dry before applying the next. However, for a deeper color, additional coats can be applied.
Conclusion
In conclusion, when it comes to staining wood, the number of coats you apply can significantly impact the final outcome. Applying multiple coats of stain can enhance the depth and richness of the color, as well as improve durability and protection. However, it’s important to consider the type of wood and the desired result when deciding on the number of coats. Remember to always follow the manufacturer’s instructions and allow proper drying time between coats for optimal results. Whether you choose one coat or multiple coats, the key is to ensure a smooth and even application for a professional-looking finish.
