If you’re planning to stain wood, you might be wondering how much wood stain you’ll need for your project. The amount of wood stain required depends on various factors, such as the size and type of the wood, the desired color intensity, and the application method. To determine the quantity, it’s recommended to calculate the total area you want to stain and check the coverage information provided by the stain manufacturer. Remember, it’s always better to have a little extra stain on hand than running out in the middle of your project.

Understanding the Factors that Determine the Amount of Wood Stain Needed
When it comes to staining wood, one of the most common questions is how much stain is needed for a particular project. Determining the right amount of wood stain is important to ensure that you have enough to complete the job without running out, while also avoiding excess waste. In this section, we will explore the key factors that influence the amount of wood stain required for a project.

Type of Wood
The type of wood you are working with plays a significant role in determining the amount of stain required. Different woods absorb stain differently due to variations in their density and porosity. Hardwoods, such as oak or mahogany, tend to have a tighter grain and lower porosity, requiring less stain compared to softer woods like pine or cedar. It’s essential to consider the type of wood you are working with to calculate the stain quantity accurately.
Surface Area
The surface area to be stained is another crucial factor in determining the amount of wood stain needed. Whether you are staining a small woodworking project or a large deck, the total square footage of the surface will influence the quantity of stain required. To calculate the surface area, measure the length and width of the wood’s exposed surfaces and multiply them. If you are staining multiple pieces, be sure to sum up the surface areas of each piece.
Desired Color Intensity
The desired color intensity also affects the amount of wood stain needed. If you prefer a more vibrant and saturated color, you will likely need to apply multiple coats of stain. Each coat adds depth and richness to the wood, but it also requires more stain. The opacity of the stain also plays a role in the color intensity. Transparent or semi-transparent stains require fewer coats compared to opaque or solid stains that completely cover the wood grain.
Stain Absorption Rate
The stain absorption rate refers to how quickly the wood absorbs the stain. Some wood species have higher absorption rates, while others may be more resistant. Understanding the absorption rate of the wood you are working with can help you estimate the amount of stain needed. Conduct a test patch on a small, inconspicuous area to determine how the wood absorbs the stain and adjust your calculations accordingly.
Application Method
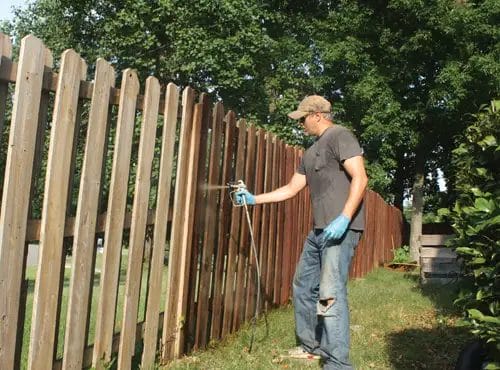
The method of stain application also affects the quantity of stain required. If you plan to apply the stain using a brush, you may need more stain than when utilizing a sprayer or cloth. Brush application tends to soak up more stain, resulting in higher consumption. Additionally, if you plan to thin the stain or apply multiple coats, this will also impact the overall stain usage.
Additional Considerations
Aside from the main factors mentioned above, several other considerations can influence the amount of wood stain needed. These include the condition of the wood surface (rough or smooth), the presence of existing finishes (requiring stripping or sanding), and environmental factors such as temperature and humidity (which can affect drying time and absorption rate). Taking these factors into account will help you determine a more accurate estimate of stain quantity.
In summary, understanding the factors that determine the amount of wood stain needed is essential for a successful staining project. Consider the type of wood, surface area, desired color intensity, stain absorption rate, application method, and additional considerations when calculating the quantity of stain required. By taking these factors into account, you can ensure that you have enough stain to complete your project while achieving the desired results.

Calculating the Quantity of Wood Stain Required for Different Surfaces
When it comes to staining wood surfaces, one common challenge is determining the right amount of wood stain needed. Whether you are planning to stain a deck, furniture, or any other wooden item, it’s essential to calculate the quantity of wood stain required accurately. This calculation ensures that you have enough stain to complete the project without running out in the middle or ending up with excess stain that goes to waste.
Calculating the quantity of wood stain required involves taking into account various factors, such as the surface area to be stained, the type of wood, the desired depth of color, and the specific stain product being used. By following a few simple steps, you can easily determine the right amount of wood stain for your project.
Step 1: Measure the Surface Area
The first step in calculating the quantity of wood stain needed is to measure the surface area that requires staining. For flat surfaces, such as decks or tabletops, measure the length and width of the area in feet. Multiply these two measurements to get the total square footage. If you have multiple surfaces to stain, measure each one separately and add up the total square footage.
For irregular or curved surfaces, it may be more challenging to measure accurately. In such cases, it’s best to break the surface down into smaller, more manageable sections and measure each section individually. Add up the total square footage of all the sections to get the overall surface area.
Step 2: Determine Stain Coverage Rate
Next, you need to determine the stain coverage rate for the specific product you are using. Stain coverage is typically measured in square feet per gallon. This information is usually mentioned on the product’s label or in the manufacturer’s instructions.
For example, if a wood stain product claims to cover 250 square feet per gallon, you can use this as a reference point for your calculations. Keep in mind that the actual coverage may vary based on factors such as the type of wood and the desired depth of color.
Step 3: Calculate the Quantity of Stain
To calculate the quantity of wood stain required, divide the total surface area (in square feet) by the stain coverage rate (also in square feet per gallon). The resulting value will give you an estimate of the number of gallons needed for your project.
For instance, if your total surface area to be stained is 500 square feet and the stain coverage rate is 250 square feet per gallon, you would divide 500 by 250 to get 2 gallons of stain needed.
It’s always a good idea to round up the quantity to the nearest whole number to ensure you have enough stain to complete the project. It’s better to have a little extra than to run out and risk not achieving the desired finish.
Additional Considerations
While the above calculations provide a general guideline for determining the quantity of stain required, it’s essential to consider a few additional factors:
- Porosity of the Wood: If the wood you are staining is particularly porous, it may absorb more stain, requiring additional quantities. Consider applying a test patch to determine the wood’s porosity before calculating the quantity.
- Multiple Coats: If you plan to apply multiple coats of stain, you will need to consider this in your calculations. Multiply the quantity of stain determined in the previous steps by the number of coats desired.
- Stain Product Recommendations: Some stain products may provide specific guidelines or recommendations for calculating the quantity required. Always refer to the manufacturer’s instructions for the most accurate information.
In summary, calculating the quantity of wood stain required for different surfaces involves measuring the surface area, determining the stain coverage rate, and performing a simple calculation. Taking into account factors such as wood porosity and the number of coats desired can help ensure your project’s success. By following these steps, you can confidently estimate the amount of wood stain needed and achieve a beautifully finished result.

Tips for Efficient Application of Wood Stain
Wood stain is a popular choice for enhancing the natural beauty of wood surfaces while also providing protection. Whether you are staining a new piece of furniture or giving a fresh look to an old wooden item, it’s important to apply the stain correctly to achieve the desired results. Here are some tips to help you efficiently apply wood stain:
1. Prepare the Surface
Before applying wood stain, it’s essential to prepare the surface properly. Sand the wood using fine-grit sandpaper to create a smooth finish. Remove any dust or debris using a tack cloth or a lint-free cloth. A clean and smooth surface ensures better stain absorption and a more even finish.
2. Choose the Right Stain
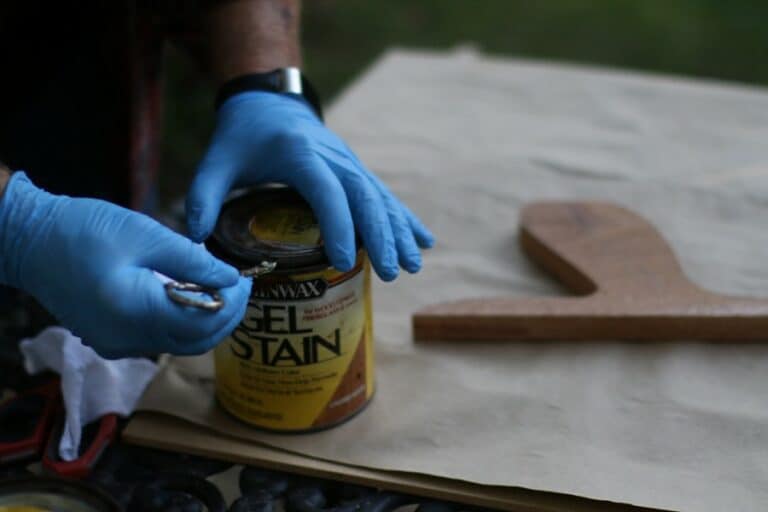
There are various types of wood stains available, including oil-based stains, water-based stains, gel stains, and more. Consider the type of wood you are working with and the desired look you want to achieve. Oil-based stains offer deep penetration and richer color, while water-based stains dry faster and have lower odor. Gel stains are great for vertical surfaces as they don’t run or drip. Choose a stain that suits your project requirements.
3. Test on a Sample
Before applying the stain to your entire project, it’s a good idea to test it on a small, inconspicuous area or a scrap piece of wood. This will help you assess the color intensity and ensure that the stain reacts well with the wood. Make adjustments if needed before proceeding with the entire surface.
4. Apply Evenly
When applying wood stain, it’s crucial to ensure an even application. Use a brush, cloth, or sponge to apply the stain in the direction of the wood grain. Avoid excessive application in one area, as it may lead to blotchy or uneven results. Work in small sections, blending the stain as you go along, to maintain uniformity.
5. Wipe Off Excess Stain
After applying the stain, allow it to penetrate the wood for a few minutes according to the manufacturer’s instructions. Then, using a clean cloth or paper towel, wipe off any excess stain that has not soaked into the wood. This step helps prevent the stain from becoming sticky or tacky after drying.
6. Allow Sufficient Drying Time
Proper drying time is essential for a successful wood stain application. Follow the manufacturer’s instructions regarding the drying time. It’s essential to allow the stain to dry completely before applying any additional coat or finishing product. This will ensure a durable and long-lasting finish.
7. Apply Multiple Coats if Desired
If you prefer a deeper color or richer finish, you can apply multiple coats of wood stain. However, it’s important to allow each coat to dry completely before applying the next one. Sand lightly between coats to remove any imperfections and ensure better adhesion.
8. Protect with a Topcoat
To enhance the longevity of your wood stain and protect it from wear and tear, consider applying a topcoat or sealer. Clear polyurethane, varnish, or lacquer can provide a protective layer that seals the stain and adds shine. Choose the appropriate topcoat based on your preferences and the level of protection required.
In summary, following these tips will help you efficiently apply wood stain and achieve the desired results. Proper surface preparation, choosing the right stain, and applying it evenly are key factors for a successful staining project. Remember to allow sufficient drying time and consider adding a protective topcoat to ensure the longevity of your beautifully stained wood surfaces.
Troubleshooting Common Issues with Wood Staining
Wood staining is a popular technique used to enhance the natural beauty of wood surfaces. It can bring out the grain patterns, add depth, and provide a protective layer to the wood. However, if you’ve ever attempted wood staining, you may have encountered some common issues that can affect the final result. In this section, we will explore these issues and provide troubleshooting tips to help you achieve a flawless wood staining finish.
1. Uneven Stain Absorption
Uneven stain absorption occurs when certain areas of the wood absorb more stain than others, leading to a patchy or blotchy appearance. This can happen due to the wood’s natural characteristics, such as variations in grain density or moisture content. Here are some steps you can take to troubleshoot this issue:
- Sand the wood surface: Before staining, ensure that the wood surface is smooth and free from any previous finishes. Sanding can help even out the surface and promote more uniform stain absorption.
- Pre-condition the wood: Using a pre-stain conditioner can help minimize uneven stain absorption. Apply the conditioner according to the manufacturer’s instructions and allow it to penetrate the wood for the recommended time.
- Apply multiple coats: If you notice uneven absorption after the first coat of stain, applying additional coats can help achieve a more uniform appearance. Be sure to wipe off any excess stain between coats for better control.
2. Blotchy or Dark Spots
Blotchy or dark spots can occur when the wood absorbs the stain unevenly, resulting in areas that are darker than the rest of the surface. This can be caused by various factors, including wood type and inconsistent stain application. Here’s how you can troubleshoot this issue:
- Prep the wood surface: Properly prepare the wood surface by sanding it to remove any existing finishes or imperfections. This will help create a more even stain absorption.
- Apply a wood conditioner: Using a wood conditioner can help prevent blotchiness by sealing the wood and promoting more consistent stain absorption. Follow the manufacturer’s instructions for application.
- Stain application technique: Ensure that you apply the stain evenly and consistently across the wood surface. Use long, smooth strokes in the direction of the wood grain and avoid overworking the stain in one area.
3. Stain Not Penetrating the Wood
If your stain appears to be sitting on the surface of the wood without penetrating it, it may be due to a barrier preventing proper absorption. Here are some troubleshooting tips to address this issue:
- Remove any existing finishes: Ensure that the wood surface is free from any previous finishes or coatings that may act as a barrier. Sand the surface to remove these barriers before applying the stain.
- Check the wood’s moisture content: Excess moisture in the wood can hinder the stain from penetrating. Test the wood’s moisture content using a moisture meter and ensure it is within the recommended range for staining.
- Choose the right stain type: Different types of stains have different penetration properties. Make sure you are using a stain specifically designed for the type of wood you are working with.
In summary, wood staining can present various challenges, but by understanding the common issues and implementing the troubleshooting tips mentioned above, you can achieve excellent results. Remember to properly prepare the wood surface, use the appropriate products, and apply the stain with care and consistency. Happy staining!
FAQs
How much wood stain do I need?
The amount of wood stain you need depends on the size of the project and the type of wood you are staining. As a general guideline, one gallon of wood stain typically covers around 150-300 square feet. However, it is recommended to check the product label or consult with the manufacturer for more accurate coverage estimates.
Conclusion
In conclusion, determining the amount of wood stain required for your project can be a crucial step in achieving the desired results. By taking into account factors such as the size of the surface area, the type of wood, and the desired color intensity, you can calculate the exact amount of stain that you need.
Remember to carefully read the instructions provided by the manufacturer to ensure proper application and coverage. It’s always a good idea to purchase a little extra stain to account for any touch-ups or unforeseen circumstances.
By following these guidelines and properly estimating the amount of wood stain needed, you can ensure a smooth and successful staining process, resulting in a beautifully finished project.