Looking for a stylish and practical solution to organize your clothes? Learn how to make a clothes rack out of wood and add a touch of rustic charm to your space. With a few simple materials and some basic woodworking skills, you can create a customized clothes rack that fits perfectly in your home or bedroom.
Whether you’re a fashion enthusiast or just looking for a way to declutter your closet, a homemade wooden clothes rack offers both functionality and aesthetic appeal. It’s a budget-friendly alternative to store-bought options and allows you to showcase your favorite garments in style.

Not only does a wooden clothes rack provide ample hanging space for your clothes, but it can also be a decorative element in your room. By using different types of wood and adding personalized touches like hooks or shelves, you can create a unique and versatile storage solution that complements your interior design.
Ready to get started? Follow our step-by-step guide to make your own wooden clothes rack and take your organization game to the next level. Whether you’re a DIY enthusiast or a beginner, this project is the perfect opportunity to showcase your creativity and craftsmanship while adding a functional piece to your home.

Stylish and Practical: Building a Wooden Clothes Rack
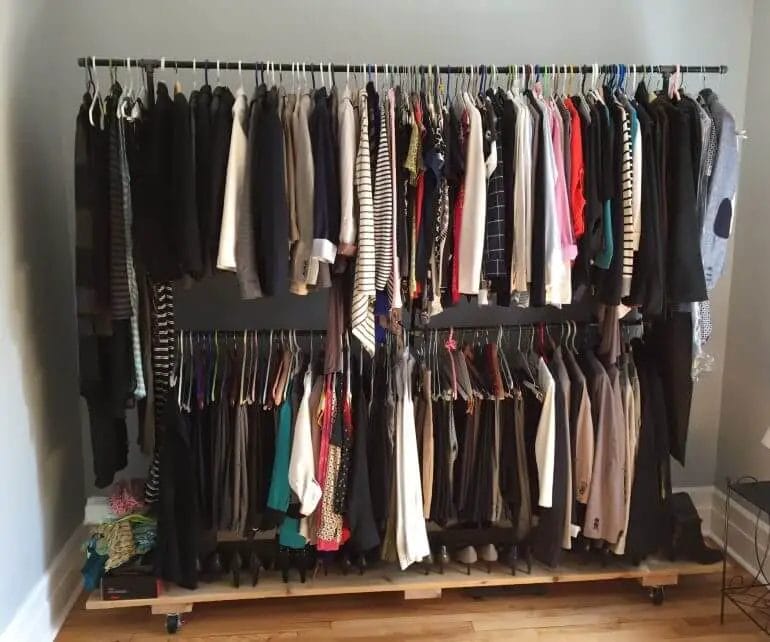
Having a well-organized and functional space for storing your clothes is essential for every household. A wooden clothes rack is not only a practical solution for hanging and organizing your clothes, but it can also add a touch of style to your room. In this section, we will discuss how to build a wooden clothes rack that is both stylish and practical.
Materials Needed
Before we start building our wooden clothes rack, let’s gather the necessary materials. Here’s what you will need:
- Wooden boards (preferably hardwood) – choose a size and length according to your desired dimensions
- Saw – to cut the wooden boards to the desired length
- Drill – for making holes
- Screws
- Sandpaper – for smoothing rough edges
- Wood stain or paint – for adding a stylish finish
- Brushes – for applying the wood stain or paint
Step-by-Step Instructions
Now that we have all the necessary materials, let’s dive into the step-by-step process of building a wooden clothes rack:
- Measure and cut the wooden boards to your desired length. You will need two longer boards for the sides and two shorter boards for the top and bottom.
- Using a drill, make holes on the longer side boards for hanging the clothes. The number of holes will depend on the length of your board and the spacing you prefer between clothes.
- Connect the side boards with the top and bottom boards using screws. Make sure to align them properly for a stable structure.
- Once the structure is assembled, use sandpaper to smooth out any rough edges or splinters.
- Apply a wood stain or paint of your choice to give the clothes rack a stylish finish. Make sure to follow the instructions on the product for the best results.
- Allow the stain or paint to dry completely before using the clothes rack.
Customization and Design Ideas
A wooden clothes rack provides endless opportunities for customization and design. Here are some ideas to make your clothes rack unique:
- Add hooks or knobs on the sides for hanging accessories like belts or scarves.
- Attach a small shelf at the bottom of the rack for shoes or storage boxes.
- Paint the clothes rack in a bold color to create a statement piece in your room.
- Use decorative knobs instead of plain screws for a more stylish look.
- Add wheels to the bottom of the rack for easy mobility.
- Hang fairy lights or small plants from the top for a whimsical touch.
Benefits of a Wooden Clothes Rack
Opting for a wooden clothes rack has several advantages:
- Durability: Wooden racks are sturdy and can support the weight of multiple garments without bending or breaking.
- Natural Aesthetic: Wood adds a warm and natural element to any space, creating a cozy and inviting atmosphere.
- Customizable: As mentioned earlier, wooden clothes racks offer numerous customization options to suit your personal style and needs.
- Easy to Maintain: Cleaning and maintaining a wooden clothes rack is simple. Regular dusting and occasional polishing are all that is required to keep it looking great.
- Cost-Effective: Building your own wooden clothes rack is a budget-friendly alternative to purchasing a pre-made one.
In Summary
A wooden clothes rack is a stylish and practical addition to any home. Building your own allows you to create a customized piece that suits your needs and enhances the aesthetic of your space. By following our step-by-step instructions and exploring various design ideas, you can build a wooden clothes rack that is not only functional but also adds a touch of personal style to your room.
Budget-Friendly Clothes Organization: Creating a Wooden Garment Rack
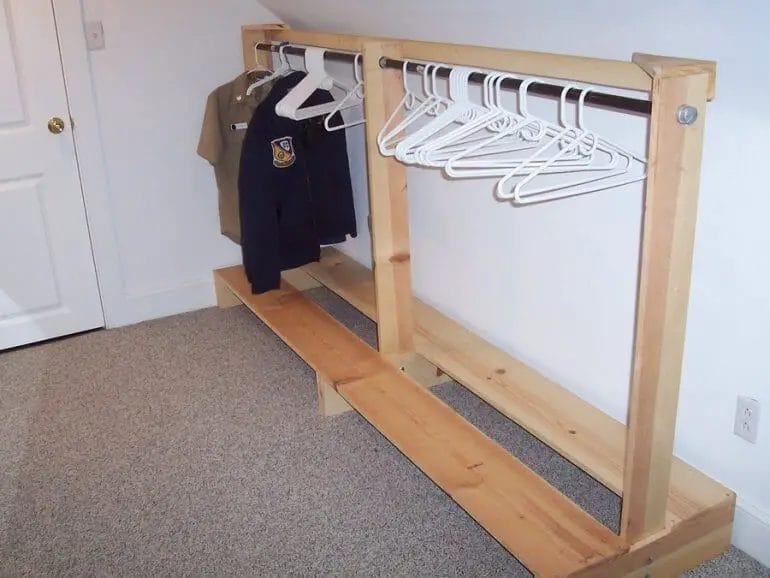
Keeping your clothes organized doesn’t have to break the bank. With a little creativity and some basic woodworking skills, you can create a budget-friendly wooden garment rack to hang and display your clothing. In this section, we will guide you through the process of building your own wooden garment rack.
Materials Needed:
- 1-inch thick wooden dowels
- Wood screws
- Drill
- Measuring tape
- Saw
- Sandpaper
- Wood glue
Step 1: Measure and Cut the Wooden Dowels
Start by measuring the length and width of the garment rack you want to create. Once you have the measurements, use a saw to cut the wooden dowels to the desired length. These dowels will serve as the horizontal bars of your garment rack.
Step 2: Sand the Dowels
After cutting the dowels, use sandpaper to smooth out any rough edges or surfaces. This will prevent your clothes from getting snagged or damaged when hanging them on the rack.
Step 3: Drill Holes for the Dowels
Next, use a drill to create evenly spaced holes on two vertical wooden support beams. Make sure the holes are at the same level on both beams, as this will ensure that the dowels are aligned when inserted.
Step 4: Attach the Dowels
Apply wood glue to the ends of the dowels and insert them into the drilled holes on the support beams. Make sure the dowels are securely attached and level.
Step 5: Reinforce with Wood Screws
To add extra stability, use wood screws to secure the dowels to the support beams. This will prevent them from wobbling or coming loose over time.
Step 6: Finishing Touches
Once the garment rack is assembled, you can add any finishing touches or decorations you desire. Consider painting or staining the wood to match your aesthetic preferences.
Benefits of a Wooden Garment Rack
A wooden garment rack offers several advantages when it comes to clothes organization. Firstly, it provides a sturdy and reliable structure for hanging your clothes, ensuring they stay wrinkle-free. Additionally, a wooden garment rack adds a touch of warmth and elegance to any room, making it a stylish storage solution. Moreover, building your own garment rack allows you to customize its dimensions and design to fit your specific needs.
In Summary
Creating a budget-friendly wooden garment rack is a great way to keep your clothes organized without spending a fortune. By following these simple steps, you can build a sturdy and stylish rack to hang and display your clothing. Enjoy the satisfaction of a DIY project while enhancing the functionality and aesthetics of your space.
Customizable Wood Clothes Rack: Design Tips and Ideas
A customizable wood clothes rack is a versatile and practical addition to any home. Whether you have a small apartment or a spacious house, a wood clothes rack offers a stylish solution for storing and displaying your clothing items. In this section, we will explore some design tips and ideas to help you create a personalized and functional wood clothes rack.
1. Choose the Right Wood
The first step in designing a customizable wood clothes rack is selecting the right type of wood. Opt for a hardwood like oak, maple, or cherry, as they are durable and have a natural beauty. Consider the overall aesthetic of your home and choose a wood that complements your existing décor.
2. Determine the Size and Shape
Next, decide on the size and shape of your wood clothes rack. Measure the available space in your room and consider the number of clothes you need to hang. A tall and narrow rack is ideal for limited spaces, while a wider rack provides more hanging options.
3. Incorporate Shelves and Drawers
To enhance the functionality of your wood clothes rack, consider incorporating shelves and drawers. This allows you to store accessories such as shoes, bags, or folded clothes. You can also add hooks to hang hats, scarves, or belts.
4. Add a Mirror or Vanity Area
If space permits, include a mirror or a small vanity area in your wood clothes rack design. This provides a convenient spot to check your appearance and can transform your rack into a multi-purpose piece of furniture.
5. Consider Mobility
If you prefer a portable option, choose a wood clothes rack with wheels. This allows you to easily move the rack from room to room or even take it with you when moving. Look for racks with sturdy locking mechanisms to ensure stability when in use.
6. Personalize with Finishes and Colors
Add personality to your wood clothes rack by selecting finishes and colors that match your style. You can leave the wood natural for a rustic look, stain it for a more polished appearance, or paint it in a bold color to make a statement. Consider the overall color scheme of your room when choosing the finish.
7. Incorporate Lighting
To showcase your clothing items and create a visually appealing display, consider adding lighting to your wood clothes rack. Install LED strip lights or small spotlights to highlight specific areas of the rack or use string lights for a cozy ambiance.
8. Experiment with Shapes and Angles
Get creative with the design of your wood clothes rack by experimenting with different shapes and angles. Instead of a traditional straight rod, consider a curved or zigzag design for added visual interest. Play with the angles of shelves and drawers to create dynamic storage options.
9. Think About Sustainability
When choosing a wood clothes rack, opt for sustainable and ethically sourced materials. Look for certifications like Forest Stewardship Council (FSC) to ensure that the wood used in the rack comes from responsibly managed forests.
10. Seek Professional Help
If you are unsure about the design or construction of a customizable wood clothes rack, it is always a good idea to seek professional help. A carpenter or interior designer can provide valuable insights and ensure that your rack is both functional and aesthetically pleasing.
In summary, a customizable wood clothes rack offers endless possibilities for storage and display. By carefully selecting the wood type, determining the size and shape, incorporating shelves and drawers, adding personalized finishes and colors, and considering other design elements such as lighting and sustainability, you can create a unique and stylish piece of furniture that suits your needs and enhances your home’s decor.
Space-Saving Solution: Building a Compact Wooden Clothes Rack
Are you tired of your clothes taking up valuable space in your closet? Do you need a practical solution to organize your garments without compromising on style? Look no further – a compact wooden clothes rack might be just what you need. In this section, we will explore the benefits of building a space-saving wooden clothes rack and guide you through the process of creating one yourself.
1. Determine your space constraints: Before diving into the construction process, it’s essential to assess the available space in your home. Measure the area where you plan to place the clothes rack to ensure it fits seamlessly into your interior without causing any obstructions. By considering your space constraints beforehand, you can create a customized clothes rack that perfectly fits your needs.
2. Choose your design: Wooden clothes racks come in various styles, from simple and minimalist to more intricate and decorative. Consider the overall aesthetic of your space and select a design that complements your existing décor. You can opt for a sleek and modern design or a rustic look, depending on your preferences.
3. Gather the materials: Building a wooden clothes rack requires a few basic materials that are easily accessible. You will need wooden dowels or rods for hanging the clothes, wooden boards for the structure, screws, a drill, a saw, sandpaper, and wood glue. Make sure to gather all the necessary materials before starting the construction process.
4. Cut and assemble the wooden boards: Using a saw, carefully cut the wooden boards according to your desired dimensions. The number of boards needed will depend on the size of the clothes rack you plan to build. Once the boards are cut, use screws and wood glue to assemble the frame. Ensure that the structure is sturdy and secure.
5. Install the wooden dowels: Measure and mark the desired spacing for the wooden dowels on the sides of the frame. Using a drill, create holes where the dowels will be inserted. Apply wood glue to the ends of the dowels and insert them into the holes. Allow the glue to dry completely before proceeding.
6. Sand and finish the rack: To achieve a smooth and polished surface, use sandpaper to sand down any rough edges or imperfections. Wipe away any dust or debris before applying a finish of your choice, such as paint, varnish, or stain. The finish will not only enhance the appearance of the clothes rack but also protect the wood from damage.
7. Add additional features: Depending on your preferences, you can add additional features to your clothes rack to increase functionality. Consider incorporating hooks or shelves for accessories, a bottom shoe rack, or even wheels for easy mobility. These additions can maximize the usability of the clothes rack while optimizing space.
8. Place and organize your clothes: Once your compact wooden clothes rack is complete, it’s time to place it in your desired location and start organizing your garments. Hang your clothes on the wooden dowels, utilizing the rack’s vertical space efficiently. Sort your clothes by category or color to create a visually appealing display.
In summary, a compact wooden clothes rack provides an excellent solution for saving space and organizing your garments. By following these steps and customizing the design to fit your needs, you can create a stylish and functional addition to your home. Say goodbye to cluttered closets and hello to a streamlined and efficient wardrobe with a homemade wooden clothes rack.
FAQs
1. How can I make a clothes rack out of wood?
To make a clothes rack out of wood, you will need a wooden dowel or rod for the hanging rail, and wooden boards or blocks for the base and supports. Measure and cut the components to your desired dimensions, then assemble them using screws or nails. Sand the surfaces and apply a coat of paint or sealant for a finished look.
2. What tools will I need to make a wooden clothes rack?
To make a wooden clothes rack, you will typically need a saw (such as a circular saw or handsaw) to cut the wood, a drill or screwdriver to attach the components, and sandpaper or a sander to smooth the surfaces. Additionally, measuring tape, a pencil, and a level may be useful for accurate measurements and alignment.
3. Are there any design considerations for a wooden clothes rack?
When designing a wooden clothes rack, consider the dimensions to ensure it fits the desired space and can accommodate the amount of clothing you plan to hang. Additionally, think about the stability and weight capacity of the rack by using appropriate sizes and materials for the base and supports. Consider adding hooks or additional storage features if needed.
Conclusion
In conclusion, creating a clothes rack out of wood is a practical and stylish solution for organizing your wardrobe. By following the steps outlined in this guide, you can easily build a sturdy and customizable rack to suit your needs. The natural beauty and durability of wood make it an excellent choice for this DIY project. Whether you are looking to maximize space in a small apartment or add a rustic touch to your home, a wooden clothes rack is a versatile and cost-effective option. So, roll up your sleeves, grab your tools, and get ready to showcase your woodworking skills!
