If you’re looking for an affordable and effective way to fill in those unsightly gaps and holes in your woodwork, look no further than making your own wood filler with sawdust. By combining sawdust with a few simple ingredients, you can create a versatile and durable filler that matches the color and texture of your wood perfectly.
Instead of spending money on store-bought wood fillers that may not give you the desired results, making your own allows you to have complete control over the color and consistency of the filler.

Sawdust, when combined with materials like glue or epoxy, creates a strong and solid filler that is easy to work with and sands down smoothly. This DIY solution not only saves you money but also gives you the satisfaction of customizing your wood filler to suit your specific needs.
Whether you’re a seasoned woodworker or a DIY enthusiast, making your own wood filler with sawdust is a simple and effective solution to repair and restore your wooden projects with precision and finesse. So why not give it a try and see the amazing results for yourself?
The Art of Repurposing: Creating Wood Filler from Sawdust
Woodworking enthusiasts know the joy of creating beautiful pieces of furniture or decorative items from scratch. However, along the way, inevitable imperfections may arise, such as small cracks, holes, or gaps in the wood. These imperfections not only compromise the aesthetic appeal but can also weaken the structural integrity of the piece. This is where wood filler comes to the rescue.
Wood filler is a versatile material used to repair and restore the surface of wood. It fills in gaps and holes, creating a smooth and flawless finish. While there are several commercial wood fillers available in the market, they often come with a hefty price tag. But did you know that you can create your own wood filler using sawdust? It’s a cost-effective and sustainable solution that allows you to repurpose materials while achieving professional results.
Materials Needed:
Step-by-Step Process:
Step 1: Gather Sawdust
Start by collecting sawdust from your woodworking projects. Make sure the sawdust is clean and free from any contaminants that might interfere with the quality of the wood filler.
Step 2: Mix Sawdust and Wood Glue
In a mixing container, combine the sawdust and wood glue in a 1:1 ratio. The consistency should be similar to that of thick paste. Adjust the ratio as needed to achieve the desired consistency.
Step 3: Add Water
Gradually add small amounts of water to the mixture while stirring continuously. The water helps to soften the wood glue and sawdust mixture, making it easier to apply and spread. Be cautious not to add too much water, as it may result in a runny mixture that won’t adhere properly.
Step 4: Mix Thoroughly
Continue mixing the ingredients until you achieve a smooth and homogenous paste-like consistency. Ensure that there are no lumps or clumps in the mixture.
Step 5: Apply the Wood Filler
Using a putty knife or a small spatula, apply the homemade wood filler to the damaged area. Ensure that you fill in the gaps or holes completely, leaving no voids behind. Smooth out the surface with the tool to achieve a seamless finish.
Step 6: Let it Dry
Allow the wood filler to dry completely. The drying time will vary depending on the temperature and humidity levels in your workspace. Follow the manufacturer’s instructions on the wood glue for the recommended drying time.
Step 7: Sand and Finish
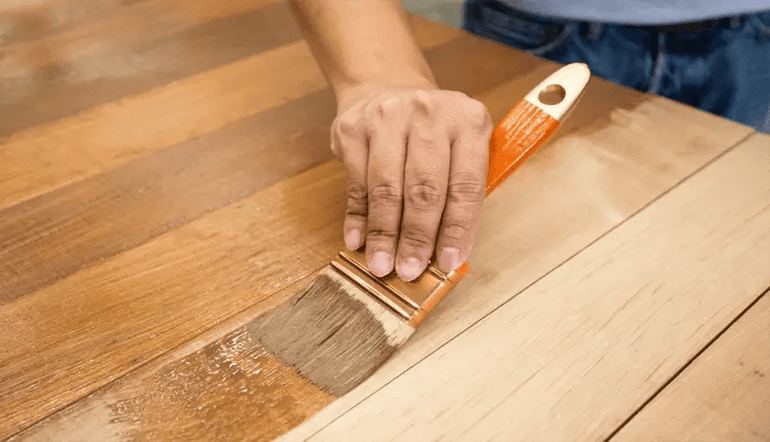
Once the wood filler is completely dry, use sandpaper to smooth out any rough edges or excess filler. Sand the repaired surface gently until it blends seamlessly with the surrounding wood. Finally, apply a suitable finish, such as stain or paint, to match the color and texture of the wood.
Creating your own wood filler from sawdust not only saves you money but also allows you to reduce waste and contribute to a more sustainable woodworking practice. It is a skill that every woodworker should have in their toolkit, providing a cost-effective and eco-friendly solution for repairing and restoring wooden surfaces. So, the next time you encounter imperfections in your woodworking projects, repurpose your sawdust and transform it into a high-quality wood filler.

Budget-friendly Wood Filler: Harnessing the Power of Sawdust
Woodworking and home improvement projects often require the use of wood filler to repair or fill in gaps, cracks, or holes in wooden surfaces. However, purchasing commercial wood fillers can be expensive, especially for larger projects. Luckily, there is a budget-friendly alternative that not only saves you money but also utilizes a readily available material – sawdust.
1. What is Wood Filler?
Wood filler is a paste-like substance used to fill voids in wood, providing a smooth and even surface for finishing. It can be applied to furniture, cabinets, flooring, or any other wooden item that requires repair or restoration. Commercial wood fillers are typically made from a combination of wood fibers, resins, and solvents.
2. The Power of Sawdust
Sawdust, the fine particles produced when wood is cut or sanded, can be an excellent alternative to commercial wood fillers. It is cost-effective and easily obtained by collecting the sawdust generated during your woodworking projects. By harnessing the power of sawdust, you can create your own budget-friendly wood filler.
3. Making Sawdust Wood Filler
Making your own sawdust wood filler is simple and requires just a few ingredients:
- Sawdust collected from your woodworking projects
- Wood glue or carpenter’s glue
Here’s a step-by-step guide:
- Collect a sufficient amount of sawdust, ensuring that it matches the color and type of wood you are working with.
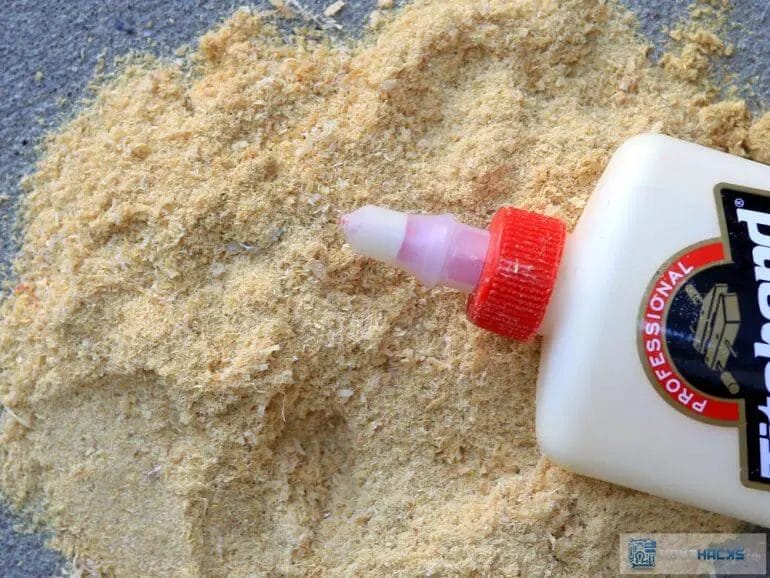
- In a container, mix the sawdust with wood glue until you achieve a thick paste-like consistency.
- Adjust the ratio of sawdust to glue as needed to achieve the desired consistency. More sawdust will result in a thicker filler, while more glue will make it thinner.
- Apply the sawdust wood filler to the damaged area using a putty knife or a similar tool.
- Smooth out the filler and remove any excess using the putty knife.
- Allow the filler to dry and cure according to the instructions provided by the wood glue manufacturer.
- Sand the filled area until it is level with the surrounding wood surface.
4. Benefits of Sawdust Wood Filler
Using sawdust as a wood filler offers several benefits:
- Cost-effectiveness: Sawdust is a byproduct of your woodworking projects, meaning it is readily available at no additional cost.
- Customization: By collecting sawdust from the same type of wood, you can create a filler that perfectly matches the color and grain pattern.
- Eco-friendly: Making use of sawdust reduces waste and promotes sustainability by repurposing materials that would otherwise be discarded.
5. Limitations of Sawdust Wood Filler
While sawdust wood filler is a budget-friendly alternative, it does have some limitations:
- Color Matching: Achieving an exact color match can be challenging, especially when working with different types of wood.
- Strength and Durability: Commercial wood fillers often contain additives that enhance their strength and durability. Sawdust wood filler may not provide the same level of performance.
6. Conclusion
In summary, harnessing the power of sawdust allows you to create a budget-friendly wood filler for your woodworking and home improvement projects. By collecting sawdust and mixing it with wood glue, you can easily create a filler that matches the color and type of wood you are working with. While it may have some limitations compared to commercial wood fillers, sawdust wood filler is a cost-effective and eco-friendly alternative that can save you money without compromising on quality.
Sustainable Solutions: Making Eco-friendly Wood Filler from Sawdust
Wood fillers are commonly used in woodworking projects to repair cracks, holes, and imperfections in wood surfaces. However, many commercial wood fillers contain harmful chemicals that can have a negative impact on the environment. To address this issue, eco-conscious individuals and woodworkers have started exploring sustainable alternatives. One such solution is making eco-friendly wood filler from sawdust.
Sawdust, a byproduct of woodworking, is often discarded and considered as waste. However, it can be repurposed and transformed into a natural and environmentally friendly wood filler. By utilizing sawdust, we can reduce waste and take a step towards a more sustainable approach to woodworking.
The Process:
The process of making eco-friendly wood filler from sawdust is relatively simple and requires a few basic ingredients:
- Sawdust
- Wood glue
- Water
Here is a step-by-step guide on how to create your own eco-friendly wood filler:
- Collect and Gather Sawdust: Start by collecting sawdust from your woodworking projects. Ensure that the sawdust is clean and free from any contaminants.
- Prepare the Mixture: In a mixing container, combine the sawdust with wood glue. The ratio of sawdust to glue may vary depending on the desired consistency, but a good starting point is to use equal parts of each.
- Add Water: Gradually add water to the mixture while stirring. The water helps to achieve a workable consistency and ensures that the wood filler adheres properly.
- Mix Thoroughly: Continuously mix the ingredients until a smooth and homogeneous paste is formed. Make sure there are no lumps or dry patches in the mixture.
- Application: Apply the eco-friendly wood filler to the desired area using a putty knife or a similar tool. Smooth out the surface and remove any excess filler.
- Drying and Sanding: Allow the wood filler to dry completely. The drying time may vary depending on the type and amount of glue used. Once dry, sand the filled area to achieve a seamless finish.
Benefits of Eco-friendly Wood Filler:
Making your own eco-friendly wood filler from sawdust offers several benefits:
- Environmentally Friendly: By repurposing sawdust, you are reducing waste and minimizing the need for synthetic fillers that can harm the environment.
- Cost-effective: Creating your own wood filler is a budget-friendly alternative to purchasing commercial options.
- Customizable: You have the flexibility to adjust the consistency and color of the wood filler to match your specific project needs.
- Natural Aesthetics: Sawdust-based wood fillers often blend seamlessly with the surrounding wood, providing a more natural and visually appealing result.
- Non-toxic: Unlike some commercial wood fillers that contain harmful chemicals, sawdust-based wood fillers are non-toxic and safe to use.
By embracing sustainable solutions like making eco-friendly wood filler from sawdust, woodworkers and DIY enthusiasts can contribute to reducing their environmental footprint and promote a more sustainable woodworking practice. So, the next time you have sawdust from a woodworking project, don’t let it go to waste. Transform it into a useful and eco-friendly wood filler!
Mastering the Craft: Crafting Custom Wood Filler with Sawdust
Woodworking is a timeless craft that requires skill, precision, and attention to detail. Whether you are a seasoned professional or a woodworking enthusiast, one of the essential skills to master is the art of filling gaps, cracks, and imperfections in wood surfaces. While there are many commercial wood fillers available in the market, crafting your own custom wood filler using sawdust can be a cost-effective and efficient solution. In this section, we will guide you through the process of creating custom wood filler with sawdust, enabling you to achieve seamless and professional-looking woodwork.
Gather the Necessary Materials
Before we dive into the step-by-step process, it is important to gather all the necessary materials. Here is a list of items you will need:
- Wood sawdust
- Wood glue
- Mixing container
- Plastic spatula or putty knife
- Sandpaper
Step-by-Step Guide
Now let’s walk through the step-by-step process of creating custom wood filler:
- Collect Sawdust: Start by collecting sawdust from the same type of wood that you are working with. You can use a saw or sandpaper to generate sawdust. Ensure that the sawdust is finely ground to achieve a smoother finish.
- Prepare Mixing Container: Take a mixing container and pour a sufficient amount of wood glue into it. The quantity of wood glue will depend on the size of the repair area.
- Add Sawdust: Gradually add the collected sawdust into the mixing container with the wood glue. Begin by adding small amounts and mix thoroughly. Continue adding and mixing until the mixture reaches a thick, paste-like consistency. The ratio of sawdust to wood glue can vary depending on the desired consistency.
- Apply the Wood Filler: Use a plastic spatula or putty knife to apply the custom wood filler onto the damaged or uneven surface. Ensure that the filler is pressed firmly into the gaps or cracks, smoothing it out as you go along. Be mindful of the excess filler, as it can be easily removed later.
- Let it Dry: Allow the wood filler to dry completely. The drying time can vary depending on the type and quantity of wood glue used. Refer to the manufacturer’s instructions for specific drying times.
- Sand and Finish: Once the wood filler is fully dry, gently sand the repaired area using sandpaper. Start with a coarse grit sandpaper and gradually work your way up to a finer grit for a smooth and seamless finish. It is important to blend the repaired area with the surrounding wood to achieve a natural look.
Tips for Success
Here are some additional tips to ensure success when crafting custom wood filler:
- Choose the Right Wood Glue: Different wood glues have different properties, so make sure to select a high-quality wood glue that is appropriate for your specific woodworking project.
- Test the Consistency: Before applying the wood filler, test its consistency and workability on a scrap piece of wood. This will give you the opportunity to make any necessary adjustments before working on your actual project.
- Remove Excess Filler: After applying the wood filler, use a damp cloth or sponge to wipe away any excess filler from the surrounding wood surfaces. This will help achieve a seamless transition between the repaired area and the rest of the wood.
- Practice Patience: Allow the wood filler to dry completely before sanding and finishing. Rushing this step can result in an uneven or inconsistent finish.
In Summary
Crafting custom wood filler with sawdust is a valuable skill for any woodworking enthusiast. By following the step-by-step process outlined above and considering the tips provided, you can create your own custom wood filler that seamlessly blends with the surrounding wood. This cost-effective and efficient technique will enable you to achieve professional-looking results in your woodworking projects.
FAQs
How can I make wood filler with sawdust?
To make wood filler with sawdust, mix sawdust from the same type of wood as the project with wood glue or a clear drying adhesive. Adjust the consistency by adding more sawdust or glue as needed. Apply the mixture to fill in gaps or holes in the wood, and sand it down once dry.
Can I use any type of sawdust for making wood filler?
It is best to use sawdust from the same type of wood as your project when making wood filler. This ensures a better color match and helps the filler blend seamlessly with the wood. Mixing sawdust from different woods can result in a noticeable contrast in color and texture.
How long does wood filler made with sawdust take to dry?
The drying time for wood filler made with sawdust can vary depending on factors such as the type of adhesive used and the thickness of the filler. In general, it may take anywhere from a few hours to overnight for the filler to fully dry. Follow the manufacturer’s instructions for the adhesive used to determine the specific drying time.
Conclusion
In conclusion, making your own wood filler with sawdust is a cost-effective and eco-friendly alternative to buying commercial fillers. By mixing sawdust with a binder such as glue or epoxy, you can create a custom filler that matches the color and texture of your wood project. This DIY filler is not only efficient in filling cracks, holes, and imperfections in wood, but it also ensures a seamless and durable finish. Plus, the process is simple and can be easily done at home with basic materials. So, why not give it a try and enjoy the satisfaction of using a homemade solution for your woodworking needs.
