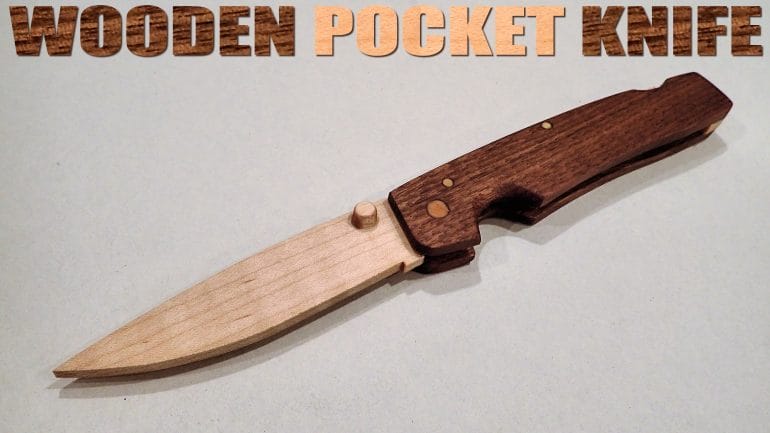
If you’re interested in crafting your own unique and functional wood knife, you’ve come to the right place. Crafting a wood knife is a rewarding and practical skill that allows you to create a personalized tool for various purposes. Whether you’re an outdoor enthusiast or simply enjoy woodworking, making a wood knife is a great project to explore.
Before you start, gather the necessary materials such as a high-quality piece of wood, a template or design of your choice, and the appropriate tools such as a saw, sandpaper, and wood carving tools. With careful planning and precise execution, you can create a beautiful and functional wood knife that reflects your style and creativity.

Begin by selecting a suitable wood type for your knife handle. Popular choices include hardwoods like walnut, oak, or mahogany, which offer durability and beauty. Ensure the wood is free from knots and imperfections to ensure a smooth and sturdy handle for your knife.
Next, create a template or trace an existing knife design onto the wood. This will serve as a guide for shaping your knife handle. Use a saw to carefully cut out the rough shape of the handle, leaving some extra material for refining the final shape later.
Once you have the rough shape, use wood carving tools to gradually shape and refine the handle. Take your time and work slowly to achieve the desired shape and comfort in your hand. Remember to frequently test the handle’s fit in your hand
Choosing the Right Type of Wood for Your Knife
When it comes to selecting the perfect handle material for your knife, wood is a classic and popular choice. Not only does it offer a warm and natural aesthetic appeal, but it also provides durability and grip. However, with so many different types of wood available, it can be overwhelming to decide which one is best suited for your knife. In this section, we will explore the factors you should consider and the various types of wood commonly used for knife handles.
Factors to Consider
Before diving into the different types of wood, it’s important to understand the key factors you should consider when choosing the right wood for your knife handle:
- Stability: Wood expands and contracts with changes in temperature and humidity. It is crucial to select a stable wood species that will not warp or crack over time.
- Density: The density of the wood affects the overall weight and balance of the knife. Consider whether you prefer a lighter or heavier handle.
- Grain Pattern: The grain pattern of the wood can impact the aesthetics of your knife handle. Decide whether you prefer a more uniform or unique pattern.
- Workability: Some woods are easier to work with than others. If you plan on shaping or customizing your handle, consider the ease of working with the chosen wood.
- Grip: Different woods offer varying levels of grip. Think about the type of grip you prefer and select a wood that is suitable.
Types of Wood for Knife Handles
Now that you understand the important factors, let’s explore some of the popular wood species used for knife handles:
| Wood Species | Characteristics |
|---|---|
| 1. Rosewood | A durable and visually appealing wood known for its dark color and smooth texture. It offers excellent stability and grip. |
| 2. Micarta | A composite material made from layers of fabric or paper impregnated with resin. Micarta is durable, lightweight, and offers excellent grip. |
| 3. G10 | A high-pressure fiberglass laminate with exceptional strength and resistance to moisture and chemicals. It provides a solid grip and is available in various colors. |
| 4. Cocobolo | A dense and oil-rich wood that offers a unique reddish-brown color and striking grain pattern. It has excellent stability and durability. |
| 5. Olive Wood | Renowned for its beautiful grain patterns and warm tones, olive wood is a popular choice for knife handles. It is stable and offers a comfortable grip. |
| 6. Ebony | A dense and dark wood that adds elegance to any knife handle. It is known for its durability and smooth texture. |
Choosing the right type of wood for your knife handle is essential to ensure both functionality and aesthetic appeal. Consider factors such as stability, density, grain pattern, workability, and grip when making your decision. Explore the various wood species available, such as rosewood, micarta, G10, cocobolo, olive wood, and ebony, to find the perfect match for your knife. With the right wood, you can create a knife that not only performs well but also showcases your personal style and craftsmanship.
Step-by-Step Guide to Shaping and Forming the Blade
Shaping and forming the blade is one of the most critical steps in the knife-making process. It determines the overall functionality, strength, and aesthetic appeal of the blade. In this section, we will provide a detailed guide on how to shape and form the blade effectively.
1. Selecting the Blade Material
The first step in shaping and forming the blade is selecting the right material. The choice of material will depend on the intended use of the knife. Common blade materials include stainless steel, carbon steel, and Damascus steel. Each material has its unique properties and characteristics, so choose the one that suits your requirements.
2. Creating a Template
Before shaping the blade, it is essential to create a template or pattern. A template serves as a guide for the desired blade shape and dimensions. You can either draw the template on paper or use computer software for more precise measurements. Ensure the template is accurate to achieve the desired blade shape.
3. Marking the Blade Profile
Once you have the template, transfer the blade profile onto the selected material. Use a scribe or marker to mark the outline of the blade. Take your time and pay attention to details to ensure accurate markings. This step is crucial as it determines the final shape of the blade.
4. Cutting the Rough Shape
With the blade profile marked, it’s time to cut the rough shape. Use an angle grinder or a hacksaw to remove the excess material outside the marked outline. Take caution and wear protective gear during this step to avoid accidents. Remember to leave some material for further shaping and refinement.
5. Grinding the Blade
Now it’s time to refine the blade shape and remove any uneven edges. Use a belt grinder or a file to grind the blade according to the marked profile. Start with a coarser grit and gradually move to finer grits for a smoother finish. Pay attention to the bevel angle and ensure symmetry on both sides of the blade.
6. Heat Treatment
After shaping the blade, it needs to undergo heat treatment for improved strength and hardness. The heat treatment process includes heating the blade to a specific temperature and quenching it in oil or water to cool rapidly. This step is crucial for achieving the desired hardness and toughness of the blade.
7. Annealing and Tempering
Once the blade is heat-treated, it is necessary to anneal and temper it for optimal performance. Annealing involves heating the blade to relieve internal stresses, while tempering helps to reduce brittleness. Follow the recommended temperature and duration for annealing and tempering to obtain the desired blade properties.
8. Refining and Polishing
After the heat treatment process, it’s time to refine the blade further and give it a polished finish. Use finer grits of sandpaper or polishing compounds to remove any remaining scratches or imperfections. Take your time and ensure a smooth and shiny surface on the blade.
9. Final Edge Honing
The last step in shaping and forming the blade is honing the final edge. Use a sharpening stone or a honing guide to achieve a sharp and precise blade edge. Take caution and maintain a consistent angle during the sharpening process. Test the edge periodically to ensure its sharpness.
In summary, shaping and forming the blade requires careful attention to detail and precision. By following this step-by-step guide, you can create a well-shaped and functional blade for your knife-making project. Remember to prioritize safety by using appropriate protective gear and tools throughout the process.
Finishing Techniques to Enhance the Durability and Aesthetic Appeal
When it comes to woodworking or any other type of construction project, finishing plays a crucial role in enhancing both the durability and aesthetic appeal of the final product. Finishing techniques not only protect the wood but also add a layer of beauty that can make a piece stand out. In this section, we will explore some popular finishing techniques that you can use to achieve the desired results.
1. Sanding
Sanding is the first step in any finishing process. It involves using sandpaper or an electric sander to smooth the surface of the wood. This helps to remove any rough spots, imperfections, or scratches, resulting in a smooth and even surface. It is important to start with coarse-grit sandpaper and gradually progress to finer-grit sandpaper to achieve the desired level of smoothness.
2. Staining
Staining is a popular technique used to add color to the wood while still allowing its natural grain to shine through. Stains come in a wide range of colors, from light tones to dark hues. Before staining, it is essential to prepare the wood surface properly by sanding it and removing any dust or debris. Applying the stain evenly with a brush or cloth and wiping off any excess ensures a uniform and vibrant color.
3. Varnishing
Varnishing is an effective technique for protecting the wood surface from moisture, UV rays, and general wear and tear. Varnishes are available in different finishes, such as gloss, semi-gloss, and matte, allowing you to choose the desired level of sheen. Applying multiple coats of varnish, with proper sanding between each coat, ensures a smooth and durable finish.
4. Oil Finishes
Oil finishes, such as linseed oil or tung oil, are known for enhancing the natural beauty of the wood. These finishes penetrate the wood fibers, providing protection from within. They create a soft, warm glow that highlights the wood’s grain patterns. Applying multiple coats of oil and wiping off any excess helps to achieve a rich and lustrous finish.
5. Lacquering
Lacquering is a technique that involves applying a clear, protective coating to the wood surface. Lacquer finishes are known for their high gloss and durability. This technique can be applied using a spray gun or brush, ensuring a smooth and even application. Lacquer finishes are ideal for furniture and other pieces that require a visually stunning, glass-like appearance.
6. Waxing
Waxing is a traditional finishing technique that provides a soft and natural sheen to the wood surface. It creates a smooth and stain-resistant layer while allowing the wood to breathe. Wax is typically applied using a clean cloth or brush and buffed to a lustrous shine. This technique is commonly used on antique furniture and other delicate woodwork.
7. Distressing
Distressing is a technique used to create an aged or weathered look on the wood surface. It involves intentionally creating dents, scratches, or other imperfections to mimic the wear and tear of time. Distressing techniques can include using tools, sandpaper, or even chemicals to achieve the desired effect. This technique adds character and rustic charm to furniture and other wooden pieces.
8. Ebonizing
Ebonizing is a technique that involves darkening the wood to create a black or dark brown appearance. Traditionally, ebonizing was achieved by using a solution made from iron and vinegar, which reacts with the tannins in the wood. However, modern methods use commercial dyes or stains to achieve the desired effect. Ebonizing can give a dramatic and sophisticated look to furniture and other wooden objects.
In summary, finishing techniques are essential in woodworking to enhance both the durability and aesthetic appeal of the final product. Whether you choose to sand, stain, varnish, oil, lacquer, wax, distress, or ebonize, each technique adds its unique charm and protection to the wood. By understanding and utilizing these techniques, you can create stunning pieces that will stand the test of time and be admired for their beauty.
Tips for Proper Maintenance and Care of Your Wooden Knife
Wooden knives are a beautiful and unique addition to any kitchen. Not only do they offer a rustic and natural aesthetic, but they also have excellent cutting capabilities. However, to keep your wooden knife in the best condition and prolong its lifespan, proper maintenance and care are essential. Here are some tips to help you care for your wooden knife:
1. Hand Wash Only
One of the most important rules to remember when it comes to wooden knives is to always hand wash them. Never put your wooden knife in the dishwasher, as the harsh detergents and high heat can cause the wood to warp, crack, or even split. Instead, gently wash the knife with warm soapy water and a soft sponge or cloth, taking care to remove any food particles or stains.
2. Dry Immediately
After washing your wooden knife, it’s crucial to dry it thoroughly to prevent any moisture from seeping into the wood. Use a clean towel to pat it dry, paying extra attention to the handle and the blade. Avoid air-drying your wooden knife, as prolonged exposure to moisture can damage the wood.
3. Oil the Handle Regularly
To keep the wooden handle of your knife looking its best and prevent it from drying out or cracking, it’s essential to oil it regularly. Use food-grade mineral oil or any other suitable wood oil, following the manufacturer’s instructions. Apply a small amount of oil to a clean cloth and gently rub it into the handle, allowing it to penetrate the wood. This will help moisturize the wood and enhance its natural beauty.
4. Sharpen the Blade Carefully
Wooden knives require regular sharpening to maintain their cutting performance. However, it’s vital to sharpen the blade carefully to avoid damaging the wood. Use a sharpening stone or honing rod specifically designed for wooden knives, following the instructions provided. Take your time and use gentle strokes to maintain the knife’s sharpness while preserving the integrity of the wooden handle.
5. Store Properly
When not in use, store your wooden knife in a safe and dry place. Avoid leaving it in water or in humid environments, as excessive moisture can cause the wood to swell or warp. Consider using a knife block or a knife sheath to protect the blade and prevent any accidental damage. Additionally, keep your wooden knife away from direct heat sources, such as stovetops or ovens, as this can also cause the wood to dry out and crack.
In summary, proper maintenance and care are crucial for keeping your wooden knife in optimal condition. Remember to hand wash, dry immediately, oil the handle regularly, sharpen the blade carefully, and store it properly. By following these tips, you can enjoy the beauty and functionality of your wooden knife for years to come.
FAQs
1. How can I make a wooden knife?
To make a wooden knife, you will need a block of wood, carving tools, sandpaper, and a finish. Start by shaping the wood into a knife-like shape using the carving tools. Once you are satisfied with the shape, sand the knife to smooth the edges and surfaces. Finally, apply a finish to protect the wood and give it a polished look.
2. What type of wood is best for making a wooden knife?
Hardwoods like maple, oak, or walnut are often preferred for making wooden knives. These types of wood are durable and have a tight grain structure, which makes them suitable for shaping and carving into a knife. Avoid using softwoods as they may not hold up well and could easily break.
3. Can a wooden knife be used for cutting food?
A wooden knife can be used for certain types of food, but it may not be suitable for all cutting tasks. Wooden knives are generally more suitable for slicing soft ingredients like fruits, vegetables, and bread. They are not recommended for cutting through hard or tough foods as they may not have the same durability as metal knives.
Conclusion
In conclusion, learning how to make a wood knife can be a rewarding and practical skill to acquire. Whether you are a beginner or an experienced craftsman, the process of creating a wooden knife allows you to exercise your creativity and precision while also providing you with a functional tool.
By following the step-by-step instructions, you can transform a block of wood into a unique and personalized knife that suits your needs and style. Additionally, constructing a wooden knife can be a cost-effective alternative to purchasing a traditional metal knife, and it offers a sense of satisfaction and accomplishment.
Remember to prioritize safety and proper techniques while working with sharp tools and handling wood. With practice and patience, you can master the art of making wood knives and enjoy the satisfaction of using a custom-made tool.
