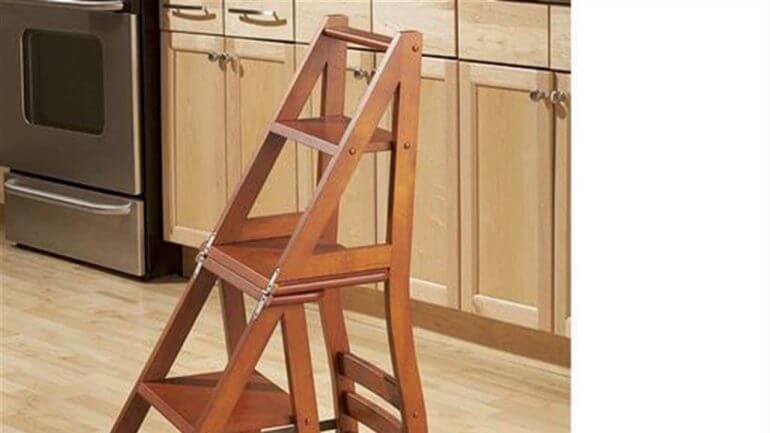
Looking to add a rustic touch to your home decor? Learn how to make a wood ladder with these simple steps. Whether you want a ladder for practical use or as a decorative accent, making your own allows you to personalize the design and size to fit your needs. With the right tools and materials, you’ll be able to create a sturdy and stylish wood ladder that will complement any space. Let’s get started!
First, gather your materials. You’ll need wooden boards, a saw, sandpaper, screws, and a drill. Choose a sturdy wood like pine or oak for durability. Measure and cut the boards to your desired length for the ladder steps and sides.

Next, use sandpaper to smooth out any rough edges or surfaces on the wood. This will ensure a polished and safe ladder. Take your time to achieve a smooth finish.
Now it’s time to assemble the ladder. Begin by attaching the ladder steps to the side rails using screws and a drill. Make sure to evenly space out the steps for balance and stability. Double-check that all screws are tightened securely.
Once the ladder is assembled, give it a final sanding to remove any imperfections or splinters. You can also add a protective finish like varnish or stain to enhance the wood’s natural beauty and provide additional durability.
Voila! Your homemade wood ladder is ready to use. Whether you use it for
Measuring and Cutting the Wood for Your Ladder
Before you start building your ladder, it is essential to measure and cut the wood accurately. This step is crucial as it determines the stability and functionality of your ladder. In this section, we will guide you on how to measure and cut the wood for your ladder.
Materials Needed
- Tape measure
- Pencil or marker
- Circular saw or handsaw
- Safety goggles
- Work gloves
Step 1: Determine the Ladder Height
The first step in measuring your ladder is to determine the desired height. Consider where you will be using the ladder and the maximum height you need to reach. Measure from the ground to the highest point you want to access with the ladder. Write down this measurement as the ladder height.
Step 2: Calculate the Ladder Length
The ladder length is determined by the ladder height and the angle at which the ladder will lean against the support surface. A standard guideline is to have a 4:1 ratio between the ladder height and the distance from the base of the ladder to the support surface. Multiply the ladder height by 4 to calculate the ladder length.
Step 3: Mark the Wood
Using a tape measure and a pencil or marker, mark the measurements on the wood pieces you will be using for the ladder. Start by marking the ladder height on the longer side rails of the ladder. Make sure the marks are clear and easily visible.
Step 4: Cut the Side Rails
Put on safety goggles and work gloves to protect yourself. Using a circular saw or handsaw, carefully cut the side rails of the ladder according to the marked measurements. Take your time and ensure that the cuts are straight and accurate.
Step 5: Determine the Rung Length
Decide on the rung length based on personal preference and the spacing you desire between the rungs. Measure and mark the rung lengths on the ladder side rails. Ensure that the rungs will be evenly spaced and placed at a comfortable height for stepping.
Step 6: Cut the Rungs
With the same safety precautions in place, cut the rungs of the ladder based on the marked measurements. Double-check the measurements and make precise cuts to ensure that the rungs fit securely between the side rails.
Step 7: Sand the Wood
After cutting all the wood pieces, use sandpaper or a sander to smooth out any rough edges or surfaces. This step will prevent splinters and create a more polished finish to your ladder.
By following these steps, you will be able to measure and cut the wood accurately for your ladder. Remember to prioritize safety during the cutting process and double-check your measurements before making any cuts. In the next section, we will guide you on how to assemble the ladder using the cut wood pieces.
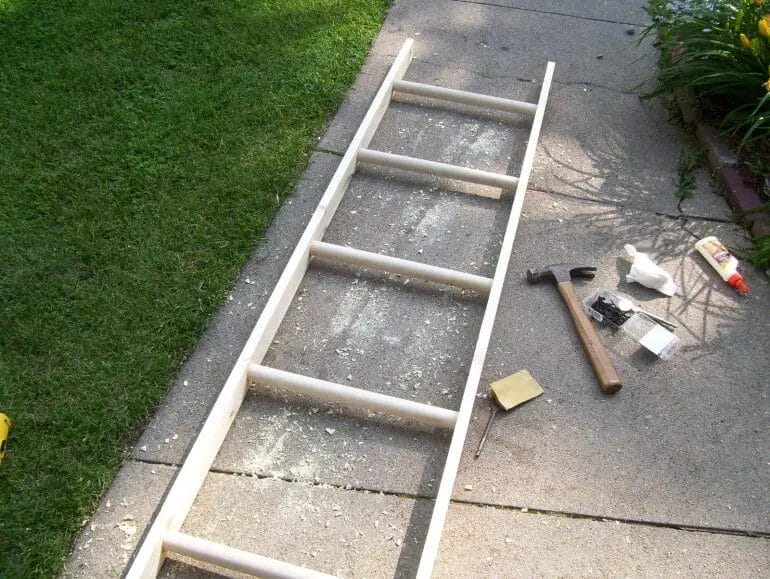
Assembling and Securing the Steps of Your Wood Ladder
Building a wooden ladder can be a rewarding and practical project. Whether you need a ladder for reaching high shelves or performing home maintenance tasks, a well-built wooden ladder can provide stability and durability. In this section, we will guide you through the process of assembling and securing the steps of your wood ladder.
Materials Needed
Before you begin, gather the following materials:
- Wooden ladder sides
- Wooden ladder steps
- Wood screws
- Drill
- Measuring tape
- Pencil
- Saw
- Sandpaper
- Wood glue
- Clamps
Step 1: Measure and Cut the Steps
Start by measuring and cutting the wooden ladder steps to your desired length. Ensure that each step is cut to the same length for consistency. Use a measuring tape and pencil to mark the measurements accurately. Once marked, use a saw to cut the steps.
Step 2: Sand the Steps
After cutting the steps, use sandpaper to smooth the edges and surfaces. This will prevent any splinters or rough surfaces that may cause discomfort or injury. Sand each step thoroughly until they are smooth to the touch.
Step 3: Attach the Steps to the Sides
Position the ladder sides on a flat surface. Place the first step at the desired height, ensuring it is level. Use wood screws and a drill to secure the step to both ladder sides. Repeat this process for each step, ensuring equal spacing between them.
Step 4: Reinforce with Wood Glue
To enhance the overall strength of your wood ladder, apply wood glue to the joints where the steps meet the ladder sides. This will create a secure bond and prevent any wobbling or instability. Use clamps to hold the ladder in place while the glue dries.
Step 5: Final Checks and Adjustments
Before using your wood ladder, perform final checks to ensure everything is secure. Double-check the tightness of the screws and make any necessary adjustments. Confirm that the ladder is stable and does not wobble. Test each step for weight-bearing capacity.
Summary
Assembling and securing the steps of your wood ladder is a straightforward process that requires careful measurement, cutting, and attachment. By following these steps and using the right materials, you can create a sturdy and reliable wood ladder for your home or workspace. Remember to prioritize safety and take necessary precautions when using the ladder.

Adding Safety Features to Your Wood Ladder
Wood ladders are a popular choice for various tasks around the house or workplace. However, they can pose a safety risk if not used properly. One way to enhance the safety of your wood ladder is by adding safety features that provide additional stability and prevent accidents. In this section, we will explore some key safety measures you can take to make your wood ladder safer to use.
1. Anti-Slip Rungs
The rungs of a ladder are the part that you step on, and they can become slippery, especially when wet or covered in dust or debris. To prevent slips and falls, you can add anti-slip material to the rungs of your wood ladder. There are various options available, such as non-slip tapes or coatings that provide traction and grip. By adding anti-slip rungs, you can significantly reduce the risk of accidents while using your ladder.
2. Stabilizing Feet
Another common safety concern with wood ladders is their stability. Wood ladders can be prone to wobbling or shifting, especially on uneven surfaces. To enhance the stability of your ladder, you can add stabilizing feet. These feet are designed to provide a wider base of support and prevent the ladder from tipping over. They are usually made of non-slip materials and can be easily attached to the existing feet of your wood ladder.
3. Safety Braces
Safety braces are additional supports that can be added to the sides of your wood ladder to provide extra stability and prevent swaying or bending of the ladder. They are typically made of strong metal or reinforced plastic and are attached diagonally or horizontally between the ladder rails. Safety braces help distribute the weight more evenly and reduce the risk of accidents due to ladder collapse.
4. Safety Labels and Instructions
Clear and visible safety labels and instructions are essential for the safe use of any ladder, including wood ladders. Ensure that your ladder has proper safety labels indicating weight capacity, recommended usage, and any specific precautions. Additionally, keep the ladder’s instruction manual handy and follow the manufacturer’s guidelines for safe use, maintenance, and storage.
5. Regular Maintenance and Inspection
Maintaining your wood ladder is crucial for its longevity and safety. Regularly inspect the ladder for any signs of wear, damage, or loose parts. Check the rungs, rails, and connections to ensure they are in good condition. If you notice any issues, such as cracked wood, loose screws, or damaged rungs, repair or replace them promptly. It is also essential to store your ladder in a dry and protected area to prevent damage.
In summary, adding safety features to your wood ladder is an important step in ensuring its safe use. By incorporating anti-slip rungs, stabilizing feet, safety braces, and following proper maintenance practices, you can significantly reduce the risk of accidents and make your wood ladder a safer tool for various tasks. Remember to always prioritize safety and use caution when using any ladder.
5. Finishing and Stabilizing Your Wood Ladder for Use
Once you have built your wooden ladder, it is important to properly finish and stabilize it before using it. This will not only enhance its appearance, but also ensure its durability and safety. Here are some steps you can follow to finish and stabilize your wood ladder:
Sand the Surface
The first step in finishing your wood ladder is to sand the surface. This will help smooth out any rough edges or imperfections and prepare the wood for staining or painting. Start by using a coarse grit sandpaper to remove any splinters or rough spots, then gradually move to finer grits to achieve a smooth finish.
Apply a Finish
Next, apply a finish to protect and enhance the appearance of the wood. There are several options you can choose from, including stain, paint, or a clear sealant. If you prefer the natural look of the wood, you can simply apply a clear sealant to protect it from moisture and UV damage. If you want to add some color, consider using a stain or paint that complements your ladder’s surroundings.
Before applying the finish, make sure to clean the wood surface thoroughly and remove any dust or debris. Use a brush or a clean cloth to apply the finish in even, thin coats, following the manufacturer’s instructions. Allow each coat to dry completely before applying the next one.
Secure the Rungs
Once the finish has dried, it’s time to ensure that the rungs of your ladder are securely attached. Check each rung to make sure it is properly fastened to the side rails. If any rungs feel loose, use screws or nails to reinforce them. It’s important to have sturdy rungs to support your weight when using the ladder.
Add Non-Slip Protection
To further enhance the safety of your wood ladder, consider adding non-slip protection to the rungs. This can be in the form of adhesive strips or traction pads that provide extra grip and prevent slipping. Non-slip protection is especially important if you plan to use the ladder outdoors or in wet conditions.
Stabilize the Ladder
Finally, it’s crucial to stabilize your wood ladder to prevent it from wobbling or tipping over while in use. One way to achieve this is by installing ladder stabilizers or standoffs at the top of the ladder. These accessories provide additional support and stability, especially when working on uneven surfaces or reaching higher heights.
Additionally, always ensure that the ladder is placed on a stable and level surface. Avoid setting it up on uneven ground or on slippery surfaces. If necessary, use wedges or blocks to level the ladder and secure it firmly in place.
Summary
Finishing and stabilizing your wood ladder is an essential step to ensure its longevity and safety. Sanding the surface, applying a finish, securing the rungs, adding non-slip protection, and stabilizing the ladder are all important considerations. By following these steps, you can enjoy a well-finished and stable wood ladder that is ready for all your climbing needs.
FAQs
How can I make a wooden ladder?
To make a wooden ladder, you will need to gather the necessary materials including wooden boards, screws, and a saw. Measure and cut the boards into the desired length for the ladder steps. Attach the steps to the side rails using screws, ensuring they are evenly spaced. Finally, secure the ladder by adding additional support to the sides.
Conclusion
In conclusion, learning how to make a wood ladder can be a rewarding and fulfilling DIY project. By following the right steps and using the proper tools, you can create a sturdy and durable ladder that will serve you for years to come.
With its rustic charm and practical functionality, a handmade wood ladder can be a versatile addition to your home or garden. Whether you use it as a decorative display, a plant stand, or a functional tool for accessing high places, a wood ladder adds a touch of style and uniqueness to any space.
So roll up your sleeves, gather your materials, and embark on this exciting woodworking adventure. Get ready to impress your friends and family with your craftsmanship and enjoy the satisfaction of completing a beautiful and useful wooden ladder!
