If you’re tired of the dated look of wood paneling and want to transform it into a sleek, modern finish that resembles drywall, you’re in the right place. With the right techniques and a little bit of creativity, you can easily make your wood paneling look like drywall. By following a few simple steps, you can achieve a smooth and seamless surface that will completely change the appearance of your space.
To start, thoroughly clean the paneling using a mild detergent and warm water. This will remove any dust or grime that has accumulated over time. Once the paneling is clean and dry, fill in any gaps or grooves with a quality wood filler. Sand the surface smooth, ensuring that the filler is level with the surrounding paneling.

Next, apply a good quality primer specifically designed for use on wood surfaces. This will help create a smooth base for your paint. Once the primer is dry, lightly sand the surface again to ensure it is smooth and ready for the final coats of paint.
Choose a high-quality paint in the color of your choice and apply it evenly to the paneling using a roller. Start from the top and work your way down, making sure to cover the entire surface with even strokes. Allow the paint to dry completely between coats, and apply as many coats as necessary to achieve the desired finish.
Finally, once the paint is dry, apply a clear coat or se
Using Drywall Mud to Smooth Wood Paneling
If you have outdated or textured wood paneling in your home, you may be wondering how to give it a smoother, more modern finish. One effective solution is to use drywall mud to smooth out the surface of the paneling. Drywall mud, also known as joint compound, is a versatile material that is commonly used in drywall projects, but it can also be used to transform wood paneling.
Why Use Drywall Mud?
Drywall mud is an ideal choice for smoothing wood paneling because it is easy to work with and provides a smooth, uniform surface. It can fill in the grooves and imperfections in the paneling, creating a seamless finish. Additionally, drywall mud is affordable and readily available at most home improvement stores, making it a cost-effective solution for updating your wood paneling.
Preparing the Wood Paneling
Before applying drywall mud, it is important to properly prepare the wood paneling. Begin by cleaning the surface to remove any dirt, dust, or grease. Use a mild detergent and water solution, and be sure to rinse thoroughly. Once the paneling is clean, allow it to dry completely.
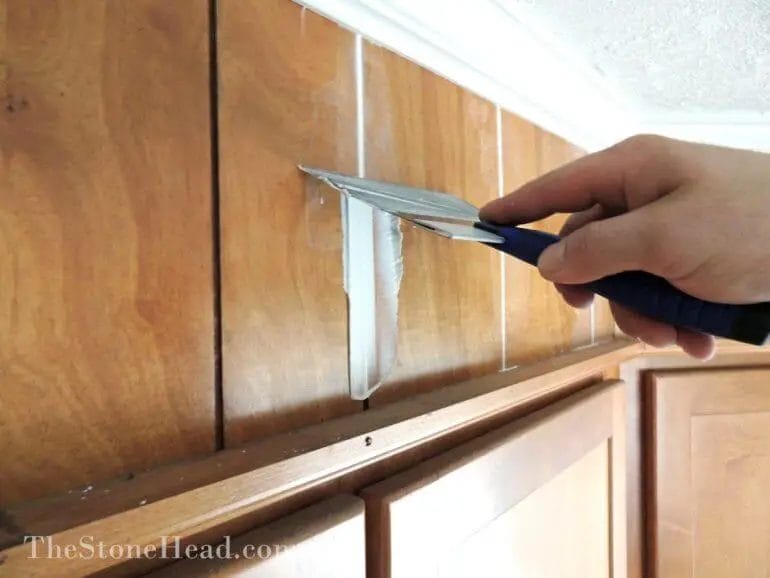
Applying the Drywall Mud
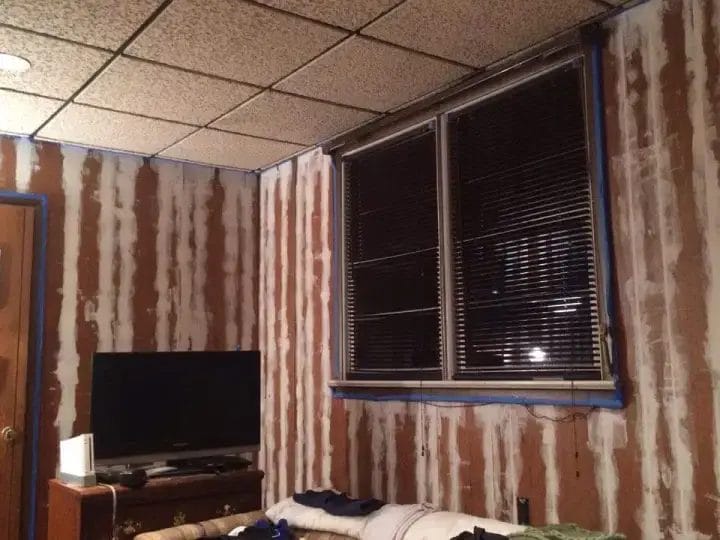
To apply the drywall mud, start by filling in any large gaps or cracks in the paneling with a putty knife. Spread the drywall mud over the surface of the paneling using a trowel or a drywall knife. Work in small sections, applying a thin layer of mud at a time. Smooth the mud out evenly, making sure to fill in any grooves or ridges in the paneling.
After applying the initial layer of drywall mud, allow it to dry according to the manufacturer’s instructions. Once dry, sand the surface with fine-grit sandpaper to remove any rough or uneven areas. Wipe away the dust with a clean, damp cloth.
Additional Coats and Finishing
Depending on the condition of the wood paneling, you may need to apply multiple coats of drywall mud to achieve the desired smoothness. Repeat the process of applying a thin layer of mud, allowing it to dry, and sanding it smooth between each coat. Be sure to remove any dust before applying additional coats.
Once you are satisfied with the smoothness of the paneling, you can proceed with finishing options. You can paint the paneling to match your desired color scheme or apply a coat of primer followed by wallpaper or a faux finish for added texture and visual interest.
Summary
Using drywall mud to smooth wood paneling is an effective way to update the look of your home. This versatile material fills in grooves and imperfections, creating a smooth surface. By following the steps outlined above, you can achieve a seamless, modern finish that will transform your wood paneling into a stylish focal point in any room.
Adding Texture to Wood Paneling for a Drywall Look
Wood paneling has been a popular choice for homeowners seeking a warm and rustic look in their homes. However, if you’re tired of the dated appearance of wood paneling and desire a more modern and sleek look, consider adding texture to the paneling to mimic the look of drywall. This simple and affordable DIY project can transform your space and give it a fresh and updated feel.
Materials You’ll Need
- Wood filler
- Sanding block
- Primer
- Paint
- Paintbrushes
- Texturing compound
- Trowel or putty knife
Step 1: Prepare the Paneling
The first step in the process is to prepare the wood paneling for texture. Start by cleaning the paneling thoroughly to remove any dust or grease. Fill in any cracks, holes, or imperfections with wood filler. Once the filler is dry, use a sanding block to smooth the surface and create an even base for the texture.
Step 2: Apply Primer
Next, apply a coat of primer to the paneling. Primer helps to create a smooth and even surface for the paint and texture to adhere to. Use a paintbrush or roller to apply the primer, ensuring full coverage. Allow the primer to dry completely before moving on to the next step.
Step 3: Paint the Paneling
Choose a paint color that complements your desired drywall look. Lighter shades tend to give a more contemporary feel, while darker shades can add depth and drama to the space. Use a paintbrush or roller to apply the paint evenly to the paneling, taking care to cover all surfaces. Allow the paint to dry completely before proceeding.
Step 4: Apply Texturing Compound
Once the paint is dry, it’s time to add texture to the paneling. Texturing compound, also known as joint compound, is readily available at most hardware stores. Using a trowel or putty knife, apply the compound to the paneling in a random pattern. You can create various textures, such as swirls, peaks, or stippling, depending on your preference. Experiment with different techniques to achieve the desired effect.
Step 5: Finishing Touches
After applying the texturing compound, allow it to dry according to the manufacturer’s instructions. Once dry, lightly sand the texture to smooth out any rough spots or edges. This will create a more polished and finished appearance. Finally, apply a coat of paint in a color of your choice to complete the transformation. This final coat will help to seal the texture and protect it from wear and tear.
Summary
By following these simple steps, you can easily add texture to wood paneling and achieve a drywall look in your home. This affordable and DIY-friendly project can bring a fresh and modern feel to any space. With a little time and effort, you can transform your outdated wood paneling into a sleek and stylish feature that will impress your guests and enhance the overall aesthetic of your home.
Creative Ways to Conceal Wood Grain on Paneling
Wood paneling can add warmth and charm to any space, but sometimes the visible wood grain may not be the desired aesthetic. If you have paneling with a prominent grain that you want to conceal, there are several creative ways to achieve a smooth, painted finish or a different textured look. In this section, we will explore some effective techniques to help you transform your wood paneling and achieve the desired appearance.
1. Fill in the Grain
One way to conceal wood grain on paneling is to fill in the grain with a wood filler or spackling compound. This method involves applying the filler to the surface of the paneling, allowing it to harden, and then sanding it down until smooth. Once the surface is smooth, you can go ahead and apply your desired paint or texture. This technique effectively hides the wood grain, giving your paneling a fresh and sleek look.
2. Skim Coat the Surface
Another approach to concealing wood grain is to skim coat the paneling surface with a layer of joint compound or plaster. This method involves applying a thin layer of the compound or plaster over the wood grain, using a trowel or putty knife to achieve a smooth and even finish. After the skim coat has dried, you can sand it down to create a seamless surface ready for painting or texturing. Skim coating not only covers the wood grain but also adds depth and texture to your paneling.
3. Textured Paint
If you prefer a textured look rather than a smooth finish, using textured paint can be a great option. Textured paint contains additives that create a textured appearance when applied to the surface. These paints come in various textures, such as sand, stone, or popcorn. By applying textured paint over your wood paneling, you can effectively mask the wood grain and add visual interest to the walls.
4. Wallpaper or Fabric Covering
An alternative way to conceal wood grain is to cover the paneling with wallpaper or fabric. This method allows you to completely transform the look of your paneling while hiding the wood grain underneath. Choose a wallpaper or fabric design that aligns with your desired aesthetic, and carefully apply it to the paneling surface using adhesive. This approach not only conceals the wood grain but also adds color, pattern, and texture to your space.
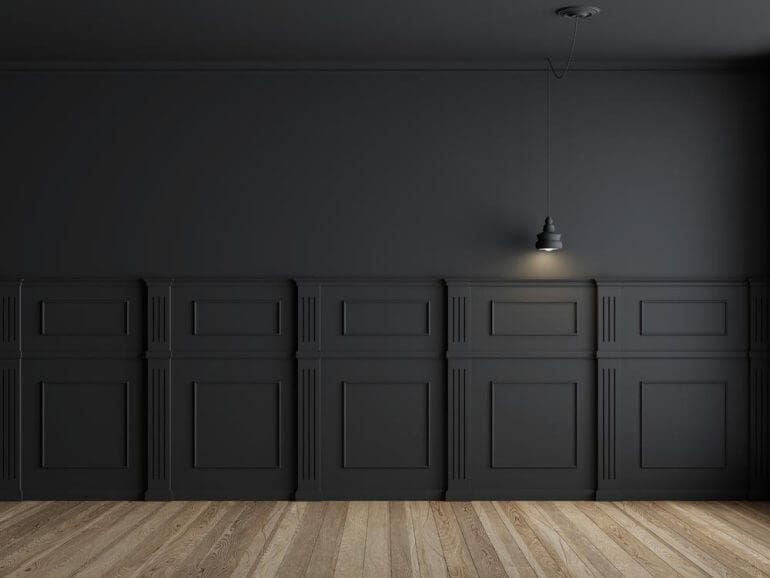
5. Shiplap or Beadboard Overlay
If you want to completely change the look of your wood paneling, consider adding a shiplap or beadboard overlay. These overlays involve installing horizontal planks or beadboard panels directly over the existing paneling, covering the wood grain completely. Shiplap and beadboard offer a timeless and rustic charm that can instantly transform your space. Once installed, you can leave them as natural wood or paint them in your desired color.
6. Whitewashing or Limewashing
Whitewashing or limewashing your wood paneling is another effective way to conceal the wood grain. These techniques involve applying a diluted paint or lime mixture over the paneling, allowing some of the wood grain to show through while creating a lighter, more even appearance. Whitewashing or limewashing gives your paneling a rustic and weathered look, perfect for adding character to any space.
In summary, if you want to conceal the wood grain on your paneling, there are several creative techniques to achieve the desired effect. Whether you choose to fill in the grain, skim coat the surface, use textured paint, apply wallpaper or fabric, add a shiplap or beadboard overlay, or opt for whitewashing or limewashing, you can transform your wood paneling into a smooth and visually pleasing surface that suits your style and decor.
Transforming Wood Paneling with Wallpaper or Fabric
Wood paneling has been a popular interior design choice for many years. However, as trends change, you may find yourself wanting to update the look of your space. One of the easiest and most effective ways to transform wood paneling is by using wallpaper or fabric. This simple yet impactful solution can completely change the atmosphere of a room, giving it a fresh and modern feel. In this section, we will explore the process of transforming wood paneling using wallpaper or fabric, and discuss the various options available to you.
1. Preparing the Surface
Before applying wallpaper or fabric, it is important to properly prepare the surface of the wood paneling. Start by cleaning the paneling thoroughly to remove any dirt, grease, or dust. Use a mild detergent and warm water solution, and scrub the paneling gently with a soft cloth or sponge. Once the paneling is clean, allow it to dry completely before proceeding.
2. Choosing Wallpaper or Fabric
When it comes to choosing wallpaper or fabric for your wood paneling, the options are virtually endless. Consider the overall style and theme of your space, as well as your personal preference. Wallpaper comes in a variety of patterns, textures, and colors, allowing you to create a unique and customized look. If you prefer a more subtle approach, you can opt for fabric instead. Fabric can be easily applied to wood paneling using a liquid starch solution, giving you the freedom to change it whenever you desire.
3. Applying Wallpaper or Fabric
Once you have selected your preferred wallpaper or fabric, it’s time to apply it to the wood paneling. Start by measuring the dimensions of each panel and cutting the wallpaper or fabric accordingly. If you are using wallpaper, make sure to follow the manufacturer’s instructions for applying adhesive. Apply the wallpaper or fabric to the paneling, starting from the top and working your way down. Smooth out any wrinkles or air bubbles using a wallpaper smoothing tool or a clean cloth. Repeat this process for each panel until all the wood paneling is covered.
4. Finishing Touches
After applying the wallpaper or fabric, it’s important to give your newly transformed wood paneling some finishing touches. Trim any excess wallpaper or fabric using a sharp utility knife or scissors, ensuring a clean and seamless look. You can also consider adding a protective top coat to the wallpaper or fabric to enhance its durability and longevity. This will help protect it from scratches, stains, and fading over time.
5. Enjoying the Transformation
Once the wallpaper or fabric has been applied and the finishing touches are complete, step back and admire the transformation. The wood paneling that was once outdated and dull will now exude charm and character, adding a touch of elegance to your space. Enjoy the new ambiance and embrace the sense of rejuvenation that comes with transforming wood paneling with wallpaper or fabric.
In summary, transforming wood paneling with wallpaper or fabric is a simple and effective way to update the look of your space. By properly preparing the surface, choosing the right wallpaper or fabric, applying it carefully, and adding some finishing touches, you can achieve a stunning transformation that will breathe new life into your room. So, don’t be afraid to get creative and explore the endless possibilities of transforming wood paneling with wallpaper or fabric.
FAQs
Q: How can I make wood paneling look like drywall?
To make wood paneling look like drywall, you can follow these steps: 1) Clean the paneling thoroughly; 2) Fill in the grooves with spackling compound; 3) Sand the paneling smooth; 4) Prime the paneling with a high-quality primer; 5) Apply multiple coats of paint in your desired color. This will give the paneling a smooth, seamless appearance similar to drywall.
Conclusion
In conclusion, transforming wood paneling to resemble drywall is a fantastic way to modernize your space without the expense of completely removing and replacing it. Whether you choose to paint or cover the paneling with drywall compound, you can achieve a seamless, smooth finish that mimics the appearance of drywall.
By following the proper preparation techniques and using the right materials, such as high-quality primer and paint or joint compound, you can easily hide the wood grain and create a clean, uniform surface. Remember to sand, fill any grooves, and prime before applying paint or compound to ensure a professional-looking result.
With a bit of patience and attention to detail, you’ll be amazed at the transformative effect of making your wood paneling look like drywall. Say goodbye to outdated walls and hello to a fresh, contemporary space!
