Are you interested in creating your own wooden puzzles? Look no further! In this guide, we will show you step-by-step how to make unique and challenging wooden puzzles that will entertain both kids and adults alike. Whether you’re a seasoned woodworker or just starting out, this DIY project is perfect for unleashing your creativity and honing your woodworking skills. So, let’s dive right in and learn how to make wooden puzzles that will impress everyone with their craftsmanship and ingenuity.

Essential Tools and Materials for Wooden Puzzle Making
Wooden puzzles are not only fun to solve, but they can also be a rewarding DIY project. Whether you are a seasoned puzzle enthusiast or a beginner looking to try your hand at craftsmanship, having the right tools and materials is essential. In this section, we will explore the must-have items that will help you create beautiful and challenging wooden puzzles.1. Wood
The first and most important item you’ll need for wooden puzzle making is, of course, wood. The type of wood you choose will greatly impact the quality and durability of your puzzles. Hardwoods such as birch, maple, and walnut are popular choices due to their strength and resistance to wear and tear. Make sure to select high-quality, flat, and stable wood boards that are free from knots and defects.2. Saw
A saw is an indispensable tool for cutting the wooden pieces of your puzzle. There are several types of saws you can use, depending on your preference and the complexity of the design. A scroll saw is a popular choice for puzzle making as it allows for intricate and detailed cuts. Band saws and coping saws are also commonly used alternatives.3. Sandpaper and Files
To achieve smooth and polished puzzle pieces, sandpaper and files are essential. Start with coarse-grit sandpaper to remove any rough edges, and gradually work your way up to finer grits for a flawless finish. Files can be used to refine the intricate details of the puzzle pieces, ensuring a precise fit.4. Drill
A drill is necessary for creating holes in the wood, especially when making puzzles with interlocking pieces. Choose a drill bit size that matches the thickness of your puzzle pieces to achieve a snug fit. A drill press is recommended for accuracy and control.5. Clamps
Clamps are indispensable when it comes to securing the wood during cutting, gluing, and assembly. They help ensure precise and stable work, preventing any movement or shifting that could affect the puzzle’s overall quality.6. Adhesive
To assemble the puzzle pieces together, you’ll need a strong and reliable adhesive. Wood glue is a popular choice as it provides a permanent bond and is easy to work with. Make sure to use a glue that dries clear and is safe for use on wood.7. Finishes
To protect and enhance the beauty of your wooden puzzles, applying a finish is crucial. There are various finish options available, including varnish, shellac, and mineral oil. Choose a finish that is food-safe if your puzzles will be handled by children.8. Safety Equipment
Last but certainly not least, don’t forget to prioritize safety. Wear protective gear such as safety goggles, gloves, and a dust mask to prevent injuries and inhaling harmful particles during the woodworking process. In summary, creating wooden puzzles is a fulfilling and enjoyable endeavor. By ensuring you have the essential tools and materials, you can embark on this craft with confidence. Remember to choose high-quality wood, invest in the right saw, sand and file your pieces meticulously, use clamps for stability, select a strong adhesive, apply a suitable finish, and prioritize safety. With these key items at hand, you’ll be well-equipped to create stunning and challenging wooden puzzles that will delight puzzle enthusiasts of all ages.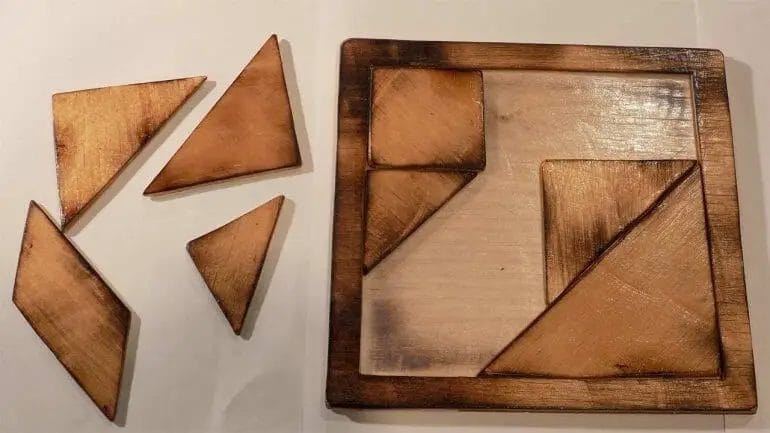
Step-by-Step Guide to Designing and Cutting Wooden Puzzle Pieces
If you are a fan of puzzles, you may have considered designing and cutting your own wooden puzzle pieces. Creating your own puzzles can be a rewarding and satisfying hobby that allows you to unleash your creativity. In this guide, we will walk you through the step-by-step process of designing and cutting wooden puzzle pieces, helping you bring your ideas to life.
1. Planning Your Puzzle
The first step in designing a wooden puzzle is to plan your puzzle’s concept. Consider the theme, difficulty level, and overall design of your puzzle. Will it be a picture puzzle, a shape puzzle, or a combination of both? Sketch out your ideas on paper to visualize the puzzle’s layout and structure.
2. Choosing the Right Wood
The type of wood you select for your puzzle pieces is essential. Opt for a hardwood like birch or maple, as they are durable and provide a smooth surface for cutting. Avoid softwoods like pine, as they may splinter or break easily.
3. Gathering the Tools
Before you begin cutting your puzzle pieces, ensure you have the necessary tools on hand. Some essential tools include:
- A scroll saw: This tool will allow you to make intricate and precise cuts.
- Clamps: Use clamps to secure your wood in place while cutting.
- Sandpaper: Smooth the edges of the puzzle pieces after cutting.
- Measuring tools: Rulers and measuring tapes will help you ensure accuracy in your design.
4. Creating a Template
Once you have your design finalized, transfer it onto a piece of cardboard or thick paper to create a template. Use a ruler and pencil to draw the shapes of your puzzle pieces accurately. This template will serve as a guide during the cutting process.
5. Securing the Wood
Place your chosen wood onto a stable surface and secure it with clamps. This will prevent the wood from moving or vibrating during the cutting process, ensuring clean and accurate cuts.
6. Cutting the Puzzle Pieces
Using the template as a guide, carefully position the scroll saw blade on the cut lines. Start cutting the puzzle pieces one by one, following the shape and design of your template. Take your time and make precise cuts to achieve the desired results.
7. Sanding and Smoothing
After cutting the puzzle pieces, use sandpaper to smooth the edges and remove any rough spots. This step will give your puzzle pieces a polished finish and ensure that they fit together seamlessly.
8. Applying a Finish
Once the puzzle pieces are cut and sanded, you may choose to apply a finish or sealant to enhance their appearance and durability. Consider using a non-toxic and food-safe finish if your puzzle will be handled by children.
9. Assembling Your Puzzle
Now that your wooden puzzle pieces are ready, it’s time to assemble them and start enjoying your creation. Test the fit of each piece and make any necessary adjustments to ensure a snug fit.
10. Sharing Your Puzzle
Once you have completed your wooden puzzle, share your creation with friends, family, or even consider selling them online. Spread the joy of solving puzzles with your unique and handcrafted designs.
Summary
Designing and cutting your own wooden puzzle pieces can be a fun and fulfilling activity. By following this step-by-step guide, you can bring your puzzle ideas to life. Remember to plan your puzzle, choose the right wood, gather the necessary tools, create a template, secure the wood, cut the puzzle pieces, sand and smooth the edges, apply a finish, assemble the puzzle, and finally, share your creation with others. Enjoy the process and let your creativity shine!
Creative Techniques for Painting and Finishing Wooden Puzzles
Wooden puzzles are not only a fun and challenging way to pass the time, but they also make for beautiful decorative pieces. One way to elevate the visual appeal of wooden puzzles is by employing creative painting and finishing techniques. In this section, we will explore some innovative methods to transform plain wooden puzzles into stunning works of art.
1. Preparing the Surface
Before diving into the painting process, it is essential to prepare the wooden puzzle surface adequately. Start by sanding down the puzzle pieces using fine-grit sandpaper to ensure a smooth and even surface. This step helps the paint adhere better and prevents any rough edges.
2. Choosing the Right Paint
The choice of paint plays a significant role in the final outcome of your wooden puzzle project. Acrylic paints are a popular option due to their vibrant colors, quick-drying properties, and versatility. Consider using water-based paints that are non-toxic and safe for both children and adults.
3. Creating a Base Coat
Applying a base coat is an essential step in achieving a professional-looking finish for your wooden puzzle. It provides a solid foundation for the subsequent paint layers and helps create a uniform color across all the pieces. Start by applying a thin layer of white or light-colored paint to the entire puzzle surface and allow it to dry completely.
4. Experimenting with Color Techniques
Painting wooden puzzles offers endless opportunities to get creative with colors. Here are a few techniques to try:
- Gradient Effect: Create a stunning gradient effect by blending different shades of the same color or transitioning between multiple colors. Start with the lightest shade at one end of the puzzle and gradually deepen the color as you move towards the other end.
- Marbling: Achieve a marbled effect by swirling two or more colors together. Apply the paint in small sections and use a toothpick or skewer to gently swirl the colors together for a mesmerizing pattern.
- Stenciling: Use stencils to add intricate designs or patterns to your wooden puzzle. Place the stencil on the puzzle surface and carefully apply paint using a stencil brush or sponge. Remove the stencil slowly to reveal the design.
5. Adding Finishing Touches
Once the paint has dried, it’s time to add some finishing touches to your wooden puzzle. Consider these techniques:
- Sealing: Apply a clear varnish or sealant to protect the painted surface and enhance its durability. This step also gives the puzzle a polished, glossy look.
- Embellishments: Get creative by adding additional elements to your puzzle, such as glitter, beads, or rhinestones. Use a strong adhesive to securely attach these embellishments for an extra touch of sparkle.
- Decoupage: Decoupage involves gluing paper cutouts or images onto the puzzle surface and sealing them with a protective coating. This technique allows you to incorporate intricate designs or personalize the puzzle with photographs.
6. Displaying and Caring for Painted Puzzles
Once your wooden puzzle is complete, it’s time to showcase your masterpiece. Consider framing the puzzle or placing it in a shadow box for a professional display. When handling painted puzzles, it’s important to treat them with care. Avoid exposing them to extreme temperatures or moisture, as this can damage the paint.
Summary
Transforming plain wooden puzzles into captivating works of art is made possible through creative painting and finishing techniques. By preparing the surface, choosing the right paint, experimenting with color techniques, and adding finishing touches, you can create unique and visually appealing puzzles. Remember to display and care for your painted puzzles properly to ensure their longevity and continued beauty.
Tips for Solving and Preserving Your Handcrafted Wooden Puzzle
Handcrafted wooden puzzles are not just beautiful pieces of art, but they also offer a challenging and engaging activity for puzzle enthusiasts. Whether you enjoy solving puzzles or have a collection of wooden puzzles, it’s important to know how to solve and preserve them properly. In this section, we will provide you with some valuable tips to help you solve and protect your handcrafted wooden puzzles.
1. Understand the Puzzle’s Design
Before diving into solving the puzzle, take some time to understand its design. Examine the shape, patterns, and colors of the puzzle pieces. Look for any unique features or motifs that can guide you during the solving process. Understanding the puzzle’s design will give you a better idea of how the pieces fit together and help you strategize your solving approach.
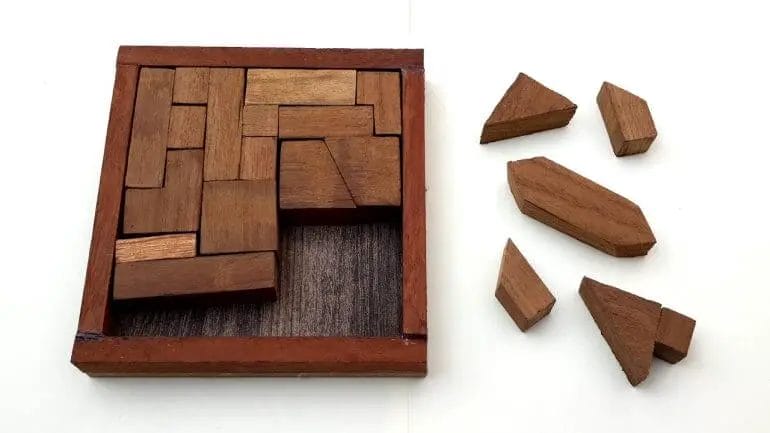
2. Sort and Organize the Pieces
When you start solving a handcrafted wooden puzzle, it’s crucial to sort and organize the pieces. Separate the edge pieces from the middle pieces and arrange them in groups based on their color or pattern. This will make it easier for you to identify the right pieces and find the corners and edges.
3. Start with the Borders
Begin solving the puzzle by constructing the border. Find the corner pieces and connect them to form the frame. Then, add the edge pieces to complete the border. This step will provide you with a clear boundary to work within and make the solving process more manageable.
4. Work on Sections or Patterns
Instead of randomly trying to fit different pieces together, focus on specific sections or patterns within the puzzle. Look for distinctive colors or shapes that can help you identify where certain pieces might belong. By working on sections or patterns, you can simplify the problem and make progress faster.
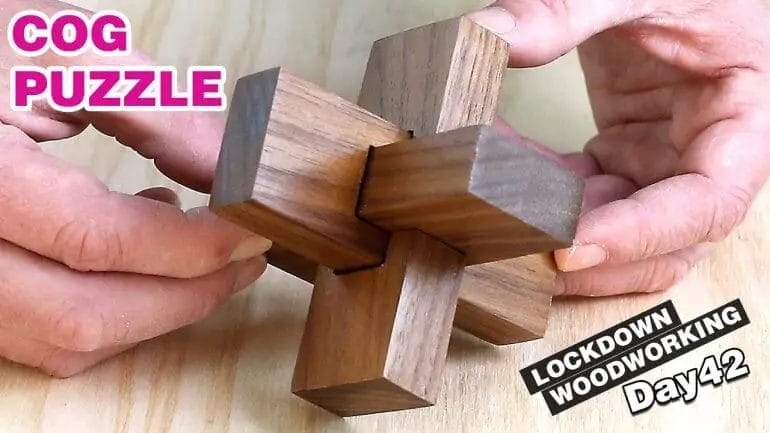
5. Pay Attention to Interlocking Pieces
Handcrafted wooden puzzles often have interlocking pieces that require a precise fit. Pay close attention to the shapes and angles of the puzzle pieces to ensure they interlock correctly. Take your time and gently try different combinations until you find the right match.
6. Use Lighting and Magnification
If you’re working on a particularly intricate puzzle, consider using additional tools such as a magnifying glass or a bright light source. These can help you examine the details of the puzzle pieces more closely and make it easier to spot subtle differences or clues.
7. Handle with Care
When solving a handcrafted wooden puzzle, it’s essential to handle the pieces with care. Avoid applying excessive force or bending the pieces to fit. Wooden puzzles can be delicate, and mishandling them can lead to damage or breakage. Gently maneuver the pieces until they fit naturally.
8. Clean and Preserve the Puzzle
Once you’ve solved the puzzle, it’s crucial to clean and preserve it properly to maintain its beauty and longevity. Use a soft cloth to remove any dust or debris from the surface of the puzzle. Avoid using harsh chemicals or abrasive materials that can damage the wood. If necessary, apply a thin layer of wood polish or wax to protect the puzzle.
9. Display and Enjoy
After solving and preserving your handcrafted wooden puzzle, it’s time to display and enjoy it. Consider framing the completed puzzle or placing it in a display case to showcase its beauty. Admire your accomplishment and share the joy of solving the puzzle with others.
In summary, solving and preserving your handcrafted wooden puzzle requires patience, attention to detail, and careful handling. By understanding the puzzle’s design, organizing the pieces, and following a systematic approach, you can successfully solve complex puzzles. Remember to handle the puzzle with care and preserve it properly to ensure its longevity. Enjoy the process and take pride in your finished masterpiece.
FAQs
Q: How can I make wooden puzzles?
To make wooden puzzles, start by selecting a design and gathering the necessary materials like plywood, a saw, sandpaper, and non-toxic paint. Trace the design onto the plywood, carefully cut it out with the saw, and sand the edges smooth. Paint or decorate the puzzle pieces as desired, and finish by applying a non-toxic sealant for durability.
Conclusion
In conclusion, learning how to make wooden puzzles can be a rewarding and fulfilling endeavor. By using your creativity and woodworking skills, you can create unique and engaging puzzles for yourself or to share with others. Whether it’s a traditional jigsaw puzzle or a brain-teasing puzzle box, the possibilities are endless. The process of designing, cutting, and assembling the pieces allows you to challenge your craftsmanship and problem-solving abilities. Moreover, the satisfaction of seeing your creation come to life and the joy it brings to others is truly priceless. So grab your tools, gather some quality wood, and embark on a journey of creating your very own wooden puzzles.