Carving faces in wood is an art form that requires skill, precision, and creativity. Whether you’re a beginner or an experienced woodworker, this guide will provide you with the necessary techniques and tips to bring life to your wooden projects.
From selecting the right wood to mastering the intricacies of facial features, you’ll learn step-by-step how to create realistic and expressive faces that captivate the eye. Discover the tools and methods used by seasoned wood carvers to achieve stunning results that will leave a lasting impression.

Unleash your inner artist and embark on a journey of transforming ordinary pieces of wood into breathtaking works of art. With the right guidance and practice, you’ll soon be able to carve faces in wood that showcase your craftsmanship and creativity.
Whether you’re interested in carving small figurines or larger sculptures, this introduction is the perfect starting point to dive into the world of wood carving. Get ready to channel your passion and bring wooden faces to life with skillful carving techniques and artistic vision.
Choosing the Right Wood for Carving Faces
When it comes to wood carving, choosing the right wood is essential to achieving the desired results. This is particularly true when carving intricate and detailed facial features. The type of wood you select will greatly impact the final outcome, as different woods have unique characteristics that can either enhance or hinder the carving process. In this section, we will explore some of the best wood options for carving faces and discuss their qualities.
1. Basswood
Basswood is widely regarded as one of the best woods for carving intricate designs, including faces. It is known for its fine texture, straight grain, and pale color, which makes it an ideal choice for capturing subtle facial expressions. Basswood is relatively soft and easy to work with, making it suitable for both beginners and experienced carvers. Additionally, its grain structure allows for clean and precise cuts, ensuring that intricate facial features are well-defined.
2. Butternut
Butternut is another popular wood choice for carving faces. It has a warm brown color and a medium texture, which adds a natural and rustic look to the finished carving. Butternut is moderately soft, making it easy to carve while still maintaining durability. It is also known for its distinct grain patterns, which can add character to the carved features. However, it’s important to note that butternut can be prone to warping and should be properly seasoned before carving.
3. Cherry
Cherry wood is often favored by experienced carvers for its rich color and grain patterns. It has a smooth texture and a medium density that allows for intricate detailing. Carvings made from cherry wood develop a beautiful reddish hue over time, adding depth and warmth to the facial features. It’s worth mentioning that cherry wood can be slightly harder than basswood or butternut, requiring sharper tools for clean cuts.
4. Mahogany
Mahogany is a hardwood known for its deep, reddish-brown color and excellent workability. While it may be slightly more challenging to carve compared to softer woods, mahogany offers a stunning finish with its smooth and lustrous surface. The wood’s natural beauty enhances the intricate details of carved facial features, giving them a timeless and elegant appeal. It’s important to note that mahogany can be expensive, so it’s often preferred for high-quality or decorative carvings.
5. Walnut
Walnut is a popular choice for carving due to its rich, dark color and fine grain. It is a dense and durable wood that can withstand intricate carving techniques. Walnut’s natural luster adds dimension to the facial features, highlighting the depth and intricacy of the carving. However, it’s important to note that walnut can be harder to work with and may require sharper tools to achieve desired results.
When choosing the right wood for carving faces, it’s essential to consider factors such as grain pattern, texture, color, and workability. Each wood type mentioned above has its unique characteristics that can contribute to the overall aesthetic and quality of the carving. Ultimately, the best wood will depend on your personal preferences, skill level, and the specific details you wish to capture in your carved faces.
Step-by-Step Process of Carving Expressive Faces
Carving expressive faces is a fascinating form of art that allows you to bring life and emotion to a wooden sculpture. Whether you are a beginner or an experienced carver, mastering the step-by-step process of carving expressive faces is essential to create captivating and realistic pieces. In this section, we will explore the key steps involved in this process.
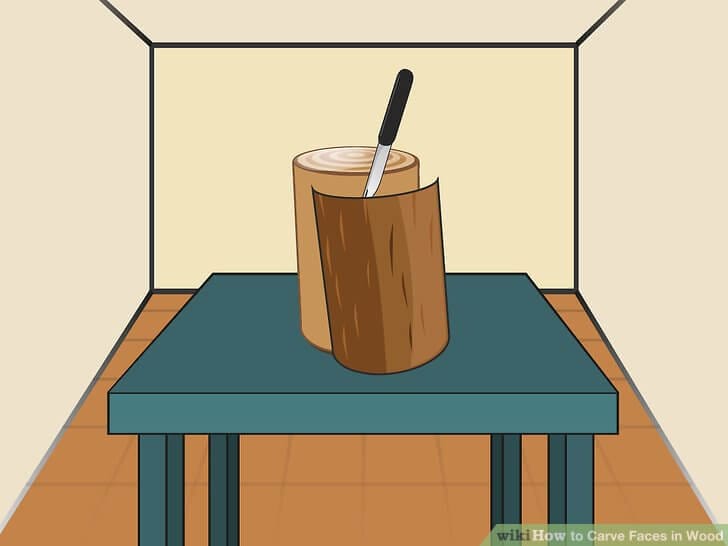
1. Select the Right Wood
The first step in carving expressive faces is choosing the right wood for your project. Look for a hardwood that is suitable for carving, such as basswood, walnut, or cherry. These woods have a fine and even grain, which makes them easier to work with and carve intricate details.
2. Plan and Sketch
Before you start carving, it is important to plan and sketch your design on the wood. This will help you visualize the final result and make any necessary adjustments before carving. Use a pencil or a marker to draw the outline of the face, including the facial features and expressions.
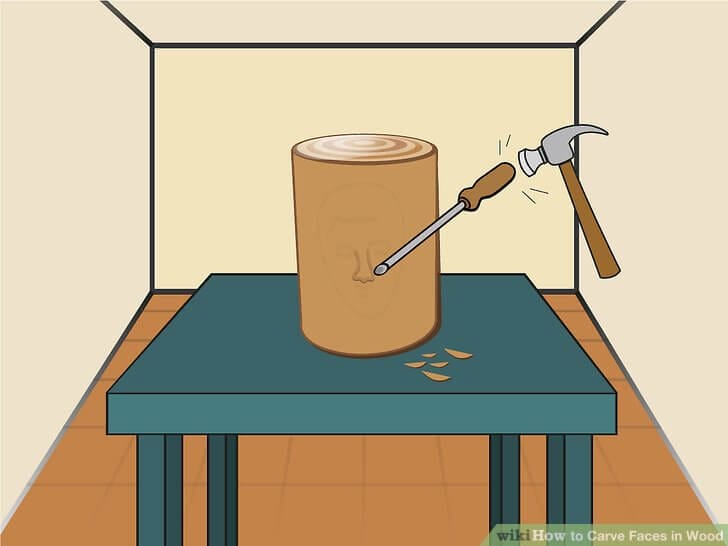
3. Rough Carving
The next step is to rough carve the basic shape of the face using a carving knife or a chisel. Begin by removing the excess wood around the outline of the face, gradually working towards the central features. Focus on establishing the overall proportions and contours of the face, keeping in mind the desired expression.
4. Refine the Features
Once the rough carving is done, it’s time to refine the facial features. Use smaller carving tools, such as gouges and V-tools, to carve out the eyes, nose, mouth, and other details. Pay close attention to the shape, depth, and angles of each feature to achieve a realistic and expressive look.
5. Add Texture and Expression
To enhance the expressiveness of the face, add texture and carve subtle details. Use different carving techniques like stippling, cross-hatching, and veining to create texture and depth. Pay attention to the nuances of facial expression, such as wrinkles, dimples, and creases, to bring life and character to the sculpture.
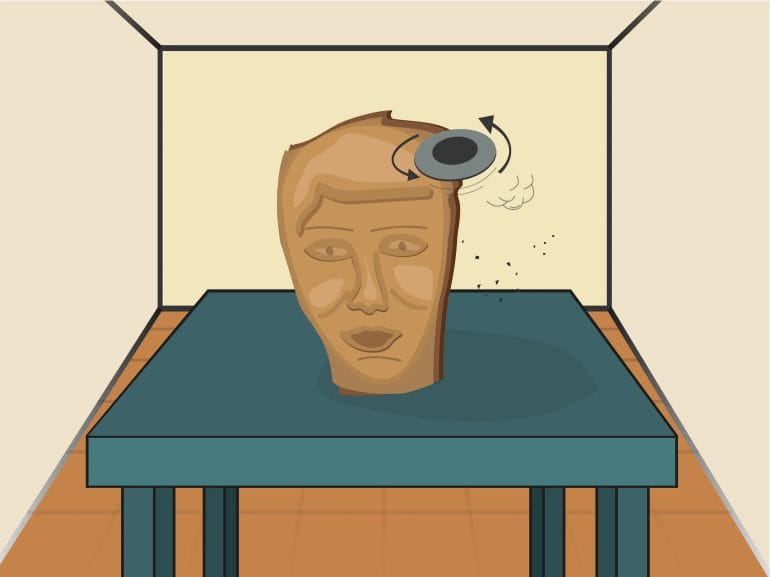
6. Smooth and Sand
After carving and adding texture, it’s important to smooth the surface of the face. Use sandpaper of various grits to remove any rough edges or tool marks and achieve a polished finish. Start with coarse-grit sandpaper and gradually move to finer grits for a smooth and refined surface.
7. Finish and Protect
The final step in the process is to apply a finish to the carved face to protect it and enhance its appearance. You can choose from a variety of finishes, such as oils, varnishes, or waxes, depending on your preference. Apply the finish evenly and let it dry according to the manufacturer’s instructions.
In summary, carving expressive faces involves a step-by-step process that starts with selecting the right wood, planning and sketching the design, rough carving, refining the features, adding texture and expression, smoothing and sanding, and finally applying a finish. By following these steps and practicing your carving skills, you can create stunning and lifelike faces that evoke emotion and captivate viewers.
Adding Detail and Texture to Wood Carved Faces
Wood carving is a timeless art form that has been practiced for centuries. It requires skill, patience, and a keen eye for detail. One of the most important aspects of wood carving is the ability to add realistic detail and texture to carved faces. This step-by-step guide will walk you through some techniques that can help take your wood carved faces to the next level.1. Study Facial Anatomy
Before you start adding detail to your wood carved faces, it’s important to have a good understanding of facial anatomy. Study photographs and artwork depicting different facial expressions and features. Pay close attention to the proportions and structure of the face, as well as the placement of features such as eyes, nose, and mouth. This knowledge will inform your carving and help you create realistic and accurate facial features.2. Use Reference Images
To add detail to your wood carved faces, it can be helpful to have reference images on hand. Find photographs or drawings of faces that have the type of detail and texture you want to achieve in your carving. These reference images can serve as a guide as you work, helping you capture the desired level of realism and texture in your carving.3. Start with General Shapes
Begin your wood carving by establishing the general shapes of the face. Use a sharp carving knife or gouge to remove larger portions of wood, creating the basic form of the face. Focus on capturing the overall proportions and contours of the face before moving on to adding finer details.4. Create Depth with Relief Carving
Relief carving is a technique that involves carving away areas of the wood to create depth and dimension. Use different carving tools such as chisels, gouges, and V-tools to carve away wood and create shadows and highlights. This technique can be used to add depth to facial features such as the eyes, nose, and mouth, giving them a three-dimensional appearance.5. Add Texture with Stippling
To give your wood carved faces a realistic texture, consider using a stippling technique. Stippling involves creating small, repetitive dots or marks on the surface of the wood to mimic the texture of skin. You can use a wood carving tool or a small round burin to create these marks. Experiment with different spacing and depths of the dots to achieve the desired texture.6. Refine Facial Features
Once you have established the basic shapes and added depth and texture to your wood carved faces, it’s time to refine the facial features. Use finer carving tools such as a small knife or a skew chisel to carve out the details of the eyes, nose, mouth, and other facial features. Pay attention to the smaller nuances and expressions that will bring your carved face to life.7. Sand and Finish
After you have completed the carving and detailing process, it’s important to sand the wood surface to smooth out any rough edges or tool marks. Start with a coarse-grit sandpaper and gradually work your way to a finer grit for a smooth finish. Once the surface is smooth, apply a wood finish of your choice to protect and enhance the beauty of your carved face. In summary, adding detail and texture to wood carved faces requires a combination of skill, knowledge, and patience. By studying facial anatomy, using reference images, and employing various carving techniques such as relief carving and stippling, you can bring your wood carved faces to life with realistic detail. Remember to refine the facial features and finish the carving with sanding and a protective wood finish. With practice and dedication, you can create wood carved faces that are truly works of art.5. Finishing and Preserving Wood Carved Faces for Longevity
After spending hours creating a beautiful wood carved face, it’s important to protect it and ensure its longevity. Proper finishing and preservation techniques will not only enhance the appearance of the carving but also guard against environmental factors that could cause damage over time. In this section, we will explore various methods for finishing and preserving wood carved faces, ensuring they stay beautiful for years to come.
5.1. Sanding and Smoothing
Before applying any finish, it’s crucial to sand and smooth the wood carved face. Start with a coarse-grit sandpaper and gradually move to finer grits to achieve a smooth surface. Pay close attention to the intricate details of the carving, ensuring all rough edges are smoothed out. This step not only enhances the overall look but also prepares the wood for the finishing process.
5.2. Staining and Coloring
Staining and coloring wood carved faces can add depth and character to the piece. Choose a stain or dye that complements the wood grain and enhances the desired aesthetic. Apply the stain evenly, making sure to reach all contours and crevices. Allow the stain to penetrate the wood for the recommended amount of time and then remove any excess with a clean cloth. Consider applying multiple layers of stain for a richer color.
5.3. Sealing and Protecting
Once the desired color is achieved, it’s essential to seal the wood carved face to protect it from moisture, UV rays, and other external elements. Choose a high-quality sealant or varnish that is specifically designed for wood carvings. Apply it evenly using a brush or cloth, following the manufacturer’s instructions. Multiple coats may be necessary for optimal protection.
5.4. Waxing and Buffing
Waxing the wood carved face adds a beautiful sheen and helps protect the finish from minor scratches and wear. Use a soft cloth to apply a thin layer of wax, working it into the wood in circular motions. Allow the wax to dry and then buff the surface gently with a clean cloth to achieve a glossy finish. Regular waxing can help maintain the appearance of the carving over time.
5.5. Display and Storage
Proper display and storage play a crucial role in preserving the longevity of wood carved faces. Avoid placing carvings in direct sunlight or near heat sources, as these can lead to fading or warping. Maintain a stable humidity level to prevent the wood from drying out or absorbing excess moisture. Use display cases or shelves with padding to protect the carving from accidental damage. Regularly dust and clean the carving to prevent the accumulation of dirt and debris.
5.6. Maintenance and Care
Regular maintenance and care are essential to ensure the longevity of wood carved faces. Avoid using harsh chemical cleaners, as they can damage the finish. Instead, use a soft, dry cloth or a brush to remove dust and gently wipe the surface. If the carving becomes dull over time, consider applying a fresh coat of wax to restore its shine. Inspect the carving periodically for any signs of damage or wear and address them promptly to prevent further deterioration.
In summary, finishing and preserving wood carved faces require attention to detail and the use of appropriate techniques and materials. By following these steps, you can protect your wood carvings, enhance their beauty, and enjoy them for years to come.
Frequently Asked Questions
1. What tools do I need to carve faces in wood?
To carve faces in wood, you will need a set of carving gouges, a carving knife, a mallet for driving the gouges, and sandpaper for finishing. It’s also helpful to have a wood vice or clamp to secure the wood while carving.
2. What kind of wood is best for carving faces?
Softer woods like basswood, butternut, or pine are commonly used for carving faces in wood. These woods are easier to carve and allow for finer details. However, you can also use hardwoods like cherry or walnut if you prefer.
3. Are there any tips for carving realistic faces in wood?
When carving realistic faces in wood, start with a good reference image and use light pencil marks to sketch the face’s features. Begin carving the basic shapes and gradually add details. Use different gouges and carving techniques to create texture and depth. Practice and patience are key to improving your skills.
Conclusion
In conclusion, carving faces in wood is a remarkable art form that allows for the expression of incredible detail and emotion. With the right tools, techniques, and practice, anyone can learn to create stunning wooden faces that are truly captivating.
Whether you’re a beginner or an experienced wood carver, the key to success lies in patience, precision, and a deep understanding of facial anatomy. By studying facial features and mastering the art of shading and carving techniques, you can bring wood to life with realistic and intricate faces.
Carving faces in wood not only showcases your artistic talent but also allows you to tell stories and evoke emotions through your creations. So, grab your tools, unleash your creativity, and immerse yourself in the mesmerizing world of wood carving.