Applying stain to a wood floor can transform its appearance and add a touch of elegance to any space. Whether you want to darken the wood or give it a different hue, staining is a popular method. In this guide, we will walk you through the step-by-step process of applying stain to a wood floor, from preparing the surface to achieving a beautiful, long-lasting finish. So, if you’re ready to enhance the beauty of your wood floor, let’s dive in and discover how to apply stain like a pro!
Preparing Your Wood Floor for Staining
Staining your wood floors can be a great way to enhance their natural beauty and add a touch of color to your space. However, before you jump into the staining process, it’s important to properly prepare your wood floor to ensure a smooth and even finish. This article will guide you through the steps of preparing your wood floor for staining.

Clean the Floor
The first step in preparing your wood floor for staining is to thoroughly clean it. Remove any furniture or rugs from the area to give yourself ample space to work. Sweep or vacuum the floor to remove any dust, dirt, or debris. For a deeper clean, you can use a wood floor cleaner to remove any stubborn stains or grime. Make sure to follow the manufacturer’s instructions for the specific cleaner you are using.
After cleaning the floor, it’s important to allow it to dry completely before moving on to the next step. Moisture can affect the staining process and result in an uneven finish, so be sure to give the floor enough time to dry.
Repair Any Damage
Inspect your wood floor for any scratches, dents, or other damage that may need to be repaired before staining. Fill in any small scratches or dents with wood filler, using a putty knife to smooth it out and ensure a seamless surface. For larger or deeper damage, you may need to consider sanding and refinishing the floor before applying the stain.
If there are any loose or damaged boards, it’s important to address these issues before staining. Secure loose boards with screws or nails and replace any severely damaged boards. A stable and even surface is essential for achieving a professional-looking stained floor.
Sand the Floor
Sanding the wood floor is a crucial step in preparing it for staining. Sanding helps to remove the existing finish, smooth out any imperfections, and allow the stain to penetrate the wood evenly. You can use a drum sander or a hand-held orbital sander for this task, depending on the size of your floor and your personal preference.
Start with a coarse-grit sandpaper and gradually work your way to a finer grit to achieve a smooth and polished surface. Be sure to sand in the direction of the wood grain to avoid any scratches or visible marks. After sanding, remove any dust or debris by sweeping or vacuuming the floor.
Apply a Pre-Stain Conditioner
Before applying the stain, it’s recommended to use a pre-stain conditioner on your wood floor. This conditioner helps to create a more even finish by sealing the wood and preventing blotchiness or uneven absorption of the stain. Apply the conditioner with a brush or a rag, following the manufacturer’s instructions.
Test the Stain
It’s always a good idea to test the stain on a small, inconspicuous area of the wood floor before applying it to the entire surface. This allows you to see how the color will look and make any necessary adjustments before committing to the full application.
Apply a small amount of the stain to the test area and wait for it to dry completely. If you’re satisfied with the color and finish, you can proceed with staining the entire floor. If not, you can try a different stain or make adjustments to the application process.
Stain the Floor
Once you’ve completed all the necessary preparations, it’s time to apply the stain to your wood floor. Use a brush, roller, or applicator pad to evenly spread the stain in the direction of the wood grain. Work in small sections, overlapping each stroke to avoid any visible lines or inconsistencies.
After applying the stain, allow it to dry according to the manufacturer’s instructions. This usually takes a few hours or overnight. Be sure to provide adequate ventilation during the drying process to help the stain cure properly.
Protect the Stained Floor
After the stain has fully dried, it’s important to protect your newly stained wood floor. Apply a clear topcoat or sealer to seal in the stain and provide a protective barrier against scratches, spills, and UV damage. Choose a product specifically designed for wood floors and follow the application instructions carefully.
In summary, preparing your wood floor for staining is a crucial step to achieve a beautiful and long-lasting finish. Clean the floor thoroughly, repair any damage, sand the surface, apply a pre-stain conditioner, test the stain, and finally, apply the stain and protect it with a topcoat. By following these steps, you’ll be on your way to enjoying a stunning
Applying Stain to Your Wood Floor: Techniques and Tips
Wood flooring adds warmth and beauty to any home, and applying a stain can enhance its natural charm even more. Whether you are installing new hardwood floors or refinishing existing ones, knowing the proper techniques and tips for applying stain is crucial to achieve a flawless and long-lasting finish. In this section, we will explore the step-by-step process of applying stain to your wood floor, along with some helpful tips to ensure a professional-looking result.
1. Preparing Your Wood Floor
Before applying stain, it is important to properly prepare your wood floor to ensure that the stain adheres well and provides an even finish. Here are some essential steps to follow:
- Clean the floor: Remove any dust, dirt, or debris from the floor surface using a broom or vacuum cleaner.
- Repair any damage: Fill in any cracks, holes, or gaps in the wood with wood filler and sand them smooth.
- Sand the floor: Use a floor sander to sand the entire floor surface, following the grain of the wood. Start with a coarse grit sandpaper and gradually switch to finer grits for a smooth finish.
- Remove sanding dust: Thoroughly clean the floor surface with a damp cloth or mop to remove any remaining sanding dust.
2. Choosing the Right Stain
When selecting a stain for your wood floor, it is important to consider the type of wood, the desired color, and the level of durability you require. There are various types of stains available, including oil-based stains, water-based stains, and gel stains. Each type has its own advantages and disadvantages, so be sure to choose one that suits your needs and preferences.
3. Applying the Stain
Now that your wood floor is prepped and you have chosen the right stain, it’s time to start the application process. Follow these steps for a successful stain application:
- Protect the surrounding areas: Use masking tape and plastic sheets to cover any nearby walls, furniture, or fixtures to prevent them from getting stained.
- Stir the stain: Stir the stain thoroughly to ensure that the pigments are evenly distributed.
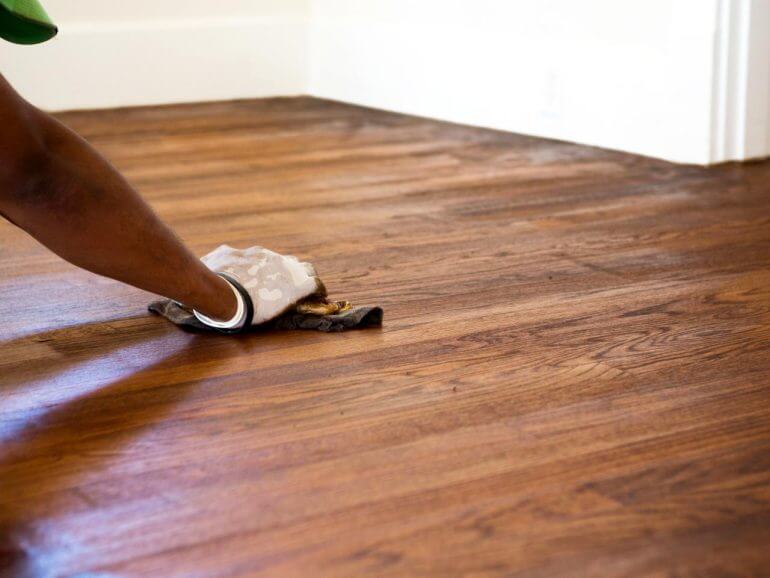
- Apply the stain: Using a brush, roller, or applicator pad, apply the stain to the wood floor in smooth and even strokes, following the grain of the wood. Work in small sections to avoid the stain drying before you can blend it.
- Wipe off excess stain: After applying the stain, use a clean cloth or rag to wipe off any excess stain from the surface. This helps achieve an even and consistent color.
- Allow the stain to dry: Follow the manufacturer’s instructions regarding the drying time. It is essential to let the stain thoroughly dry before applying any additional coats or finishes.
4. Finishing and Sealing
Once the stain has dried completely, you may choose to apply a protective finish or sealer to enhance the durability and longevity of your wood floor. This step is particularly important if the floor will be exposed to heavy foot traffic or moisture. There are various types of finishes available, including polyurethane, varnish, and wax. Consult the manufacturer’s instructions for the specific application and drying times.
5. Maintenance and Care
Proper maintenance and care are essential to preserve the beauty of your stained wood floor. Here are some tips to help you maintain its luster:
- Regularly sweep or vacuum the floor to remove dirt and debris.
- Use a damp mop or cloth to clean the floor, avoiding excessive moisture.
- Avoid dragging heavy furniture across the floor to prevent scratches or dents.
- Place protective pads or mats under furniture legs to prevent damage.
- Periodically recoat the floor with a fresh layer of finish to rejuvenate its appearance.
In summary, applying stain to your wood floor is a rewarding process that can transform the look of your space. By following the proper techniques and tips outlined in this section, you can achieve a beautiful and durable finish that will enhance the beauty of your wood floor for years to come.

Drying and Curing of Stained Wood Floor
Staining wood floors is a popular technique that adds beauty and character to any space. However, after applying the stain, it is crucial to properly dry and cure the wood floor to ensure a long-lasting and flawless finish. In this section, we will discuss the importance of drying and curing stained wood floors and the steps involved in the process.
Importance of Drying and Curing
Drying and curing are essential steps in the staining process as they allow the stain to properly penetrate the wood and create a durable and vibrant finish. Proper drying ensures that the stain adheres to the wood fibers, while curing allows the stain to fully set and harden, providing protection against wear and tear.
When wood floors are not adequately dried and cured, several issues can arise. Insufficient drying time can lead to uneven color distribution, blotchy patches, and poor adhesion. Inadequate curing may result in a tacky or sticky surface, which can attract dirt and dust, ultimately compromising the appearance of the floor.
Steps for Drying and Curing Stained Wood Floors
1. Allow Sufficient Drying Time: After applying the stain, it is essential to allow the wood floor ample time to dry. The drying time will vary depending on factors such as temperature, humidity, and the type of stain used. It is advisable to consult the manufacturer’s instructions for specific drying times.
2. Provide Adequate Ventilation: Proper airflow is crucial during the drying process. Ensure that the room is well-ventilated by opening windows, using fans, or turning on the HVAC system. This will help expedite the drying process and prevent the accumulation of moisture, which can lead to long drying times and potential damage to the wood.
3. Use a Sealant: Once the stain has dried, applying a sealant is recommended to protect the stained wood floor from moisture, scratches, and UV rays. The sealant acts as a barrier between the stain and external elements, enhancing the longevity of the finish. Select a sealant that is compatible with the stain used and follow the manufacturer’s instructions for application and curing time.
4. Allow Sufficient Curing Time: Curing time is as crucial as drying time when it comes to stained wood floors. The stain needs ample time to set and harden to achieve optimal durability and resistance. Curing times can vary depending on the type of sealant used, so it is important to follow the manufacturer’s instructions for specific guidelines.
5. Take Precautions: While the stained wood floor is drying and curing, it is essential to take precautions to prevent any damage. Avoid placing heavy furniture or walking on the floor until it is fully cured. Place protective pads under furniture legs and use caution when moving objects to prevent scratches or indentations.
In summary, proper drying and curing are crucial for achieving a flawless and long-lasting finish on stained wood floors. By following the recommended steps and allowing sufficient time for the stain to dry and cure, you can ensure the beauty and durability of your stained wood floor for years to come.
Maintaining and Protecting Your Stained Wood Floor
Stained wood floors add warmth and beauty to any home, but they require proper maintenance to keep them looking their best. In this section, we will discuss the essential steps to maintain and protect your stained wood floor, so it retains its luster and durability for years to come.
1. Regular Cleaning
The first step in maintaining a stained wood floor is regular cleaning. This involves sweeping or vacuuming the floor to remove dirt, dust, and debris. It’s important to use a soft-bristle broom or a vacuum cleaner with a hardwood floor attachment to avoid scratching the surface.
Once the loose dirt is removed, you can mop the floor using a damp mop or a microfiber cloth. It’s crucial to avoid using excess water, as it can seep into the wood and cause damage. Instead, lightly dampen the mop or cloth and gently wipe the floor, focusing on any stains or spills.
2. Preventing Scratches
Scratches can detract from the beauty of your stained wood floor, so it’s essential to take preventive measures to avoid them. Start by placing floor mats or rugs at entryways to trap dirt and prevent it from being tracked onto the floor. This will help minimize the risk of scratches caused by abrasive particles.
Additionally, consider using protective pads or felt furniture sliders under the legs of your furniture. This will reduce the friction between the furniture and the floor, preventing scratches when moving or rearranging items.
3. Avoiding Moisture Damage
Moisture can be detrimental to stained wood floors, as it can cause warping, swelling, and discoloration. To protect your floor from moisture damage, make sure to address spills or leaks promptly. Use a clean, dry cloth to blot up any liquid spills immediately.
It’s also important to maintain a consistent indoor humidity level to prevent moisture-related issues. Ideally, the humidity should be between 35% and 55%. You can use a humidifier or dehumidifier to regulate the humidity levels in your home.
4. Regular Maintenance
In addition to regular cleaning, your stained wood floor may require occasional maintenance to keep it in optimal condition. This can include reapplying a protective finish or wax to enhance its durability and shine.
Before applying any product, ensure that the floor is clean and free from debris. Follow the manufacturer’s instructions for the specific product you are using and apply it evenly using a clean mop or cloth. Allow the product to dry completely before walking on the floor.
5. Professional Refinishing
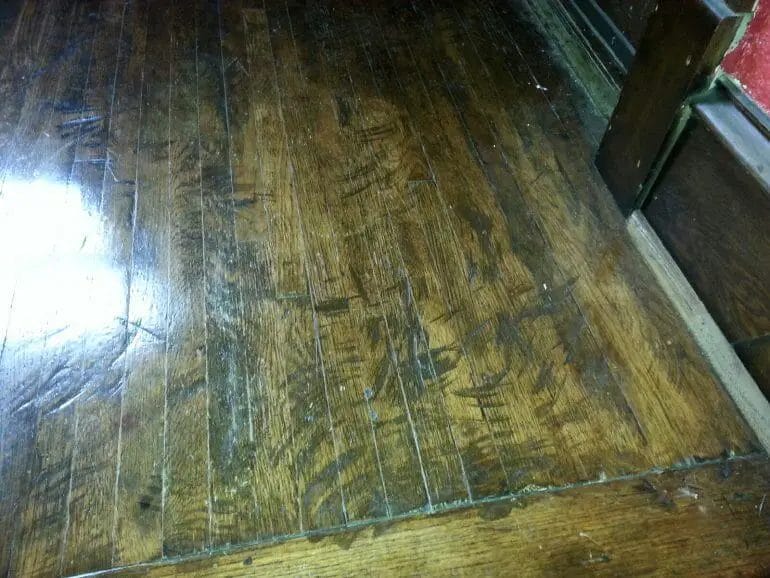
Over time, your stained wood floor may start to show signs of wear and tear, such as scratches, dents, or fading. In such cases, it may be necessary to opt for professional refinishing to restore its original beauty.
Professional refinishing involves sanding down the existing finish, repairing any imperfections, and applying a fresh coat of stain and protective finish. This process can significantly extend the lifespan of your stained wood floor and rejuvenate its appearance.
In summary, maintaining and protecting your stained wood floor requires regular cleaning, preventing scratches, avoiding moisture damage, regular maintenance, and, if needed, professional refinishing. By following these steps, you can ensure that your stained wood floor remains a stunning focal point in your home.
FAQs
How do I apply stain to a wood floor?
To apply stain to a wood floor, first ensure the floor is clean and free of any debris. Then, apply a thin, even coat of stain using a brush or cloth, working with the grain of the wood. Allow the stain to penetrate for a few minutes, and then wipe off any excess stain with a clean cloth. Repeat this process until you achieve the desired color intensity.
Conclusion
In conclusion, applying stain to a wood floor can enhance its beauty and add character to any space. By following the proper steps and techniques, you can achieve a professional-looking finish that will impress everyone. Remember to prepare the floor by sanding and cleaning it thoroughly beforehand to ensure the stain adheres properly. Take your time during the application process, ensuring an even and consistent coat of stain. Lastly, protect your newly stained floor by applying a sealant or topcoat for added durability and longevity.
By following these tips and techniques, you can transform your wood floor into a stunning centerpiece of your home. Whether you prefer a natural or a dark, rich color, the application of stain can completely rejuvenate your wood floor, giving it a fresh and appealing look. So, don’t hesitate to explore different stain options and unleash the full potential of your wood floor. Happy staining!