If you want to add an attractive finish to your woodworking projects, learning how to bevel wood is a valuable skill to have.
A bevel is an angled cut made on the edge of a piece of wood, which adds depth and dimension to the finished piece.

By beveling wood, you can create decorative edges, chamfers, and miters, giving your projects a professional and polished look.
Whether you’re a beginner or experienced woodworker, understanding the techniques and using the right tools will enable you to bevel wood effectively and efficiently.
In this guide, we’ll explore the different methods and tools you can use to achieve precise and well-executed bevels on your woodworking projects.

Step-by-step guide on how to bevel wood
Beveling wood is a technique that involves cutting or shaping the edges of a wooden piece at an angle. This process not only adds an aesthetic appeal to the woodwork but also helps to create smoother joints and edges. If you want to learn how to bevel wood, follow the step-by-step guide below:
1. Gather the necessary tools and materials
Before you start beveling wood, make sure you have the following tools and materials:
- Wood piece
- Measuring tape
- Pencil
- Miter saw or hand plane
- Sanding block or sandpaper
- Safety goggles
2. Measure and mark the desired angle
Using a measuring tape and pencil, measure the angle you want to create on the wood. Mark the starting and ending points of the bevel on the wood.
3. Set up your tools
If you are using a miter saw, adjust the blade to the desired angle. Make sure the blade is securely in place and the wood is clamped down for stability. If you don’t have a miter saw, you can use a hand plane to manually bevel the wood.
4. Cut the bevel
If you are using a miter saw, carefully position the wood against the blade, aligning the marked lines with the blade angle. Slowly push the wood through the blade, applying even pressure to create a smooth and clean bevel cut. If you are using a hand plane, hold the plane at a slight angle and shave off thin layers of wood until you achieve the desired bevel.
5. Sand the beveled edge
After cutting the bevel, use a sanding block or sandpaper to smooth out the edges and remove any roughness. Sand in the direction of the wood grain for best results.
6. Safety precautions
Always prioritize safety when working with woodworking tools. Wear safety goggles to protect your eyes from flying wood particles, and make sure to work in a well-ventilated area.
In summary, beveling wood is a simple yet effective technique to enhance the appearance and functionality of your woodwork. By following this step-by-step guide, you can easily bevel wood and achieve professional-looking results.
Different Types of Bevel Cuts for Wood
When it comes to woodworking, bevel cuts play an important role in achieving precise and accurate results. A bevel cut is an angled cut made on the edge or surface of a piece of wood. This type of cut is commonly used to create decorative edges, joinery, and to add visual interest to woodworking projects. In this section, we will explore some of the different types of bevel cuts that woodworkers commonly use.
1. Straight Bevel Cut
The straight bevel cut is the most basic and commonly used type of bevel cut in woodworking. It involves cutting a straight angle across the edge or surface of the wood, typically at a 45-degree angle. This type of cut is often used for creating chamfers, which are angled edges that add a decorative touch to furniture, cabinets, and other woodworking projects.
2. Compound Bevel Cut
A compound bevel cut is more complex and involves cutting two different angles simultaneously. This type of cut is commonly used for joining two pieces of wood together, such as when creating miter joints. The angles for a compound bevel cut are typically measured in both degrees of bevel and degrees of tilt.
3. Miter Bevel Cut
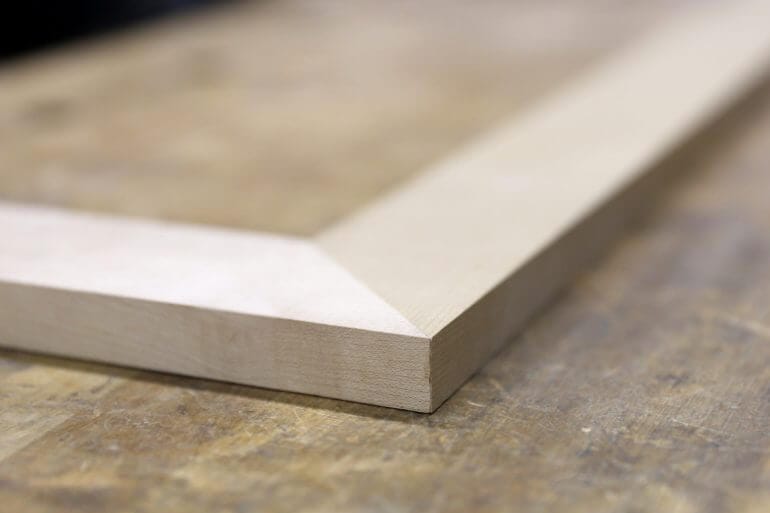
The miter bevel cut is a variation of the compound bevel cut and is commonly used when creating angled corners or frames. It involves cutting a bevel angle on the edge of the wood and a miter angle across the face of the wood. This allows for a tight joint when two pieces of wood are joined at an angle, creating a clean and seamless appearance.
4. Cove Bevel Cut
A cove bevel cut is a curved bevel cut that adds an elegant touch to woodworking projects. It involves cutting a concave curve along the edge or surface of the wood. Cove bevel cuts are commonly used for decorative purposes, such as creating curved edges on furniture, molding, or trim.
5. Roundover Bevel Cut
The roundover bevel cut is another type of curved bevel cut that creates a rounded edge on the wood. It involves cutting a convex curve along the edge or surface of the wood. Roundover bevel cuts are often used to soften sharp edges, add a smooth finish, and prevent splintering.
6. Bullnose Bevel Cut
The bullnose bevel cut is similar to the roundover bevel cut, but it creates a more pronounced and defined curve. It involves cutting a larger convex curve along the edge or surface of the wood, resulting in a semi-circular profile. This type of bevel cut is commonly used for decorative purposes, such as creating handrails or table edges.
7. V-Groove Bevel Cut
The V-groove bevel cut is a bevel cut that creates a V-shaped groove along the edge or surface of the wood. It involves cutting two angled bevel cuts that meet at a point, forming a V-shape. V-groove bevel cuts are commonly used for decorative purposes, such as adding a decorative border or detail to panels or doors.
In summary, bevel cuts are an essential technique in woodworking that allow for unique and decorative finishes. By understanding the different types of bevel cuts, woodworkers can add visual interest and complexity to their projects. Whether it’s a straight bevel cut for chamfers or elaborate compound cuts for joinery, mastering the various types of bevel cuts opens up a world of possibilities in woodworking.
Tips and Tricks for Achieving Smooth and Precise Bevels
Beveling is a technique commonly used in various industries including woodworking, metalworking, and glass fabrication. It involves creating an angled edge or surface on a material, resulting in a sleek and polished look. Achieving smooth and precise bevels requires attention to detail and the use of proper techniques. In this section, we will discuss some tips and tricks that can help you master the art of beveling.
1. Choose the Right Tool
When it comes to beveling, using the right tool is crucial. The choice of tool depends on the material you are working with and the desired bevel angle. Some common tools for beveling include:
- Hand plane: Ideal for woodworking, a hand plane allows you to control the depth and angle of the bevel.
- Angle grinder: A versatile tool for metalworking, an angle grinder equipped with a grinding disc or a flap disc can quickly create bevels.
- Router: For precise and consistent bevels in woodworking, a router with a chamfer bit is an excellent choice.
- Glass cutter: Specifically designed for glass, a glass cutter with a carbide wheel can create clean and accurate bevels.
Choosing the right tool ensures that you have better control over the beveling process, resulting in smooth and precise bevels.
2. Secure the Material
Before you start beveling, it is important to secure the material properly. Unsecured material can lead to accidents or uneven bevels. Depending on the type of material, you can use clamps, a vice, or a workbench to hold it securely in place. This provides stability and allows you to focus on the beveling process.
3. Mark the Bevel Line
Precision is key when it comes to beveling. Before you begin, mark the intended bevel line on the material. You can use a pencil, a marking knife, or a marking gauge to create a clear and visible line. This guideline will help you maintain consistency and achieve the desired angle throughout the beveling process.
4. Start with a Shallow Angle
When starting the beveling process, it is advisable to begin with a shallow angle. This allows you to gradually work your way towards the desired angle, ensuring control and precision. Starting with a steep angle right away can make it challenging to achieve a smooth and even bevel.
5. Use Proper Technique
The technique you use while beveling can greatly impact the final result. Here are some tips to ensure a smooth and precise bevel:
- Apply consistent pressure on the tool to maintain a uniform bevel throughout the material.
- Keep the tool steady and move it along the marked bevel line in a slow and controlled manner.
- Check your progress frequently to ensure you are achieving the desired angle and smoothness.
6. Sand and Finish
After creating the bevel, it is important to sand and finish the surface for a polished look. Use progressively finer grits of sandpaper to remove any rough edges or imperfections. Once the bevel is smooth, apply a suitable finish for protection and enhancement.
By following these tips and tricks, you can achieve smooth and precise bevels on various materials. Remember to prioritize safety and practice proper technique to achieve the best results. Happy beveling!
Common Mistakes to Avoid While Beveling Wood
Beveling wood is a woodworking technique that involves cutting an angle along the edge or surface of a piece of wood. It adds visual interest and can enhance the overall design of a project. However, beveling wood requires precision and attention to detail to achieve a clean and professional result. Unfortunately, there are some common mistakes that beginners often make when attempting to bevel wood. In this section, we will discuss these mistakes and provide tips on how to avoid them.
1. Improper tool selection
One of the most common mistakes when beveling wood is using the wrong tools for the job. Different bevels require different tools, and using the wrong tool can result in a sloppy or uneven cut. For example, using a handheld circular saw instead of a table saw with a beveling guide can lead to inaccurate cuts.
To avoid this mistake, carefully consider the type of bevel you want to achieve and choose the appropriate tool for the job. Research different tools and techniques to determine which one will best suit your needs. Additionally, ensure that your tools are properly maintained and sharpened to ensure clean and precise cuts.
2. Inadequate measurement and marking
Poor measurement and marking can lead to uneven or incorrect bevel cuts. It is essential to measure and mark the wood accurately before making any cuts. Failing to do so can result in asymmetrical bevels or pieces that do not fit together properly.
When measuring, use a high-quality measuring tape or ruler and double-check your measurements to ensure accuracy. Take your time when marking the wood, using a pencil or marking knife to make clear and precise lines. Consider using a square or other measuring tools to ensure your marks are perpendicular to the wood’s edge.
3. Incorrect angle or depth setting
Another common mistake is setting the bevel angle or depth incorrectly. This can result in bevels that are too shallow or too steep, compromising the overall aesthetic and functionality of the piece.
Before making any cuts, take the time to properly set the angle and depth on your tool. Consult the manufacturer’s instructions or seek guidance from experienced woodworkers if you are unsure. Test the settings on a scrap piece of wood before working on your actual project to ensure they are correct.
4. Rushing the cutting process
Beveling wood requires patience and a steady hand. Rushing the cutting process can lead to mistakes such as uneven cuts or jagged edges. It is important to take your time and make slow, deliberate cuts to ensure a clean and smooth bevel.
When cutting, maintain a steady pace and apply even pressure to the tool. Avoid forcing the tool through the wood, as this can result in splintering or chipping. Use a support or guide to help keep the tool steady and ensure accurate cuts.
5. Neglecting finishing touches
After beveling the wood, it is crucial to give attention to the finishing touches. Neglecting this step can leave your project looking unfinished or rough.
Take the time to sand the beveled edges to remove any roughness or imperfections. Start with a coarse-grit sandpaper and gradually work your way up to a finer grit for a smooth finish. Additionally, consider applying a finish or sealant to protect the wood and enhance its appearance.
Summary
By avoiding these common mistakes, you can achieve clean and professional bevels on your woodworking projects. Remember to select the appropriate tools, measure and mark accurately, set the angle and depth correctly, take your time during the cutting process, and give attention to the finishing touches. With practice and attention to detail, you can master the art of beveling wood and create beautiful and precise woodworking projects.
FAQs
1. How do I bevel wood?
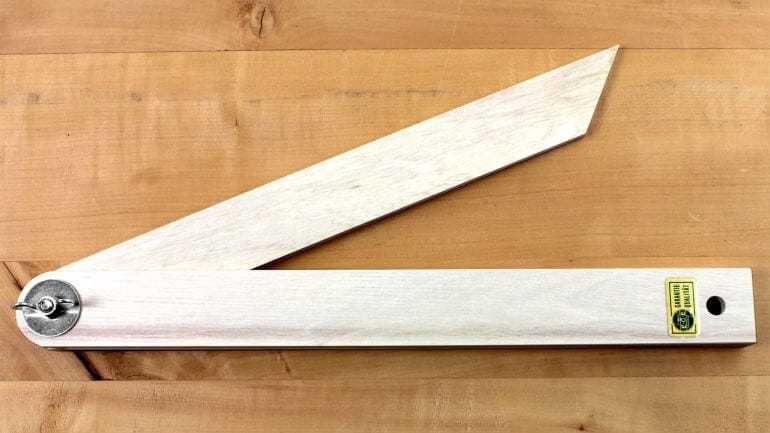
To bevel wood, you can use a bevel gauge or a combination square to mark the desired angle on the wood. Then, use a hand plane or a power saw to carefully remove the material along the marked line, creating a beveled edge.
2. What tools do I need to bevel wood?
To bevel wood, you will need a bevel gauge or a combination square for marking the angle, a hand plane or a power saw for removing material, sandpaper for smoothing the edges, and a measuring tape for accurate measurements.
3. Can I bevel wood without power tools?
Yes, you can bevel wood without power tools. Instead of using a power saw, you can use a hand plane or a chisel to carefully remove the material and create the beveled edge. It may require more time and effort, but it is entirely possible to achieve a bevel without power tools.
Conclusion
In conclusion, learning how to bevel wood can be a valuable skill for both beginners and experienced woodworkers. By following the steps outlined in this guide, you can achieve precise and clean bevel cuts that will enhance the aesthetic appeal and functionality of your woodworking projects.
Mastering the art of beveling wood opens up a world of design possibilities, allowing you to create beveled edges, angles, and joints with ease. Whether you are constructing furniture, cabinets, or decorative items, incorporating beveled elements adds an elegant and professional touch.
Remember to choose the appropriate tools, practice good safety measures, and take your time to ensure accurate cuts. With patience and practice, you’ll become proficient in beveling wood and elevate your woodworking projects to the next level.
