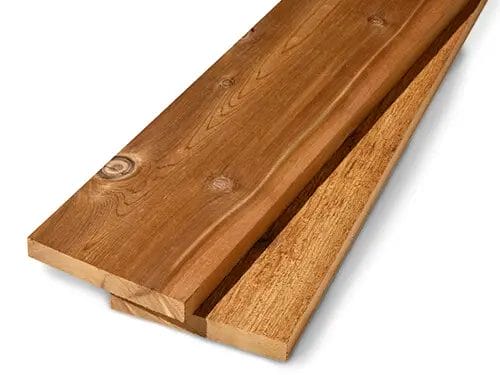
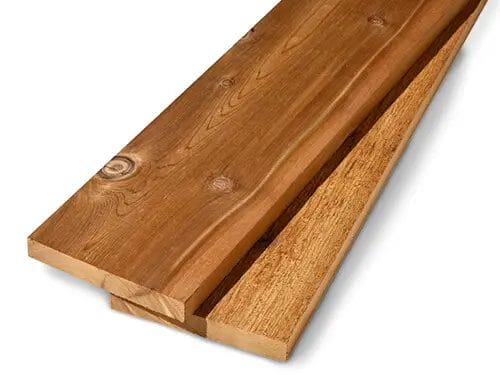
If you’re looking to add a touch of natural beauty to your indoor space, finishing cedar wood is a great option. Cedar wood is known for its unique grain patterns and aromatic scent, making it a popular choice for furniture, cabinetry, and decorative accents.
When finishing cedar wood for indoor use, it’s important to choose a finish that will enhance its natural beauty, protect it from wear and tear, and preserve its durability. There are various options available, including clear sealers, stains, and oils.

Clear sealers provide a protective barrier against moisture and UV rays while maintaining the wood’s natural color and texture. Stains add color and depth to the cedar wood, enhancing its overall appearance. Oils penetrate the wood and nourish it, giving it a rich, lustrous finish.
Before applying any finish, it’s essential to properly prepare the cedar wood. This involves sanding the surface to remove any roughness or imperfections and ensuring it is clean and dust-free. It’s also important to follow the manufacturer’s instructions for the chosen finish and apply it evenly using a brush, rag, or applicator.
By choosing the right finish and following the proper steps, you can ensure that your cedar wood project for indoors will have a stunning finish that lasts for years to come.

How to Protect Cedar Wood Indoors
Cedar wood is a popular choice for indoor furniture, paneling, and flooring due to its natural beauty and durability. However, like any other type of wood, cedar needs proper protection to maintain its appearance and longevity. In this section, we will explore different methods and techniques to protect cedar wood indoors.
1. Seal the Wood
One of the most effective ways to protect cedar wood indoors is by sealing it. Sealing creates a barrier that prevents moisture and dirt from penetrating the wood, thus minimizing the risk of damage or decay. There are various sealant options available, including oil-based sealants, water-based sealants, and polyurethane sealants. Choose a sealant that is specifically formulated for cedar wood and follow the manufacturer’s instructions for application.
2. Apply a Protective Finish
In addition to sealing, applying a protective finish can further enhance the appearance and durability of cedar wood. A protective finish not only adds a layer of protection but also enhances the natural color and grain of the wood. Options for protective finishes include varnish, lacquer, or shellac. Before applying a protective finish, make sure to clean the wood thoroughly and sand it lightly to create a smooth surface for better adhesion.
3. Keep the Environment Controlled
Cedar wood is sensitive to changes in humidity and temperature, which can cause it to expand or contract. To prevent warping or cracking, it is essential to maintain a controlled environment. Use a humidifier to regulate the humidity levels in the room, especially during dry seasons. Avoid placing cedar wood furniture near heat sources or in direct sunlight, as excessive heat can also lead to damage.
4. Regular Cleaning and Maintenance
To keep cedar wood looking its best, regular cleaning and maintenance are necessary. Use a soft cloth or feather duster to remove dust and debris from the surface. Avoid using harsh chemicals or abrasive cleaners that can strip the protective sealant or finish. Instead, opt for a mild soap solution and a damp cloth for gentle cleaning. It is also recommended to periodically inspect the wood for any signs of damage and address them promptly to prevent further deterioration.
5. Avoid Excessive Moisture Exposure
While cedar wood is naturally resistant to rot and decay, excessive moisture exposure can still cause damage over time. To protect cedar wood indoors, it is important to minimize the exposure to moisture. Avoid placing cedar furniture or items directly on damp surfaces, and ensure proper ventilation in areas prone to high humidity, such as bathrooms or basements. If you notice any moisture buildup or condensation, address the issue promptly to prevent potential damage to the wood.
In summary, protecting cedar wood indoors involves sealing the wood, applying a protective finish, controlling the environment, regular cleaning and maintenance, and avoiding excessive moisture exposure. By following these guidelines, you can ensure that your cedar wood furniture, paneling, or flooring remains beautiful and durable for years to come.

Easy Steps to Finish Cedar Wood for Indoor Use
Cedar wood is a popular choice for indoor projects due to its natural beauty, durability, and resistance to rot and insects. To ensure your cedar wood looks its best and lasts for years to come, it’s important to properly finish it. In this section, we will outline easy steps to finish cedar wood for indoor use.
Step 1: Prepare the Surface
The first step in finishing cedar wood is to prepare the surface. Start by thoroughly sanding the wood to remove any rough spots, splinters, or imperfections. Use a medium-grit sandpaper to smooth out the surface. Be sure to sand along the grain of the wood for the best results.
Once the sanding is complete, clean the wood with a damp cloth to remove any dust or debris. This will ensure a clean and smooth surface for the finish to adhere to.
Step 2: Choose the Right Finish
When it comes to finishing cedar wood for indoor use, there are several options to choose from. The most common finishes for cedar wood include clear sealers, stains, and varnishes.
A clear sealer will enhance the natural beauty of the wood while providing protection against moisture and UV rays. Stains, on the other hand, add color to the wood while still allowing the grain to show through. Varnishes provide a protective layer that enhances the wood’s durability but may alter the natural appearance of the wood.
Consider the look you want to achieve and the level of protection needed when choosing the finish for your cedar wood project.
Step 3: Apply the Finish
Before applying the finish, be sure to read and follow the manufacturer’s instructions carefully. Different finishes may have specific application methods and drying times.
If using a clear sealer, apply a thin and even coat using a brush or a soft cloth. Allow the sealer to penetrate the wood for the recommended time before removing any excess with a clean cloth.
For stains, use a brush or a cloth to apply an even coat in the direction of the grain. Let the stain soak into the wood for a few minutes, then wipe off any excess with a clean cloth.
If you choose to use a varnish, apply it with a brush or a sprayer following the manufacturer’s instructions. Be sure to apply thin and even coats, allowing each coat to dry completely before applying the next one. Sand lightly between coats for a smooth finish.
Step 4: Allow for Proper Drying and Curing
After applying the finish, it’s important to allow the cedar wood to dry and cure properly. Follow the manufacturer’s instructions for drying times, as these can vary depending on the type of finish used.
During the drying process, ensure proper ventilation in the area to allow for adequate air circulation. Avoid using or placing objects on the finished wood until it has completely cured to avoid any damage or imperfections.
Step 5: Maintain the Finish
To keep your cedar wood looking its best, it’s important to maintain the finish. Regularly clean the wood with a mild soap and water solution, avoiding harsh chemical cleaners that may damage the finish.
If the finish starts to wear or dull over time, you can reapply the same finish or choose a different one to refresh the wood’s appearance and protection.
In summary, finishing cedar wood for indoor use involves preparing the surface, choosing the right finish, applying the finish correctly, allowing for proper drying and curing, and maintaining the finish over time. By following these easy steps, you can ensure your cedar wood projects retain their beauty and durability for years to come.

Top Tips for Enhancing the Beauty of Indoor Cedar Wood
Indoor cedar wood is a stunning addition to any home decor. Its warm tones, natural grain, and aromatic scent add a touch of elegance and sophistication to any space. To ensure that your indoor cedar wood looks its best and stands the test of time, follow these top tips for enhancing its beauty:
1. Regular Cleaning and Dusting
Regular cleaning is essential to maintain the beauty of indoor cedar wood. Dusting the surface with a soft cloth or using a microfiber duster helps to prevent the buildup of dust and debris. Avoid using harsh chemical cleaners that can damage the wood. Instead, opt for a mild soap solution or a specialized wood cleaner. Remember to dry the surface thoroughly after cleaning to prevent any moisture damage.
2. Moisturize with Oil
To preserve the natural luster and longevity of indoor cedar wood, it is important to moisturize it regularly. Applying a high-quality wood oil or cedar-specific oil nourishes the wood, enhances the color, and protects it from drying out. Use a soft cloth to apply the oil in the direction of the grain, allowing it to penetrate the wood. Wipe off any excess oil to prevent a sticky residue.
3. Protect from Sunlight
Direct exposure to sunlight can cause indoor cedar wood to fade and lose its vibrancy over time. To protect your cedar wood furniture or paneling, keep it away from windows or use curtains and blinds to filter the sunlight. If the wood has already faded, you can consider using a wood stain or tinted oil to restore its original color.
4. Prevent Moisture Damage
Cedar wood is naturally resistant to moisture, but prolonged exposure can still lead to damage and warping. Avoid placing indoor cedar wood furniture or decor items in areas prone to high humidity, such as bathrooms or basements. Use dehumidifiers or proper ventilation to maintain an optimal humidity level. In case of spills or accidents, immediately wipe off any moisture to prevent absorption into the wood.
5. Polish for Shine
To give your indoor cedar wood a beautiful shine, consider using a high-quality wood polish. Choose a polish that is specifically formulated for cedar wood to avoid any damage or discoloration. Apply a small amount of polish to a soft cloth and gently rub it onto the wood surface in circular motions. Buff the wood with a clean cloth to achieve a glossy finish.
6. Avoid Sharp Objects
To maintain the pristine condition of your indoor cedar wood, be cautious with sharp objects and avoid dragging or scratching the surface. Use coasters or placemats to protect the wood from hot and wet items. Trim pets’ nails regularly to prevent accidental scratches. By taking these preventive measures, you can keep your cedar wood looking flawless for years to come.
7. Regular Maintenance
Lastly, make regular maintenance a habit to ensure the long-lasting beauty of indoor cedar wood. Inspect the wood periodically for any signs of wear, damage, or insect infestation. Address any issues promptly to prevent further damage. Follow the manufacturer’s guidelines for specific care instructions, as different cedar wood products may have unique maintenance requirements.
In summary, by following these top tips for enhancing the beauty of indoor cedar wood, you can enjoy the timeless elegance and charm that cedar wood brings to your home. Regular cleaning, moisturizing, protecting from sunlight and moisture, polishing, avoiding sharp objects, and maintaining the wood will help extend its lifespan and preserve its natural beauty. With proper care, your indoor cedar wood will continue to be a stunning focal point in your home for years to come.
Choosing the Right Finish for Your Indoor Cedar Wood
When it comes to furnishing your indoor space, cedar wood is an excellent choice. Not only is it beautiful and durable, but it also has a pleasant natural scent. To ensure that your cedar wood retains its beauty and longevity, it is important to apply the right finish. In this section, we will discuss the various finishes available for indoor cedar wood and provide guidance on how to choose the right one for your specific needs.
1. Clear Varnish
Clear varnish is a popular choice for cedar wood as it enhances the natural color and grain of the wood. It provides a protective barrier against moisture, UV rays, and general wear and tear. Clear varnish is available in different sheen levels, ranging from glossy to matte, allowing you to achieve the desired look. It is important to note that clear varnish may slightly darken the wood over time.
2. Stain
If you prefer to add some color to your indoor cedar wood, a stain is a great option. Stains come in a variety of shades, allowing you to choose one that complements your interior design. Whether you opt for a lighter or darker shade, the stain will still allow the natural grain of the wood to show through. Stains provide protection against moisture and UV rays, but they may require more frequent reapplication compared to varnish.
3. Oil Finish
If you want to maintain the natural appearance of your indoor cedar wood while providing protection, an oil finish is worth considering. Oil finishes penetrate the wood, enhancing its natural color and grain. They provide a low sheen and a smooth, natural feel. While they do not offer the same level of protection against moisture as varnish or stain, oil finishes can easily be reapplied as needed. It is important to note that oil finishes may require more maintenance compared to other finishes.
4. Shellac
Shellac is a traditional finish that adds a warm, amber-toned color to cedar wood. It provides good protection against moisture and general wear and tear. Shellac is available in different shades, allowing you to achieve the desired color tone. It is important to note that shellac may require periodic refinishing to maintain its appearance and protection.
5. Polyurethane
Polyurethane is a durable and long-lasting finish for cedar wood. It provides excellent protection against moisture, UV rays, and general wear and tear. Polyurethane finishes are available in different sheen levels, ranging from glossy to matte. They offer a clear, hard coating that enhances the natural beauty of the wood. It is important to follow the manufacturer’s instructions carefully when applying polyurethane to ensure a smooth and even finish.
Choosing the right finish for your indoor cedar wood is essential to enhance its beauty and protect it from everyday wear and tear. Whether you prefer a clear varnish, stain, oil finish, shellac, or polyurethane, each option has its own unique characteristics and benefits. Consider the level of protection, desired color, and maintenance requirements when making your decision. By selecting the right finish, you can ensure that your indoor cedar wood remains a stunning and long-lasting addition to your home.
FAQs
How do I finish cedar wood for indoor use?
To finish cedar wood for indoor use, start by sanding the surface to remove any roughness. Then, apply a clear water-based or oil-based finish to enhance the natural beauty of the wood and protect it from moisture and stains. Make sure to follow the manufacturer’s instructions and apply multiple coats for better durability.
Conclusion
Wrapping up, finishing cedar wood for indoor use is a crucial step to enhance its beauty and durability. By choosing the appropriate finish, such as clear sealers or oils, you can protect the wood from moisture, stains, and UV damage while preserving its natural look and pleasant aroma.
Remember to prepare the wood surface properly before applying any finish, ensuring it is clean, smooth, and free from any dust or debris. Applying multiple coats of finish evenly and allowing sufficient drying time between coats can result in a more professional and long-lasting finish.
Whether you prefer a glossy or matte finish, following these steps will help you achieve a beautiful and protected cedar wood surface that will last for years to come.
