Hanging wood art on your wall is a fantastic way to add a touch of warmth and natural beauty to your space.
Whether it’s a handmade wooden sculpture or a wooden wall hanging, proper hanging techniques are essential to showcase the art effectively.

In this guide, we’ll explore some easy steps and tips to help you securely and aesthetically hang your wood art on the wall.
From choosing the right hardware to finding the perfect placement, you’ll learn everything you need to know to create a stunning display of your wooden art pieces.
Let’s get started!
Measuring and Marking: Ensuring Proper Placement for Hanging Wood Art
When it comes to decorating our homes, hanging wood art can add a touch of elegance and warmth to any space. Whether you have a collection of cherished wooden pieces or have recently purchased a new artwork, it’s important to ensure proper placement for maximum visual impact. This article will guide you through the process of measuring and marking, so you can hang your wood art with precision and confidence.
1. Assessing the Wall and Artwork
The first step in hanging wood art is to assess the wall where you intend to display it. Take a few moments to examine the wall’s overall size, color, and texture. Consider the existing decor and furniture in the room, as well as the desired focal point. Understanding these factors will help you determine the ideal placement for your wood art.
Next, carefully examine the wood artwork itself. Note its dimensions, weight, and any special features such as hooks or wires for hanging. This information will be crucial in determining the appropriate hardware and tools needed for installation.
2. Measuring the Wall Space
Before you start hammering nails or drilling holes, it’s crucial to measure the wall space to ensure accurate placement of your wood art. Grab a measuring tape and follow these steps:
- Measure the height and width of the wall space where you plan to hang the artwork. Take note of these measurements for reference.
- If you have multiple pieces of wood art to hang together, consider the spacing between each artwork. Aim for equal spacing to create a cohesive and balanced display.
- Mark the desired height of the wood art on the wall using a pencil. This will serve as a reference point during installation.
3. Determining Hanging Hardware
Choosing the right hanging hardware is essential for securely displaying your wood art. The type of hardware you’ll need will depend on the weight and size of the artwork. Here are some common options:
- Picture Hooks: Ideal for smaller and lighter wood art pieces.
- D-Rings: Perfect for larger wood art or pieces with a wire hanger.
- French Cleat: Provides extra stability and support for heavier wood art.
Consult the manufacturer’s instructions or a local hardware store for specific recommendations based on your wood art’s weight and dimensions.
4. Marking the Wall
Now that you have all the necessary measurements and hanging hardware, it’s time to mark the wall for proper placement of your wood art. Follow these steps:
- Hold the wood art against the wall at the desired height. Use a level to ensure it’s straight.
- Using a pencil, make light marks on the wall where the top corners of the wood art align. These marks will indicate where you’ll install the hanging hardware.
- If you’re hanging multiple pieces of wood art, repeat the process for each piece, ensuring proper spacing between each artwork.
5. Installation and Final Adjustments
With your marks in place, it’s time to install the hanging hardware and hang your wood art. Follow the manufacturer’s instructions for each type of hardware, ensuring proper alignment and anchoring for stability.
Once the hardware is securely in place, carefully hang your wood art on the designated hooks or hangers. Step back and assess the placement, making any necessary adjustments to ensure the artwork is level and visually appealing.
In summary, measuring and marking are crucial steps in ensuring proper placement for hanging wood art. By assessing the wall space, measuring accurately, choosing the right hanging hardware, and marking the wall accordingly, you’ll be able to display your wood art with precision and confidence. Take your time during the process and make any necessary adjustments for a visually stunning display that adds personality and charm to your home.
Preparing the Wall: Making Sure the Surface is Suitable for Hanging Wood Art
Before you hang your beautiful wood art on the wall, it’s essential to prepare the surface properly to ensure a secure and long-lasting installation. In this section, we will discuss the steps you need to take to make sure the wall is suitable for hanging wood art.
1. Clean the Wall
The first step in preparing the wall is to clean it thoroughly. Use a mild detergent and warm water solution to remove any dirt, dust, or grease that may be present. Scrub the wall gently with a soft cloth or sponge, paying close attention to corners and edges. Once you have cleaned the wall, rinse it with clean water and allow it to dry completely before proceeding to the next step.
2. Repair Any Damage
Inspect the wall for any cracks, holes, or other damage that needs to be repaired. Fill in any small holes or cracks with a suitable spackle or filler and a putty knife. For larger holes or damage, you may need to use a patching compound. Follow the manufacturer’s instructions for the specific product you are using and make sure the repairs are smooth and level with the wall surface. Allow the repairs to dry completely before moving on.
3. Sand the Surface
Once the repairs have dried, it’s time to sand the wall surface. Use fine-grit sandpaper or a sanding block to smooth out any rough areas or uneven patches. Sand in a circular motion or back and forth, following the natural grain of the wall. This will ensure a smooth surface for the wood art to hang evenly. After sanding, wipe away any dust with a clean cloth or tack cloth.
4. Prime the Wall
Priming the wall before hanging wood art is highly recommended, especially if you are working with a porous or textured surface. A primer will create a barrier between the wall and the wood, ensuring better adhesion and preventing any discoloration or damage to the art. Apply the primer according to the manufacturer’s instructions and allow it to dry completely before proceeding.
5. Mark the Hanging Location
Before hanging your wood art, it’s essential to mark the precise location on the wall where you want it to be placed. Measure the dimensions of the art piece and use a pencil to mark the top and sides on the wall. This will help you align and position the art accurately when it’s time to hang it.
6. Choose the Right Hanging Hardware
Selecting the appropriate hanging hardware is crucial to ensure the secure and stable installation of your wood art. Consider the weight and size of the artwork and choose hooks, brackets, or other hanging devices that can safely support the piece. Make sure to follow the manufacturer’s recommendations and consider consulting a professional if you are unsure about the appropriate hardware for your specific artwork.
7. Hang the Wood Art
Now that the wall is clean, repaired, sanded, primed, and marked, it’s time to hang your wood art. Follow the instructions provided with your chosen hanging hardware and carefully position the art piece on the marked location. Use a level to ensure it is straight, and then secure it firmly to the wall. Double-check the stability of the installation and make any necessary adjustments to ensure a secure fit.
In summary, preparing the wall for hanging wood art involves cleaning the surface, repairing any damage, sanding it to create a smooth finish, priming to improve adhesion, marking the hanging location, choosing appropriate hardware, and finally hanging the art securely. By following these steps, you can ensure that your wood art is showcased beautifully on your wall while maintaining its integrity for years to come.
Hanging Techniques: Step-by-Step Instructions for Mounting Wood Art on the Wall
Welcome to our guide on hanging techniques for mounting wood art on the wall. Whether you have a beautiful wooden sculpture, a handcrafted wooden sign, or a wooden wall panel, properly mounting it will not only enhance its visual appeal but also ensure its stability and longevity. In this section, we will walk you through step-by-step instructions to help you hang your wood art securely and safely.
1. Choose the Right Hardware
The first step in mounting your wood art is to choose the appropriate hardware. The type of hardware you select will depend on the weight and size of your piece. Here are some common options:
- Hanging wire: Ideal for lightweight wood art pieces. Attach the wire to the back of your art and use two wall hooks for added stability.
- D-rings: Suitable for medium-sized wood art. Attach two D-rings to the back of your piece and use two screws to secure it to the wall.
- French cleats: Recommended for heavy wood art. Attach one cleat to the back of your art and another to the wall for a secure and stable hold.
Make sure the hardware you choose is strong enough to support the weight of your wood art.
2. Find the Right Location
Before you start drilling holes in your wall, take the time to find the perfect location for your wood art. Consider the following:
- Height: The center of your art should be at eye level for optimal viewing. Measure and mark the desired height on the wall.
- Spacing: If you have multiple pieces to hang, maintain consistent spacing between them for a cohesive look.
- Lighting: Take into account the lighting in the room to avoid glare or shadows on your wood art.
3. Prepare the Wall
Once you’ve determined the location, it’s important to prepare the wall surface before mounting your wood art. Follow these steps:
- Clean the wall: Remove any dust, dirt, or debris from the wall surface using a clean cloth.
- Mark the spot: Use a pencil to mark the exact spot where you want to hang your wood art.
- Locate studs (if necessary): If your wood art is heavy, it’s recommended to hang it on wall studs for added support. Use a stud finder to locate the studs and mark their positions.
4. Install the Hardware
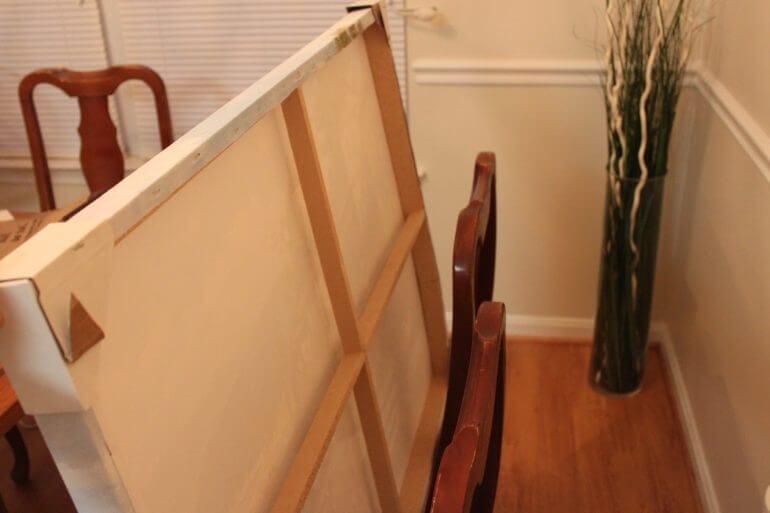
Now it’s time to install the chosen hardware onto your wood art. Follow these instructions:
- Measure and mark: On the back of your wood art, measure and mark the positions where the hardware will be attached. Ensure the measurements are accurate.
- Attach the hardware: Depending on the chosen hardware, follow the manufacturer’s instructions to securely attach it to your wood art. Use screws, nails, or adhesive as needed.
5. Hang Your Wood Art
With the hardware properly installed, you’re ready to hang your wood art on the wall. Here’s how:
- Hold the art: Carefully hold your wood art by the sides or bottom to avoid touching the front surface.
- Align and hang: Align the hardware on the back of your art with the marks on the wall. Slowly lift the art and fit it onto the wall hooks, screws, or cleats.
- Level and adjust: Use a level to ensure your wood art is straight. Make any necessary adjustments to achieve the desired position.
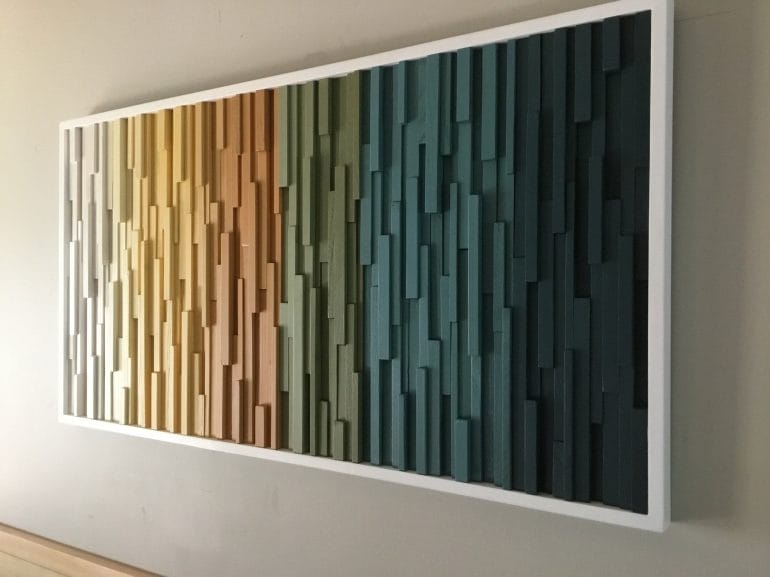
- Step back and admire: Once your wood art is securely hung, step back and admire the beautiful addition to your space.
By following these step-by-step instructions, you can confidently mount your wood art on the wall with ease. Remember to check the stability and make any adjustments if needed. Enjoy showcasing your wood art and adding a touch of natural beauty to your home or office!
Displaying and Styling: Creative Ideas for Arranging and Showcasing Wood Art on Your Walls
Wood art has a timeless beauty that brings warmth and character to any space. Whether you have a collection of wooden sculptures, wall hangings, or carved panels, how you arrange and showcase them can make a significant impact on the overall aesthetic of your home. In this section, we will explore some creative ideas for displaying and styling wood art on your walls.
1. Create a Gallery Wall
Gallery walls are a popular trend that allows you to curate and display multiple pieces of art in an organized and visually appealing way. When it comes to wood art, you can create a stunning gallery wall by mixing different sizes and types of wooden pieces. Consider incorporating carved panels, wooden masks, and framed wooden artworks together to create a diverse and visually interesting display.
Start by selecting a focal point, such as a larger wooden sculpture or a standout carved panel. Arrange the remaining pieces around it, experimenting with different layouts until you find the one that best complements your space. To add depth and dimension, vary the height and spacing between the artworks. You can also include other elements like framed photographs or paintings to create a unique mix of textures.
2. Focus on Contrast
Contrast is key when it comes to showcasing wood art. By pairing light and dark wooden pieces, you can create a visually striking display that adds depth to your walls. For example, if you have a darker wood sculpture, consider placing it against a light-colored wall to create a contrast that highlights its intricate details.
In addition to color contrast, you can also experiment with contrasting textures. Mix smooth, polished wooden pieces with rough, rustic ones to create an interesting tactile experience. This combination will not only draw attention to the individual artworks but also add visual interest to your space.
3. Incorporate Natural Elements
Wood art is inherently connected to nature, so incorporating natural elements into your display can further enhance its beauty. Consider adding elements like potted plants, woven baskets, or dried flowers to create a harmonious blend of organic textures.
For example, you can hang a wooden wall hanging surrounded by hanging plants to create a captivating nature-inspired display. Alternatively, you can place a wooden sculpture on a shelf adorned with small potted plants to create a mini indoor garden vignette.
4. Use Lighting to Enhance the Artwork
Proper lighting can make a world of difference when it comes to showcasing wood art on your walls. Highlighting the texture, grain, and intricate details of the artworks can create a dramatic effect.
Consider installing spotlights or track lighting that can be directed towards specific pieces to create a focal point. This will not only draw attention to the artwork but also create a mesmerizing interplay of light and shadows.
5. Experiment with Unconventional Placement
Don’t be afraid to think outside the box when it comes to arranging your wood art. Experiment with unconventional placement ideas to create a unique and unexpected display. For example, instead of hanging a wooden wall panel vertically, try placing it horizontally above a console table.
You can also explore the option of leaning larger wooden pieces against the wall instead of hanging them. This adds a laid-back and casual vibe while allowing you to easily switch up the arrangement whenever you want.
In summary, displaying and styling wood art on your walls is an opportunity to showcase its beauty and create a visually captivating space. Consider creating a gallery wall, focusing on contrast, incorporating natural elements, using lighting to enhance the artwork, and experimenting with unconventional placement. By exploring these creative ideas, you can transform your walls into a gallery that celebrates the allure of wood art.
FAQs
1. How do I hang wood art on a wall?
To hang wood art on a wall, start by measuring the desired placement and marking the wall. Use a stud finder to locate studs for a secure installation. Next, attach the appropriate hanging hardware to the back of the wood art piece. Finally, carefully hang the wood art on the wall using a level to ensure it is straight.
2. What type of hanging hardware should I use for wood art?
For wood art, it is recommended to use D-ring hangers or sawtooth hangers. D-ring hangers provide a sturdy hold and are great for heavier wood art pieces, while sawtooth hangers are suitable for smaller and lighter pieces. Choose the appropriate hardware based on the weight and size of your wood art.
3. Can I hang wood art without damaging the wall?
Yes, there are several options to hang wood art without damaging the wall. You can use adhesive hooks or removable wall hangers specifically designed for this purpose. These options allow you to hang wood art without the need for nails or screws, making it easier to remove or reposition the artwork without leaving marks on the wall.
Conclusion:
By following the simple steps outlined above, you can easily hang your wood art on the wall and create a visually stunning display in your home or office. Remember to choose the right hardware, measure accurately, and use proper hanging techniques to ensure a secure and stable installation. Whether you’re showcasing a beautiful handcrafted piece or a cherished family heirloom, hanging wood art adds warmth and character to any space. So go ahead, get creative, and let your walls tell a story with the timeless beauty of wood art.
