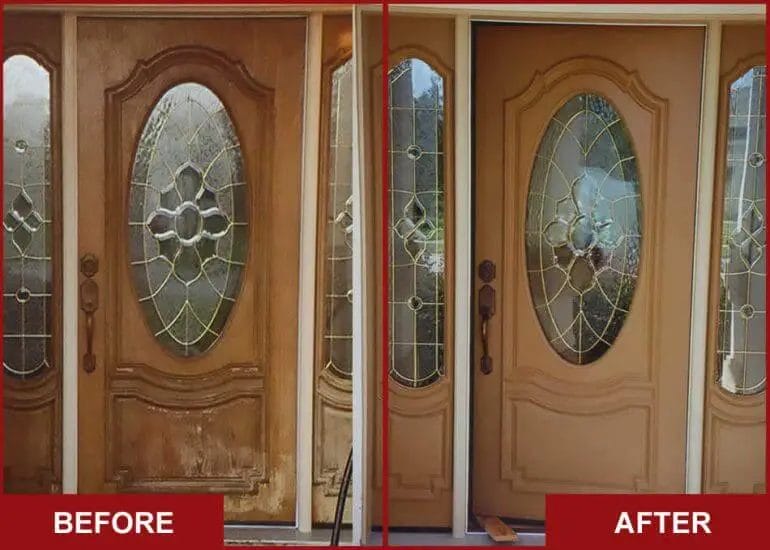
If you’re looking to give your wood door a fresh new look, refinishing is the way to go. Refinishing a wood door involves stripping off the old finish, sanding down the surface, and applying a new stain or paint. Not only will this enhance the appearance of your door, but it will also protect it from the elements and extend its lifespan.
Before you start the refinishing process, it’s important to gather all the necessary tools and materials, such as sandpaper, paint or stain, brushes, and a drop cloth to protect your surrounding areas. It’s also crucial to choose the right finish for your door based on your desired look and the level of protection you want.
Begin by removing the door from its hinges and placing it on a flat surface. Use a paint stripper or chemical remover to remove the old finish, following the manufacturer’s instructions. Once the old finish is removed, sand the entire surface of the door to smooth out any imperfections and create a clean, even surface.
After sanding, wipe down the door with a damp cloth to remove any dust. Apply the new stain or paint using even strokes, following the wood grain for a professional finish. Allow the finish to dry completely between coats, and apply multiple coats if necessary for a richer color or added durability.
Once the final coat is dry, reattach the door to its hinges and step back to admire your beautifully

Preparing the Wood Surface: Sanding and Filling Imperfections
Before applying any finish to your wood project, it is essential to prepare the surface properly. This involves sanding the wood to create a smooth and even surface and filling any imperfections such as cracks, holes, or gouges. Properly preparing the wood surface not only enhances the visual appeal of the final product but also ensures the longevity and durability of the finish.
Sanding the Wood
The first step in preparing the wood surface is sanding. Sanding helps to remove any rough spots, splinters, or existing finish, and creates a smooth surface for the new finish to adhere to. Here’s a step-by-step guide on how to sand the wood:
- Start with coarse-grit sandpaper (around 80 or 100 grit) to remove any major imperfections. Sand with the grain of the wood using long, even strokes.
- Once the surface is relatively smooth, switch to a medium-grit sandpaper (around 120 or 150 grit) to further refine the surface. Sand in the same direction as the grain.
- Finally, use a fine-grit sandpaper (around 220 grit) for the final sanding. This will leave the wood surface smooth and ready for the finish.
- After sanding, wipe away any dust or debris using a clean, damp cloth. This will ensure a clean surface for the next step.
Filling Imperfections
After sanding, it’s time to fill any imperfections on the wood surface. Imperfections can include cracks, holes, or gouges that need to be addressed before applying the finish. Here’s how to fill these imperfections:
- If there are any small cracks or holes, you can use a wood filler. Choose a filler that matches the color of your wood for a seamless finish.
- Apply the wood filler using a putty knife, filling the imperfection completely and smoothing it out. Allow the filler to dry according to the manufacturer’s instructions.
- Once the filler is dry, sand it lightly with a fine-grit sandpaper to level it with the surrounding wood surface. Be careful not to sand too aggressively, as you don’t want to remove too much of the filler.
- Wipe away any dust or debris using a clean, damp cloth.
By sanding the wood surface and filling any imperfections, you create a smooth and flawless canvas for the finish. This not only enhances the overall appearance of the wood but also ensures that the finish adheres properly and lasts longer. Taking the time to properly prepare the wood surface is a crucial step in any woodworking project and is well worth the effort.

Applying the Stain: Techniques for a Smooth and Even Finish
Once you have prepared your wood surface and chosen the right stain, it’s time to apply the stain for a smooth and even finish. The application process plays a significant role in achieving the desired result, so it’s important to follow proper techniques. In this section, we will discuss some effective methods to ensure a flawless stain application.
Clean and Prepare the Wood
Before applying the stain, it is crucial to clean and prepare the wood surface properly. Remove any dust, dirt, or debris by using a clean cloth or vacuum. Ensure that the wood is free from any previous finishes or coatings. Sand the surface gently to create a smooth and even texture. Starting with a clean and well-prepared surface will allow the stain to penetrate evenly and adhere properly.
Choose the Right Applicator
The choice of applicator can greatly impact the outcome of your stain application. There are several options to consider, such as brushes, foam applicators, staining pads, or spray guns. Each applicator has its own advantages and disadvantages, so it’s important to choose the one that suits your project and personal preference.
A high-quality brush is a popular choice for stain application. It allows for better control and precision, especially in intricate or detailed areas. Foam applicators are useful for larger surfaces and can provide a smooth finish. Staining pads are great for evenly spreading the stain without leaving visible brush strokes. Spray guns are ideal for larger projects or when working with intricate designs.
Apply in the Right Direction
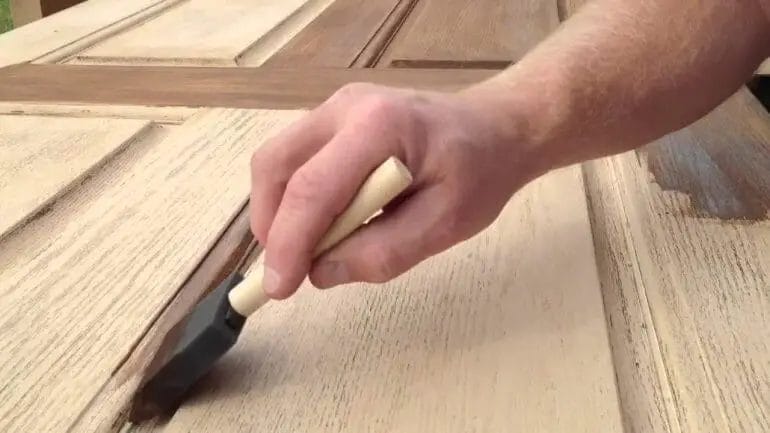
When applying the stain, it’s important to work in the direction of the wood grain. This helps to avoid streaks and ensures a more natural-looking finish. Use long, even strokes to apply the stain evenly, following the length of the wood. Take care to overlap each stroke slightly to prevent any gaps or inconsistencies.
Wipe off Excess Stain
After applying the stain, allow it to penetrate the wood for the recommended time mentioned on the product label. Then, using a clean cloth or staining pad, gently wipe off any excess stain. This step helps to prevent the stain from pooling or drying unevenly, resulting in a smooth and uniform appearance.
Multiple Coats for Deep Color
If you desire a deeper or richer color, you can apply multiple coats of stain. Allow each coat to dry completely before adding the next layer. Be mindful not to over-apply the stain, as it may result in a blotchy or uneven finish. Take your time and apply thin, even coats until you achieve the desired color intensity.
Protective Finish
Once the stain has dried completely, it’s essential to protect the wood surface with a protective finish. This can be a clear varnish, polyurethane, or lacquer. Apply the protective finish according to the manufacturer’s instructions, ensuring a smooth and even application. The protective finish not only adds durability but also enhances the beauty of the stained wood.
Clean up
Properly clean all the tools used for the stain application, such as brushes or applicators, according to the manufacturer’s instructions. Dispose of any rags or materials soaked in stain or solvents in a safe manner to avoid fire hazards.
Summary
Applying the stain to your wood surface requires careful attention to detail and proper techniques. Start by cleaning and preparing the wood, then choose the right applicator for your project. Work in the direction of the wood grain, apply thin coats, and wipe off excess stain. Consider applying multiple coats for a deeper color and finish with a protective topcoat. By following these techniques, you can achieve a smooth and even stain application, enhancing the beauty and longevity of your wood projects.
Sealing and Protecting: Choosing the Best Varnish or Polyurethane
When it comes to protecting and enhancing the beauty of your woodwork, choosing the right varnish or polyurethane is essential. These products not only seal the wood, but also provide a protective layer that guards against scratches, spills, and UV damage. However, with a wide range of options available in the market, it can be overwhelming to select the best one for your project. In this section, we will guide you through the process of choosing the best varnish or polyurethane for your needs.
1. Consider the Type of Wood
The first step in selecting the right varnish or polyurethane is to consider the type of wood you are working with. Different woods have different characteristics and porosity levels, which can affect how well the finish adheres. For example, softwoods like pine may require a different type of product compared to hardwoods like oak or mahogany. It is important to choose a varnish or polyurethane that is specifically designed for the type of wood you are working with to ensure optimal results.
2. Determine the Desired Finish
Next, you need to determine the desired finish for your project. Varnishes and polyurethanes come in different sheen levels, including gloss, semi-gloss, satin, and matte. Glossy finishes provide a high shine and reflectivity, while matte finishes offer a more subtle and natural look. Consider the overall aesthetic you want to achieve and choose a varnish or polyurethane with the appropriate sheen level.
3. Evaluate Durability and Protection
One of the primary purposes of varnish or polyurethane is to provide durability and protection for your woodwork. It is important to assess the level of protection offered by the product you are considering. Look for varnishes or polyurethanes that offer resistance to scratches, water, and UV damage. Additionally, consider the expected level of wear and tear your woodwork will endure and choose a product that can withstand those conditions.
4. Assess Application Method and Drying Time
The ease of application and drying time of the varnish or polyurethane should also be taken into account. Some products require multiple coats, while others may only need a single coat for sufficient coverage. Consider your level of experience and the time you can dedicate to the application process. Additionally, check the drying time to ensure it aligns with your project timeline.
5. Read Reviews and Consider Brand Reputation
Before making a final decision, it is always a good idea to read reviews from other users and consider the reputation of the brand. Look for varnishes or polyurethanes that have positive feedback regarding their quality, ease of use, and longevity. Trusted brands with a proven track record in the industry are more likely to provide reliable and satisfactory results.
6. Test on a Small Area
Lastly, it is recommended to test the selected varnish or polyurethane on a small, inconspicuous area before applying it to the entire project. This will allow you to assess the color, finish, and overall compatibility with the wood. It is better to identify any issues or discrepancies on a small scale rather than discovering them after completing the entire application.
In summary, choosing the best varnish or polyurethane involves considering the type of wood, determining the desired finish, evaluating durability and protection, assessing application method and drying time, reading reviews, and testing on a small area. By following these guidelines, you can ensure that your woodwork is sealed and protected with a high-quality varnish or polyurethane that meets your specific needs and preferences.
Maintaining Your Refinished Wood Door: Tips for Long-lasting Beauty
Refinishing a wood door can bring a new life and beauty to your home’s exterior. However, just like any other investment, proper maintenance is key to ensuring its long-lasting beauty. With the right care and attention, your refinished wood door can withstand the test of time and continue to enhance the curb appeal of your home. In this section, we will provide you with some valuable tips on how to maintain your refinished wood door.
1. Regular Cleaning
Regular cleaning is essential to keep your refinished wood door looking its best. Start by removing any loose dirt or debris using a soft brush or a microfiber cloth. Avoid using abrasive cleaners or harsh chemicals that can damage the finish. Instead, opt for a mild soap or a mixture of water and vinegar. Gently wipe the surface of the door using a soft cloth or sponge, then rinse thoroughly with clean water. Finally, dry the door with a clean, lint-free cloth to prevent water spots.
2. Protecting against Moisture
Moisture is one of the biggest enemies of wood doors, as it can lead to warping, swelling, and rotting. To protect your refinished wood door against moisture, make sure it is properly sealed. Apply a high-quality exterior wood sealer or varnish to create a protective barrier. Be sure to follow the manufacturer’s instructions for application and reapplication. In addition, check the weather stripping around your door regularly and replace it if it becomes worn or damaged.
3. Preventing Sun Damage
Exposure to sunlight can cause the finish on your refinished wood door to fade and deteriorate over time. To prevent sun damage, consider applying a UV-protective topcoat or using a door with built-in UV protection. Additionally, you may want to position your door in a shaded area or use curtains or blinds to limit direct sunlight exposure. Regularly applying a high-quality wood wax or polish can also help maintain the door’s luster and protect it from UV rays.
4. Handling Scratches and Dings
Despite your best efforts, scratches and dings may occasionally occur on your refinished wood door. Fortunately, most minor damages can be easily repaired. Start by cleaning the affected area with a mild soap and water solution. For small scratches, you can use a touch-up pen or wood marker that matches the color of your door to fill in the damaged area. For deeper scratches or dings, consider using a wood filler or epoxy. Follow the product instructions carefully and sand the repaired area gently to ensure a smooth finish.
5. Regular Inspection and Maintenance
Performing regular inspections and maintenance can help you address any issues before they escalate. Check for signs of water damage, rot, or insect infestation, especially in the corners and edges of the door. If you notice any cracks or gaps in the finish, reapply a thin coat of sealer or varnish to protect the exposed wood. Lubricate the hinges and other hardware periodically to ensure smooth operation. Finally, if your door has glass panels, clean them with a glass cleaner to maintain their clarity.
In summary, maintaining your refinished wood door requires regular cleaning, protecting against moisture and sun damage, addressing scratches and dings promptly, and performing regular inspections and maintenance. By following these tips, you can ensure that your refinished wood door retains its beauty and durability for years to come.
Frequently Asked Questions
1. How do I refinish a wood door?
To refinish a wood door, start by removing the door from its hinges and sanding it down to remove the existing finish. Next, apply a wood stain or paint in your desired color, following the manufacturer’s instructions. Once dry, seal the door with a clear coat or varnish to protect the wood and enhance its appearance.
2. What tools will I need to refinish a wood door?
Some common tools you’ll need to refinish a wood door include sandpaper or a sanding block, a paintbrush or foam brush, a roller or paint sprayer (if using paint), a wood stain or paint, clear coat or varnish, and a screwdriver or drill to remove the door from its hinges.
3. Can I refinish a wood door without removing it from its hinges?
While it’s generally recommended to remove the wood door from its hinges for easier refinishing, it is possible to refinish a wood door without removing it. However, it may be more challenging to achieve an even finish and access all areas of the door. Take extra care to protect surrounding surfaces and hardware if refinishing in place.
Conclusion
In conclusion, refinishing a wood door is a great way to give it a fresh and updated look. By following the steps mentioned in this guide, you can easily achieve professional-looking results. Remember to start by gathering all the necessary tools and materials, preparing the door by removing old paint or varnish, and sanding it down to a smooth surface. Then, choose a suitable stain or paint color and apply it evenly using brush strokes. Finally, protect the door with a clear sealant for long-lasting durability.
Refinishing a wood door not only enhances the beauty of your home’s exterior, but also adds value. It allows you to customize the door according to your preferences and gives it a brand-new appearance. With patience and attention to detail, you can transform an old, worn-out door into a stunning focal point. So, go ahead and give your wood door the makeover it deserves with these simple refinishing techniques.
