Interested in turning a wooden bowl? Look no further! In this guide, we will show you how to transform a plain block of wood into a beautiful and functional bowl. Whether you’re a beginner or an experienced woodworker, this step-by-step tutorial will provide you with all the information you need to create your own unique wooden bowl.
From selecting the right wood to using the appropriate tools and techniques, we will cover everything you need to know to turn a wooden bowl. So, let’s get started and unleash your creativity in woodworking!

Essential Tools and Equipment for Turning Wooden Bowls
Turning wooden bowls is a popular craft that allows artisans to create beautiful and functional pieces out of wood. Whether you are a beginner or an experienced woodturner, having the right tools and equipment is essential to achieve the best results. In this section, we will explore the essential tools and equipment needed for turning wooden bowls.
1. Lathe
The centerpiece of any woodturning workshop is the lathe. A lathe is a machine that holds and rotates the wood while you shape it with different cutting tools. When it comes to turning bowls, a larger lathe with a swing capacity of at least 12 inches is recommended. This will allow you to work on larger diameter bowls with ease. Additionally, a variable speed lathe is ideal as it gives you more control over the turning process.
2. Turning Tools
Turning tools are the cutting instruments used to shape the wood on the lathe. For turning bowls, the following tools are essential:
- Bowl Gouge: This tool has a deep flute and is designed specifically for shaping the inside of bowls. It allows for precise control and smooth cuts.
- Spindle Gouge: While primarily used for spindle work, a spindle gouge can also be used to shape the exterior of bowls and create delicate details.
- Skew Chisel: The skew chisel is a versatile tool that can be used for both shaping the exterior of bowls and creating clean, fine cuts.
- Parting Tool: This tool is used to separate the bowl from the waste material and create the final shape. It is also handy for creating grooves and decorative details.
3. Chuck
A chuck is a specialized piece of equipment that holds the bowl securely to the lathe while you work on it. It provides stability and allows you to remove the bowl easily for sanding and finishing. There are various types of chucks available, such as scroll chucks and vacuum chucks. Choose one that suits your needs and the size of the bowls you plan to turn.
4. Faceplate or Screw Chuck
A faceplate or screw chuck is used to mount the bowl blank onto the lathe before transferring it to the chuck. It provides a secure attachment point and allows you to shape the exterior of the bowl before hollowing out the inside.
5. Sandpaper and Finishing Supplies
Once the bowl is shaped and hollowed, sanding is an important step to achieve a smooth and polished surface. Various grits of sandpaper, ranging from coarse to fine, should be used for this process. Additionally, a finish such as wax, oil, or lacquer can be applied to protect the wood and enhance its beauty.
6. Safety Equipment
Woodturning can be a hazardous activity, so it is crucial to prioritize safety. Some essential safety equipment includes:
- Face Shield: Protects your face from flying debris and wood chips.
- Dust Mask or Respirator: Prevents inhalation of wood dust, which can be harmful.
- Lathe Apron: Keeps your body and clothing protected from the spinning wood and tools.
Having the right tools and equipment is key to successful woodturning. Investing in quality tools and prioritizing safety will not only enhance your woodworking experience but also allow you to create stunning wooden bowls that will be cherished for years to come.
Step-by-Step Guide to Turning a Wooden Bowl
Wooden bowls are not only functional and durable, but they also add a touch of rustic charm to any kitchen or dining table. If you have a knack for woodworking and want to try your hand at turning a wooden bowl, this step-by-step guide will walk you through the process.
Before you get started, here is a list of tools and materials you will need:
- Wood lathe
- Wood chisels of various sizes
- Wood gouge
- Woodturning blank
- Safety goggles
- Dust mask
- Face shield
- Calipers
- Sandpaper
- Finishing oil or wax
Step 1: Prepare the Woodturning Blank
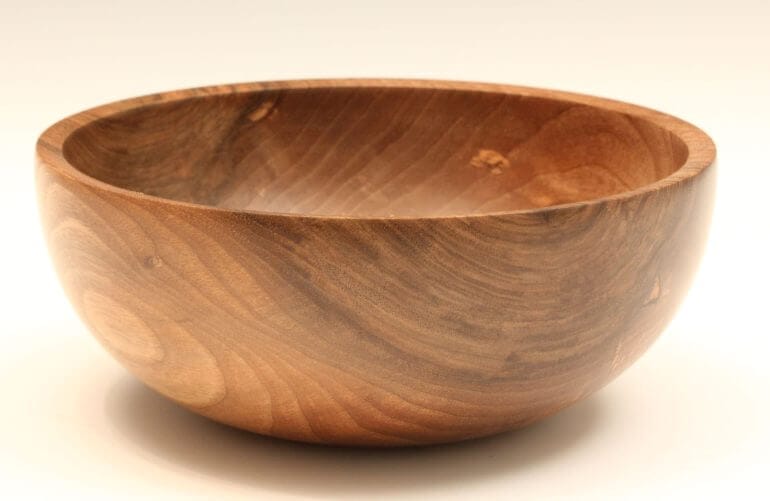
Start by selecting a suitable woodturning blank. Hardwoods like maple, cherry, or walnut are ideal for making wooden bowls. Make sure the blank is large enough to accommodate the size of bowl you intend to create.
Use a bandsaw or handsaw to roughly cut the blank into a circular shape, leaving some excess material around the edges. This will make it easier to mount the blank onto the lathe.
Step 2: Mount the Blank onto the Lathe
Secure the blank onto the lathe’s faceplate or chuck, making sure it is centered and securely fastened. Double-check for any wobbling or instability before turning on the lathe.
Step 3: Rough Turning
Put on your safety goggles, dust mask, and face shield for protection. Start the lathe at a low speed and use a roughing gouge to remove excess material from the blank, shaping it into a rough bowl form. Take your time and be mindful of the grain direction.
Continue turning the blank until you achieve the desired shape and thickness for your bowl. Use calipers to measure the thickness evenly throughout the walls of the bowl.
Step 4: Sanding and Smoothing
Once you are satisfied with the shape and thickness, slow down the lathe and switch to sandpaper. Starting with a coarse grit, sand the bowl’s surface in the direction of the grain to remove any tool marks or imperfections.
Gradually work your way up to finer grits until the surface feels smooth to the touch. Use a soft cloth to remove any dust or debris between grit changes.
Step 5: Finishing Touches
Apply a finish of your choice to protect and enhance the natural beauty of the wood. Finishing oils or waxes are commonly used for wooden bowls. Follow the manufacturer’s instructions for application and drying times.
Once the finish has dried, give the bowl a final sanding with a very fine grit sandpaper to achieve a silky smooth surface.
Step 6: Final Inspection
Inspect the bowl for any rough spots or imperfections. Make any necessary adjustments or sanding before declaring your wooden bowl complete.
In summary, turning a wooden bowl requires careful selection of materials, precise turning techniques, and attention to detail. By following this step-by-step guide, you can create a beautiful and functional piece of craftsmanship to be proud of.
Finishing Techniques for a Polished and Smooth Wooden Bowl
Wooden bowls are not only functional but also beautiful pieces of craftsmanship. To truly showcase the natural beauty of the wood, it is essential to apply a finishing technique that will enhance and protect the bowl. In this section, we will explore some of the best finishing techniques for achieving a polished and smooth surface on a wooden bowl.
1. Sanding
The first step in finishing a wooden bowl is sanding. Sanding helps to smooth out any rough patches and imperfections on the surface of the wood. Start by using a coarse grit sandpaper, such as 80 or 120 grit, to remove any large tool marks or uneven areas. Gradually progress to finer grits, such as 220 or 320, until the surface feels smooth to the touch.
Make sure to sand with the grain of the wood to avoid creating scratches or gouges. It is also important to remove any dust or debris between sanding steps to ensure a clean and smooth finish.
2. Grain Filling
Grain filling is a technique used to fill the pores of the wood to create a smoother surface. Some woods, like oak or ash, have larger pores that can be more challenging to fill. To fill the grain, you can use a grain filler specifically designed for wood. Apply the filler to the surface of the bowl using a putty knife, working it into the wood’s pores.
Once the filler has dried, use a sanding block or sandpaper to remove the excess filler from the surface. This step will help achieve a more uniform and polished appearance.
3. Applying a Finish
After sanding and grain filling, it’s time to apply a finish to protect and enhance the wooden bowl. There are several options for finishes, each offering different levels of protection and aesthetics. Here are some common finishes used for wooden bowls:
- Oil-based finish: This type of finish penetrates the wood, providing a natural and warm look. It is easy to apply and maintain but may require regular reapplication to keep the bowl looking its best.
- Water-based finish: Water-based finishes are more environmentally friendly and offer good durability. They dry quickly and produce a clear and glossy finish.
- Wax finish: Wax finishes provide a soft, satin sheen and a smooth feel. They are easy to apply and can be buffed to a beautiful shine.
- Polyurethane finish: Polyurethane finishes are highly durable and resistant to heat and moisture. They create a glossy or satin finish and require minimal maintenance.
Whichever finish you choose, make sure to apply it according to the manufacturer’s instructions. Use a brush, cloth, or spray to evenly apply the finish to the entire surface of the bowl. Allow sufficient drying time between coats, and lightly sand between coats for a smooth finish.
4. Final Buffing and Polishing
Once the finish has fully dried, you can take your wooden bowl to the next level by giving it a final buffing and polishing. This step will help to enhance the luster and smoothness of the finish.
Use a soft cloth or buffing pad to gently buff the surface of the bowl in a circular motion. This will help to remove any fine scratches and bring out a beautiful shine. For an extra level of polish, you can use a polishing compound specifically designed for wood.
In summary, to achieve a polished and smooth wooden bowl, start by sanding the surface to remove any imperfections. Consider grain filling to create a smoother appearance, and then apply a suitable finish to protect and enhance the wood. Finally, give your bowl a final buffing and polishing for a stunning, professional look. With the right finishing techniques, you can transform a simple wooden bowl into a work of art.
Tips and Tricks for Enhancing the Beauty of Your Wooden Bowl
Wooden bowls are not only functional, but they can also be a beautiful addition to your home decor. Whether you have a handcrafted wooden bowl or a vintage find, there are several tips and tricks you can use to enhance its natural beauty and keep it looking its best. In this section, we will explore various techniques and methods to help you enhance the beauty of your wooden bowl.
1. Cleaning and Maintenance
Before you begin enhancing the beauty of your wooden bowl, it is important to ensure that it is clean and well-maintained. Here are some tips for cleaning and maintaining your wooden bowl:
- Gently wash your wooden bowl with mild soap and warm water. Avoid using harsh chemicals or abrasive cleaners as they can damage the wood.
- Dry your wooden bowl thoroughly with a soft cloth to prevent moisture from causing any damage.
- Apply a food-grade mineral oil or beeswax finish to nourish the wood and protect it from drying out. Reapply the finish periodically to maintain its luster.
- Avoid exposing your wooden bowl to extreme temperatures or direct sunlight, as it can cause the wood to warp or fade.
2. Polishing and Refinishing
If your wooden bowl has lost its shine or has minor scratches or blemishes, you can polish and refinish it to restore its beauty. Here’s how:
- Start by sanding the surface of the bowl with fine-grit sandpaper to remove any imperfections. Sand in the direction of the wood grain.
- Once the surface is smooth, wipe away any dust with a clean, damp cloth.
- Apply a wood polish or wax using a soft cloth or brush. Work the polish into the wood in circular motions, covering the entire surface of the bowl.
- Allow the polish to dry according to the manufacturer’s instructions, then buff the bowl with a clean cloth to bring out its natural shine.
3. Staining and Painting
If you want to add a pop of color or customize your wooden bowl, staining or painting can be a great option. Here are some tips to consider:
- Choose a stain or paint that is specifically designed for wood and is food-safe if you plan on using the bowl for serving food.
- Before applying the stain or paint, sand the surface of the bowl to create a smooth and even base.
- Apply the stain or paint evenly, following the manufacturer’s instructions. You may need to apply multiple coats for a more vibrant color.
- Once the stain or paint is dry, seal the bowl with a food-safe finish to protect the color and provide a smooth, durable surface.
4. Decorating and Displaying
Enhancing the beauty of your wooden bowl is not limited to its physical appearance. Consider these ideas for decorating and displaying your bowl:
- Add a decorative touch by placing dried flowers, potpourri, or decorative stones inside the bowl.
- Use your wooden bowl as a centerpiece on your dining table or coffee table. Pair it with other natural elements like candles or fresh greenery to create a stunning display.
- Hang your wooden bowl on the wall as a unique piece of wall decor. You can use a decorative plate hanger or create a custom wall mount to showcase its beauty.
In summary, enhancing the beauty of your wooden bowl involves proper cleaning, maintenance, polishing, refinishing, staining, and painting. Additionally, by decorating and displaying your bowl creatively, you can elevate its aesthetic appeal and make it a focal point in your home. With these tips and tricks, you can enjoy the timeless beauty of your wooden bowl for years to come.
Frequently Asked Questions (FAQs)
Q: How to turn a wooden bowl?
To turn a wooden bowl, you will need a lathe, a wooden blank, and turning tools. Secure the blank on the lathe, shape the outside of the bowl using the roughing gouge, refine the shape with other tools, hollow out the inside using a bowl gouge, sand the bowl smooth, and apply a finish of your choice.
Q: What type of wood is best for turning a bowl?
Hardwoods like maple, cherry, and walnut are commonly used for turning bowls due to their durability and beautiful grain patterns. However, softer woods like pine or cedar can also be used, although they may be more prone to dents and scratches.
Q: What tools do I need to turn a wooden bowl?
Essential tools for turning a wooden bowl include a lathe, roughing gouge, bowl gouge, parting tool, skew chisel, and a set of carving gouges. Additionally, you may need sandpaper, a faceplate or chuck to secure the blank, and a sharpening system to keep your tools sharp.
Conclusion
In conclusion, turning a wooden bowl is a fascinating and rewarding craft that allows you to create beautiful and functional pieces. By following the step-by-step process, you can transform a simple piece of wood into a captivating bowl that showcases your woodworking skills.
Whether you are a beginner or an experienced woodturner, the key to achieving success lies in practice, patience, and attention to detail. Remember to choose the right type of wood, secure it properly on the lathe, and use the appropriate tools to shape and refine the bowl.
Furthermore, don’t forget to sand and finish the bowl to enhance its natural beauty and durability. With time and dedication, you can master the art of turning wooden bowls, creating unique and functional objects that will be cherished for generations to come.
