Yes, you can paint cedar wood to enhance its appearance and provide protection against weathering. Painting cedar wood allows you to choose from a variety of colors and finishes to match your desired aesthetic. However, it is important to properly prepare the surface by cleaning and sanding it before applying the paint. Additionally, using a primer specifically designed for cedar wood will ensure better adhesion and longevity of the paint. With the right preparation and care, painting cedar wood can be a great way to prolong its lifespan and maintain its beauty.
Best Paints for Cedar Wood
Cedar wood is a popular choice for outdoor furniture, siding, and decking due to its natural beauty and durability. However, to enhance its longevity and protect it from the elements, it is important to apply a high-quality paint or stain. In this section, we will explore the top paint options that are specifically formulated for cedar wood.

1. Acrylic Latex Paints
Acrylic latex paints are a popular choice for cedar wood due to their excellent adhesion, durability, and resistance to cracking and peeling. They provide a smooth and attractive finish while allowing the natural grain of the wood to show through. These paints are also water-based, making them easy to clean up and environmentally friendly.
When choosing an acrylic latex paint for cedar wood, look for one that is specifically designed for exterior use and offers UV protection. This will help prevent the paint from fading or deteriorating when exposed to sunlight.
2. Oil-Based Paints
Oil-based paints are another great option for painting cedar wood. They provide a durable and long-lasting finish that can withstand harsh weather conditions. Oil-based paints also penetrate the wood fibers, providing excellent protection against moisture and preventing the wood from rotting.
When using oil-based paints, it is important to properly prepare the cedar wood surface by cleaning and sanding it. Additionally, keep in mind that oil-based paints have a longer drying time compared to latex paints.
3. Semi-Transparent Stains
If you want to preserve the natural beauty and grain of cedar wood while still providing some color and protection, semi-transparent stains are an excellent choice. These stains penetrate the wood and provide a subtle tint, enhancing the appearance of the wood while allowing its natural characteristics to show through.
Semi-transparent stains are available in a variety of colors, allowing you to choose a shade that complements your outdoor space. They also offer protection against UV rays and moisture, making them a suitable option for cedar wood that is exposed to the elements.
4. Solid Stains
If you prefer a more opaque finish that completely covers the wood grain, solid stains are a good option. These stains provide a thicker coating and offer enhanced protection against UV rays, moisture, and fading. Solid stains are available in a wide range of colors, allowing you to achieve the desired look for your cedar wood.
When applying a solid stain, it is important to properly prepare the cedar wood surface by cleaning and sanding it. This will ensure proper adhesion and longevity of the stain.
5. Water-Based Stains
Water-based stains are an environmentally friendly option for painting cedar wood. They provide a durable and long-lasting finish, and their low VOC content makes them safe to use. Water-based stains are easy to apply, dry quickly, and are available in a variety of colors to suit your preferences.
When choosing a water-based stain for cedar wood, opt for one that offers UV protection and is specifically formulated for exterior use. This will ensure that the stain withstands exposure to sunlight and harsh weather conditions.
When it comes to painting cedar wood, it is important to choose a high-quality paint or stain that offers durability, protection, and enhances the natural beauty of the wood. Acrylic latex paints, oil-based paints, semi-transparent stains, solid stains, and water-based stains are all excellent options that provide different finishes and levels of protection. Consider the specific needs of your project and choose a paint or stain that suits your preferences and requirements. By selecting the best paint for cedar wood, you can ensure its longevity and maintain its beautiful appearance for years to come.
Steps to Prep Cedar Wood for Painting
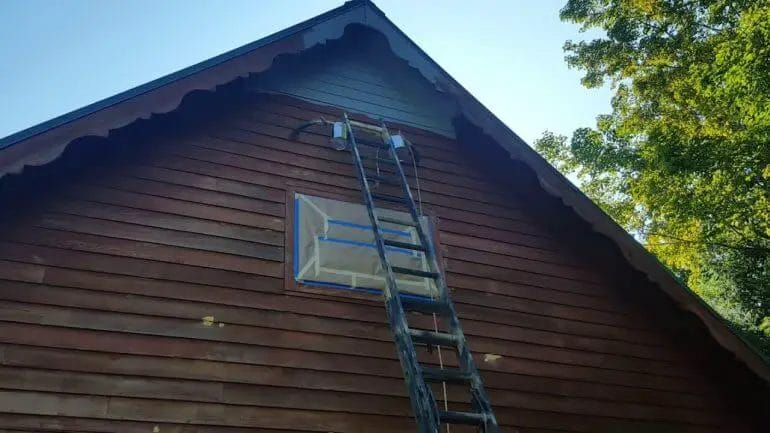
If you’re planning to paint cedar wood surfaces, it’s important to properly prepare them to ensure a smooth and long-lasting finish. Follow these steps to prep cedar wood for painting:
1. Clean the Surface
The first step in prepping cedar wood for painting is to clean the surface thoroughly. Use a mild detergent mixed with water and a soft brush to gently scrub away any dirt, grime, or mildew. Rinse the surface with clean water and allow it to dry completely before moving on to the next step.
2. Sand the Wood
Once the surface is clean and dry, use sandpaper to sand the cedar wood. This helps to smooth out any rough patches, splinters, or imperfections. Start with a coarse-grit sandpaper and gradually move to finer-grit sandpaper for a smoother finish. Sand in the direction of the wood grain to avoid damaging the surface.
3. Remove Dust
After sanding, it’s essential to remove any dust or debris from the wood surface. Use a clean, dry cloth or a vacuum cleaner with a brush attachment to gently remove the dust. Make sure the surface is completely free of dust before proceeding.
4. Apply Primer
Priming the cedar wood is crucial to ensure proper adhesion and an even paint finish. Choose a high-quality primer suitable for cedar wood and apply it evenly using a brush or roller. Allow the primer to dry according to the manufacturer’s instructions.
5. Fill Cracks and Holes
If there are any cracks or holes in the cedar wood, use a wood filler or putty to fill them. Apply the filler using a putty knife and smooth it out to create a seamless surface. Allow the filler to dry completely before proceeding.
6. Sand Again
After the filler has dried, sand the surface once again to ensure it is smooth and level. Use a fine-grit sandpaper and gently sand the filled areas until they blend in with the rest of the wood surface.
7. Clean and Prime Again (Optional)
If necessary, you can repeat the cleaning and priming steps to ensure a flawless finish. This is particularly important if the wood surface was heavily damaged or if the previous coat of primer is not satisfactory.
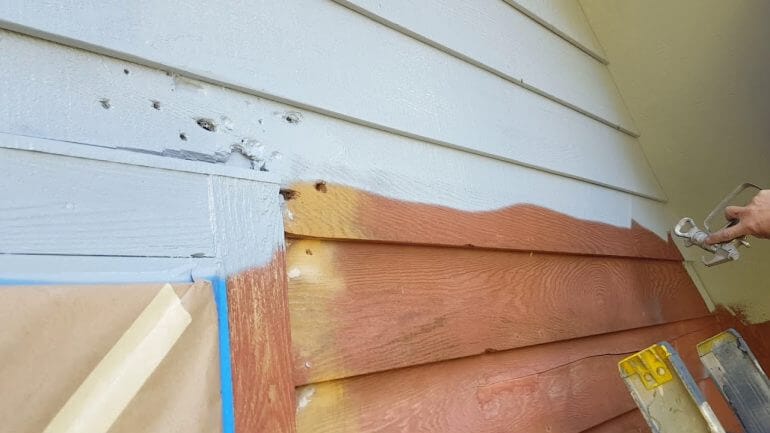
8. Apply Paint
Finally, it’s time to apply the paint to the prepped cedar wood surface. Choose a high-quality exterior paint suitable for cedar wood and apply it using a brush or roller. Follow the manufacturer’s instructions regarding the number of coats and drying times.
In summary, the key steps to prep cedar wood for painting include cleaning, sanding, priming, filling cracks, sanding again, and applying paint. By following these steps, you can ensure a professional-looking and durable paint finish on your cedar wood surfaces.
Tips for Achieving a Professional Finish on Cedar Wood
Cedar wood is a popular choice for outdoor projects due to its natural beauty and durability. However, achieving a professional finish on cedar wood can be a bit challenging if you don’t follow the right techniques. In this section, we will explore some expert tips that will help you achieve a smooth and long-lasting paint job on cedar wood.
1. Prepare the Surface
Before you start painting, it’s crucial to properly prepare the cedar wood surface. Begin by cleaning the wood to remove any dust, dirt, or debris. You can use a mild detergent with water and a soft brush or sponge to gently scrub the surface. Rinse it thoroughly and allow it to dry completely.
Next, inspect the wood for any cracks, knots, or imperfections. Sand the surface using a fine-grit sandpaper to smooth out any rough spots. Be sure to sand in the direction of the wood grain to avoid creating scratches or gouges.
2. Apply a Primer
To achieve a professional finish, it’s recommended to apply a primer before painting cedar wood. A high-quality primer will help seal the wood, prevent bleeding of tannins, and improve the adhesion of the paint. Choose a primer that is specifically formulated for use on cedar or other porous woods.
Before applying the primer, make sure the surface is clean and dry. Use a brush or roller to evenly apply the primer in long, smooth strokes, following the grain of the wood. Allow the primer to dry completely according to the manufacturer’s instructions.
3. Choose the Right Paint
When selecting paint for your cedar wood project, opt for a high-quality exterior paint that is specifically designed for wood surfaces. Look for paint that offers excellent durability, weather resistance, and UV protection to ensure a long-lasting finish.
Additionally, consider using a paint color that complements the natural beauty of cedar wood. Lighter colors tend to reflect sunlight and are less likely to fade or develop heat-related issues.
4. Apply Thin Coats
When it comes to painting cedar wood, it’s best to apply multiple thin coats rather than a single thick coat. Thin coats allow the paint to adhere better to the wood surface, resulting in a smoother and more even finish.
Use a high-quality brush or roller to apply the paint in long, smooth strokes, following the direction of the wood grain. Allow each coat to dry completely before applying the next one. This will help prevent drips, runs, and uneven application.
5. Protect the Finish
Once you have achieved a professional finish on your cedar wood project, it’s important to protect it from the elements. Apply a clear, exterior-grade sealant or varnish to help maintain the integrity of the paint and enhance the wood’s natural beauty.
Regular maintenance is also key to preserving the finish. Inspect the painted surface periodically and touch up any areas that may have been damaged or faded over time.
Summary
Achieving a professional finish on cedar wood requires proper preparation, the use of a primer, selecting the right paint, applying thin coats, and protecting the finish. By following these expert tips, you can ensure a smooth and durable paint job on your cedar wood projects, enhancing their beauty and longevity.
Choosing the Right Color for Cedar Wood
When it comes to enhancing the beauty of cedar wood, choosing the right paint color is crucial. The right color can complement the natural tones of cedar and bring out the best in its texture and grain. Whether you’re looking to paint your cedar siding, furniture, or any other cedar wood surfaces, getting inspired by trending paint colors can help you make the perfect choice.
Cedar wood is known for its warm, reddish-brown tones and natural beauty. It has a distinct grain pattern that adds visual interest to any space. When selecting a paint color for cedar wood, it’s important to consider colors that harmonize with its natural hues. Here are some popular paint color options that can complement cedar wood:
1. Earthy Neutrals
Earthy neutrals such as beige, taupe, and warm grays are excellent choices for cedar wood. These colors blend well with the warm tones of cedar and create a cozy and inviting feel. Earthy neutrals also provide a timeless and classic look that can easily complement any architectural style.
2. Deep Greens
Deep greens, like forest green or olive green, can create a striking contrast against the warm tones of cedar wood. This color choice brings a touch of nature into your space and adds a sense of tranquility. Whether you’re painting a cedar siding or a deck, deep greens can provide a visually appealing and refreshing look.
3. Rich Blues
Rich blues, such as navy or royal blue, can add a touch of elegance and sophistication to cedar wood. The deep blue color enhances the warmth of cedar and creates a visually stunning combination. This color choice is perfect for creating a statement piece or adding a pop of color to your outdoor space.
4. Warm Reds
Warm reds, like terracotta or brick red, can complement the reddish-brown tones of cedar wood. This color choice creates a harmonious and cohesive look, emphasizing the natural beauty of cedar. Whether you’re painting a fence or a gazebo, warm reds can add warmth and character to your cedar wood surfaces.
Remember, when choosing a paint color for cedar wood, it’s essential to consider the overall aesthetics and style of your space. Take into account the surrounding elements, such as the color of your home’s exterior or the landscaping, to ensure a cohesive look. Additionally, always test the paint color on a small, inconspicuous area of the cedar wood surface to see how it looks before applying it to the entire surface.
In summary, selecting the right paint color for cedar wood can enhance its natural beauty and create a visually appealing space. Earthy neutrals, deep greens, rich blues, and warm reds are all excellent color choices that can complement the warm tones of cedar wood. Consider the overall aesthetics of your space and test the paint color before applying it to achieve the desired look. With the right paint color, you can transform your cedar wood surfaces into stunning focal points.
5. Maintenance and Longevity of Painted Cedar Wood
Painted cedar wood surfaces can bring a touch of natural beauty and elegance to any home. However, to keep them looking their best and ensure their longevity, proper care and maintenance are essential. In this section, we will explore some helpful tips on how to care for and extend the life of your painted cedar wood surfaces.
1. Regular Cleaning
To maintain the appearance of your painted cedar wood, regular cleaning is crucial. Use a soft-bristle brush or a sponge and mild soapy water to gently scrub the surface. Avoid using harsh chemicals or abrasive cleaners as they can damage the paint and the wood itself. Ensure that you rinse off all the soap residue thoroughly and allow the surface to dry completely before applying any protective coatings.
2. Inspection and Repair
Regularly inspect your painted cedar wood surfaces for any signs of wear, damage, or peeling paint. Address any issues promptly to prevent further damage. If you notice any loose or peeling paint, gently scrape off the loose paint and lightly sand the area. Then, apply a primer and touch up the paint to ensure a seamless finish. This will help maintain the integrity of the paint and protect the wood underneath.
3. Protecting from Moisture
Cedar wood is naturally resistant to moisture, but painted surfaces can be vulnerable. It is important to protect your painted cedar wood from excessive moisture to prevent warping, rotting, and mold growth. Avoid placing potted plants directly on the surface, as the moisture from the pots can seep into the wood. Additionally, ensure that the painted cedar wood is properly sealed with a high-quality exterior paint or sealer to provide an added layer of protection against moisture.
4. UV Protection
Exposure to sunlight can cause fading and damage to painted cedar wood surfaces over time. To protect your painted cedar wood from UV rays, consider applying a UV-resistant paint or using a clear topcoat with UV inhibitors. These products can help extend the life of the paint and prevent premature fading, ensuring that your painted cedar wood retains its vibrant color for years to come.
5. Seasonal Maintenance
Seasonal changes can have an impact on your painted cedar wood surfaces. During winter, it is important to remove any snow or ice buildup from the surface to prevent moisture damage. Use a plastic shovel or a broom with soft bristles to gently remove the snow without scratching the paint. In the spring and fall, inspect the painted cedar wood for any signs of damage or wear and perform any necessary touch-ups or repairs.
6. Regular Repainting
Even with proper care and maintenance, painted cedar wood surfaces will require repainting over time. The frequency of repainting will depend on various factors such as the climate, exposure to elements, and the quality of the original paint job. Regularly inspect the painted surfaces and determine when repainting is necessary to keep the wood protected and looking its best.
In summary, proper care and maintenance are essential for the longevity and appearance of painted cedar wood surfaces. Regular cleaning, inspection, and repair, protecting from moisture and UV rays, seasonal maintenance, and regular repainting are all important elements of maintaining the beauty and extending the life of your painted cedar wood surfaces.
FAQs
Can I paint cedar wood?
Yes, you can paint cedar wood. However, it’s important to properly prepare the surface by cleaning and sanding it before applying the paint. Additionally, using a primer specifically designed for cedar wood can help improve the adhesion and durability of the paint.
Conclusion:
In conclusion, painting cedar wood is not only possible but also a great way to enhance its overall appearance and protect it from damage caused by weather and pests. By using the right type of paint and following proper preparation and application techniques, you can achieve excellent results. Whether you want to add a pop of color or create a more cohesive look with your surroundings, painting cedar wood can be a rewarding and effective solution. Remember to choose a high-quality paint that is specifically designed for exterior use and take the necessary steps to ensure proper adhesion and longevity.
