Staining wood in cold weather can be a challenging task, but with the right precautions, it is possible to achieve excellent results. Cold temperatures can slow down the drying process and affect the penetration of the stain into the wood grain. However, by using a high-quality stain specifically formulated for low temperatures and ensuring proper ventilation and drying time, you can successfully stain wood even in colder weather conditions. This guide will provide you with helpful tips and techniques to effectively stain wood during the colder months.

Best Practices for Staining Wood in Cold Weather
Staining wood can be a rewarding and transformative process, whether you’re refinishing a piece of furniture or adding color to a deck. However, when the temperature drops, it can pose challenges to achieving optimal results. Cold weather can affect the drying time, absorption, and overall quality of the stain. To ensure success, it’s important to follow these best practices when staining wood in cold weather:

1. Choose the Right Stain
Not all stains are created equal, especially when it comes to cold weather. Look for products specifically formulated for low temperatures. These stains are designed to perform well even in chilly conditions and provide better adhesion and drying time.
2. Check the Temperature and Humidity
Before starting your staining project, check the weather forecast. Aim for a day with temperatures above 50°F (10°C) and humidity levels below 80%. Cold temperatures slow down the drying process, while high humidity can interfere with proper absorption.
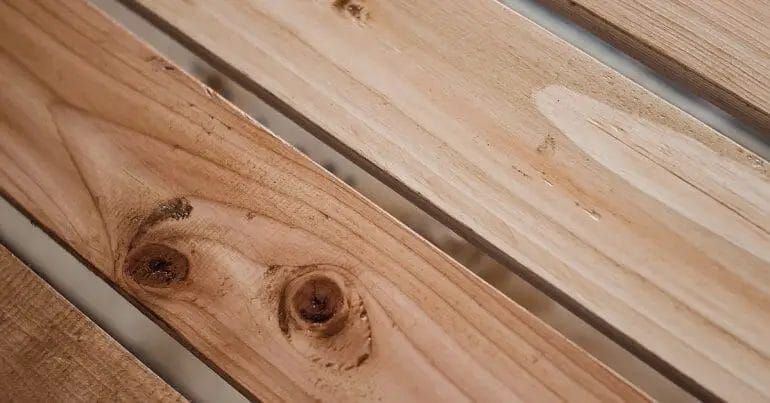
3. Prepare the Wood Surface
Properly preparing the wood surface is crucial for achieving a smooth and even finish. Start by cleaning the wood thoroughly to remove any dirt, debris, or old stain. Sand the surface gently to remove rough patches and create a smooth texture for better stain adhesion.
4. Apply Thin Coats
In cold weather, it’s best to apply multiple thin coats of stain instead of one thick coat. Thin coats dry more quickly and evenly, reducing the chances of the stain becoming tacky or not drying properly. Allow each coat to dry completely before applying the next.
5. Use the Right Applicator
The choice of applicator can greatly impact the outcome of your staining project. In cold weather, it’s best to use a brush or a lint-free cloth for better control and coverage. Foam brushes and rollers may not perform as well in low temperatures.
6. Work in Small Sections
Divide your staining project into manageable sections to ensure that the stain doesn’t dry before you have a chance to work it into the wood. This is especially important in cold weather when drying times are longer. Working in small sections allows you to maintain a wet edge and achieve a more uniform finish.
7. Allow for Sufficient Drying Time
Cold weather extends the drying time of the stain. Be patient and allow for sufficient drying time between coats and before subjecting the wood to any wear or exposure. This will prevent smudging or damage to the freshly stained surface.
8. Protect the Stained Wood
Once the stain has dried completely, it’s important to protect the wood from the elements. Apply a clear protective finish or sealant designed for exterior wood to prevent moisture damage, UV fading, and premature wear.
In summary, staining wood in cold weather requires some additional considerations to ensure optimal results. By choosing the right stain, checking the temperature and humidity, preparing the wood surface, applying thin coats, using the right applicator, working in small sections, allowing for sufficient drying time, and protecting the stained wood, you can achieve a beautiful and long-lasting finish even in chilly conditions.
The Impact of Cold Weather on Wood Staining
Wood staining is a popular method used to enhance the natural beauty of wooden surfaces, such as decks, fences, and furniture. However, when it comes to staining wood in cold weather conditions, there are certain considerations that need to be taken into account. In this section, we will explore the impact of cold weather on wood staining and provide some tips for successful staining in chilly temperatures.
1. Temperature and Drying Time
One of the main challenges of staining wood in cold weather is the extended drying time. Cold temperatures can significantly slow down the drying process of wood stains and cause the stain to take longer to cure. This can result in a sticky or tacky finish that is prone to attracting dust and debris.
Ideally, the temperature for wood staining should be between 50°F and 90°F (10°C to 32°C) for optimal drying and curing. If the temperature drops below 50°F (10°C), the stain may not dry properly, leading to poor adhesion and an uneven finish. It is important to check the weather forecast and avoid staining wood when temperatures are too low.
2. Moisture Content and Absorption
Cold weather often brings higher humidity levels, which can affect the moisture content of the wood and its ability to absorb stain. Moisture in the wood can prevent the stain from penetrating the surface properly and result in an uneven or blotchy appearance.
Before staining wood in cold weather, it is crucial to ensure that the wood is dry and free from any moisture. Use a moisture meter to determine the moisture content of the wood. Ideally, the moisture content should be below 15% for optimal staining results. If the wood is too moist, wait for a dry and less humid day to proceed with staining.
3. Stain Application Techniques
In cold weather, it is important to adjust your stain application techniques to compensate for the slower drying time. Here are some tips to consider:
- Apply thin coats: Instead of applying a thick layer of stain, apply thin coats to allow for faster drying and better absorption.
- Work in smaller sections: Stain one small section at a time to ensure that each area receives enough attention and the stain can be worked into the wood properly.
- Use a brush: In colder temperatures, using a brush instead of a sprayer or roller can help ensure better control and coverage.
- Allow extra drying time: Be prepared to wait longer for the stain to dry and cure in cold weather. Follow the manufacturer’s instructions for recommended drying times and avoid rushing the process.
4. Protecting Stained Wood in Cold Weather
Once the staining process is complete, it is essential to protect the stained wood from the harsh effects of cold weather. Cold temperatures, moisture, and freeze-thaw cycles can damage the stained surface if proper precautions are not taken. Consider the following steps to protect your stained wood:
- Apply a protective sealant: After the stain has dried and cured, apply a clear protective sealant to provide an additional layer of defense against the elements.
- Avoid direct exposure to snow and ice: If possible, shield the stained wood from direct contact with snow, ice, and excessive moisture. Use covers or tarps to protect outdoor structures.
- Regular maintenance: Regularly inspect the stained wood for any signs of damage or wear. Touch up any areas that may have been affected by the cold weather to maintain the integrity of the stain.
In summary, staining wood in cold weather requires careful consideration and adjustments to ensure optimal results. By paying attention to temperature, moisture content, and application techniques, you can successfully stain wood even in chilly temperatures. Remember to protect your stained wood from the effects of cold weather to maintain its beauty and longevity.
Choosing the Right Type of Stain for Cold Weather Applications
When it comes to staining wood surfaces in cold weather, it’s important to choose the right type of stain that can withstand the challenging conditions. Cold temperatures can affect the drying process and overall performance of the stain, so it’s crucial to select a stain that is specifically designed for cold weather applications. In this section, we will discuss the factors to consider and the different types of stains that are suitable for cold weather staining projects.
Factors to Consider
Before diving into the different types of stains, it’s important to understand the factors that need to be considered when choosing a stain for cold weather applications. These factors include:
- Temperature Range: Different stains have different temperature ranges at which they can be applied and perform optimally. It’s essential to check the temperature requirements provided by the stain manufacturer to ensure that the product is suitable for cold weather conditions.
- Drying Time: Cold weather can significantly extend the drying time of stain. Therefore, it’s crucial to choose a stain that has a relatively faster drying time to minimize the risk of dust, dirt, or other debris settling on the surface before it fully dries.
- Freeze-Thaw Stability: Cold weather can lead to freeze-thaw cycles, where moisture can seep into the wood and freeze, causing damage to the stained surface. It’s important to choose a stain that provides good freeze-thaw stability to protect the wood from potential damage.
- Protection and Durability: In cold weather, wood surfaces are exposed to harsh conditions such as snow, ice, and moisture. It’s essential to select a stain that offers excellent protection and durability to withstand these conditions and maintain the aesthetic appeal of the wood.
Types of Stains for Cold Weather
Now that we understand the factors to consider, let’s explore the different types of stains that are suitable for cold weather applications:
1. Oil-Based Stains:
Oil-based stains are known for their durability and ability to penetrate deep into the wood. They provide excellent protection against moisture and are suitable for cold weather applications. Oil-based stains have a slower drying time compared to other types, but they offer superior protection and longevity.
2. Water-Based Stains:
Water-based stains are an environmentally friendly option that dries relatively faster than oil-based stains. These stains are resistant to freezing and offer good protection and durability in cold weather conditions. Water-based stains are also available in a wide range of colors, making them a versatile choice for various projects.
3. Gel Stains:
Gel stains are thicker in consistency compared to oil-based and water-based stains. They are specifically designed to provide better control during application and are ideal for vertical surfaces. Gel stains offer good protection and durability in cold weather and are suitable for projects where precise application is required, such as doors and cabinets.
4. Hybrid Stains:
Hybrid stains combine the benefits of oil-based and water-based stains. They offer the durability and penetration of oil-based stains along with the faster drying time of water-based stains. Hybrid stains are designed to provide excellent protection and are a suitable option for cold weather applications.
5. Acrylic Stains:
Acrylic stains are known for their excellent freeze-thaw stability and durability. They form a protective film on the wood surface and provide long-lasting protection against cold weather conditions. Acrylic stains are available in a variety of colors and offer good UV resistance, ensuring that the wood maintains its color and appearance over time.
In Summary
When it comes to staining wood surfaces in cold weather, choosing the right type of stain is crucial. Consider factors such as temperature range, drying time, freeze-thaw stability, and overall protection and durability. Oil-based stains, water-based stains, gel stains, hybrid stains, and acrylic stains are all suitable options for cold weather applications. Make sure to follow the stain manufacturer’s instructions for optimal results and enjoy a beautifully stained wood surface even in the coldest of temperatures.
Preparing Wood Surfaces for Staining in Cold Temperatures
Staining wood surfaces in cold temperatures can be a challenging task. The cold weather can affect the drying and adhesion of the stain, leading to unsatisfactory results. However, with proper preparation and precautions, you can still achieve a beautiful and long-lasting stained finish on your wood surfaces even in cold temperatures.
1. Clean the wood surface
Before applying the stain, it is crucial to clean the wood surface thoroughly. Use a mild detergent or wood cleaner to remove any dirt, dust, or grime. Scrub the surface gently with a soft brush or sponge, then rinse with clean water and let it dry completely.
2. Sand the wood surface
Sanding the wood surface helps to remove any existing finish, smooth out imperfections, and open up the pores of the wood, allowing better absorption of the stain. Use a fine-grit sandpaper (such as 120-grit or higher) and sand in the direction of the wood grain. Wipe away any dust or debris with a tack cloth.
3. Apply a wood conditioner
In cold temperatures, wood tends to be more porous, which can result in uneven absorption of the stain. To prevent this, it is recommended to apply a wood conditioner before staining. Wood conditioner helps to seal the wood and create a more even stain color. Follow the manufacturer’s instructions for application and drying time.
4. Choose the right stain
When staining in cold temperatures, it is important to choose a stain that is specifically formulated for such conditions. Look for stains that are labeled as “cold weather” or “low temperature” stains. These stains are designed to dry and cure properly even in colder temperatures, ensuring a smooth and durable finish.
5. Apply the stain
Before applying the stain, make sure the temperature is within the recommended range specified by the stain manufacturer. Typically, it is advised to stain in temperatures above 50°F (10°C). Stir the stain thoroughly to ensure even distribution of color pigments.
Using a brush, roller, or sprayer, apply a thin and even coat of stain in the direction of the wood grain. Avoid over-applying the stain, as it can lead to blotching and longer drying times. Allow the stain to penetrate the wood for the recommended time, usually 5-15 minutes.
6. Wipe off excess stain
After the recommended time, use a clean cloth or rag to wipe off any excess stain from the wood surface. Wipe in the direction of the wood grain to avoid smearing or streaking. Make sure to remove all excess stain to prevent tackiness or problems with drying.
7. Allow proper drying and curing time
In cold temperatures, proper drying and curing can take longer than usual. Ensure that the stained wood surface is placed in a well-ventilated area with adequate air circulation. Allow the stain to dry completely according to the manufacturer’s instructions before applying additional coats or finishing products.
8. Protect the stained wood surface
To ensure the longevity of the stained wood surface, it is essential to protect it from harsh weather conditions. Apply a suitable topcoat or sealer to provide an extra layer of protection against moisture, UV rays, and temperature changes. Follow the manufacturer’s instructions for application and reapplication.
In summary, preparing wood surfaces for staining in cold temperatures requires proper cleaning, sanding, and the use of a wood conditioner. Choosing the right stain formulated for cold weather is crucial, and proper application techniques should be followed. Allowing sufficient drying and curing time and protecting the stained wood surface will result in a beautiful and durable finish, even in chilly weather conditions.
Tips and Tricks for Successful Wood Staining in Cold Weather
If you’re planning to stain your wood projects during the winter months, you may encounter some challenges due to the colder temperatures. Cold weather can affect the drying time, absorption, and overall outcome of your staining project. However, with the right techniques and precautions, you can still achieve a beautiful and long-lasting finish. In this section, we’ll provide you with some helpful tips and tricks for successful wood staining in cold weather.
1. Choose the Right Stain
When staining wood in cold weather, it’s essential to select a stain specifically formulated for low temperatures. Look for stains that are designed to perform well in colder conditions, as they will have a slower drying time and better absorption rate. These stains are often labeled as “cold weather” or “winter formula,” and they will provide better results in chilly temperatures.
2. Prepare the Wood Surface
Properly preparing the wood surface is crucial for a successful staining project, regardless of the weather conditions. Start by cleaning the wood thoroughly to remove any dust, dirt, or debris. Use a mild detergent or wood cleaner and a soft-bristle brush to scrub the surface gently. Rinse off the cleaner with water and allow the wood to dry completely before moving on to the next step.
In colder temperatures, it’s even more important to ensure that the wood is completely dry. Moisture can interfere with the stain’s absorption and drying process, leading to uneven or blotchy results. Allow the wood to acclimate to the indoor temperature for a few days before staining to minimize the risk of moisture-related issues.
3. Apply Stain in a Controlled Environment
Staining wood in cold weather requires a controlled environment to ensure optimal results. Avoid staining outdoors or in unheated areas, as the low temperatures can interfere with the stain’s drying process. Instead, find a well-ventilated space with a temperature range of 50-80°F (10-27°C) to work in.
If you don’t have access to a suitable indoor space, consider using a portable heater or heat gun to warm up the area before applying the stain. Keep in mind that the temperature should be consistent throughout the staining process to avoid any issues.
4. Thin the Stain if Necessary
In colder temperatures, stains may become thicker and harder to work with. If you find that your stain is too viscous, you can thin it down to improve the application. Check the manufacturer’s instructions for the recommended thinning ratio and use a compatible thinner, such as mineral spirits or turpentine.
Be cautious not to over-thin the stain, as it may affect its color and overall performance. Start with small amounts of thinner and gradually add more as needed until you achieve the desired consistency.
5. Take Advantage of Longer Drying Times
Cold weather often leads to longer drying times for wood stains. While this can be frustrating if you’re in a hurry to finish the project, it can also work to your advantage. The extended drying time allows the stain to penetrate deeper into the wood, resulting in a more vibrant and durable finish.
Take your time during the staining process and allow each coat to dry thoroughly before applying the next one. Follow the manufacturer’s recommended drying time and avoid rushing the process to ensure optimal results.
6. Protect the Stained Wood
After completing the staining process, it’s essential to protect the wood from the elements, especially in cold weather. Apply a suitable topcoat, such as polyurethane or varnish, to seal the stained wood and provide an extra layer of protection against moisture, UV rays, and temperature changes.
Ensure that the topcoat is also designed for low temperatures, as some products may become thick or cloudy when applied in colder conditions. Follow the manufacturer’s instructions for application and drying times to achieve the best outcome.
Summary
Staining wood in cold weather requires some additional considerations and precautions to ensure a successful outcome. Remember to choose a stain formulated for low temperatures, prepare the wood surface thoroughly, work in a controlled environment, thin the stain if necessary, take advantage of longer drying times, and protect the stained wood with a suitable topcoat. By following these tips and tricks, you’ll be able to achieve a beautiful and durable wood stain finish even in chilly temperatures.
Frequently Asked Questions
Can I stain wood in cold weather?
Staining wood in cold weather is not recommended. Cold temperatures can prevent proper drying and curing of the stain, resulting in a poor finish. It is best to stain wood in temperatures between 50°F and 90°F for optimal results.
Conclusion
In conclusion, staining wood in cold weather can be challenging but not impossible. The low temperatures and high humidity can prolong the drying time of the stain, resulting in uneven or blotchy finishes. However, with proper precautions and the right techniques, you can successfully stain wood in colder temperatures.
Here are a few tips to keep in mind:
First, make sure the wood is completely dry and free from moisture. Use a moisture meter to ensure the wood’s moisture content is within the recommended range.
Second, choose a stain that is specifically formulated for cold weather application. These stains are designed to dry faster and produce more consistent results in colder temperatures.
Finally, make sure to work in a well-ventilated area and allow ample drying time between coats. Patience is key when staining wood in cold weather.
By following these guidelines, you can achieve a beautiful and durable finish on your wood projects, even in cold weather conditions.
