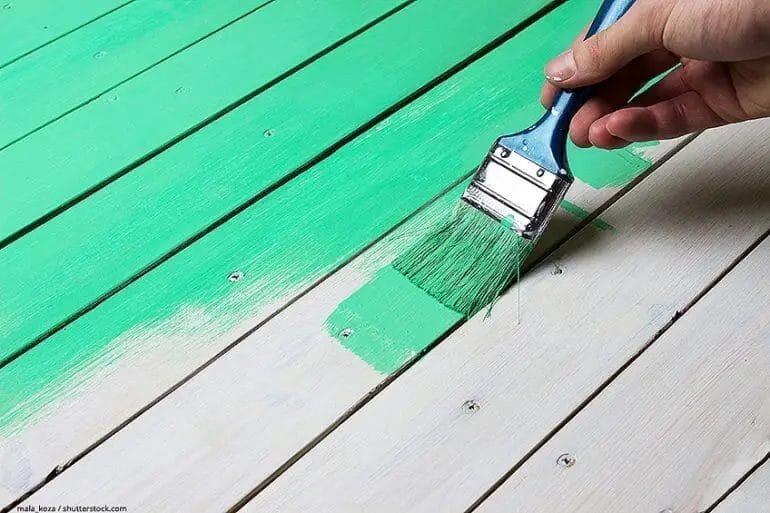
Yes, you can indeed use acrylic paint on wood surfaces. Acrylic paints are versatile and adhere well to wood, making it a popular medium for various art and craft projects. The vibrant colors, quick drying time, and ability to blend and layer make acrylics a great choice for painting on wood. Whether you’re creating a rustic sign, wooden furniture, or decorative pieces, acrylic paint provides a durable and vibrant finish that will enhance the beauty of the wood.
Benefits of Using Acrylic Paint on Wood
Acrylic paint is a versatile and popular choice when it comes to painting on wood surfaces. Whether you are a professional artist or a DIY enthusiast, using acrylic paint on wood offers numerous benefits that make it an ideal medium for your projects.

1. Versatility
One of the major benefits of using acrylic paint on wood is its versatility. Acrylic paint can be easily applied to various types of wood, including plywood, hardwood, and even unfinished surfaces. It adheres well to the wood surface and provides excellent coverage, allowing you to achieve vibrant and bold colors.
2. Quick Drying Time
Unlike oil-based paints, acrylic paint dries quickly on wood. This means you can work more efficiently and complete your projects in a shorter amount of time. The fast drying time also allows for layering and adding details without waiting for extended drying periods.
3. Fade-Resistant
Acrylic paint is known for its long-lasting color retention. When properly applied and sealed, acrylic paint on wood is highly resistant to fading caused by sunlight or other environmental factors. This makes it a great choice for outdoor wood projects, such as garden signs or patio furniture.
4. Water-Based and Non-Toxic
Acrylic paint is water-based, which means it is easy to clean up with soap and water. This makes it a suitable option for artists working in indoor spaces or for those concerned about the use of harsh chemicals. Additionally, acrylic paint is generally non-toxic, making it safe to use around children and pets.
5. Durability
When properly sealed with a clear protective finish, acrylic paint on wood becomes durable and resistant to wear and tear. It forms a hard and flexible film that can withstand daily use and handling. This makes it suitable for painting wood surfaces that are subject to frequent contact, such as furniture or wooden toys.
6. Wide Range of Colors and Finishes
Acrylic paint offers a vast selection of colors and finishes to choose from. Whether you prefer bold and vibrant colors or subtle and muted tones, acrylic paint allows you to create your desired look on wood. Additionally, you can mix and blend acrylic paints to achieve custom colors and create unique effects.
7. Ease of Use
Acrylic paint is known for its user-friendly nature. It is easy to work with, whether you are a beginner or an experienced artist. The paint can be thinned with water for transparent washes or used straight out of the tube for opaque coverage. It also adheres well to various brushes and tools, allowing for smooth application and precise detailing.
8. Cost-Effective
Compared to other painting mediums, acrylic paint is relatively affordable. It is widely available in art supply stores and comes in various sizes, allowing you to choose the quantity that suits your needs and budget. Additionally, acrylic paint has a good shelf life and can be stored for extended periods, making it a cost-effective choice for long-term projects.
In summary, using acrylic paint on wood offers numerous benefits, including its versatility, quick drying time, fade-resistance, water-based and non-toxic nature, durability, wide range of colors and finishes, ease of use, and cost-effectiveness. Whether you are painting furniture, creating artwork, or embarking on a DIY project, acrylic paint is a reliable and vibrant choice for enhancing wood surfaces.
Step-by-Step Guide: How to Use Acrylic Paint on Wood
Acrylic paint is a versatile and popular medium that can be used on various surfaces, including wood. Painting with acrylics on wood allows you to add color, texture, and artistic flair to your wooden objects. Whether you’re a seasoned artist or a beginner, this step-by-step guide will walk you through the process of using acrylic paint on wood.
Materials You’ll Need
Before you start painting, gather the following materials:
- Wooden surface or object
- Acrylic paint in your desired colors
- Paintbrushes of different sizes
- Palette or a flat surface for mixing paints
- Water for cleaning brushes
- Palette knife (optional)
- Primer (optional)
- Sealer or varnish (optional)
- Sandpaper (optional)
Step 1: Prepare the Wood
If your wooden surface is new and unfinished, it’s recommended to prepare it before painting. Sand the surface with sandpaper to make it smooth and remove any rough edges. Wipe away the dust with a clean cloth or brush.
Step 2: Prime the Surface (Optional)
If you want to ensure better adhesion and durability of your acrylic paint, you can apply a primer to the wood. Primer helps create a smooth and even base for your paint. Use a brush or roller to apply the primer evenly and let it dry according to the manufacturer’s instructions.
Step 3: Choose Your Colors
Acrylic paints come in various colors and finishes. Select the colors you want to use for your project. Consider the desired outcome and the color scheme you want to achieve.
Step 4: Prepare the Paint
Squeeze a small amount of each color onto your palette or a flat surface. If you want to mix colors, use a palette knife to blend them together. Add a few drops of water to your paints to achieve the desired consistency. Mix well until you have smooth, even colors.
Step 5: Start Painting
Dip your paintbrush into the color of your choice and start applying the paint to the wooden surface. Use long, smooth brushstrokes for an even application. Depending on your design, you may need to apply multiple layers of paint to achieve the desired opacity and color intensity. Allow each layer to dry before applying the next one.
Step 6: Add Texture and Details
If you want to add texture or finer details to your painting, you can use different techniques. Experiment with dry brushing, stippling, or using a palette knife to create interesting effects and textures on the wood surface.
Step 7: Let it Dry
Once you have finished painting, allow your artwork to dry completely. This may take a few hours or overnight, depending on the thickness of the paint layers. Avoid touching or moving the painted object until it is fully dry.
Step 8: Seal the Wood (Optional)
To protect your acrylic paint and enhance its longevity, you can apply a sealer or varnish to the painted surface. Apply the sealer according to the manufacturer’s instructions, using a brush or roller. Let it dry completely before handling the painted wood.
Step 9: Enjoy Your Acrylic Painting on Wood
Once the sealer has dried, your acrylic painting on wood is ready to be displayed or used. Admire your artwork and showcase it proudly!
In summary, using acrylic paint on wood allows you to unleash your creativity and add a touch of color to any wooden surface. By following this step-by-step guide, you can achieve beautiful results and create unique pieces of art. Remember to have fun and experiment with different techniques to make your acrylic painting on wood truly stand out.
Tip 1: Prepare the wood surface
Before you start painting with acrylics on wood, it is important to properly prepare the surface. Start by smoothing out any rough areas or imperfections using sandpaper. This will create a smooth and even surface for the paint to adhere to. After sanding, remove any dust or debris by wiping the surface with a clean cloth.
Tip 2: Apply a primer
To ensure that the acrylic paint adheres well to the wood, it is recommended to apply a primer. Choose a primer that is suitable for both wood and acrylic paint. Apply a thin and even layer of primer using a brush or roller. Allow the primer to dry completely before proceeding.
Tip 3: Use thin layers of paint
When working with acrylic paint on wood, it is best to apply thin layers of paint rather than thick ones. This allows for better control and reduces the risk of the paint cracking or peeling. Start with a light layer of paint and gradually build up the intensity by adding more layers once each previous layer has dried.
Tip 4: Seal the finished artwork
To protect the acrylic paint on wood and ensure its longevity, it is important to seal the finished artwork. There are various options for sealing, such as varnishes or sealants specifically designed for acrylic paintings on wood. Apply the sealant evenly over the entire surface and allow it to dry according to the manufacturer’s instructions.
Tip 5: Properly store and display your artwork
After completing your acrylic painting on wood, it is important to store and display it properly to maintain its quality. Avoid exposing the artwork to direct sunlight or extreme temperatures, as this can cause fading or warping of the paint and wood. If possible, frame the artwork under glass to provide an additional layer of protection.
Tip 6: Experiment and have fun!
Acrylic paint offers a wide range of possibilities and allows for experimentation. Don’t be afraid to try different techniques, colors, and effects on your wood surface. Explore different brush strokes, blending techniques, and texture-building methods. Remember, the more you practice and experiment, the more you will develop your own unique style and achieve the best results.
By following these tips and techniques, you can achieve the best results when using acrylic paint on wood. Remember to prepare the surface, use thin layers of paint, seal the finished artwork, and properly store and display your masterpiece. Enjoy the process and let your creativity shine!
Exploring Different Techniques for Painting Wood with Acrylics
Wood is a versatile material that can be transformed into beautiful works of art with the right techniques and materials. Acrylic paint, known for its vibrant colors and quick drying time, is a popular choice among artists for painting on various surfaces, including wood. In this section, we will explore different techniques that you can use to paint wood with acrylics, allowing you to unleash your creativity and bring your wooden pieces to life.
1. Preparing the Wood Surface
Before you start painting, it is essential to prepare the wood surface properly to ensure optimal adhesion and a smooth finish. Here are a few steps to follow:
- Clean the surface: Remove any dust, dirt, or grease from the wood using a mild cleaner or soap and water. Rinse thoroughly and allow it to dry completely.
- Sand the wood: Use fine-grit sandpaper to gently sand the surface of the wood. This will help create a slightly rough texture, allowing the paint to adhere better.
- Apply a primer: Apply a layer of acrylic primer specifically designed for wood. This will create a smooth and even surface for your paint to adhere to.
2. Layering and Blending Colors
One of the advantages of using acrylic paint is its ability to layer and blend colors effectively. This technique allows you to create depth, dimension, and realistic effects in your wood painting. Here’s how you can do it:
- Start with a base color: Apply a solid base color to the wood using broad strokes or a paintbrush. Let it dry completely before moving on to the next layer.
- Add layers: Gradually build up layers of color, starting with lighter shades and gradually adding darker tones. Use a dry brush or a sponge to blend the colors together for a seamless transition.
- Highlight and shade: Use lighter shades to highlight certain areas and darker shades to create shadows and depth. This technique will bring your wood painting to life and give it a three-dimensional appearance.
3. Creating Textures and Patterns
Wood has unique textures and patterns that can be enhanced with acrylic paint. You can use various techniques to create interesting textures and patterns on your wooden surface. Here are a few ideas:
- Dry brushing: Dip a dry brush into a small amount of paint and remove most of it on a paper towel. Lightly brush the surface of the wood to create a textured and weathered look.
- Sponging: Dip a sponge into different colors of paint and gently dab it onto the wood surface. This technique creates a speckled or stippled effect, resembling wood grain or natural patterns.
- Stenciling: Use stencils to create intricate designs or patterns on the wood. Secure the stencil in place with tape and gently dab the paint over it using a sponge or a stencil brush.
4. Finishing and Sealing the Painting
Once you have completed your wood painting with acrylics, it is essential to protect and seal the artwork to ensure its longevity. Here’s how you can finish and seal your painting:
- Allow the paint to dry: Let your painting dry completely before applying any sealant or varnish. This will prevent smudging or damage to the artwork.
- Apply a clear coat: Use a clear acrylic varnish or sealant to protect the surface of the wood and enhance the colors of your painting. Apply multiple thin coats, allowing each coat to dry before applying the next.
- Consider waxing: For a more natural and matte finish, you can use furniture wax specifically designed for wood. Apply a thin layer of wax using a cloth and buff it gently to achieve the desired sheen.
In summary, painting wood with acrylics opens up a world of possibilities for artists. By following the proper preparation techniques, layering and blending colors, creating unique textures and patterns, and finishing and sealing the painting, you can create stunning works of art on wood surfaces. So grab your paintbrushes, unleash your creativity, and explore the endless possibilities of painting on wood with acrylics!
Inspiring Ideas: Creative Projects Using Acrylic Paint on Wood
Acrylic paint is a versatile and vibrant medium that can be used on various surfaces, including wood. Whether you are a seasoned artist or a beginner looking to explore your creative side, acrylic paint on wood offers endless possibilities for unique and stunning projects. In this section, we will explore some inspiring ideas that will help you unleash your creativity and create beautiful works of art using acrylic paint on wood.
1. Abstract Wall Art
If you love abstract art, acrylic paint on wood is the perfect medium to express your creativity. Start by selecting a wooden panel or canvas and prepare it by sanding and priming the surface. Once the surface is ready, experiment with different color combinations, textures, and brush strokes to create a visually captivating abstract piece. You can use a palette knife, sponges, or even your fingers to add texture and depth to your artwork. Let your imagination run wild and create a unique abstract masterpiece that reflects your style and personality.
2. Hand-Painted Signs
Wooden signs are a popular home decor item, and you can personalize them by adding your own artistic touch. Using acrylic paint on wood, you can hand-paint inspiring quotes, family names, or catchy phrases on wooden boards or plaques. Choose a font style that suits the overall aesthetic you want to achieve, and use a fine brush or a paint marker to create clean and crisp lettering. Finish off your hand-painted sign with a protective clear coat to ensure longevity.
3. Nature-Inspired Wall Hangings
Bring the beauty of nature into your home by creating nature-inspired wall hangings using acrylic paint on wood. Start with a wooden slice or a thin wooden board as your canvas. You can paint intricate floral designs, landscapes, or even animals using a combination of vibrant and earthy colors. Experiment with different brush techniques to create texture and depth, and add details using fine brushes or paint markers. Once your artwork is complete, you can attach a hanging mechanism to the back and display it as a stunning wall decoration.
4. Decorative Wooden Boxes
Transform plain wooden boxes into beautiful and functional pieces with the help of acrylic paint. Whether you want to create a jewelry box, a keepsake box, or a storage box, acrylic paint offers endless possibilities for customization. Start by sanding and priming the surface of the wooden box, then let your imagination soar. Paint intricate patterns, floral motifs, or geometric designs using a combination of bold and subtle colors. You can also add metallic accents or embellishments for an extra touch of elegance. Finish off your decorative wooden box with a protective clear coat to ensure durability.
5. Handcrafted Furniture
If you are feeling adventurous and want to take your acrylic paint on wood projects to the next level, consider revamping furniture pieces with a touch of creativity. From chairs and tables to cabinets and shelves, you can transform ordinary furniture into extraordinary pieces of art. Before you start painting, make sure to clean and prepare the surface properly. Then, choose a color palette and design that complements the style of the furniture and your overall decor. Use a combination of brushes, sponges, or even stencils to add patterns, motifs, or intricate details. Once your masterpiece is complete, protect it with a clear coat or varnish to ensure longevity.
In summary, acrylic paint on wood opens up a world of possibilities for creative projects. Whether you choose to create abstract wall art, hand-painted signs, nature-inspired wall hangings, decorative wooden boxes, or handcrafted furniture, acrylic paint allows you to express your artistic vision and create stunning works of art. So grab your brushes, choose your colors, and let your imagination run wild as you embark on these inspiring projects using acrylic paint on wood.

FAQs
Can I use acrylic paint on wood?
Yes, acrylic paint can be used on wood. It is a versatile paint that adheres well to wood surfaces and dries quickly. However, it is important to properly prepare the wood surface by sanding and priming it before applying the acrylic paint.
How long does acrylic paint take to dry on wood?
The drying time of acrylic paint on wood depends on various factors like the thickness of the paint layer and environmental conditions. Generally, acrylic paint dries within 20-30 minutes to touch and takes around 24 hours to fully cure on wood.
Do I need to seal acrylic paint on wood?
Sealing acrylic paint on wood is not necessary, but it can provide additional protection and enhance the longevity of the artwork. You can use a clear varnish or polyurethane sealer to seal the acrylic paint on wood surfaces.
Conclusion:
In conclusion, acrylic paint can indeed be used on wood surfaces. Its versatility and adhesive properties make it an excellent choice for various art and craft projects. Whether you are painting a wooden sculpture, furniture, or even creating a mural, acrylic paints provide vibrant colors and can be easily applied to wood surfaces.
Furthermore, acrylic paints offer long-lasting results and are resistant to fading and yellowing over time. With proper surface preparation and the right sealing techniques, you can ensure that your acrylic paint adheres well to the wood and stays protected.
So, go ahead and unleash your creativity by using acrylic paint on wood—be it for home decor, DIY projects, or artwork—the possibilities are endless!
