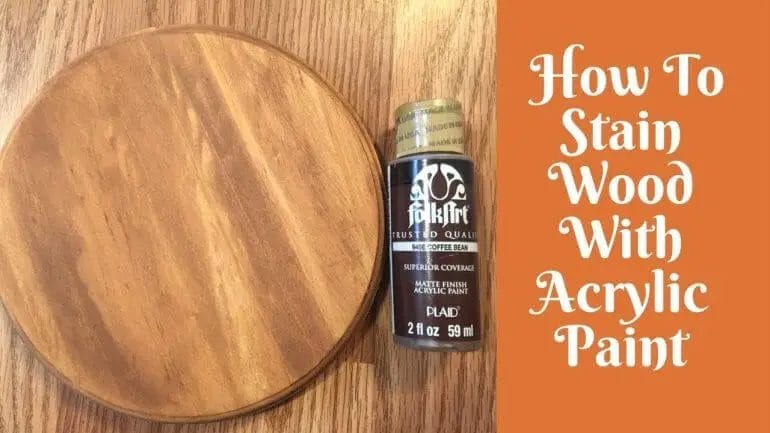
If you’re looking to add a beautiful and vibrant color to your wooden surfaces, staining with acrylic paint is a fantastic option. Unlike traditional wood stains, acrylic paints offer a wide range of colors and can be easily customized to suit your style and preferences. In this guide, we’ll walk you through the step-by-step process of staining wood with acrylic paint, from preparing the surface to applying the paint and achieving a professional and long-lasting finish.
Before you begin the staining process, it’s important to properly prepare the wood surface. This involves cleaning the wood, sanding any rough areas, and ensuring a smooth and even surface. Once the wood is prepped, you can start applying the acrylic paint. Unlike traditional wood stains, acrylic paint doesn’t penetrate the wood grain, but instead sits on top of it, creating a vibrant and opaque color.

When applying acrylic paint to wood, it’s important to use thin and even layers. This helps to prevent any drips or clumps of paint and ensures a smooth and professional finish. You can use a brush, sponge, or even a rag to apply the paint, depending on the desired effect. Make sure to allow each layer to dry completely before applying the next one, and consider adding a clear protective coat to enhance durability and longevity.
One of the great advantages of staining wood with acrylic paint is the ability to mix colors and create unique shades. This allows you to unleash your creativity and
Choosing the Right Wood for Acrylic Staining
When it comes to acrylic staining, selecting the right type of wood is crucial to achieving the desired results. Different woods have distinct characteristics, and these unique properties can greatly impact how well the acrylic stain adheres and appears on the surface. In this section, we will explore some of the key factors to consider when choosing the right wood for acrylic staining.
1. Porosity
The porosity of the wood refers to its ability to absorb and retain moisture. When it comes to acrylic staining, it is important to choose a wood species with moderate porosity. Woods with high porosity tend to absorb the stain unevenly, resulting in a blotchy or streaky appearance. On the other hand, woods with low porosity may not absorb the stain effectively, resulting in a dull or faded finish.
Some wood species that are known for their moderate porosity and are commonly used for acrylic staining include oak, maple, and birch. These woods provide a good balance between absorption and retention of the acrylic stain.
2. Grain Pattern
The grain pattern of the wood can significantly impact the final appearance of the acrylic stain. Woods with pronounced grain patterns, such as oak or mahogany, can add depth and character to the stained surface. The acrylic stain tends to settle into the grain, highlighting its natural beauty.
On the other hand, woods with a more subtle or uniform grain pattern, such as maple or pine, can provide a smoother and more uniform appearance when stained with acrylic. These woods are often preferred for projects that require a more contemporary or sleek look.
3. Durability
The durability of the wood is another important consideration when choosing a material for acrylic staining. Depending on the specific project or application, you may want to select a wood species that is known for its strength and resistance to wear and tear.
Hardwood species like oak, walnut, and teak are renowned for their durability and are often used for high-traffic areas or furniture pieces that need to withstand daily use. On the other hand, softwood species like pine or cedar may be more suitable for indoor decorative pieces or projects with less wear and tear.
4. Availability and Cost
Lastly, the availability and cost of the wood should also be considered. Some exotic or rare wood species may be harder to find and come at a higher price point. If budget is a concern, it is important to explore locally available wood options that still meet the desired criteria for acrylic staining.
Conclusion
In summary, choosing the right wood for acrylic staining involves considering factors such as porosity, grain pattern, durability, and availability. By selecting a wood species that has the appropriate characteristics for your project, you can ensure a beautiful and long-lasting finish that enhances the natural beauty of the wood while showcasing the vibrant colors of the acrylic stain.
Preparing the Wood Surface for Staining
Before you can achieve a smooth and flawless wood stain finish, it is crucial to properly prepare the wood surface. This step is often overlooked, but it plays a significant role in ensuring the longevity and effectiveness of the stain. In this section, we will outline the necessary steps to prepare the wood surface for staining.
Clean the Wood Surface
The first step in preparing the wood surface for staining is to thoroughly clean it. Remove any dirt, dust, or debris that may be present on the surface. You can use a broom, vacuum cleaner, or a damp cloth to wipe down the wood surface. It is important to ensure that the wood is free from any foreign particles that may interfere with the staining process.
Repair Damaged Areas
If there are any damaged or worn-out areas on the wood surface, it is crucial to repair them before applying the stain. Inspect the wood for any cracks, dents, or splinters. Use wood filler to fill in any imperfections and sand them down until they are smooth and level with the rest of the surface. This step will help create a uniform and flawless finish.
Sand the Wood Surface
Sanding the wood surface is an essential step in preparing it for staining. This process helps to remove any existing finish, smooth out imperfections, and open up the wood pores to better absorb the stain. Start by using a coarse-grit sandpaper to remove the existing finish or paint. Then gradually move to finer-grit sandpaper to achieve a smooth and even surface. Sand in the direction of the wood grain to avoid creating scratches.
Remove Dust
After sanding the wood surface, it is vital to remove any dust or debris that may have accumulated during the process. Use a vacuum cleaner or a tack cloth to thoroughly clean the wood. Removing the dust ensures that the wood is ready to absorb the stain evenly and prevents any particles from interfering with the final finish.
Apply Wood Conditioner (Optional)
Depending on the type of wood you are working with, it may be beneficial to apply a wood conditioner before staining. Wood conditioners help to seal the wood and prevent uneven absorption of the stain. Follow the manufacturer’s instructions for the specific wood conditioner you are using, as application methods and drying times may vary.
Test the Stain
Before applying the stain to the entire wood surface, it is always recommended to do a test on a small inconspicuous area. This will allow you to assess the color and appearance of the stain before committing to the entire project. Apply the stain according to the instructions and let it dry completely before making your final decision.
In summary, preparing the wood surface for staining involves cleaning the wood, repairing any damaged areas, sanding to achieve a smooth surface, removing dust, optionally applying a wood conditioner, and conducting a stain test. By following these steps, you can ensure that your wood stain project results in a professional and long-lasting finish.
Applying Acrylic Paint for Wood Staining
Wood staining is a popular technique used to enhance the appearance and durability of wooden surfaces. While traditional wood stains are commonly used, acrylic paint can also be a great alternative for achieving a unique and vibrant look. In this section, we will explore the process of applying acrylic paint for wood staining and the benefits it offers.Benefits of Using Acrylic Paint for Wood Staining
Acrylic paint offers several advantages when used for wood staining. Here are some key benefits to consider: 1. Color Variety: Acrylic paints come in a wide range of colors, allowing you to choose from an extensive palette to match your desired look and style. 2. Opacity Control: Acrylic paint can be easily adjusted for opacity by diluting it with water or by applying multiple layers. This allows you to create different levels of transparency, from sheer to solid coverage. 3. Quick Drying Time: Acrylic paint dries relatively fast compared to other types of paint, reducing the waiting time between coats or for the final finish. This is especially beneficial when working on larger wood surfaces. 4. Durability: Acrylic paint forms a tough and durable layer on the wood surface, providing protection against scratches, moisture, and UV damage. It can withstand regular use without fading or peeling. 5. Easy Cleanup: Acrylic paint is water-based, making it easy to clean up spills and brushes with just soap and water. This eliminates the need for harsh solvents or chemicals.Preparing the Wood Surface
Before applying acrylic paint for wood staining, it is important to properly prepare the wood surface. Follow these steps to ensure a smooth and long-lasting finish: 1. Sand the Wood: Start by sanding the wood surface to create a smooth and even texture. Use fine-grit sandpaper and sand in the direction of the wood grain to avoid scratches. 2. Clean the Surface: Remove any dust, dirt, or debris from the wood surface using a clean cloth or vacuum. This will help the paint adhere better and ensure a pristine finish. 3. Apply a Primer: If desired, apply a wood primer to create a sealed surface and enhance paint adhesion. This step is particularly recommended if the wood has a lot of knots or is prone to bleeding sap.Applying Acrylic Paint for Wood Staining
Now, let’s dive into the process of applying acrylic paint for wood staining: 1. Choose the Right Paint: Select a high-quality acrylic paint specifically formulated for wood surfaces. Look for a product that offers good adhesion and durability. 2. Prepare the Paint: If necessary, dilute the acrylic paint with water to achieve the desired opacity. Mix well to ensure a consistent color throughout. 3. Apply the First Coat: Using a brush, roller, or sprayer, apply the first coat of acrylic paint onto the wood surface. Work in long, even strokes, following the direction of the wood grain. Allow the paint to dry completely before applying additional coats. 4. Apply Additional Coats: Depending on the level of opacity desired, apply additional coats of acrylic paint. Allow each coat to dry before applying the next. This will help build up the color and ensure a more vibrant finish. 5. Seal the Paint: Once the final coat of acrylic paint has dried, consider sealing it with a clear varnish or polyurethane for added protection and longevity. Apply the sealer according to the manufacturer’s instructions and allow it to dry completely.Summary
Using acrylic paint for wood staining can offer a wide range of colors, opacity control, quick drying time, durability, and easy cleanup. Properly preparing the wood surface and following the application steps will help you achieve a beautiful and long-lasting finish. Whether you’re staining furniture, cabinets, or any other wooden item, acrylic paint can provide a unique and personalized look to enhance the overall aesthetic. Experiment with different colors and techniques to create stunning wood stain effects with acrylic paint.Techniques for Achieving Different Wood Stain Effects
Wood staining is a popular method of enhancing the natural beauty of wood while adding color and protection. Whether you are working on a DIY project or a professional woodworking job, understanding different wood stain effects can help you achieve the desired look. In this section, we will explore various techniques for achieving different wood stain effects.
1. Basic Wood Stain Application
The most common technique for applying wood stain is the basic application method. This involves applying the stain evenly across the wood surface using a brush, cloth, or foam applicator. The stain should be allowed to penetrate the wood for a few minutes before wiping off any excess with a clean cloth. This technique is ideal for achieving a uniform color and showcases the natural grain of the wood.
2. Layering Stains
Layering stains is a technique that involves applying multiple layers of different colored stains to achieve a unique look. This method allows you to create depth and dimension in the wood by combining various shades. Start with a lighter stain as the base coat and allow it to dry completely. Then, apply a darker stain on top, ensuring that each layer is evenly applied and allowed to dry before proceeding to the next one. This technique offers endless possibilities for creating custom stain effects.
3. Pre-Stain Conditioner
Using a pre-stain conditioner is particularly useful when working with softwoods, such as pine or aspen, which tend to absorb stain unevenly. The conditioner acts as a sealer, preventing the wood from absorbing too much stain and resulting in blotchy or uneven color. Apply the conditioner evenly across the wood surface and allow it to penetrate for the recommended time. Once the conditioner has dried, proceed with the regular staining process.
4. Distressing and Aging
If you desire a rustic or antique look, distressing and aging techniques can be employed. This involves creating intentional imperfections on the wood surface to mimic the effects of wear and tear over time. Before staining, you can use tools like a hammer, chains, or sandpaper to create dents, scratches, or weathered textures. Once the desired distressing is achieved, proceed with the staining process. The stain will accentuate and highlight these imperfections, giving the wood a vintage appearance.
5. Bleaching or Whitewashing
Bleaching or whitewashing is a technique used to lighten the color of wood or create a white-washed effect. This method is often used to achieve a coastal or beachy aesthetic. Start by applying a wood bleach solution to remove the natural color from the wood. Once the wood has dried, apply a white or light-colored stain to achieve the desired effect. This technique can be used on both hardwood and softwood surfaces and allows for a range of lightened or white-washed finishes.
6. Stencil or Pattern Staining
For those looking to add decorative elements to their wood surfaces, stencil or pattern staining is an excellent technique. This involves applying a stencil or pattern onto the wood surface before staining. Use painter’s tape or adhesive to secure the stencil in place and apply the desired stain color within the stencil. Once the stain has dried, carefully remove the stencil to reveal the intricate design. This technique allows for creative customization and can be used to add intricate patterns or logos to your wood projects.
7. Color Wash
A color wash involves diluting the wood stain with water or a glaze to create a translucent or washed-out effect. This technique is often used to add a subtle touch of color while still allowing the natural wood grain to show through. Apply the diluted stain using a brush or cloth, ensuring it is evenly spread across the wood surface. The color wash can be layered for a more saturated look or applied lightly for a softer, more subtle effect.
By utilizing these various techniques for achieving different wood stain effects, you can transform your woodworking projects and create stunning finishes that suit your style and preferences. Experiment with these methods and unleash your creativity to achieve the perfect look for your next wood staining project.
Sealing and Protecting the Acrylic Stained Wood
Acrylic stains are a popular choice for staining wood surfaces due to their vibrant color options and fast drying time. However, once you’ve applied the acrylic stain to your wood, it’s important to seal and protect it to ensure its longevity and durability. In this section, we will discuss the steps to effectively seal and protect acrylic stained wood.1. Clean the Surface
Before sealing the acrylic stained wood, it’s crucial to clean the surface thoroughly. Use a mild soap or wood cleaner and a soft cloth to remove any dirt, dust, or grime. Make sure the surface is completely dry before proceeding to the next step.2. Sand the Wood
Next, you’ll need to sand the wood to create a smooth and even surface for the sealer. Use a fine-grit sandpaper and sand in the direction of the wood grain. This will help to remove any imperfections and ensure that the sealer adheres properly to the wood. After sanding, make sure to clean off any sanding dust before moving on.3. Choose the Right Sealer
Selecting the appropriate sealer for your acrylic stained wood is essential for achieving optimal protection. There are various types of sealers available, including polyurethane, lacquer, and varnish. Consider factors such as the desired level of sheen, durability, and compatibility with acrylic stains when choosing a sealer.4. Apply the Sealer
Using a clean brush or applicator, apply the sealer evenly to the acrylic stained wood. Start from one end and work your way to the other, following the direction of the wood grain. Be sure to apply a thin, even coat to avoid any drips or pooling of the sealer.5. Allow for Drying and Curing
After applying the first coat of sealer, allow it to dry according to the manufacturer’s instructions. This typically takes a few hours, but it’s important to give the sealer ample time to cure completely. Once the first coat is dry, you can apply additional coats for added protection and durability.6. Sand and Buff (Optional)
If desired, you can sand the sealed wood between coats to achieve a smoother finish. Use a fine-grit sandpaper and lightly sand the surface, then wipe away any dust. This step helps to remove any imperfections and creates a smoother surface for the subsequent coats of sealer.7. Maintain and Reapply
To ensure the longevity of the sealer and protection of the acrylic stained wood, it’s important to properly maintain the surface. Avoid exposing it to excessive moisture, harsh chemicals, or direct sunlight. Regularly clean the wood with a mild soap and water solution, and periodically reapply a thin coat of sealer as needed. In summary, sealing and protecting acrylic stained wood is crucial for preserving its color and durability over time. By following these steps, you can effectively seal and protect your acrylic stained wood, ensuring its beauty and longevity for years to come.
FAQs
1. How can I stain wood with acrylic paint?
To stain wood with acrylic paint, dilute the paint with water and mix well. Apply the mixture to the wood using a brush or sponge, following the wood grain. Wipe off any excess paint with a cloth. Repeat the process until you achieve the desired color intensity. Finally, seal the stained wood with a clear finish.
2. Can I use acrylic paint as a stain for outdoor wood projects?
Yes, you can use acrylic paint as a stain for outdoor wood projects. However, it’s important to seal the stained wood with a weather-resistant clear finish to protect it from the elements. This will ensure that the color lasts and the wood is adequately protected.
3. How long does acrylic paint stain take to dry on wood?
The drying time of acrylic paint stain on wood varies depending on factors such as humidity, temperature, and the thickness of the paint layer. Generally, it takes around 1-2 hours for acrylic paint stain to dry to the touch. However, it’s recommended to wait at least 24 hours before applying a clear finish to ensure the paint is fully dry and cured.
Conclusion
In conclusion, staining wood with acrylic paint can be a creative and cost-effective way to transform the look of your wooden furniture or crafts. By following the steps mentioned in this guide, you can achieve stunning results that mimic the appearance of traditional wood stains. Acrylic paint offers a wide range of colors and finishes, allowing you to customize your projects according to your personal style and preferences. Furthermore, it is an easy-to-use and versatile medium that can be used on various types of wood surfaces. Whether you’re a seasoned DIY enthusiast or a beginner, staining wood with acrylic paint is a great technique to explore and experiment with. So, unleash your creativity and start staining!
