Yes, hydro dipping can be done on wood surfaces, including furniture, panels, and accessories. Hydro dipping, also known as water transfer printing, is a technique that allows you to apply intricate patterns, designs, and colors to various objects using water and specialized hydrographic films.
By creating a hydro dipping setup, you can transform plain wooden items into unique and visually appealing pieces. The process involves preparing the wood surface, selecting a desired film pattern, activating the film in water, and then dipping and transferring the pattern onto the wood.

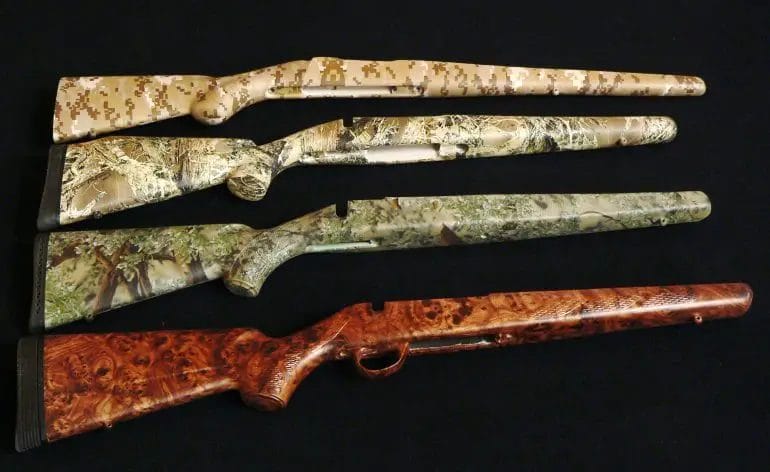
Whether you want to add a vibrant design to a wooden guitar, give a rustic table a new look, or customize wooden crafts, hydro dipping provides endless possibilities for enhancing the appearance of wood surfaces.
Step-by-Step Guide on Hydro Dipping Wood Surfaces
Hydro dipping, also known as water transfer printing, is a popular technique used to apply intricate and vibrant designs to various surfaces, including wood. This process involves immersing an object into a water-based film with a chosen design, which adheres to the surface upon contact. Hydro dipping can be a fun and creative way to enhance the appearance of wood surfaces, and in this guide, we will walk you through the step-by-step process of hydro dipping wood.
Materials You Will Need:
- Wooden object to dip (e.g., furniture, decor, or small items)
- Hydrographic film with desired design
- Container large enough to fit the wooden object
- Water
- Hydrographic activator
- Masking tape
- Rubbing alcohol
- Spray paint (optional)
- Clear coat sealant
- Gloves
- Protective eyewear
Step 1: Preparing the Wood Surface
Start by ensuring that the wood surface is clean and free of any dirt, dust, or grease. Use a damp cloth with mild soap to clean the object thoroughly. Once clean, let it dry completely before proceeding to the next step.
Step 2: Applying Masking Tape
Use masking tape to cover any areas of the wood surface that you do not want the design to adhere to. This will help create clean and defined lines. Take your time to tape off the desired sections carefully.
Step 3: Preparing the Hydrographic Film
Measure and cut the hydrographic film to fit the size of your wooden object. Fill a container with enough water to fully submerge the film. Carefully place the film into the water and allow it to soak for a few seconds until it becomes pliable.
Step 4: Activating the Film
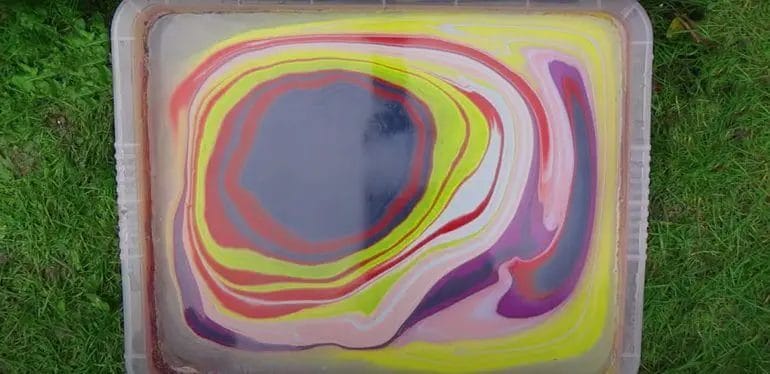
Put on gloves and protective eyewear to protect yourself during this step. Spray the hydrographic activator evenly onto the surface of the water in the container. This will create a chemical reaction that activates the film and allows it to adhere to the wood surface.
Step 5: Dipping the Wood
Hold the wooden object at either end and slowly and steadily dip it into the water, ensuring that the entire surface comes into contact with the film. Be careful not to submerge it too quickly or at an angle, as this can cause the design to distort.
Step 6: Rinsing and Drying
After dipping, gently swirl the water around the wooden object to remove any excess film. Carefully remove the object from the water and set it aside to dry. Avoid touching the dipped surface until it is completely dry to prevent smudging or damage to the design.
Step 7: Finishing Touches
Once the wood surface is dry, you can optionally enhance the design further by applying spray paint. Select a color that complements the hydro dip pattern and lightly spray it onto the surface. Allow the paint to dry completely before proceeding to the next step.
Step 8: Sealing the Design
To protect the hydro dip design and give it a glossy finish, apply a clear coat sealant over the entire surface of the wood. Follow the manufacturer’s instructions for the specific sealant you are using and allow it to dry thoroughly before handling the object.
Summary
Hydro dipping wood surfaces can be a fantastic way to add a unique and eye-catching design to your wooden objects. By following this step-by-step guide, you can achieve professional-looking results. Remember to prepare the wood surface properly, apply masking tape for clean lines, activate the hydrographic film, dip the wood carefully, rinse and dry the object, add optional spray paint for additional flair, and seal the design with a clear coat. With some patience and creativity, you can transform ordinary wooden objects into extraordinary pieces of art.
Exploring Different Colors and Patterns for Hydro Dipping Wood
Hydro dipping, also known as water transfer printing, is a popular technique used to apply vibrant and intricate patterns to various surfaces, including wood. This process involves immersing the object in water and then transferring a specially designed film onto its surface. One of the most exciting aspects of hydro dipping wood is the ability to experiment with different colors and patterns, allowing for truly unique and visually stunning results.
When it comes to choosing colors for hydro dipping wood, the possibilities are endless. Whether you prefer bold and vibrant shades or more subtle and earthy tones, there is a color palette to suit every taste. It is essential to consider the overall aesthetic you want to achieve and the intended use of the finished piece. For example, if you’re looking to create a vibrant and eye-catching design, opting for bright colors such as red, yellow, or blue can make a statement. On the other hand, if you prefer a more natural and organic look, earthy tones like browns, greens, or grays can bring a sense of warmth and tranquility to the wood.
Patterns play a crucial role in hydro dipping wood and can transform a plain surface into a work of art. There are various patterns available, ranging from classic designs like marble or wood grain to more intricate and abstract motifs. Marble patterns, for instance, can give the appearance of luxurious stone and add elegance to any wooden object. Wood grain patterns, on the other hand, can enhance the natural beauty of the wood and create a seamless integration between the design and the material itself. Abstract patterns offer endless creativity and allow for personalized and unique designs that reflect individual style and preferences.
When combining different colors and patterns for hydro dipping wood, the possibilities for creativity are limitless. One can experiment with contrasting or complementary colors to create a visually stimulating effect. For example, pairing a vibrant red pattern with a contrasting cool-toned blue creates a striking and dynamic design. On the other hand, using complementary colors like purple and yellow can create a harmonious and balanced look. It’s important to consider the overall color scheme and ensure that the different colors and patterns work together cohesively.
To truly explore the potential of hydro dipping wood, one can also experiment with techniques like layering and blending. Layering involves applying multiple films with different patterns and colors onto the surface, creating a multidimensional and textured effect. Blending, on the other hand, involves mixing colors together to create unique gradients and transitions. These techniques can add depth and complexity to the design, resulting in a truly captivating finished product.
In summary, hydro dipping wood offers a world of possibilities when it comes to exploring different colors and patterns. Whether you prefer bold and vibrant shades or more subtle and earthy tones, there is a color palette to suit every taste. By choosing patterns that range from classic designs to abstract motifs and experimenting with techniques like layering and blending, you can create truly unique and visually stunning designs that will make your hydro dipped wood stand out.

Tips and Tricks for Achieving the Best Hydro Dipping Results on Wood
Hydro dipping, also known as water transfer printing, is a popular technique used to decorate various surfaces, including wood. This process involves applying a design to an object by submerging it in a water bath containing a previously printed film. The film adheres to the object, resulting in a vibrant and customized finish. If you are looking to achieve the best hydro dipping results on wood, here are some helpful tips and tricks to consider.
1. Surface Preparation
Before starting the hydro dipping process, it’s crucial to prepare the wood surface properly. Begin by sanding the wood to remove any imperfections, rough areas, or old finishes. Ensure that the surface is smooth and free from dust or debris. This step will help the film adhere better to the wood and result in a more even and professional-looking finish.
2. Choose the Right Film
The film you choose plays a significant role in the final outcome of the hydro dip. Consider the design and color scheme you want to achieve on your wood piece. Select a film that complements the wood’s natural grain or choose a bold design that contrasts beautifully with the wood. Make sure the film is specifically designed for hydro dipping and is compatible with wood surfaces.
3. Temperature and Timing
Temperature and timing are crucial factors in achieving successful hydro dipping results. It’s important to follow the manufacturer’s instructions regarding water temperature and dip duration. Typically, warmer water helps activate the film and improve adhesion. Additionally, keeping track of the timing is essential to ensure the film is correctly transferred onto the wood.
4. Proper Dipping Technique
Mastering the proper dipping technique is essential for achieving the best results. Here’s a step-by-step guide:
- Fill a large container with water and ensure it’s at the recommended temperature.
- Place the film on the water’s surface, allowing it to fully hydrate and activate.
- Once the film is ready, slowly dip the wood piece into the water at a 45-degree angle. Ensure complete and even submersion.
- Hold the piece underwater for a few seconds to allow the film to wrap around the wood.
- Carefully remove the wood from the water, pulling it out evenly and avoiding any contact with the film that remains on the water’s surface.
- Allow the wood to dry thoroughly before applying any protective coating or finish.
5. Post-Dipping Finishing
After the hydro dipping process, it’s crucial to finish the wood properly to protect the design and enhance its longevity. Once the wood is fully dry, apply a clear protective coat or finish to seal the design and provide durability. This step will protect the wood from scratches, moisture, and UV damage, ensuring that your hydro dipped piece remains in excellent condition for years to come.
6. Practice and Patience
Like any skill, achieving the best hydro dipping results on wood requires practice and patience. Don’t get discouraged if your first attempts don’t turn out as expected. Take the time to experiment with different techniques, films, and designs. With practice, you’ll develop a better understanding of the process and achieve the desired results.
In summary, achieving the best hydro dipping results on wood involves proper surface preparation, selecting the right film, following temperature and timing guidelines, mastering the dipping technique, applying post-dipping finishes, and practicing with patience. By implementing these tips and tricks, you can create stunning and customized hydro dipped wood pieces that stand out.
The Benefits and Limitations of Hydro Dipping Wood
Hydro dipping, also known as water transfer printing or immersion printing, is a popular technique used to apply intricate designs or patterns to various surfaces, including wood. This process involves submerging the object in water and then applying a specialized film that adheres to the surface when activated. While hydro dipping wood offers several benefits, it also has its limitations. In this section, we will explore the advantages and drawbacks of hydro dipping wood.
Benefits of Hydro Dipping Wood
1. Customization: One of the main advantages of hydro dipping wood is the ability to customize the surface with unique patterns and designs. Whether you want a natural wood grain look or a vibrant and eye-catching pattern, hydro dipping allows you to achieve the desired aesthetic.
2. Versatility: Hydro dipping can be applied to various types of wood, including hardwood and softwood. It works well on both smooth and textured surfaces, making it suitable for a wide range of woodworking projects.
3. Durability: The hydro dipping process involves applying a clear coat or protective finish over the design, enhancing the durability of the wood. This protective layer helps to prevent scratches, fading, and damage caused by exposure to moisture or UV rays.
4. Cost-effective: Compared to other decorative techniques such as painting or wood carving, hydro dipping is a cost-effective option. It eliminates the need for expensive equipment or extensive manual labor, making it a popular choice among DIY enthusiasts and professionals alike.
Limitations of Hydro Dipping Wood
Despite its many benefits, hydro dipping wood does have its limitations that should be considered before opting for this technique.
1. Surface Preparation: Prior to hydro dipping, the wood surface needs to be properly prepared to ensure optimal adhesion of the film. This may involve sanding, priming, or sealing the wood. Failure to adequately prepare the surface can result in poor adhesion and a less desirable finish.
2. Limited Design Size: The size of the hydro dipping film can limit the design possibilities for larger wood pieces. If the desired pattern or design exceeds the size of the available film, it may not be possible to achieve the desired result.
3. Complexity: Hydro dipping wood requires some level of skill and expertise to achieve consistent and high-quality results. It involves precise timing, handling of the film, and proper application techniques. Beginners may find it challenging to master the process initially.
4. Limited Repairs: Once the hydro dipping process is complete, it can be difficult to repair any damages or imperfections. Unlike traditional painting or staining methods, where touch-ups are relatively easy, hydro dipping requires redoing the entire process.
In summary, hydro dipping wood offers the advantages of customization, versatility, durability, and cost-effectiveness. However, it also has limitations such as the need for surface preparation, design size constraints, complexity, and limited repair options. By carefully considering these factors, individuals can determine if hydro dipping is the right technique for their woodworking projects.
FAQs
Can you hydro dip wood?
Yes, hydro dipping can be done on wood. The process involves applying a special hydrographic film onto the wood surface, which adheres to it when placed in water. The wood is then coated with a clear protective finish to seal the design.
Conclusion:
In conclusion, hydro dipping is a versatile technique that can be used on various surfaces, including wood. By using this method, you can transform ordinary wooden objects into unique and eye-catching pieces of art. The hydro dip process allows for endless possibilities in terms of design, patterns, and colors, making it a popular choice for DIY enthusiasts, artists, and craftsmen. Whether you want to hydro dip a wooden furniture piece or create customized wooden accessories, this technique can give your projects a striking and professional finish. So, go ahead and explore the world of hydro dipping on wood!