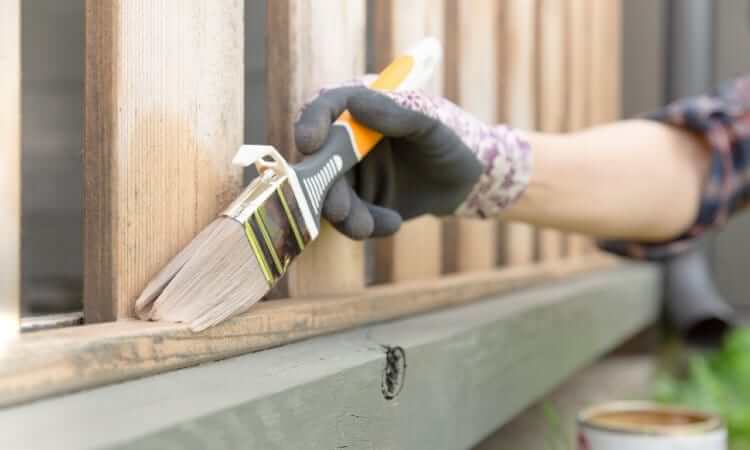
Painting wet wood can lead to poor adhesion and a less durable finish. It is important for the wood to be completely dry before applying paint, as moisture can cause the paint to bubble, peel, or crack over time.
Before painting, make sure the wood is dry to the touch and has had sufficient time to dry out. This will ensure a smooth and long-lasting paint job. If the wood is still damp, it is best to wait until it is completely dry before proceeding with the painting process.

By properly preparing the wood and allowing it to dry thoroughly, you can achieve a beautiful and well-protected finish that will last for years to come.
Understanding the Risks and Benefits of Painting Wet Wood
Painting wet wood can be a tricky task, as it comes with its own set of risks and benefits. In this section, we will explore the potential risks and benefits of painting wood that is still damp or wet.
Risks of Painting Wet Wood
1. Poor adhesion: When paint is applied to wet wood, it may not adhere properly. The moisture can prevent the paint from bonding with the surface, leading to peeling or flaking in the future.
2. Mold and mildew growth: Wet wood provides the ideal conditions for mold and mildew to thrive. If you paint over wet wood, you may trap moisture underneath the paint, creating a breeding ground for these harmful fungi.
3. Uneven finish: Painting wet wood can result in an uneven and streaky finish. The excess moisture can cause the paint to spread unevenly and may lead to visible brush or roller marks.
Benefits of Painting Wet Wood
1. Time-saving: Painting wet wood can help save time, especially if you are working on a large project. You can apply the paint immediately after preparing the surface, without waiting for it to dry completely.
2. Enhanced penetration: Wet wood is more porous than dry wood, allowing the paint to penetrate deeper into the surface. This can result in better adhesion and a longer-lasting finish.
3. Improved moisture protection: Painting wet wood can help seal the surface and prevent further moisture absorption. This can be beneficial in areas with high humidity or where the wood is prone to water exposure.
In summary, painting wet wood comes with both risks and benefits. While there is a chance of poor adhesion, mold growth, and an uneven finish, it can also save time, enhance penetration, and improve moisture protection. Ultimately, the decision to paint wet wood should be based on the specific project requirements and the condition of the wood. It is recommended to consult with a professional or follow the manufacturer’s guidelines to ensure the best results.

How to Safely Dry and Prepare Wet Wood for Painting
When it comes to painting wood, it’s important to ensure that the surface is dry and properly prepared. However, if you are dealing with wet or damp wood, there are some additional steps you need to take before you can start painting. This guide will walk you through the process of safely drying and preparing wet wood for painting.
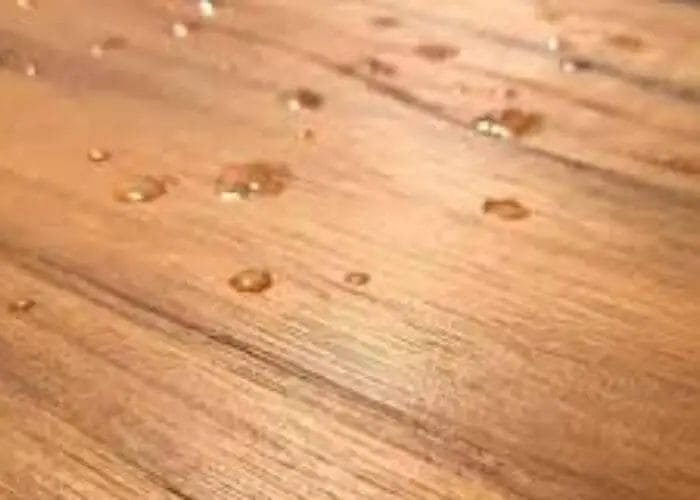
1. Assess the Moisture Content
The first step is to assess the moisture content of the wood. You can use a moisture meter to get an accurate reading. Ideally, the moisture content should be below 12% for interior projects and below 15% for exterior projects.
2. Allow the Wood to Air Dry
If the wood is only slightly damp, you can try air drying it. Place the wood in a dry, well-ventilated area and allow it to dry naturally. This process may take several days or even weeks, depending on the level of moisture in the wood and the surrounding conditions.
3. Use a Dehumidifier or Fan
If you need to speed up the drying process, you can use a dehumidifier or a fan. Position the dehumidifier or fan near the wet wood to help remove the excess moisture from the air. This method can be particularly effective in humid environments.
4. Apply a Wood Preservative
Before painting, it’s important to treat the wood with a wood preservative to prevent any potential issues caused by moisture. Apply the preservative according to the manufacturer’s instructions and allow it to dry completely before proceeding.
5. Sand the Surface
Once the wood is dry, you’ll need to sand the surface to create a smooth and even base for your paint. Use a medium-grit sandpaper to remove any rough spots or imperfections. Be sure to sand in the direction of the wood grain to avoid damaging the surface.
6. Fill in Cracks and Holes
If there are any cracks or holes in the wood, it’s important to fill them in before painting. Use a wood filler or putty to fill the gaps, and then smooth it out with a putty knife. Allow the filler to dry completely and sand the area again to ensure a seamless finish.
7. Prime the Wood
Before applying the paint, it’s crucial to prime the wood to improve adhesion and enhance the longevity of the paint job. Choose a primer that is suitable for the type of paint you will be using and apply it evenly over the entire surface. Allow the primer to dry according to the manufacturer’s instructions.
8. Apply the Paint
Finally, you can begin painting the wood once the primer has fully dried. Select a high-quality paint that is recommended for the type of wood and the intended use. Apply the paint evenly using a brush or roller, and allow each coat to dry before applying the next one. Depending on the desired finish, you may need to apply multiple coats.
Summary
Properly drying and preparing wet wood for painting is essential to ensure a successful and long-lasting paint job. Assess the moisture content, allow the wood to air dry or use a dehumidifier, apply a wood preservative, sand the surface, fill in cracks and holes, prime the wood, and apply the paint. Following these steps will help you achieve a professional-looking finish and protect the wood from potential damage caused by moisture.
Choosing the Right Paint and Primer for Painting Wet Wood
When it comes to painting wet wood, it is important to choose the right paint and primer to achieve a long-lasting and professional-looking finish. Painting wet wood requires a specific approach to ensure that the paint adheres properly and remains durable over time. In this section, we will explore the factors to consider when selecting paint and primer for wet wood, as well as some tips for achieving the best results.
1. Consider the Type of Wood
Before choosing a paint and primer, it is essential to consider the type of wood you are working with. Different types of wood have different levels of moisture, porosity, and natural oils, which can affect the adhesion and durability of the paint. Hardwoods like oak or teak, for example, may have a higher moisture content and require a specific type of paint and primer.
2. Opt for Waterproof or Water-Resistant Paint
When painting wet wood, it is crucial to choose a paint that is waterproof or water-resistant. These types of paints are specially formulated to withstand moisture, preventing the paint from peeling or cracking over time. Look for paint labeled as “exterior” or “all-weather” as these are designed to withstand a variety of weather conditions.
3. Use an Oil-Based Primer
When priming wet wood, it is recommended to use an oil-based primer. Oil-based primers have better adhesion and provide a barrier against moisture, helping the paint adhere more effectively. They also offer better stain-blocking properties, which can be beneficial if the wet wood has any discoloration or stains.
4. Consider a High-Build Primer
If the wet wood has a rough or uneven surface, using a high-build primer can help create a smoother and more even base for the paint. High-build primers have a thicker consistency and can fill in small imperfections, ensuring a more professional-looking finish.
5. Test for Dryness
Before starting the painting process, it is crucial to test the moisture content of the wood. Use a moisture meter to measure the moisture level, and ensure that it falls within the acceptable range for painting. Painting wet wood can lead to poor adhesion and premature paint failure, so it is essential to wait until the wood is dry enough to paint.
6. Follow Proper Application Techniques
When applying paint and primer to wet wood, it is important to follow the manufacturer’s instructions and application techniques. This includes using the recommended brushes or rollers, applying multiple thin coats instead of one thick coat, and allowing sufficient drying time between each coat. Proper application ensures better adhesion and a more durable finish.
7. Consider a Sealant
Depending on the level of moisture in the wood and the desired level of protection, applying a sealant on top of the paint can provide an additional layer of moisture resistance. Sealants can help prolong the life of the paint and provide extra protection against water damage.
8. Regular Maintenance
Once you have successfully painted the wet wood, it is crucial to maintain it properly to ensure its longevity. Regularly inspect the painted surface for any signs of peeling or cracking and promptly address any issues. Clean the painted surface regularly to remove dirt or debris that may compromise the paint’s integrity.
In summary, choosing the right paint and primer for painting wet wood involves considering the type of wood, opting for waterproof or water-resistant paint, using an oil-based primer, considering a high-build primer for rough surfaces, testing for dryness, following proper application techniques, considering a sealant for added protection, and regular maintenance. By selecting the appropriate paint and primer and following the recommended techniques, you can achieve a beautiful and long-lasting finish on wet wood surfaces.
Expert Advice on Achieving Long-lasting Results when Painting Wet Wood
When it comes to painting wet wood, it’s important to take certain precautions to ensure long-lasting results. Whether you’re dealing with rain-soaked exterior siding or damp interior surfaces, following these expert tips will help you achieve a professional finish that withstands the test of time.
1. Assess the Moisture Content
The first step in painting wet wood is to assess the moisture content of the surface. Use a moisture meter to determine the level of moisture present. Ideally, the wood should have a moisture content of less than 15% for exterior painting and less than 12% for interior painting.
If the wood is excessively wet, it’s important to allow it to dry completely before painting. This may involve waiting for sunny weather or using fans and dehumidifiers to expedite the drying process. Painting over wet wood can lead to poor adhesion and premature paint failure.
2. Clean and Prep the Surface
Before painting, it’s crucial to clean and prep the wet wood surface. Remove any dirt, debris, or mildew using a solution of water and mild detergent. Scrub the surface gently with a soft brush or sponge, then rinse thoroughly and allow it to dry.
If there’s mold or mildew present, treat the area with a mildewcide solution to prevent future growth. Sand any rough areas or peeling paint to create a smooth surface for better paint adhesion.
3. Use the Right Primer
When painting wet wood, using the right primer is essential. Look for a primer specifically formulated for damp surfaces or exterior use. These primers provide a barrier against moisture and help paint adhere to the wood surface more effectively.
Apply the primer according to the manufacturer’s instructions, ensuring complete coverage. Allow the primer to dry fully before applying the paint.
4. Choose a High-Quality Paint
Investing in a high-quality paint is crucial for painting wet wood. Look for paints that are specifically formulated for exterior use or for use on damp surfaces. These paints are designed to withstand moisture and provide long-lasting protection.
Consider opting for an acrylic or latex-based paint, as they are more resistant to moisture and offer better durability. Apply the paint in thin, even coats, allowing sufficient drying time between each coat.
5. Maintain Proper Ventilation
During the painting process, it’s important to ensure proper ventilation. Open windows and use fans to improve airflow, especially in areas where moisture may be trapped. Adequate ventilation helps the paint dry faster and prevents the growth of mold or mildew.
6. Monitor the Painted Surface
After painting wet wood, it’s essential to monitor the painted surface for any signs of moisture or paint failure. Regularly inspect the area for peeling, cracking, or discoloration. If any issues arise, address them promptly to prevent further damage.
In summary, achieving long-lasting results when painting wet wood requires proper assessment of moisture content, thorough surface preparation, the use of suitable primers and high-quality paints, adequate ventilation, and ongoing monitoring. By following these expert tips, you can ensure a professional finish that stands up to the challenges of wet wood surfaces.
FAQs
Can you paint wet wood?
No, it is not recommended to paint wet wood. The moisture content in the wood can prevent the paint from properly adhering to the surface and can lead to peeling or blistering. It is important to let the wood dry completely before painting.
How long does it take for wood to dry before painting?
The drying time for wood can vary depending on factors such as the type of wood, weather conditions, and the thickness of the wood. As a general rule, it is advisable to wait at least 24-48 hours for the wood to dry thoroughly before painting.
Should I prime wood before painting?
Priming wood before painting is highly recommended. A primer creates a smooth and even surface for the paint to adhere to, enhances the durability of the paint, and helps to prevent stains or bleed-through. It is an important step in achieving a professional and long-lasting paint finish on wood.
Conclusion
In conclusion, painting wet wood can be a risky endeavor. It is generally recommended to wait for the wood to dry completely before applying paint. Painting wet wood can lead to several issues such as poor adhesion, uneven coverage, and potential paint failure. Moisture trapped underneath the paint can cause the paint to crack, peel, or bubble over time. Additionally, painting wet wood may also prevent the paint from drying properly, resulting in a longer drying time and compromised finish. Therefore, it is best to ensure that the wood is thoroughly dry before beginning any painting project for optimal results.
