Painting wood without sanding is possible and can save you time and effort. With the right preparation and products, you can achieve a smooth and durable finish on your wooden surfaces. Whether you’re revamping furniture or refreshing trim, there are alternative methods to sanding that can still yield great results. In this guide, we will explore various techniques and tools that you can use to paint wood without sanding, allowing you to transform your space easily and efficiently.
Quick and Easy Wood Painting Methods
When it comes to giving your wooden furniture or surfaces a fresh, new look, painting is a popular choice. Not only does it enhance the aesthetic appeal of the wood, but it also helps protect it from wear and tear. If you’re looking for quick and easy methods to paint wood, we’ve got you covered. In this section, we’ll explore some simple techniques that will have your wood looking beautiful in no time.

1. Preparing the Wood Surface
Before you begin painting, it’s important to properly prepare the wood surface to ensure the best results. Start by cleaning the wood thoroughly with a mild detergent and water. Remove any dirt, grease, or grime that may be present. Once the wood is clean, sand it gently with fine-grit sandpaper to create a smooth surface for the paint to adhere to. Remember to wipe away any sanding dust before moving on to the next step.
2. Choosing the Right Paint
When selecting paint for your wood project, it’s essential to choose a type that is suitable for the surface and desired finish. Oil-based paints are typically more durable and provide a smoother finish, while latex paints are easier to clean up and have fewer fumes. Consider the specific needs of your project and select a paint that will meet those requirements.
3. Using a Primer
Applying a coat of primer before painting can significantly improve the adhesion and durability of the paint. Primer fills in any imperfections on the wood surface and creates a smooth, even base for the paint to adhere to. It also helps prevent the wood from absorbing too much paint, resulting in a more even finish. Be sure to choose a primer that is compatible with your chosen paint type.
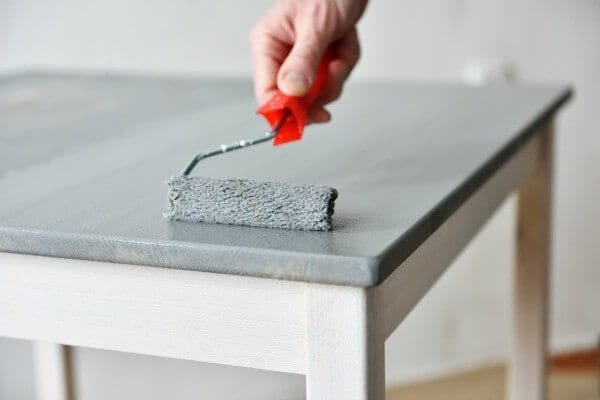
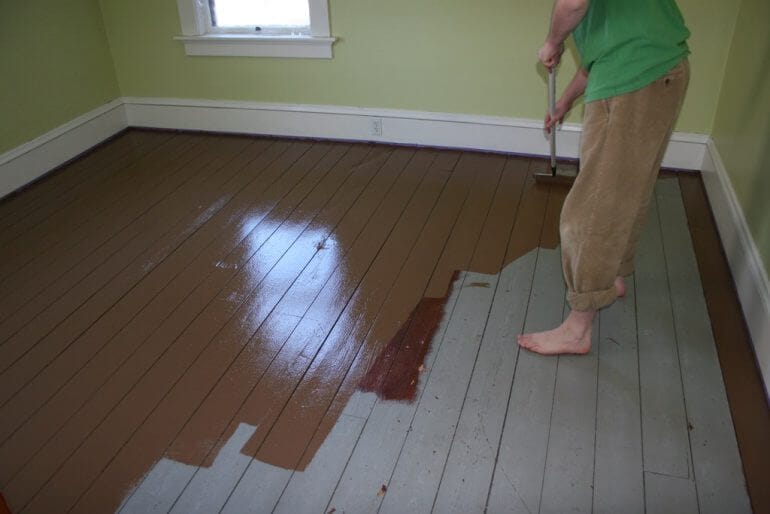
4. Applying the Paint
Now that your wood surface is prepped and primed, it’s time to apply the paint. Start by stirring the paint thoroughly to ensure an even consistency. Use a brush, roller, or sprayer to apply an even coat of paint, working with the grain of the wood. Avoid applying too thick of a coat, as this can lead to drips and uneven drying. Allow the first coat to dry completely before applying additional coats as needed.
5. Finishing Touches
Once the paint has dried, you can add any desired finishing touches to your wood project. This may include applying a clear protective coat, distressing the paint for a vintage look, or adding decorative accents. Be sure to follow the manufacturer’s instructions for any additional products or techniques you choose to use.
6. Cleaning Up
After you’ve completed your wood painting project, it’s essential to clean up properly. Dispose of any leftover paint or materials according to local regulations. Clean your brushes, rollers, or sprayers with the appropriate cleaning solution recommended for the type of paint you used. Store any leftover paint in a sealed container for future touch-ups or projects.
Summary
Painting wood can be a quick and easy way to transform the look of your furniture and surfaces. By properly preparing the wood, choosing the right paint and primer, applying the paint with care, and adding the finishing touches, you can achieve professional-looking results. Remember to clean up properly after your project to maintain the longevity of your painting tools. With these methods, you’ll be able to give your wood a fresh, new look in no time.
Sanding-Free Wood Painting Techniques
If you’re looking to give your wooden furniture or surfaces a fresh new look, painting is a great way to do it. However, the thought of sanding can be daunting and time-consuming. Luckily, there are sanding-free wood painting techniques that can help you achieve a smooth and professional finish without the need for sanding.
1. Clean and Prep: Before you start painting, it’s important to clean and prepare the wood surface properly. Remove any dirt, grease, or old paint using a mild detergent and water. If there are any rough patches or imperfections, you can use a putty knife to fill them in with wood filler.
2. Use a Primer: Primer helps to create a smooth surface and gives the paint something to adhere to. Look for a bonding primer specifically designed for use on wood surfaces. Apply the primer evenly using a paintbrush or a roller. Allow it to dry completely before moving on to the next step.
3. Choose the Right Paint: When it comes to choosing paint for wood surfaces, opt for a high-quality latex or oil-based paint. These types of paints provide better durability and coverage. Consider the finish you want – matte, satin, or gloss – and choose accordingly.
4. Apply Thin Coats: Instead of applying one thick coat of paint, it’s best to apply multiple thin coats. This helps to prevent drips and ensures a smooth, even finish. Use a paintbrush or a roller to apply the paint, working in long, smooth strokes. Allow each coat to dry before applying the next one.
5. Sand-Free Finishing Techniques: To achieve a smooth finish without sanding, you can try the following techniques:
- Wet Sanding: Wet sanding involves using a damp sponge or sanding block to smooth out the paint surface. Gently rub the surface in a circular motion, keeping it wet with water. This technique removes any imperfections and creates a smooth finish.
- Buffing: Buffing is another technique that can help to achieve a glossy finish without sanding. Use a buffing wheel or a soft cloth to gently rub the dried paint surface in circular motions. This helps to even out the paint and bring out its shine.
- Polishing: Polishing is similar to buffing but uses a polishing compound instead. Apply a small amount of the compound to a soft cloth and gently rub it onto the painted surface. This helps to smooth out any imperfections and gives the paint a polished look.
In summary, sanding-free wood painting techniques offer a quick and efficient way to revamp your wooden furniture and surfaces. By following proper preparation steps, using a primer, choosing the right paint, and applying thin coats, you can achieve a professional finish. Additionally, the use of wet sanding, buffing, and polishing techniques can help to further enhance the smoothness and shine of the painted surface. So, go ahead and give your wood a fresh new look without the hassle of sanding!
Tips for Painting Wood Surfaces without Sanding
Painting wood surfaces can be a time-consuming task, especially when it comes to sanding. Sanding is often necessary to remove old paint or varnish and create a smooth and even surface for painting. However, if you’re looking for a quicker and easier way to paint wood surfaces without sanding, there are some tips and techniques you can try. In this section, we’ll explore these tips to help you achieve a professional-looking paint finish without the hassle of sanding.
1. Clean and Prep the Surface
The first step in painting wood surfaces without sanding is to ensure that the surface is clean and free from dust, dirt, grease, and any loose debris. Use a mild detergent and warm water to clean the surface thoroughly. You can also use a degreaser or a trisodium phosphate (TSP) solution to remove any grease or stains.
2. Use a Primer
Priming the wood surface before painting is essential, as it helps the paint adhere better and provides a smooth and even base for the paint. Look for a high-quality primer that is specifically designed for wood surfaces. Apply the primer using a brush or roller and allow it to dry completely before proceeding to the next step.
3. Choose the Right Paint
When painting wood surfaces without sanding, it’s important to select the right type of paint. Look for paint that is specifically formulated for use on wood and provides good adhesion. Acrylic latex paint is a popular choice for painting wood surfaces, as it is durable and provides excellent coverage. You can also opt for enamel paint for a more durable finish.
4. Use Light Coats
Instead of applying a thick coat of paint all at once, it’s advisable to apply multiple light coats. This allows the paint to dry more quickly and reduces the chances of drips and uneven application. Allow each coat to dry completely before applying the next one.
5. Sand Between Coats
To achieve a smoother finish, you can sand the surface lightly between each coat of paint. Use a fine-grit sandpaper or sanding sponge to remove any imperfections or brush marks. Wipe away any dust with a damp cloth before applying the next coat.
6. Finishing Touches
Once you have applied the desired number of paint coats and achieved the desired finish, allow the final coat to dry completely. If desired, you can further enhance the durability and appearance of the painted wood surface by applying a clear topcoat or sealer. This will protect the paint from scratches and ensure its longevity.
By following these tips, you can save time and effort while still achieving a beautiful and professional-looking paint finish on your wood surfaces. Remember to clean and prep the surface, use a primer, choose the right paint, apply light coats, sand between coats, and add finishing touches. With these techniques, you can enjoy the benefits of painting without the need for extensive sanding.
Alternatives to Sanding before Painting Wood
When it comes to painting wood, sanding is often considered a necessary step to ensure a smooth and even surface. However, sanding can be time-consuming and messy, and it may not always be the best option for every project. Fortunately, there are alternatives to sanding that can still help you achieve a professional-looking finish. In this section, we will explore some of these alternatives and how they can be used effectively.
1. Chemical Stripping
Chemical stripping is a popular alternative to sanding for removing old paint or varnish from wood surfaces. It involves applying a chemical paint stripper to the surface, which softens the paint and allows it to be easily scraped off. Chemical stripping is particularly useful for intricate or delicate woodwork, as it can reach into crevices and corners that may be difficult to sand. However, it is important to follow safety precautions and use the appropriate protective gear when working with chemical strippers.
2. Heat Gun
Using a heat gun is another effective method for removing paint from wood without sanding. A heat gun produces a stream of hot air that can soften the paint, making it easy to scrape off with a putty knife or scraper. This method is particularly useful for larger surfaces or thick layers of paint. However, caution must be exercised as heat guns can generate high temperatures, and it is important to avoid overheating the wood or causing any damage.
3. Power Washing
If you are working with outdoor wood surfaces, such as decks or fences, power washing can be a great alternative to sanding. A power washer uses a high-pressure stream of water to remove dirt, grime, and loose paint from the surface. This method is quick and efficient, and it can save you a lot of time compared to sanding. However, it is important to use the appropriate pressure setting and nozzle to avoid damaging the wood.
4. Liquid Sandpaper
Liquid sandpaper, also known as deglosser, is a chemical solution that can be used to prepare wood surfaces for painting without the need for sanding. It works by dissolving the glossy surface of the wood, allowing the new paint to adhere better. Liquid sandpaper is particularly useful for small areas or intricate details that may be difficult to sand. However, it is important to carefully follow the instructions and proper safety precautions when using this product.
5. Fillers and Putties
If you are dealing with rough or uneven surfaces, fillers and putties can be used to smooth out imperfections before painting. These products can be applied to cracks, dents, or holes in the wood and then sanded down to create a smooth surface. Fillers and putties come in different formulations and drying times, so it is important to choose the right product for your specific needs.
6. Primer
Using a primer before painting can also help to minimize the need for sanding. A primer creates a smooth and even surface for the paint to adhere to, filling in any imperfections or unevenness in the wood. It can also help to prevent the paint from soaking into the wood, resulting in better coverage and a more professional finish. However, it is important to choose the appropriate primer for your project and follow the manufacturer’s instructions.
In summary, while sanding is typically the go-to method for preparing wood surfaces before painting, there are several alternatives available that can save you time and effort. Whether you choose chemical stripping, heat gun, power washing, liquid sandpaper, fillers and putties, or primer, it is important to carefully consider the specific requirements of your project and choose the method that best suits your needs. By exploring these alternatives, you can achieve a beautiful and long-lasting finish on your wood surfaces without the hassle of sanding.
Achieving a Smooth Finish on Wood without Sanding
When it comes to woodworking projects, achieving a smooth finish on wood is essential for a professional and polished look. Traditionally, sanding has been the go-to method for achieving a smooth surface, but it can be time-consuming and messy. Luckily, there are alternative techniques that can help you achieve a smooth finish on wood without the need for sanding. In this section, we will explore these techniques and how you can use them to get the desired results.
1. Choosing the Right Wood
The first step in achieving a smooth finish without sanding is to select the right type of wood for your project. Some woods naturally have a smoother grain and require less sanding to achieve a polished look. For example, maple, cherry, and walnut are known for their smooth texture and fine grain, making them great choices for projects where sanding is not desired. On the other hand, woods like oak and pine have a more pronounced grain that may require additional sanding to achieve a smooth finish.
2. Proper Wood Preparation
Before applying any finish, it is important to properly prepare the wood surface. This involves removing any dirt, debris, or old finishes that may affect the final outcome. Start by cleaning the wood with a mild detergent and water solution. Use a soft cloth or sponge to gently scrub the surface and remove any dirt or grime. If there are any old finishes present, you can use a paint stripper or chemical remover to strip them away. Once the surface is clean and free of any debris, rinse it thoroughly and allow it to dry completely.
3. Fill in Imperfections
If the wood surface has any imperfections such as cracks, dents, or holes, it is important to address them before applying the finish. One way to fill in these imperfections is by using a wood filler. Choose a filler that matches the color of the wood and apply it to the affected areas. Use a putty knife to smooth out the filler and remove any excess. Allow the filler to dry according to the manufacturer’s instructions, and then sand it lightly with fine-grit sandpaper to ensure a smooth and even surface.
4. Apply a Grain Filler
If you are working with a wood species that has an open grain, such as oak or mahogany, applying a grain filler can help achieve a smoother finish. Grain fillers are available in different colors and can be applied using a brush or a rag. Apply the filler in the direction of the wood grain, working it into the pores. Allow the filler to dry, and then use a scraper or sandpaper to remove the excess filler. This will fill in the open pores and create a smooth and even surface.
5. Use a Smoothing Plane
A smoothing plane is a woodworking tool that can be used to level and smooth the surface of the wood. It works by removing thin shavings of wood, leaving behind a smooth and polished surface. To use a smoothing plane, adjust the blade to a shallow cutting depth and hold the plane at a slight angle to the wood surface. Push the plane forward in smooth, overlapping strokes, taking care not to press too hard. Continue planing until the entire surface is smooth and free of any imperfections.
6. Apply a Topcoat
Once you have achieved a smooth surface, it is time to apply a topcoat to protect and enhance the wood. There are various types of topcoats available, including lacquer, polyurethane, and varnish. Choose a topcoat that suits your project and apply it according to the manufacturer’s instructions. Use a brush or a sprayer to evenly coat the wood surface, working in the direction of the wood grain. Allow the topcoat to dry completely between coats, and apply multiple coats for added protection and durability.
Summary
Achieving a smooth finish on wood without sanding is possible with the right techniques and tools. By choosing the right type of wood, properly preparing the surface, and using alternative methods such as wood fillers and smoothing planes, you can achieve a professional-looking finish. Remember to apply a topcoat to protect and enhance the wood’s beauty. With these methods, you can save time and effort while still achieving excellent results.
FAQs
Can you paint wood without sanding?
Yes, it is possible to paint wood without sanding, but it is generally recommended to sand the surface first for better adhesion and smoother finish. If you choose to skip sanding, make sure to clean the wood thoroughly and apply a primer that is specifically designed to adhere to glossy or smooth surfaces.
What kind of paint should I use on wood?
For painting wood, it is best to use a paint that is specifically formulated for wood surfaces. Latex or acrylic-based paints are commonly used for indoor projects, while oil-based paints are more suitable for outdoor applications. Choose a paint type that suits your project and follow the manufacturer’s instructions for best results.
Do I need to use a primer before painting wood?
Using a primer before painting wood is highly recommended. Primer helps to seal the surface, improve paint adhesion, and prevent stains from bleeding through the paint. It also provides a smoother base for the paint to adhere to, ensuring a more uniform finish. Make sure to choose a primer that is compatible with both the type of wood and the paint you intend to use.
Conclusion
In conclusion, painting wood without sanding is indeed possible, thanks to the availability of specialized products in the market. These products, such as primers and paints with adhesive properties, can adhere to the surface of the wood without the need for sanding. This process saves time and effort, making it a convenient option for those looking to update the look of their wooden furniture or surfaces. However, it is important to note that while sanding may be skipped, proper cleaning and preparation of the wood is still necessary to ensure the best possible results. So, go ahead and transform your wood without the hassle of sanding!
