If you’re looking to enhance the appearance of your woodworking projects, sanding veneer wood can be a great way to achieve a smooth, polished finish. Sanding veneer wood helps to remove imperfections, smooth out rough edges, and prepare the surface for staining or painting. By using the right techniques and tools, you can sand veneer wood effectively without damaging it. In this guide, we’ll walk you through the steps to sand veneer wood and provide you with helpful tips for a successful outcome.

Benefits of Sanding Veneer Wood: A Guide to Achieving a Smooth Finish
Veneer wood is a popular choice for furniture and cabinetry due to its beauty and durability. However, to achieve a smooth and flawless finish, sanding is a critical step in the process. In this guide, we will explore the benefits of sanding veneer wood and provide you with useful tips to help you achieve the best results.

1. Enhances the Appearance
Sanding veneer wood not only helps to remove any imperfections on the surface but also enhances its overall appearance. The process of sanding helps to smooth out the wood surface, allowing the natural grain patterns to shine through. It removes any rough patches or blemishes, resulting in a more refined and elegant look.
2. Improves Adhesion
One of the primary benefits of sanding veneer wood is that it improves adhesion. The smooth surface created by sanding allows for better adherence of stains, sealants, or paint. Without proper sanding, these finishes may not adhere well, resulting in a less durable and less attractive end result. By sanding the surface, you create a better bond between the wood and the finish, ensuring longevity and visual appeal.
3. Evens Out the Surface
Veneer wood often has slight variations in thickness, which can lead to an uneven surface. Sanding helps to level out these variations and create a consistent surface. This is particularly important when veneer wood is used for tabletops or other surfaces where a smooth and level finish is desired. By sanding the surface, you can eliminate any unevenness and create a uniform appearance.
4. Removes Scratches and Stains
Over time, veneer wood can develop scratches, stains, or other marks that mar its appearance. Sanding can effectively remove these imperfections and restore the wood to its original beauty. By sanding the surface, you can eliminate shallow scratches and reduce the visibility of deeper ones. It also helps to remove any stains or discoloration, giving the wood a fresh and clean look.
5. Preps the Wood for Finishing
Sanding is an essential step in preparing veneer wood for finishing. Whether you plan to stain, seal, or paint the wood, sanding ensures that the surface is properly prepped to receive the finish. Sanding helps to smooth out the wood’s surface, creating a clean and uniform canvas for the finish. It also opens up the wood’s pores, allowing for better absorption of the finish, resulting in a more even and long-lasting result.
6. Achieves a Professional Finish
Lastly, sanding veneer wood is crucial for achieving a professional-quality finish. Whether you are a DIY enthusiast or a professional woodworker, sanding is an essential step for ensuring that your final product looks polished and well-crafted. It helps to eliminate any imperfections, enhances the wood’s natural beauty, and creates a smooth and flawless surface that is sure to impress.
In summary, sanding veneer wood offers numerous benefits in terms of enhancing appearance, improving adhesion, leveling the surface, removing scratches and stains, prepping the wood for finishing, and achieving a professional finish. By dedicating time and effort to sanding, you can transform your veneer wood projects into stunning pieces that stand the test of time.
Step-by-Step Guide: How to Sand Veneer Wood for Flawless Results
When it comes to woodworking, sanding is an essential step to achieve a flawless finish. If you’re working with veneer wood, it requires special care and attention during the sanding process. Veneer wood is a thin layer of real wood that is applied to a base material, often plywood or particleboard. Sanding veneer wood requires a delicate touch to avoid damaging or sanding through the thin layer of wood. In this section, we will provide you with a step-by-step guide on how to sand veneer wood for flawless results.
Step 1: Gather the Necessary Tools and Materials
Before you begin the sanding process, it’s important to gather all the necessary tools and materials. Here’s a list of what you’ll need:
- Sanding block or orbital sander
- Sandpaper in various grits (start with a finer grit, such as 180 or 220)
- Soft-bristle brush or vacuum cleaner
- Clean, lint-free cloth
Step 2: Prepare the Work Area
Next, you’ll want to prepare your work area to ensure a clean and organized space. Clear away any debris or objects that could interfere with the sanding process. Cover any nearby surfaces or furniture to protect them from dust and scratches.
Step 3: Start with a Fine Grit Sandpaper
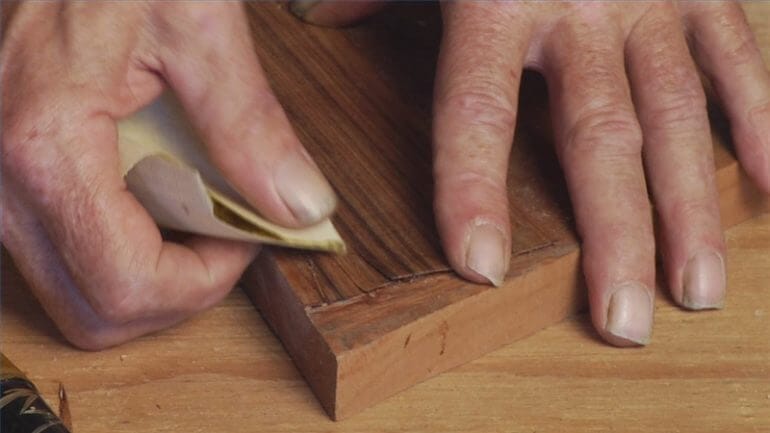
Begin the sanding process by using a sanding block or orbital sander with a fine grit sandpaper (around 180 or 220 grit). Gently sand the surface of the veneer wood in the direction of the grain. Be careful not to apply too much pressure or linger in one spot for too long, as this can cause damage to the veneer.
Step 4: Smooth Out Imperfections
If there are any imperfections, such as scratches or dents, you can use a slightly coarser grit sandpaper to smooth them out. Gradually work your way up to a finer grit sandpaper, always sanding in the direction of the wood grain.
Step 5: Remove Dust and Residue
After sanding, use a soft-bristle brush or vacuum cleaner to remove any dust and residue from the surface of the veneer wood. It’s essential to clean the surface thoroughly before progressing to the next step.
Step 6: Sand with Finer Grits
Now that you have a smooth surface, you can proceed to sand with finer grits to achieve a polished finish. Gradually increase the grit size of the sandpaper, always sanding in the direction of the grain. This will help to remove any remaining scratches and create a flawless surface.
Step 7: Wipe Clean and Inspect
After sanding with the finer grits, wipe the surface clean with a lint-free cloth. Take a close look at the veneer wood to inspect for any imperfections or uneven areas. If needed, lightly sand those spots again with a fine-grit sandpaper.
Step 8: Apply Finish
Once you are satisfied with the smoothness of the veneer wood surface, you can apply a finish of your choice, such as stain, varnish, or paint. Follow the manufacturer’s instructions for the specific finish you are using, and allow the finish to dry completely before using or handling the veneer wood.
Step 9: Final Inspection
In summary, sanding veneer wood requires patience and attention to detail. By following this step-by-step guide, you can achieve flawless results and preserve the beauty of the veneer wood. Remember to always sand in the direction of the grain, use progressively finer grits of sandpaper, and take your time to ensure a smooth and uniform surface. With the right tools and techniques, you’ll be able to create stunning woodworking projects with veneer wood.
Choosing the Right Sandpaper for Veneer Wood Sanding: Tips and Recommendations
If you are working with veneer wood and need to sand it down, choosing the right sandpaper is essential to achieve a smooth and flawless finish. Sanding veneer wood requires a delicate touch, as it is a thin layer of wood that is glued onto another surface. Using the wrong sandpaper can result in damage to the wood or uneven sanding. In this section, we will provide you with some helpful tips and recommendations to ensure you select the right sandpaper for veneer wood sanding.
1. Grit Size
The first thing to consider when choosing sandpaper for veneer wood sanding is the grit size. Grit size refers to the coarseness of the sandpaper and determines how much material it can remove. For sanding veneer wood, it is recommended to start with a finer grit size, such as 120 or 150. Finer grit sizes are less aggressive and will help prevent damage to the delicate veneer surface. As you progress through the sanding process, you can gradually move to a slightly coarser grit size if needed.
2. Material
The material of the sandpaper also plays a role in determining its effectiveness for veneer wood sanding. There are two main types of sandpaper materials: aluminum oxide and silicon carbide. Aluminum oxide sandpaper is more commonly used for woodworking projects, including veneer wood sanding. It is durable and provides good results. Silicon carbide sandpaper, on the other hand, is often used for sanding harder materials and may be too aggressive for veneer wood. It is best to stick with aluminum oxide sandpaper for veneer wood sanding.
3. Backing Type
The backing type of the sandpaper refers to the material used on the backside of the abrasive. There are three common types of sandpaper backing: paper, cloth, and film. For veneer wood sanding, paper-backed sandpaper is the most suitable option. It is flexible, affordable, and provides good adhesion. Cloth-backed sandpaper is more suitable for heavy-duty sanding tasks, while film-backed sandpaper is typically used for wet sanding applications.
4. Choosing the Right Form
In addition to considering the grit size, material, and backing type, it is also important to select the right form of sandpaper for your veneer wood sanding needs. Sandpaper can come in sheets, rolls, or discs. Sheets are ideal for smaller projects or hand sanding, while rolls are convenient for larger areas or power sanding. Discs are commonly used with power sanders and provide efficient sanding. Choose the form that suits your project requirements and tools.
5. Quality and Durability
Lastly, it is crucial to choose sandpaper that is of high quality and durability. Cheaper sandpaper may wear out quickly or not provide consistent results. Look for reputable brands that specialize in woodworking products. Consider reading reviews or seeking recommendations from experienced woodworkers to ensure you invest in sandpaper that will last and deliver satisfactory sanding results.
In summary, when it comes to sanding veneer wood, selecting the right sandpaper is crucial for achieving a smooth and flawless finish. Remember to choose a finer grit size, opt for aluminum oxide sandpaper, select paper-backed sandpaper, choose the appropriate form, and prioritize quality and durability. By following these tips and recommendations, you can ensure a successful veneer wood sanding project.
Common Mistakes to Avoid When Sanding Veneer Wood
Veneer wood is a popular choice for furniture and other woodworking projects due to its versatility and attractive finish. However, sanding veneer wood requires a delicate touch, as it is more delicate and thin compared to solid wood. To ensure the best results and prevent damage, it is important to avoid these common mistakes when sanding veneer wood:
1. Using Too Rough Grit Sandpaper
One of the biggest mistakes when sanding veneer wood is using sandpaper with a grit that is too rough. Veneer is thin and fragile, so using a coarse grit sandpaper can easily cause damage and remove too much of the veneer layer. It is recommended to start with a fine grit sandpaper, such as 220 or higher, and gradually work your way up to coarser grits if needed.
2. Sanding Against the Grain
Sanding against the grain is another common mistake that can lead to unwanted scratches and damage to the veneer wood. It is important to always sand in the direction of the wood grain to achieve a smooth and even surface. Sanding against the grain can cause the veneer to lift or chip, ruining the appearance of the piece.
3. Applying Too Much Pressure
When sanding veneer wood, it is crucial to apply gentle and even pressure. Applying too much pressure can result in uneven sanding and potentially damage the thin veneer layer. Instead, let the sandpaper do the work and apply light pressure, allowing the grit to gradually smooth out the surface.
4. Neglecting to Use a Sanding Block
A sanding block is a valuable tool when sanding veneer wood, as it helps distribute pressure evenly and prevents the sandpaper from digging into the wood. Neglecting to use a sanding block can lead to inconsistent sanding and potential damage to the veneer. Invest in a sanding block with a soft or flexible surface, such as cork or foam, to ensure smooth and even sanding.
5. Skipping Grit Progression
Skipping grit progression is a common mistake that can result in an uneven and rough surface. It is important to start with a finer grit sandpaper and gradually work your way up to coarser grits, as this allows for a smoother and more polished finish. Each grit level helps to refine the surface and remove previous scratch marks, resulting in a flawless end result.
6. Not Cleaning the Surface Properly
Before sanding veneer wood, it is essential to clean the surface thoroughly. Dust, dirt, and other debris can get trapped in the sandpaper and cause scratches or damage to the veneer. Use a tack cloth or a soft brush to remove any particles from the surface before sanding. Additionally, ensure that the work area is clean to prevent any debris from contaminating the surface during the sanding process.
In summary, when sanding veneer wood, it is important to take extra care to avoid common mistakes that can damage the delicate veneer layer. By using the correct sandpaper grit, sanding with the grain, applying gentle pressure, using a sanding block, following a grit progression, and properly cleaning the surface, you can achieve a smooth and polished finish without compromising the integrity of the veneer wood.
Expert Tips for Achieving a Professional-Looking Veneer Wood Finish
When it comes to woodworking, achieving a professional-looking veneer wood finish can make all the difference in the final product. Veneer wood is a thin layer of real wood that is applied to a base material, such as plywood, to create a high-end appearance. To help you achieve a flawless finish, we have compiled a list of expert tips that will take your veneer wood projects to the next level.
1. Choose High-Quality Veneer
The first step in achieving a professional veneer wood finish is to select high-quality veneer. Look for veneer that is free of defects, such as knots or cracks, and has a consistent grain pattern. This will ensure a smooth and beautiful finish.
2. Proper Surface Preparation
Before applying veneer, it is important to properly prepare the surface. Start by sanding the base material to ensure it is smooth and free of imperfections. Remove any dust or debris with a damp cloth before proceeding.
3. Use the Right Adhesive
Choosing the right adhesive is crucial for achieving a professional veneer wood finish. Opt for a high-quality wood adhesive that is specifically designed for veneer applications. Follow the manufacturer’s instructions for proper application and allow adequate drying time.
4. Apply Veneer with Care
When applying the veneer, take your time and work carefully to ensure a precise placement. Start by applying adhesive to both the base material and the back of the veneer. Use a roller or a veneer scraper to press the veneer onto the surface, starting from the center and working your way outwards. This will help to eliminate air bubbles and ensure a smooth finish.
5. Trim Excess Veneer
Once the veneer is applied, trim any excess using a sharp utility knife or veneer saw. Take care to make clean and precise cuts along the edges for a professional-looking finish. Use sandpaper to smooth any rough edges for a seamless appearance.
6. Finish with a Protective Coat
To enhance the beauty and durability of your veneer wood project, finish it with a protective coat. Choose a clear finish that is compatible with the type of veneer you are using. Apply multiple thin coats, sanding between each coat for a smooth and glossy finish.
7. Pay Attention to Detail
Lastly, paying attention to the small details can make a big difference in achieving a professional-looking veneer wood finish. Check for any imperfections, such as bubbles or rough spots, and fix them before applying the final finish. Take your time and be meticulous in your work for the best results.
By following these expert tips, you can elevate your woodworking projects and achieve a professional-looking veneer wood finish. Remember to choose high-quality veneer, prepare the surface properly, use the right adhesive, apply the veneer with care, trim excess veneer, finish with a protective coat, and pay attention to detail. With practice and patience, you will be able to master the art of veneer woodworking and create stunning pieces that showcase your craftsmanship.
FAQs
Can you sand veneer wood?
Yes, veneer wood can be sanded, but it requires extra care due to its thin layer. Use a fine-grit sandpaper and apply gentle pressure to avoid damaging the veneer. It is advisable to consult with a professional or follow manufacturer’s instructions for best results.
Conclusion
In conclusion, sanding veneer wood can be a delicate process but with the right techniques, it can be done effectively. By carefully selecting the appropriate grit sandpaper and using light, even strokes, you can achieve a smooth and polished finish on your veneer wood surface.
Remember to always start with a lower grit sandpaper to remove any imperfections and gradually work your way up to finer grits for a flawless result. Additionally, be cautious not to sand too aggressively as it can damage the thin veneer layer.
With proper sanding techniques and patience, you can transform your veneer wood into a stunning and refined piece that will showcase its natural beauty. So, go ahead and embark on your sanding journey with confidence!
