If you have weathered wood that has lost its luster or color, staining can be a great solution to revive its appearance. Staining weathered wood not only enhances its natural beauty but also provides protection against further damage from the elements. Whether it’s a deck, fence, or furniture, staining can bring new life to your weathered wood and make it look as good as new. In this article, we will explore the steps involved in staining weathered wood and provide tips to ensure a successful and long-lasting finish.

Reviving Old Wood: Techniques for Staining Weathered Surfaces
If you have weathered or aged wood surfaces that have lost their charm and appeal, you might be wondering how to bring them back to life. Staining is a great way to revive old wood and enhance its natural beauty. In this article, we will explore some effective techniques for staining weathered surfaces, allowing you to transform your worn-out wood into a stunning focal point.

1. Prepare the Surface
Before you begin staining, it is important to properly prepare the surface. Start by cleaning the wood to remove any dirt, debris, or previous coatings. Use a mild detergent and water solution, scrubbing gently with a soft brush. Rinse thoroughly and allow the wood to dry completely.
Once the wood is clean and dry, sand the surface to smooth out any rough areas or imperfections. Start with a coarse-grit sandpaper and gradually move to finer grits for a smooth finish. Be sure to remove all dust particles after sanding.
2. Choose the Right Stain
Choosing the right stain is essential for achieving the desired results. Consider the type of wood you are working with and the final look you want to achieve. There are various types of stains available, including oil-based, water-based, gel, and penetrating stains.
If you want to highlight the natural grain and texture of the wood, opt for a transparent or semi-transparent stain. For a more opaque finish, choose a solid color stain. Test the stain on a small, inconspicuous area of the wood to ensure you are happy with the color and consistency before applying it to the entire surface.
3. Apply the Stain
Now that your surface is prepared and you have chosen the right stain, it’s time to apply it. Start by stirring the stain thoroughly to ensure an even distribution of pigments. Use a brush, roller, or sprayer to apply the stain, depending on the size and intricacy of the wood surface.
Apply the stain in the direction of the wood grain, using long, smooth strokes. Work in small sections at a time to prevent the stain from drying too quickly. Avoid overlapping strokes to maintain an even color throughout the surface.
After applying the stain, allow it to penetrate the wood for the recommended amount of time specified by the manufacturer. This will ensure that the stain fully absorbs into the wood fibers and creates a durable, long-lasting finish.
4. Seal and Protect
To protect your newly stained wood and prolong its beauty, it is important to seal it. Choose a clear, exterior-grade sealer that is compatible with the type of stain you used. Apply the sealer using a brush or roller, following the manufacturer’s instructions.
The sealer will provide an additional layer of protection against UV rays, moisture, and other environmental factors that can damage the wood. It will also enhance the color and sheen of the stain, giving your wood a polished, finished look.
5. Maintenance and Care
Proper maintenance and care will help your stained wood surfaces retain their beauty and longevity. Regularly clean the wood with a mild detergent and water solution to remove dirt and grime. Avoid using harsh chemicals or abrasive cleaners that can damage the stain.
If you notice any signs of wear or fading, you can reapply a thin coat of stain and sealer to rejuvenate the wood’s appearance. Be sure to follow the same preparation and application steps mentioned earlier to ensure a seamless finish.
Summary
Reviving old wood surfaces is possible with the right techniques for staining weathered surfaces. Start by preparing the wood and choosing the appropriate stain. Apply the stain using smooth, even strokes, and allow it to penetrate the wood fibers. Seal the stained wood with a clear sealer for added protection and a finished look. With proper maintenance and care, your stained wood surfaces will continue to showcase their natural beauty for years to come.
Transforming Weathered Wood: A Guide to Staining and Renewing
Wood is a timeless and versatile material that adds warmth and character to any space. However, over time, exposure to the elements can take a toll on its appearance, causing wood to become weathered and worn. If you have weathered wood that is in need of a refresh, staining and renewing the surface can bring it back to life. In this guide, we will provide you with step-by-step instructions on how to transform weathered wood through the staining process.
1. Assess the Condition of the Wood
Before you begin the staining process, it is important to assess the condition of the wood. Look for signs of damage such as cracks, splintering, or rot. If the wood is severely damaged, it may require repair or replacement before staining. Minor imperfections can often be addressed during the staining process.
2. Prepare the Wood Surface
Proper preparation is key to achieving a successful staining result. Start by cleaning the wood surface to remove any dirt, grime, or mildew. Use a mild detergent and scrub the surface with a stiff brush. Rinse thoroughly and allow the wood to dry completely before moving on to the next step.
If the wood surface has any existing stain or finish, you will need to strip it off before applying a new stain. Use a wood stripper and follow the manufacturer’s instructions. Once the old finish is removed, sand the surface gently to smooth out any rough areas.
3. Choose the Right Stain
When selecting a stain, consider the type of wood you are working with and the desired end result. There are various types of stains available, including oil-based, water-based, and gel stains. Oil-based stains provide rich color and protection, while water-based stains offer quick drying times and easy cleanup. Gel stains are ideal for vertical surfaces as they do not drip or run.
Additionally, consider the opacity of the stain. Transparent stains allow the natural grain and texture of the wood to show through, while semi-transparent and solid stains provide more coverage. Test the stain on a small inconspicuous area of the wood to ensure it achieves the desired color and appearance.
4. Apply the Stain
Before applying the stain, protect the surrounding area from potential drips or spills by using drop cloths or plastic sheets. Stir the stain thoroughly to ensure an even consistency.
Using a brush or a cloth, apply the stain in the direction of the wood grain. Work in small sections, ensuring even coverage. Avoid applying the stain too thickly, as it may lead to blotching or uneven drying. Allow the stain to penetrate the wood for the recommended amount of time stated by the manufacturer.
5. Wipe off Excess Stain
After the stain has had time to penetrate the wood, use a clean cloth to wipe off any excess stain. Wipe in the direction of the wood grain to avoid streaking or smudging. Removing excess stain helps to prevent an uneven finish and allows the wood to fully absorb the stain.
6. Allow the Stain to Dry and Cure
Once you have wiped off the excess stain, allow the wood to dry completely. The drying time may vary depending on the type of stain and environmental conditions. Follow the manufacturer’s instructions for the recommended drying time.
After the stain has dried, it is important to allow it to cure fully before subjecting the wood to heavy use or exposing it to moisture. Curing time can range from a few days to a couple of weeks, depending on the type of stain. Be sure to check the product label for specific curing instructions.
7. Apply a Protective Finish
To enhance the longevity and durability of the stained wood, consider applying a protective finish. A clear varnish or polyurethane coating can help to seal the wood and protect it from moisture, UV rays, and everyday wear and tear.
Apply the protective finish according to the manufacturer’s instructions, using a brush or a clean cloth. Allow the finish to dry and cure before using or installing the wood.
8. Maintain and Enjoy
With proper maintenance and care, your newly stained wood can maintain its beauty for years to come. Regularly clean the surface with a mild detergent and water to remove dirt and grime. Avoid using harsh chemicals or abrasive cleaners that can damage the stain or finish.
Periodically inspect the wood for signs of wear or damage and touch up
4. Fresh Color for Weathered Wood: Tips and Tricks for Staining
Weathered wood can add character and charm to any outdoor space, but over time, it can become dull and faded. If you’re looking to breathe new life into your weathered wood, staining is a great solution. With the right tips and tricks, you can achieve a fresh and vibrant color that will make your wood look brand new. In this section, we will explore the process of staining weathered wood, from preparation to application.
1. Assess the Condition of the Wood
Before you start staining, it’s important to assess the condition of the weathered wood. Look for any signs of rot, mold, or mildew. If you notice any of these issues, you’ll need to address them before applying stain. Use a pressure washer or a bleach solution to clean the wood and remove any dirt or debris.
2. Sand the Surface
After cleaning the wood, sanding is the next step. This helps to remove any remaining dirt or old stain, and also creates a smooth surface for the new stain to adhere to. Use a medium-grit sandpaper and sand in the direction of the wood grain. Be sure to sand evenly and remove any rough spots or splinters.
3. Choose the Right Stain
Selecting the right stain is crucial for achieving the desired color and protection for your weathered wood. There are two main types of stains: oil-based and water-based. Oil-based stains penetrate deep into the wood and provide long-lasting protection. Water-based stains are easier to clean up and have less odor. Consider the look you want to achieve and the level of protection needed before making your choice.
4. Test the Color
Before applying the stain to the entire surface, it’s important to test the color on a small, inconspicuous area of the wood. This will give you an idea of how the stain will look once applied. Apply a small amount of stain and let it dry completely. Assess the color and make any adjustments if necessary.
5. Apply the Stain
Once you’ve chosen the right stain and tested the color, you can begin the application process. Use a brush, roller, or sprayer to apply the stain evenly to the wood. Work in small sections, and be sure to follow the manufacturer’s instructions for drying time and additional coats. It’s important to apply the stain evenly and avoid any drips or puddles.
6. Seal the Wood
After the stain has dried, it’s recommended to seal the wood to provide additional protection and enhance the color. There are various sealants available, such as polyurethane or varnish. Apply the sealant according to the manufacturer’s instructions, making sure to cover the entire surface of the wood.
7. Maintain and Reapply
To keep your weathered wood looking fresh and vibrant, regular maintenance is key. This may include cleaning the wood periodically and reapplying stain and sealant as needed. By following a maintenance routine, you can prolong the life of your stained wood and enjoy its beauty for years to come.
In summary, staining weathered wood can transform its appearance and give it a fresh and vibrant color. By assessing the condition of the wood, sanding the surface, choosing the right stain, testing the color, applying the stain evenly, sealing the wood, and maintaining it properly, you can achieve long-lasting results. So, why wait? Revive your weathered wood with a fresh coat of stain and enjoy the beauty it adds to your outdoor space.
Enhancing Outdoor Spaces: Staining Solutions for Weathered Wood
Outdoor spaces are an essential part of any home, offering a place to relax, entertain, and enjoy the beauty of nature. However, over time, the harsh elements can take a toll on wood surfaces, leaving them weathered and worn. Fortunately, there are staining solutions available that can bring new life to weathered wood, enhancing the beauty and durability of outdoor spaces.
1. Understanding Weathered Wood
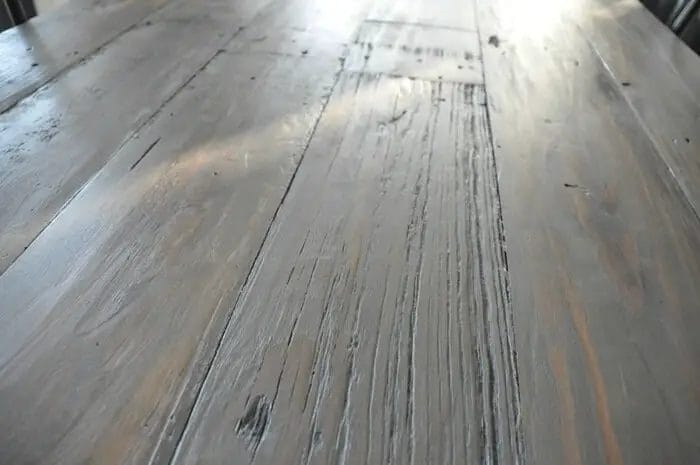
Before diving into staining solutions, it’s important to understand what weathered wood is and why it occurs. Weathered wood typically refers to wood that has been exposed to moisture, sunlight, and other environmental factors for an extended period. Over time, this exposure can cause the wood to fade, develop a grayish appearance, and even suffer from rot and decay.
2. The Benefits of Staining Weathered Wood
Staining weathered wood offers numerous benefits that can transform your outdoor spaces. Here are some key advantages:
- Restores Color: Stains are available in a wide range of colors, allowing you to restore and enhance the natural beauty of the wood.
- Protects Against Further Damage: Stains provide a protective barrier against moisture, UV rays, and other elements, helping to prevent future weathering and decay.
- Improves Durability: By penetrating the wood fibers, stains can strengthen the structure of the wood, making it more resistant to cracking, splitting, and warping.
- Enhances Aesthetics: A freshly stained outdoor space can instantly elevate its visual appeal, creating a welcoming and inviting atmosphere for you and your guests.
3. Choosing the Right Stain
When it comes to staining weathered wood, choosing the right stain is crucial. Here are a few factors to consider:
- Type of Wood: Different wood species may require specific types of stains to achieve the desired results. Research the recommended stains for your particular wood type.
- Desired Color: Stains come in a variety of hues, from natural wood tones to vibrant colors. Take into account your desired aesthetic and how it complements your outdoor space.
- Transparency: Stains can have different levels of transparency, ranging from transparent to solid. Transparent stains allow the natural wood grain to show through, while solid stains provide a more opaque finish.
- Weather Resistance: Consider the climate and weather conditions in your area. Opt for a stain that offers excellent weather resistance to ensure long-lasting protection.
4. Steps for Staining Weathered Wood
Now that you have selected the right stain, it’s time to start the staining process. Here are the steps to follow:
- Clean the Wood: Before staining, thoroughly clean the weathered wood surfaces to remove dirt, debris, and any existing stain or finish.
- Prepare the Surface: Sand the wood to create a smooth and even surface. This step also helps the stain to penetrate the wood fibers effectively.
- Apply the Stain: Use a brush, roller, or spray to apply the stain evenly across the wood surface. Follow the manufacturer’s instructions for application and drying time.
- Allow for Drying and Curing: Give the stain ample time to dry and cure before using the outdoor space or exposing it to moisture or heavy traffic.
- Apply a Sealer (Optional): For added protection, consider applying a sealer over the stained wood. This will enhance the stain’s durability and longevity.
5. Maintenance Tips for Stained Wood
To keep your stained wood looking its best, regular maintenance is necessary. Here are some tips to help prolong the life of your stained outdoor spaces:
- Regular Cleaning: Remove dirt, leaves, and other debris from the wood surface regularly to prevent staining and deterioration.
- Annual Inspections: Check for any signs of wear, damage, or discoloration. Address any issues promptly to prevent further damage.
- Reapply Stain as Needed: Over time
FAQs
Can you stain weathered wood?
Yes, you can stain weathered wood. However, it is important to prepare the wood properly before staining by cleaning and sanding it to remove any dirt or previous coatings. Additionally, using a wood conditioner or pre-stain treatment can help the stain penetrate more uniformly into the wood surface.
How long does it take for wood stain to dry?
The drying time for wood stain can vary depending on several factors such as the type of stain, temperature, humidity, and ventilation. In general, most wood stains dry to the touch within a few hours. However, it is recommended to wait 24-48 hours before applying a second coat or any finishes to ensure proper drying and curing.
Can you apply a clear coat over stained wood?
Yes, you can apply a clear coat over stained wood to protect and enhance the appearance of the stain. After the stain has dried, you can use a clear varnish, polyurethane, or lacquer to provide a protective layer. Make sure to follow the manufacturer’s instructions and apply the clear coat in thin, even coats for best results.
Conclusion
In conclusion, the answer is yes, you can stain weathered wood. Staining weathered wood can help revive and enhance its beauty while providing protection from further damage. By removing dirt, grime, and any previous finishes, you can prepare the wood for staining. Using a quality wood stain that is suitable for outdoor use will ensure long-lasting results.
Remember to follow the manufacturer’s instructions for application and drying times. Additionally, it is essential to clean and maintain the stained wood regularly to preserve its appearance and durability. With proper care and attention, staining weathered wood can bring new life to your outdoor furniture, deck, or any other weathered wooden structure.