Yes, oil paint can be used on wood surfaces to create beautiful and durable finishes. Applying oil paint on wood offers several advantages, including its ability to provide a smooth and glossy finish, enhanced color vibrancy, and long-lasting durability.
Whether you are refinishing furniture, painting wooden crafts, or reviving the beauty of your wood cabinets, oil paint is a great choice. With proper surface preparation and application techniques, you can achieve stunning results and protect your wood surfaces for years to come.


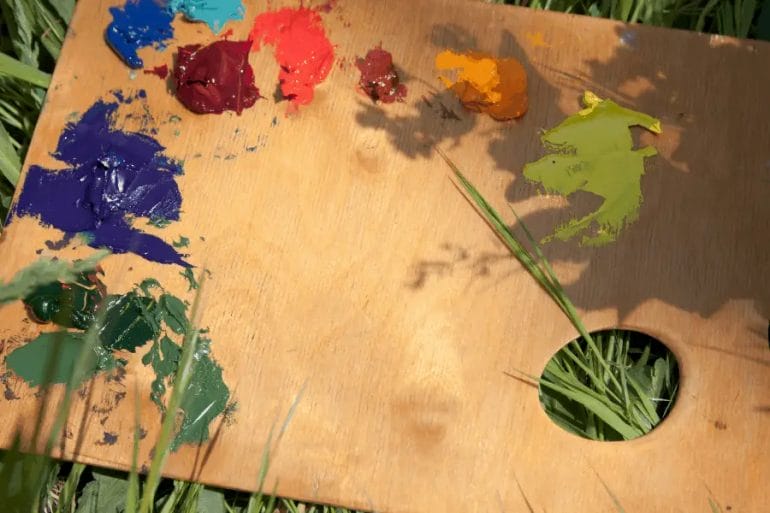
1. Can you use oil paint on wood?
When it comes to painting on wood, there is often confusion about whether oil paint can be used. In this section, we will explore the question of whether oil paint can be applied directly to wood surfaces.
1.1. Understanding oil paint
Oil paint is a type of paint that consists of pigment particles suspended in an oil binder, typically linseed oil. This combination creates a thick, rich paint that can be manipulated and blended easily. It is known for its vibrant colors and long drying time.
1.2. Preparing the wood surface
Before applying oil paint to wood, it is important to properly prepare the surface to ensure good adhesion and longevity of the painting. This may involve sanding the wood to create a smooth surface, removing any existing paint or varnish, and applying a primer specifically designed for oil-based paints.
1.3. Benefits of using oil paint on wood
Using oil paint on wood offers several advantages. Firstly, oil paint provides a durable and long-lasting finish that can withstand the test of time. The slow drying time allows for easy blending and layering of colors, resulting in a rich and textured painting. Additionally, oil paint offers a wide range of colors with excellent color retention.
1.4. Challenges of using oil paint on wood
While oil paint can be successfully used on wood, there are some challenges to consider. The drying time of oil paint can be lengthy, which means you will have to wait for the paint to fully dry before applying additional layers or varnish. Additionally, oil paint can be toxic and emit strong fumes, so it is important to work in a well-ventilated area and take appropriate safety precautions.
1.5. Proper application techniques
When applying oil paint to wood, it is important to use proper techniques for the best results. This includes using a brush or palette knife to apply the paint, ensuring even coverage and avoiding drips or runs. It is also advisable to work in thin layers, allowing each layer to dry before applying the next.
1.6. Varnishing and protecting the painting
Once the oil paint has fully dried, it is recommended to protect the painting by applying a varnish. Varnish not only enhances the appearance of the painting but also provides a protective layer against dust, moisture, and UV damage. It is important to choose a varnish specifically designed for oil paintings.
Pros and Cons of Using Oil Paint on Wood
Oil paint is a popular choice for artists and craftsmen who work with wood due to its unique qualities and versatility. However, like any medium, there are both pros and cons to using oil paint on wood. In this section, we will explore the advantages and disadvantages of using oil paint on wood surfaces.
Pros of Using Oil Paint on Wood
- Durability: One of the key advantages of using oil paint on wood is its durability. Oil paint forms a protective layer on the surface, making the wood more resistant to moisture, UV damage, and general wear and tear. This makes it suitable for outdoor applications and areas with high humidity.
- Rich and Vibrant Colors: Oil paint is known for its ability to produce rich and vibrant colors. The pigments in oil paint are more saturated, resulting in a depth and intensity of color that is hard to achieve with other mediums. This can enhance the overall visual appeal of the wood artwork.
- Blending and Layering: Oil paint is highly blendable, allowing artists to create smooth transitions and gradients. This makes it ideal for creating subtle nuances in textures and shading. Additionally, oil paint can be easily layered, enabling artists to build up depth and complexity in their artwork.
- Long Drying Time: Unlike acrylic paint, which dries quickly, oil paint has a slower drying time. This gives artists more time to work on their piece, making it easier to blend colors or make adjustments. It also allows for greater flexibility and control.
Cons of Using Oil Paint on Wood
- Extended Drying Time: While the slow drying time of oil paint can be an advantage, it can also be a disadvantage. It may take several days or even weeks for oil paint to fully dry and cure on wood surfaces. This can be frustrating for artists who need a faster drying time for their projects.
- Strong Odor: Oil paint has a distinct smell due to the presence of solvents. This can be unpleasant and may require proper ventilation when working with oil paint on wood. It is important to handle oil paint in a well-ventilated area to ensure the artist’s safety.
- Requires Thinner or Medium: Oil paint needs to be thinned or mixed with a medium to achieve the desired consistency. This can add an extra step in the painting process and may require additional supplies. It is important to choose the right thinner or medium to ensure proper adhesion and drying.
- Potential Yellowing: Over time, oil paint may undergo a process called yellowing. This is more likely to occur when the artwork is exposed to direct sunlight or certain environmental conditions. However, using high-quality paint and varnish can help minimize the risk of yellowing.
In summary, using oil paint on wood offers several advantages, including durability, vibrant colors, blending capabilities, and a longer drying time. However, it also comes with some drawbacks, such as extended drying time, a strong odor, the need for thinning or medium, and the potential for yellowing. Artists and woodworkers should carefully consider these pros and cons when deciding whether to use oil paint on wood surfaces.
Choosing the Right Type of Oil Paint for Wood Surfaces
When it comes to painting wood surfaces, using the right type of oil paint is crucial to ensure a long-lasting and beautiful finish. Oil paint is known for its durability, rich color, and ability to enhance the natural beauty of wood. However, with so many options available in the market, it can be challenging to determine which type of oil paint is best suited for your project. In this section, we will discuss the different types of oil paint available for wood surfaces and provide you with practical tips to help you make an informed decision.
1. Traditional Oil-Based Paints
Traditional oil-based paints are the most commonly used type of oil paint for wood surfaces. These paints contain a binder made of linseed oil, which provides excellent adhesion to wood and offers a smooth, glossy finish. They are highly durable and can withstand the test of time. Traditional oil-based paints are available in a wide range of colors and finishes, making them versatile for various wood painting projects.
It’s important to note that traditional oil-based paints have a longer drying time compared to other types of paints. They can take anywhere from 24 hours to several days to completely dry and cure. This is something to consider if you are working on a project with tight deadlines.
2. Alkyd Oil-Based Paints
Alkyd oil-based paints are a popular alternative to traditional oil-based paints. These paints are made by combining an alkyd resin with a solvent and pigments. Alkyd resin is derived from natural oils and provides similar characteristics to linseed oil, such as excellent adhesion and durability. However, alkyd oil-based paints have a faster drying time compared to traditional oil-based paints.
One of the advantages of using alkyd oil-based paints is that they offer better resistance to yellowing over time. This makes them a suitable choice for wood surfaces that are exposed to sunlight or artificial light sources. Alkyd oil-based paints are also available in a range of finishes, from glossy to matte, allowing you to achieve the desired look for your wood project.
3. Waterborne Oil-Based Paints
Waterborne oil-based paints, also known as hybrid oil-based paints, are another option to consider for painting wood surfaces. These paints combine the benefits of traditional oil-based paints with the ease of water-based paints. They contain a mixture of oils and a water-based emulsion, allowing for easy application and cleanup.
Waterborne oil-based paints offer excellent adhesion and durability, similar to traditional oil-based paints. They have a faster drying time compared to traditional oil-based paints, making them a convenient choice for projects with time constraints. These paints also have low VOC (volatile organic compound) levels, making them a more environmentally friendly option compared to their traditional counterparts.
4. Specialty Oil-Based Paints
In addition to the standard oil-based paints mentioned above, there are also specialty oil-based paints available for specific wood painting projects. These paints are formulated to meet specific requirements, such as outdoor durability or resistance to moisture and mildew. Specialty oil-based paints may also offer additional features like UV protection or self-leveling properties.
Before choosing a specialty oil-based paint, consider the specific needs of your wood project and consult with a knowledgeable paint professional to ensure you select the right product for the job.
Factors to Consider When Choosing Oil Paint for Wood Surfaces
Now that we have discussed the different types of oil paints available for wood surfaces, let’s explore some important factors to consider when making your selection:
1. Project Type
Consider the nature of your wood project. Is it an indoor or outdoor application? Will the wood be exposed to moisture or harsh weather conditions? Understanding the specific requirements of your project will help you determine which type of oil paint is best suited for the job.
2. Desired Finish
Think about the finish you want to achieve for your wood surface. Do you prefer a glossy, satin, or matte finish? Different types of oil paint offer varying levels of sheen, so consider your aesthetic preferences when selecting a paint.
3. Drying Time
If you have time constraints or need to complete your project quickly, drying time becomes an essential factor to consider. Traditional oil-based paints have a longer drying time compared to alkyd oil-based paints and waterborne oil-based paints.
Preparation and Priming Steps for Using Oil Paint on Wood
Oil painting on wood can be a rewarding and versatile artistic medium. Whether you’re a professional artist or an aspiring hobbyist, properly preparing and priming the wood surface is crucial for achieving optimal results. In this section, we will discuss the essential steps to ensure that your oil paint adheres well to the wood and lasts for a long time.
1. Selecting the Right Type of Wood
The first step in preparing to paint with oil on wood is to choose the right type of wood for your project. Generally, hardwoods like birch, oak, or mahogany are preferred due to their durability and stability. Avoid using softwoods like pine or cedar as they tend to absorb moisture and can cause your paint to crack or warp over time.
2. Sanding the Wood
Before applying any primer or paint, it is essential to sand the wood surface to create a smooth and even texture. Start with a coarse-grit sandpaper (around 80 grit) to remove any rough spots or imperfections. Gradually progress to a finer-grit sandpaper (around 120 to 220 grit) to achieve a polished surface. Remember to sand with the grain of the wood to avoid scratching or damaging the surface.
3. Cleaning the Surface
After sanding, it is crucial to thoroughly clean the wood surface to remove any dust, dirt, or oils that could hinder paint adhesion. Use a damp cloth or sponge to wipe down the wood, and if necessary, you can use a mild detergent solution for stubborn stains. Allow the wood to dry completely before moving on to the next step.
4. Applying a Wood Primer
Priming the wood is essential to create a barrier between the paint and the wood surface. Choose a high-quality wood primer specifically designed for oil painting. Use a brush or roller to apply a thin and even coat of primer, following the wood grain. Allow the primer to dry according to the manufacturer’s instructions.
5. Sanding the Primer
Once the primer is dry, lightly sand the surface with a fine-grit sandpaper (around 220 grit) to smooth out any brush strokes or imperfections. This step will ensure a smooth and even foundation for your oil paint. Remember to wipe away any dust residue with a clean cloth before proceeding.
6. Additional Priming Layers (Optional)
In some cases, you may choose to apply additional layers of primer for a more refined finish. This step is particularly useful if you’re working with highly absorbent wood or if you want to achieve a specific texture or effect. Allow each layer of primer to dry completely before proceeding to the next.
7. Begin Oil Painting
Once the primer is completely dry, you are ready to start oil painting on your wood surface. Use high-quality oil paints, brushes, and other preferred tools to bring your artistic vision to life. Remember to follow the recommended drying times for your oil paints and consider applying varnish once your artwork is complete to protect and enhance its longevity.
Techniques for achieving smooth and durable oil paint finishes on wood
When it comes to painting wood surfaces, achieving a smooth and durable finish is essential for both aesthetics and longevity. Oil paint offers a beautiful and long-lasting finish, but it requires proper techniques to ensure a smooth and durable outcome. In this section, we will explore some effective techniques that can help you achieve a professional-looking oil paint finish on wood.
1. Surface Preparation
The key to a smooth and durable oil paint finish on wood starts with proper surface preparation. Begin by cleaning the wood surface thoroughly to remove any dust, dirt, or grease. Sand the surface using a fine-grit sandpaper to create a smooth and even base. Make sure to sand with the grain of the wood to avoid any scratches or marks. After sanding, wipe away any residue with a clean, lint-free cloth.
2. Use a Primer
Applying a primer before painting is crucial for achieving a smooth and durable finish. Choose a high-quality wood primer that is compatible with oil paint. Apply the primer evenly using a brush or roller, following the grain of the wood. Allow the primer to dry completely according to the manufacturer’s instructions before proceeding to the next step.
3. Choose the Right Brushes
The type and quality of brushes you use can greatly impact the final outcome of your oil paint finish. Opt for high-quality brushes specifically designed for oil painting. Synthetic brushes with fine bristles are ideal for smooth finishes. Choose brushes appropriate for the size and intricacy of your project to ensure precise application.
4. Thin Layers, Multiple Coats
When applying oil paint, it is important to work with thin layers and build up multiple coats for a smooth finish. Start with a thin layer of paint and allow it to dry completely before applying the next coat. Sand lightly between each coat to ensure an even surface. This layering technique helps to prevent brush strokes and imperfections in the final finish.
5. Proper Drying Time
Allow each coat of oil paint to dry thoroughly before proceeding to the next step. Oil paint takes longer to dry compared to other types of paint, so it is important to exercise patience. Rushing the drying process can lead to uneven finishes and smudging. Follow the manufacturer’s instructions for drying times to ensure optimal results.
6. Sanding and Buffing
After the final coat has dried completely, you can enhance the smoothness of the finish by sanding and buffing. Use a very fine-grit sandpaper or sanding block to gently smooth any imperfections or brush strokes. Be careful not to sand too aggressively, as this can damage the underlying layers. After sanding, use a clean cloth or polishing pad to buff the surface gently, giving it a glossy and polished appearance.
7. Seal and Protect
To ensure the longevity of your oil paint finish on wood, it is important to seal and protect it. Apply a clear varnish or sealant specifically designed for oil paint finishes. Choose a product that offers protection against UV rays, moisture, and everyday wear and tear. Follow the manufacturer’s instructions for application and drying times to achieve the best results.
In summary, achieving a smooth and durable oil paint finish on wood requires proper surface preparation, the use of a primer, high-quality brushes, thin layers with multiple coats, sufficient drying time, sanding and buffing, and finally, sealing and protecting the finish. By following these techniques, you can create a professional-looking and long-lasting oil paint finish that enhances the beauty of your wood surfaces.
Tips for maintaining and protecting oil-painted wood surfaces
Oil-painted wood surfaces can add beauty and elegance to any space, but they require proper maintenance and protection to ensure their longevity. Whether you have oil-painted furniture, cabinets, or other wooden surfaces, here are some tips to help you keep them looking their best:
1. Regular cleaning
Regular cleaning is essential to prevent dirt and grime from building up and damaging the paint. Use a soft, lint-free cloth or a feather duster to gently remove dust and debris from the surface. Avoid using abrasive cleaners or harsh chemicals that can strip away the paint or cause discoloration. Instead, opt for a mild soap mixed with warm water to gently clean the surface.
2. Avoid direct sunlight
Direct sunlight can cause the paint to fade and the wood to dry out, leading to cracks and peeling. Keep your oil-painted wood surfaces away from windows or use curtains or blinds to limit the exposure to sunlight. If possible, rotate or move the furniture periodically to avoid continuous sun exposure on a particular spot.
3. Use coasters and placemats
To protect oil-painted wooden tables and countertops from heat and moisture damage, always use coasters and placemats when placing hot dishes, glasses, or wet items on the surface. This will prevent water rings, stains, and heat marks from forming on the paint.
4. Handle with care
Avoid dragging or sliding objects across the oil-painted wood surface, as this can scratch or chip the paint. Instead, lift and move objects carefully to prevent any damage. Use felt pads or furniture gliders on the legs of furniture to prevent scratches when moving them.
5. Apply a protective finish
Applying a protective finish, such as varnish or polyurethane, can help shield the oil-painted wood surface from scratches, stains, and moisture. Before applying the protective finish, make sure the surface is clean and dry. Follow the manufacturer’s instructions for application and allow sufficient drying time between coats.
6. Touch up when necessary
If you notice any chips, scratches, or areas where the paint has worn off, it’s important to touch up those areas promptly. Use a small artist brush or a cotton swab to carefully apply matching oil paint to the damaged areas. Allow it to dry completely before applying a protective finish over the touch-up.
7. Store properly
If you need to store oil-painted wood furniture or other items, make sure to do it properly to avoid damage. Store them in a climate-controlled environment, away from extreme temperatures and humidity. Cover the items with breathable materials, such as cotton sheets, to protect them from dust and dirt.
8. Seek professional restoration if needed
If your oil-painted wood surfaces have significant damage or deterioration, it’s best to seek professional restoration services. Restorers have the expertise and knowledge to assess the condition of the surface, repair any damage, and restore the original beauty of the piece.
In summary, maintaining and protecting oil-painted wood surfaces involves regular cleaning, avoiding direct sunlight, using coasters and placemats, handling with care, applying a protective finish, touching up when necessary, storing properly, and seeking professional restoration if needed. By following these tips, you can enjoy the beauty of your oil-painted wood surfaces for years to come.
Can you use oil paint on wood?
Yes, oil paint can be used on wood surfaces. It provides a durable and long-lasting finish, but it requires proper surface preparation and sealing with a primer or sealer specifically designed for wood.
Conclusion:
In conclusion, oil paint can be successfully used on wood surfaces, offering a versatile and durable option for artistic expression and wood protection. The unique characteristics of oil paint, such as its rich colors, smooth texture, and slow drying time, make it ideal for creating detailed and vibrant artwork on wood. Additionally, oil paint forms a protective layer that helps prevent wood damage and deterioration over time. Whether you are an artist looking to create stunning wooden masterpieces or a homeowner seeking to enhance the beauty and longevity of wooden surfaces, using oil paint on wood is a fantastic choice.
By employing proper surface preparation techniques and using high-quality oil paints, you can achieve outstanding results with a long-lasting finish. So, unleash your creativity, and explore the endless possibilities of using oil paint on wood!