If you’re wondering how long it takes for wood filler to dry before sanding, you’ve come to the right place. Wood filler is a handy product used to fill in gaps, cracks, and holes in wood surfaces. The drying time can vary depending on various factors such as the type of filler, humidity levels, and temperature. Typically, wood filler can take anywhere from 15 minutes to several hours to dry completely. It’s important to allow the filler to dry thoroughly before sanding to achieve smooth and flawless results. Read on to discover more about drying times for wood fillers and essential tips for a successful sanding process.

Optimal Drying Time for Wood Filler: Achieve the perfect finish
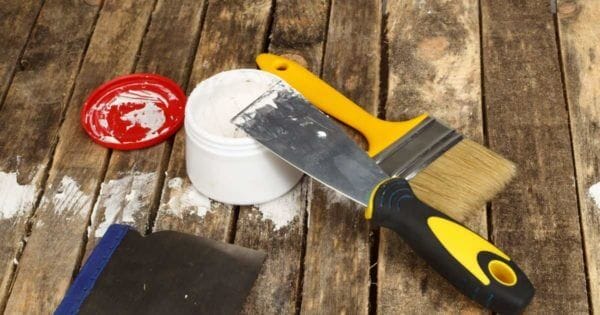
Wood filler is a versatile product used to fill holes, cracks, and gaps in wood surfaces. It provides a smooth and even finish, allowing you to achieve a professional look. However, to achieve the best results, it’s important to know the optimal drying time for wood filler.

1. Understanding Wood Filler:
Before delving into the drying time, let’s first understand what wood filler is. Wood filler, also known as wood putty, is a type of paste or compound that is used to fill imperfections in wood surfaces. It is typically made from a combination of wood fibers or sawdust and a binding agent, such as epoxy or latex.
2. Importance of Drying Time:
The drying time of wood filler is crucial as it directly affects the final outcome of your project. If you sand or paint the wood filler before it is completely dry, it can result in a sloppy finish or cause the filler to shrink and crack over time. On the other hand, if you wait too long, the filler may become hard to work with or difficult to blend into the surrounding wood.
3. Factors Affecting Drying Time:
Several factors can influence the drying time of wood filler, including:
- Type of Wood Filler: Different types of wood fillers have varying drying times. Read the manufacturer’s instructions to determine the recommended drying time for the specific product you are using.
- Temperature and Humidity: Drying time can be affected by the temperature and humidity levels in your environment. Warmer temperatures and lower humidity can accelerate the drying process, while cooler temperatures and higher humidity can slow it down.
- Thickness of the Application: Thicker layers of wood filler will take longer to dry than thinner layers. It’s important to apply the filler in thin layers to ensure even drying.
4. Recommended Drying Times:
While drying times can vary depending on the factors mentioned above, there are general guidelines to follow:
| Type of Wood Filler | Recommended Drying Time |
|---|---|
| Water-based Wood Filler | Approximately 1-2 hours |
| Solvent-based Wood Filler | Approximately 24 hours |
| Epoxy-based Wood Filler | Approximately 6-8 hours |
It’s important to note that these are general recommendations, and you should always refer to the manufacturer’s instructions for the specific product you are using.
5. Testing for Dryness:
Before sanding or painting over the wood filler, it’s essential to ensure that it is completely dry. You can perform a simple touch test to check its dryness. Gently press your fingertip against the filler. If it feels firm and does not leave a mark, it is likely dry and ready for the next step. However, if it feels soft or leaves an impression, it needs more time to dry.
6. Additional Tips:
Here are some additional tips to ensure optimal drying of wood filler:
- Follow the manufacturer’s instructions carefully to ensure the best results.
- Ensure proper ventilation in the drying area to facilitate the drying process.
- Avoid applying thick layers of wood filler, as they can extend the drying time and increase the risk of cracking.
- If necessary, use a hairdryer or a fan on a low setting to speed up the drying process. However, exercise caution to prevent overheating or uneven drying.
- Consider using a sanding sealer before sanding and finishing the wood surface to further enhance the durability and smoothness of the filler.
In summary, achieving the perfect finish with wood filler involves understanding its optimal drying time. By considering factors such as the type of filler, temperature, humidity, and thickness of application, you can ensure that the filler dries evenly and provides a flawless finish. Follow the manufacturer’s instructions and perform a touch test to determine when the filler is dry and ready for further finishing steps. With proper drying and finishing techniques, you can achieve professional-looking
Factors Affecting Wood Filler Drying Time: Understanding the variables
Wood fillers are a popular choice for repairing and restoring wooden surfaces. They are used to fill in gaps, cracks, and holes in wood, creating a smooth and even surface. However, one important aspect of using wood filler is understanding the drying time. The drying time can vary based on several factors, which we will explore in this section.
1. Type of Wood Filler
The type of wood filler you choose can greatly affect the drying time. There are different types of wood fillers available in the market, such as solvent-based fillers, water-based fillers, and epoxy fillers. Each type has its own characteristics and drying time.
Solvent-based fillers typically dry faster compared to water-based fillers. These fillers contain solvents that evaporate quickly, speeding up the drying process. On the other hand, water-based fillers require more time to dry as the water content needs to evaporate.
Epoxy fillers, which are a combination of resin and hardener, have a different drying process altogether. The drying time of epoxy fillers is typically longer, as they go through a chemical reaction to cure and harden.
2. Temperature and Humidity
The environment in which the wood filler is applied plays a significant role in its drying time. Temperature and humidity levels can affect the evaporation rate, thus impacting the drying process.
Generally, warmer temperatures and lower humidity levels promote faster drying times. The heat helps to evaporate the solvents or water content in the filler, while low humidity prevents moisture from slowing down the drying process. On the contrary, cooler temperatures and higher humidity can slow down the drying time, prolonging the curing process.
3. Application Thickness
The thickness of the wood filler layer also affects the drying time. Thicker layers take longer to dry compared to thinner layers. This is because the moisture or solvents in the filler need more time to evaporate when there is a larger amount to remove.
It is important to apply thinner layers of wood filler to ensure quicker drying and better adhesion. If a thicker layer is necessary, it is recommended to apply multiple thin layers, allowing each layer to dry completely before adding another.
4. Ventilation and Airflow
Proper ventilation and airflow can significantly impact the drying time of wood filler. Good airflow helps in the evaporation process, speeding up the drying time. Ensuring proper ventilation, either through natural air circulation or the use of fans, can help remove moisture and solvents more efficiently.
However, it is important to note that excessive airflow can also have a negative impact. Rapid evaporation caused by strong airflow can lead to uneven drying and the formation of cracks or bubbles in the wood filler. Finding the right balance is crucial to achieve optimal drying results.
5. Brand and Product Formulation
Lastly, the brand and specific formulation of the wood filler can affect the drying time. Different brands may have variations in the ingredients used and the additives included in their formulations. These variations can lead to differences in drying time.
It is recommended to follow the manufacturer’s instructions and guidelines regarding the drying time of the specific wood filler product you are using. They usually provide information on the expected drying time under typical conditions.
Summary
Wood filler drying time can be influenced by various factors, including the type of filler, temperature and humidity levels, application thickness, ventilation and airflow, and brand formulation. Understanding these variables is crucial for achieving optimal results when using wood fillers for repairing and restoring wooden surfaces.

Effective Techniques for Speeding Up Wood Filler Drying: Get your project done faster
Wood filler is a commonly used product in woodworking projects to fill in gaps, cracks, and holes in wood surfaces. It provides a smooth and seamless finish, making it an essential step in achieving a professional-looking result. However, one common challenge when working with wood filler is the drying time. Waiting for the filler to dry can be time-consuming and can delay your project. Fortunately, there are several effective techniques that can help speed up the drying process and get your project done faster. In this section, we will explore these techniques in detail.
1. Choose the Right Type of Wood Filler
Not all wood fillers are created equal when it comes to drying time. Some fillers are designed to dry faster than others. When selecting a wood filler, opt for a quick-drying formula that is specifically labeled as such. These fillers typically contain additives that promote faster drying, allowing you to move on to the next step of your project sooner.
2. Apply Thin Layers
One effective way to speed up the drying time of wood filler is to apply thin layers rather than thick ones. Thick layers take longer to dry and can lead to uneven drying, resulting in a longer waiting time. By applying thin and even layers of filler, you allow for better airflow and more efficient drying. Use a putty knife to spread the filler evenly and smoothly across the surface, removing any excess material.
3. Use a Fan or Heat Source
Increasing air circulation around the wood filler can significantly reduce drying time. Place a fan near the project or use a portable fan to direct air towards the filled area. The moving air helps evaporate the moisture in the filler, accelerating the drying process. Additionally, you can also use a heat source like a hairdryer or a heat gun to gently warm the filler. Be cautious not to apply excessive heat, as it may damage the wood or cause the filler to bubble.
4. Utilize Fast-Drying Accelerators
Fast-drying accelerators are products specifically designed to speed up the drying time of wood fillers. These accelerators usually come in spray or liquid form and contain chemicals that react with the filler to facilitate faster drying. Follow the manufacturer’s instructions carefully when using these products, as improper use may affect the quality of the finish.
5. Optimize Temperature and Humidity
Temperature and humidity levels can significantly impact the drying time of wood filler. Ideally, work in an environment with moderate temperature (around 70°F or 21°C) and low humidity. High humidity can prolong the drying process, while low humidity may cause the filler to dry too quickly, leading to cracking. If the conditions are not favorable, consider using a dehumidifier or humidifier to create an optimal environment for faster drying.
6. Sand and Finish
Once the wood filler is dry, sand it down to achieve a smooth and seamless finish. Start with a coarse-grit sandpaper to remove any excess filler and then gradually move to finer grits for a polished result. After sanding, apply a suitable wood finish or paint to protect the wood and give it the desired appearance. Ensure that the filler is fully dry before proceeding with sanding and finishing to avoid any damage or imperfections.
In summary, by following these effective techniques, you can speed up the drying time of wood filler and complete your woodworking project faster. Remember to choose a quick-drying wood filler, apply thin layers, increase air circulation with a fan or heat source, utilize fast-drying accelerators as needed, optimize temperature and humidity, and finish with sanding and appropriate wood finish. By implementing these strategies, you can save valuable time and enjoy the satisfaction of a beautifully finished woodworking project.
Tips for Sanding Wood Filler: Achieve a smooth, seamless surface
Wood filler is a versatile material that is commonly used in woodworking projects to fill in gaps, cracks, and imperfections in wood surfaces. Once the wood filler has dried, it is essential to sand it down to achieve a smooth and seamless finish. Here are some tips to help you sand wood filler effectively:
1. Use the right grit sandpaper
When sanding wood filler, it is crucial to choose the right grit sandpaper for the task. Coarse grit sandpaper, such as 80 or 100 grit, is ideal for initial sanding to remove excess filler and level the surface. As you progress, switch to finer grit sandpaper, such as 120 or 150 grit, for a smoother finish. Finish off with an even finer grit like 220 or 320 for a polished surface.
2. Sand in the direction of the grain
Always sand in the direction of the wood grain to avoid creating visible scratches or marks on the surface. Sanding against the grain can lead to a less professional-looking finish. Follow the natural pattern of the wood and apply even pressure when sanding.
3. Keep the sandpaper flat
One common mistake when sanding wood filler is tilting the sandpaper, which can result in an uneven surface. Make sure to keep the sandpaper flat against the wood and use long, smooth strokes. This will help you achieve a consistent finish across the entire surface.
4. Check the progress frequently
Regularly check the progress of your sanding to ensure you are achieving the desired results. Stop sanding periodically and run your hand over the surface to feel for any remaining rough patches or imperfections. This will help you identify areas that require further sanding and ensure a smooth and seamless finish.
5. Use a sanding block or a sanding tool
Using a sanding block or a sanding tool can provide better control and even pressure when sanding wood filler. These tools help distribute the pressure evenly, minimizing the risk of creating uneven surfaces and over-sanding certain areas. Additionally, a sanding block can help prevent your fingers from accidentally rounding off edges or corners.
6. Remove dust between sanding grits
After each sanding grit, it is essential to remove dust and debris from the surface before progressing to a finer grit. Use a soft brush or a tack cloth to gently remove any particles that may affect the smoothness of the finish. This step will help you achieve better results as you move to finer grits.
7. Apply a finish
Once you have achieved a smooth and seamless surface, it is recommended to apply a suitable finish to protect the wood and enhance its appearance. Whether you choose a stain, varnish, or paint, make sure to follow the manufacturer’s instructions for application and drying times.
In summary, sanding wood filler is a crucial step in achieving a smooth and seamless surface. By using the right grit sandpaper, sanding in the direction of the grain, keeping the sandpaper flat, checking progress frequently, using a sanding block or tool, removing dust between grits, and applying a finish, you can ensure a professional-looking result for your woodworking projects.
FAQs
How long does wood filler take to dry before sanding?
The drying time of wood filler varies depending on factors like brand, type, and thickness. Generally, it takes around 1-4 hours for water-based fillers to dry and 4-6 hours for solvent-based ones. However, it is always recommended to check the specific instructions on the product packaging for accurate drying times.
Conclusion:
In conclusion, the drying time of wood filler before sanding is a crucial aspect to consider for any woodworking project. The duration can vary depending on the specific product used, environmental conditions, and the depth of the filler. Typically, wood fillers require at least 24 hours to dry completely. It is recommended to check the manufacturer’s instructions for accurate drying times. Patience is key when using wood filler, as rushing the drying process may compromise the quality of the final result. Remember to always allow sufficient time for the filler to dry before proceeding with sanding to ensure a smooth and flawless finish.