If you’re looking to build a robust wooden box frame, you’ve come to the right place. A sturdy box frame is essential for various DIY projects, such as furniture construction or storage solutions. Whether you’re a beginner or an experienced carpenter, we’ll provide you with the step-by-step guidance you need to create a strong and durable wooden box frame that will stand the test of time.
From choosing the right type of wood to employing proper construction techniques, we’ll cover all the key aspects involved in building a reliable box frame. By following our expert tips and guidelines, you’ll be able to tackle this project like a pro and achieve a professional-looking result. So, let’s get started on crafting your very own sturdy wooden box frame!

Essential Tools and Materials for Building a Solid Wooden Box Frame
Building a solid wooden box frame requires the right tools and materials to ensure a sturdy and durable structure. Whether you are a beginner or an experienced woodworker, having the essential tools and materials is crucial for a successful project. In this section, we will discuss the tools and materials that are necessary to build a solid wooden box frame.
Tools
1. Measuring Tape: A measuring tape is essential for taking accurate measurements of the wood pieces and ensuring precise cuts.
2. Circular Saw: A circular saw is used for making straight cuts on the wooden boards. It is a versatile tool that can handle different types and sizes of wood.
3. Miter Saw: A miter saw is helpful for making accurate angle cuts on the wood, especially for creating decorative corners or joints.
4. Drill: A drill is needed for creating holes in the wood for screws or nails. It is recommended to have both corded and cordless drills for different applications.
5. Screwdriver: A screwdriver is essential for driving screws into the wood. It is important to have different sizes and types of screwdrivers depending on the project requirements.
6. Clamps: Clamps are used to hold the wood pieces together securely during the assembly process. They provide stability and prevent any movement or shifting.
7. Chisel: A chisel is necessary for removing excess wood and creating clean and precise cuts or mortises.
8. Sandpaper and Sanding Block: Sandpaper and a sanding block are used for smoothing the wood surface and removing any rough edges or imperfections.
9. Router: A router is an optional but useful tool for creating decorative edges or profiles on the wooden box frame.
Materials
1. Wood: The most important material for building a wooden box frame is the wood itself. Choose a strong and durable wood species such as oak, maple, or pine, depending on your preferences and budget.
2. Screws or Nails: Use appropriate screws or nails to join the wood pieces together. Make sure to select the right size and type that will provide sufficient strength and stability.
3. Wood Glue: Wood glue is essential for reinforcing the joints and adding strength to the wooden box frame. Choose a high-quality wood glue that dries clear and bonds well.
4. Finishing Materials: If you desire a polished and finished look, you will need finishing materials such as wood stain, varnish, or paint. These materials will protect the wood and enhance its appearance.
By having the right tools and materials, you can confidently embark on your wooden box frame project. Remember to prioritize safety by wearing protective gear such as goggles and gloves, and always follow the manufacturer’s instructions for each tool and material. With patience and attention to detail, you can build a solid wooden box frame that will stand the test of time.

Step-by-Step Guide to Constructing a Sturdy Wooden Box Frame
Constructing a sturdy wooden box frame is a great DIY project that can be useful for various purposes, such as building furniture or creating storage solutions. With the right tools and materials, you can create a strong and durable wooden box frame that will last for years. In this section, we will provide you with a step-by-step guide to help you construct your own sturdy wooden box frame.
Materials You Will Need:
- 1-inch thick wooden boards
- Nails or screws
- Hammer or screwdriver
- Saw
- Measuring tape
- Pencil
- Wood glue
- Clamps
Step 1: Measure and Cut the Boards
Start by measuring and cutting the wooden boards to the desired dimensions of your box frame. You will need four equal-sized pieces for the sides of the frame and two equal-sized pieces for the top and bottom.
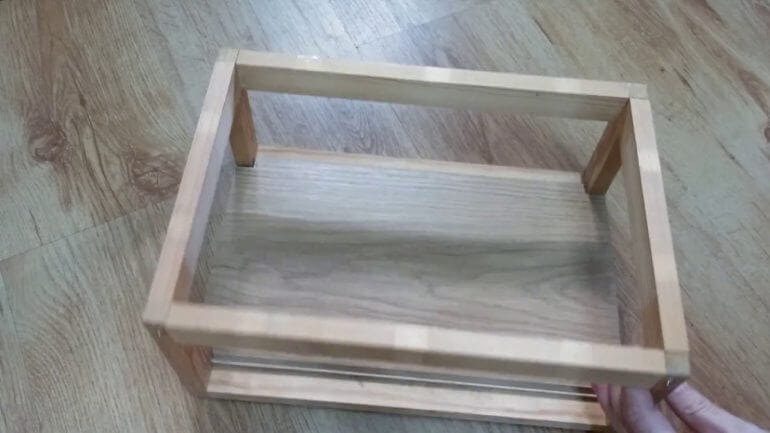
Step 2: Create the Box Shape
Once you have cut the boards, arrange them into a rectangular shape to create the box frame. Make sure the corners are aligned properly.
Step 3: Attach the Boards
Using wood glue, apply a thin layer to the edges of the boards where they will be joined. Then, secure the boards together by using clamps to hold them in place while the glue dries. Alternatively, you can use nails or screws to attach the boards together.
Step 4: Reinforce the Corners
To provide additional strength to the box frame, reinforce the corners by using L-brackets or metal corner brackets. Attach the brackets to the inside corners of the frame using screws for a secure hold.
Step 5: Sand and Finish
Once the box frame is assembled, use sandpaper to smooth out any rough edges or surfaces. This will give the frame a polished look. You can also apply a coat of paint or varnish to protect the wood and enhance its appearance.
Step 6: Add a Bottom or Lid (Optional)
If desired, you can add a bottom or lid to your wooden box frame. Cut a piece of plywood or another suitable material to fit the dimensions of the frame and attach it securely using nails or screws.
Step 7: Enjoy Your Sturdy Wooden Box Frame
Once your wooden box frame is complete, you can use it for various purposes, such as a display case, a storage container, or even a table. Let your creativity guide you as you design and utilize your newly constructed box frame.
In summary, constructing a sturdy wooden box frame is a rewarding DIY project that can be customized to suit your needs. Follow these step-by-step instructions, and you’ll have a durable and functional box frame that you can be proud of.

Tips for Reinforcing and Securing the Joints of Your Wooden Box Frame
Wooden box frames are a popular choice for various projects, from building furniture to crafting decorative storage containers. While wooden frames provide durability and a rustic appeal, it is essential to reinforce and secure the joints properly to ensure the longevity and strength of the structure. In this section, we will discuss some helpful tips to reinforce and secure the joints of your wooden box frame.
1. Choose the Right Wood
Selecting the right type of wood is crucial in reinforcing the joints of your wooden box frame. Opt for hardwoods like oak or maple, which are known for their strength and durability. These types of wood have a tighter grain structure, making them less prone to splitting and splintering. Avoid softwoods like pine, as they tend to be less sturdy and may not hold up well in the long run.
2. Use Reinforcement Hardware
Adding reinforcement hardware to your wooden box frame can significantly improve its overall strength. Consider using corner brackets or metal plates at the joints to provide additional support. These hardware pieces are typically installed using screws or nails, securely holding the frame together and preventing any wobbling or loosening of the joints.
3. Apply Wood Glue
Applying wood glue to the joints before fastening them together is an excellent way to reinforce and secure the wooden box frame. Wood glue creates a strong bond between the wood pieces, increasing the overall stability of the frame. Ensure that you apply an even layer of glue to both surfaces of the joint, then clamp the pieces together until the glue dries completely.
4. Use Dowels or Biscuits
Another effective way to reinforce the joints of your wooden box frame is by using dowels or biscuits. These small wooden pieces are inserted into corresponding holes drilled in the adjoining pieces of wood. Once the dowels or biscuits are glued and inserted, they create a strong connection between the joints, enhancing the overall structural integrity of the frame.
5. Install Corner Blocks
Adding corner blocks to the joints of your wooden box frame can provide additional reinforcement and stability. Corner blocks are small wooden pieces that are cut to fit the corners of the frame and are secured using screws or nails. These blocks prevent the joints from twisting or shifting, ensuring that the frame remains solid and secure.
6. Reinforce with Metal Braces
If you want to add extra strength and durability to your wooden box frame, consider reinforcing it with metal braces. Metal braces can be attached to the joints using screws or nails, offering excellent support and preventing any potential joint failure. Metal braces are particularly useful for larger and heavier wooden box frames.
7. Regularly Inspect and Maintain
Once you have reinforced and secured the joints of your wooden box frame, it is important to regularly inspect and maintain the structure. Check for any signs of wear, loose joints, or damage, and promptly address any issues. Regularly oiling or waxing the frame can also help prevent it from drying out or becoming brittle over time.
By following these tips and reinforcing the joints of your wooden box frame, you can ensure that your project will stand the test of time. Proper reinforcement and securing techniques will not only enhance the strength and stability of the frame but also provide you with a reliable and durable piece that can be enjoyed for years to come.
5. Finishing Touches: How to Paint or Stain Your Wooden Box Frame for a Polished Look
After constructing your wooden box frame, it’s time to give it a finishing touch that will enhance its appearance and protect the wood. Whether you prefer a sleek and modern look or a rustic and natural feel, painting or staining the wooden frame can create the desired effect. In this section, we will guide you through the steps to paint or stain your wooden box frame for a polished and professional finish.
Gather the Necessary Materials
Before you start the painting or staining process, make sure you have all the materials at hand. Here’s a list of items you will need:
- Primer or wood conditioner
- Paint or stain of your choice
- Paintbrushes or foam brushes
- Sandpaper or sanding block
- Clean cloth or tack cloth
- Drop cloth or newspaper for protection
- Painter’s tape (if needed)
Preparing the Wood
Before applying any paint or stain, it’s important to properly prepare the wood surface. Follow these steps:
- Sand the wood: Use sandpaper or a sanding block to smooth out any rough edges or imperfections on the surface of the wood. Start with a coarse-grit sandpaper and gradually move to a finer grit for a smooth finish.
- Clean the wood: Wipe down the wood with a clean cloth or tack cloth to remove any dust or debris.
- Apply primer or wood conditioner (optional): If you are planning to paint the wooden frame, applying a primer will help the paint adhere better and create a more even finish. If you prefer to stain the wood, use a wood conditioner to ensure the stain absorbs evenly.
Painting the Wooden Frame
If you have chosen to paint your wooden box frame, follow these steps:
- Protect the surrounding area: Place a drop cloth or newspaper to protect the surface underneath the frame from any paint splatters.
- Tape off any areas: If you want to keep certain areas unpainted, such as the inside of the frame or decorative details, use painter’s tape to create clean lines.
- Apply the paint: Dip your paintbrush or foam brush into the paint and start applying it to the wooden frame. Work in the direction of the wood grain for a smooth and even finish. Apply multiple thin coats rather than one thick coat to avoid drips and achieve better coverage.
- Allow drying time: Follow the manufacturer’s instructions to determine the drying time between coats. Make sure each coat is completely dry before applying the next one.
Staining the Wooden Frame
If you prefer the natural look of wood and want to stain your wooden box frame, follow these steps:
- Protect the surrounding area: Place a drop cloth or newspaper to protect the surface underneath the frame from any stain spills or drips.
- Apply the stain: Using a clean cloth or brush, apply the stain to the wooden frame in the direction of the wood grain. Apply a thin, even coat and wipe off any excess stain with a clean cloth.
- Allow drying time: Follow the manufacturer’s instructions to determine the drying time for the stain. Make sure the stain is completely dry before proceeding.
- Apply additional coats (optional): If you prefer a darker or richer color, you can apply additional coats of stain. Make sure to allow drying time between each coat.
Finishing Touches
Once the paint or stain is dry, you can add some final touches to complete the polished look of your wooden box frame:
- Remove any painter’s tape: If you used painter’s tape, carefully remove it to reveal clean lines and edges.
- Inspect for touch-ups: Examine the frame for any missed spots or imperfections. Touch up with additional paint or stain if needed.
- Apply a protective finish (optional): To further protect the wood and enhance its longevity, you can apply a clear topcoat or sealer. This will also give your wooden box frame a glossy or matte finish, depending on your preference.
In summary, painting or
Frequently Asked Questions
1. How can I build a strong wooden box frame?
To build a strong wooden box frame, start by selecting high-quality, sturdy lumber. Use strong joinery techniques like mortise-and-tenon or dovetail joints for added stability. Also, ensure proper bracing and reinforcement to prevent the frame from warping or collapsing.
2. What tools do I need to build a wooden box frame?
To build a wooden box frame, you will need essential tools such as a saw, drill, hammer, chisel, tape measure, and clamps. Additionally, depending on your project, you may require other tools like a miter saw, router, or nail gun.
3. Can I customize the size of a wooden box frame?
Yes, you can customize the size of a wooden box frame to fit your specific needs. Measure the dimensions you require and then cut the lumber accordingly. Just ensure that you maintain proper proportions and structural integrity while resizing the frame.
Conclusion:
In conclusion, building a strong wooden box frame requires careful planning, precise measurements, and the use of quality materials. By following the step-by-step process, you can ensure the stability and durability of your frame. Additionally, reinforcing the joints with strong glue or screws will enhance its strength. Regular maintenance and proper sealing will help protect the wood from moisture and prolong the life of the frame. Whether you are building a box frame for storage or as a foundation for a piece of furniture, a solid and sturdy wooden frame will provide the necessary support and endurance. So, roll up your sleeves, gather your tools, and start building your wooden box frame today!