Are you looking to add a pop of color to your wooden beads? Dyeing wooden beads is a fantastic way to customize your craft projects and create unique jewelry pieces. Whether you want a bold and vibrant look or a subtle and natural finish, dyeing wooden beads is a simple process that can yield stunning results. In this guide, we will walk you through the step-by-step process of dyeing wooden beads, from preparing the beads to achieving the desired color, so you can unleash your creativity and make your beads stand out.
Preparing the Wooden Beads for Dyeing
Before you can start dyeing your wooden beads, it is important to properly prepare them to ensure the best results. This step is crucial in achieving vibrant and long-lasting colors. Here are some essential steps to follow when preparing wooden beads for dyeing:

Gather the Necessary Materials
First and foremost, gather all the materials you will need for the dyeing process. This includes:
- Wooden beads
- Water-based dye or acrylic paint
- Disposable gloves
- Plastic containers or bowls
- Hot water
- Mild detergent
- Soft cloth or sponge
Clean the Wooden Beads
Before dyeing, it is important to clean the wooden beads to remove any dirt, dust, or oils that may be present on the surface. This will ensure that the dye adheres evenly to the beads. Follow these steps to clean the wooden beads:
- Fill a plastic container or bowl with warm water.
- Add a small amount of mild detergent to the water and mix well.
- Place the wooden beads in the soapy water and gently scrub them using a soft cloth or sponge.
- Rinse the beads thoroughly with clean water to remove any soap residue.
- Pat the beads dry using a clean towel or let them air dry completely.
Sand the Surface of the Beads (Optional)
If you want to achieve a smoother finish on your wooden beads, you can choose to sand the surface before dyeing. This step is optional but can help create a more polished look. Here’s how to sand the wooden beads:
- Use fine-grit sandpaper to gently sand the surface of the wooden beads in a circular motion.
- Continue sanding until the beads feel smooth to the touch.
- Wipe away any dust or debris with a clean cloth.
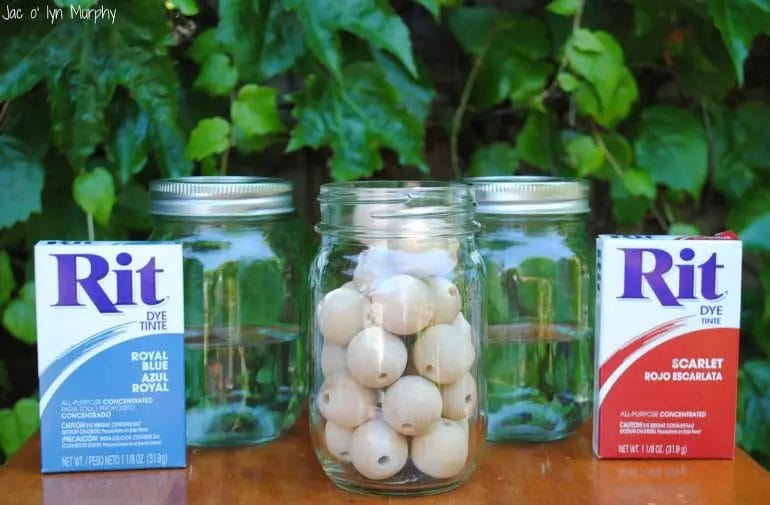
Prepare the Dye Solution
Now it’s time to prepare the dye solution that you will be using to color the wooden beads. If you are using water-based dye, follow the instructions provided by the manufacturer. If you prefer to use acrylic paint, dilute it with water to achieve the desired consistency. Here’s how to prepare the dye solution:
- Fill a plastic container or bowl with hot water.
- Add the dye or diluted acrylic paint to the water and mix well until the color is evenly distributed.
Immerse the Beads in the Dye Solution
Once the dye solution is ready, it’s time to immerse the wooden beads and allow them to absorb the color. Follow these steps to dye the wooden beads:
- Wear disposable gloves to protect your hands from stains.
- Place the wooden beads in the dye solution, making sure they are fully submerged.
- Allow the beads to soak in the dye for the recommended amount of time. This can vary depending on the type of dye or paint you are using.
- If you want a darker color, you can leave the beads in the dye solution for a longer period.
Rinse and Dry the Beads
After the beads have absorbed the desired amount of color, it’s time to rinse and dry them. Follow these steps to complete the process:
- Remove the beads from the dye solution and rinse them under running water to remove any excess dye.
- Continue rinsing until the water runs clear and there is no more dye coming off the beads.
- Pat the beads dry using a clean towel or let them air dry completely.
Once the wooden beads are fully dry, they are ready to be used in your crafting projects. Whether you’re creating jewelry, home decor, or other handmade items, the dyed wooden beads will add a colorful and unique touch. Enjoy the process of dyeing wooden beads and let your creativity shine!

Methods for Dyeing Wooden Beads: Techniques and Tips
Wooden beads are a popular choice for jewelry making and crafts, as they add a natural and earthy element to any design. While wooden beads come in a variety of colors and finishes, sometimes you may want to customize them to suit your specific project. Dyeing wooden beads is a great way to achieve the desired color and enhance the overall look of your jewelry or craft piece. In this section, we will explore different methods for dyeing wooden beads, along with some techniques and tips to help you get the best results.
1. Use Commercial Wood Dye
If you are looking for a quick and convenient way to dye your wooden beads, using commercial wood dye is a great option. Wood dyes are specifically designed for staining wood and are available in a wide range of colors. To dye your wooden beads with a commercial wood dye, follow these steps:
- Prepare your work area: Cover your work surface with a disposable plastic sheet or newspaper to protect it from stains.
- Sand the wooden beads: Use fine-grit sandpaper to lightly sand the surface of the wooden beads. This will help the dye adhere better to the wood.
- Mix the wood dye: Follow the instructions on the wood dye packaging to mix the dye with the appropriate solvent. Different wood dyes may require different solvents, such as water or alcohol.
- Dip or brush the dye onto the beads: Use a brush or immerse the wooden beads into the dye solution, making sure to coat them evenly. Allow the beads to sit in the dye for the recommended amount of time.
- Remove excess dye: After the desired color is achieved, remove the wooden beads from the dye solution and wipe off any excess dye with a clean cloth.
- Let the beads dry: Place the dyed wooden beads on a clean surface to dry completely. Depending on the dye and solvent used, drying times may vary.
2. Natural Dyeing with Plant Materials
If you prefer a more eco-friendly and natural approach to dyeing wooden beads, using plant materials can yield beautiful and unique colors. Here’s how to dye wooden beads using plant materials:
- Choose your plant materials: Collect plant materials such as onion skins, berries, or flowers that contain natural dyes. Different plants produce different colors, so experiment with various options to achieve your desired shades.
- Prepare the dye bath: Place the plant materials in a pot and add enough water to cover them. Bring the mixture to a boil and let it simmer for about an hour to extract the natural dyes.
- Strain the dye bath: Once the dye bath has simmered, strain the liquid to remove any solid plant materials.
- Simmer the beads in the dye bath: Place the wooden beads in the strained dye bath and simmer them for about an hour. The longer you simmer, the deeper the color will be.
- Remove the beads and let them dry: Take out the dyed wooden beads from the dye bath and allow them to dry completely before using them in your projects.
3. Paint Staining Technique
If you want to achieve a more opaque or vibrant color on your wooden beads, using paint as a stain is an excellent option. Here’s how to use the paint staining technique:
- Choose your paint: Select a water-based acrylic paint in your desired color. Make sure the paint is thin enough to seep into the wooden beads but thick enough to provide good coverage.
- Prepare the paint mixture: Mix the paint with a small amount of water to thin it out. The consistency should be similar to that of a stain.
- Apply the paint to the beads: Use a brush or immerse the wooden beads into the paint mixture, ensuring they are fully coated. Allow the paint to penetrate the wood for a few minutes.
- Remove excess paint: Wipe off any excess paint from the beads with a clean cloth or paper towel.
- Let the beads dry: Place the painted wooden beads on a clean surface to dry thoroughly. Depending on the paint and wood, drying times may vary.
Tips for Dyeing Wooden Beads
Here are some additional tips to keep in mind when dyeing wooden beads:
- Always test

Adding a Protective Finish to the Dyed Wooden Beads
Once you have successfully dyed your wooden beads to your desired color, it is important to protect the dye and enhance the longevity of the color. Adding a protective finish not only safeguards your beads from wear and tear but also enhances their overall appearance. In this section, we will guide you through the process of adding a protective finish to your dyed wooden beads.1. Gather the Required Materials
Before you begin, make sure you have all the necessary materials on hand. You will need:- Clear varnish or sealant
- Small paintbrush
- Sandpaper (200-grit or higher)
- Lint-free cloth
- Well-ventilated area
2. Prepare the Beads for Finishing
Start by preparing the dyed wooden beads for the protective finish. Gently sand the surface of each bead using 200-grit or higher sandpaper. This step helps to smooth out any rough spots and create a better surface for the varnish or sealant to adhere to. After sanding, wipe away any dust or debris using a lint-free cloth.3. Apply the Protective Finish
Ensure you are working in a well-ventilated area, as some varnishes or sealants may emit fumes. Dip the paintbrush into the clear varnish or sealant, ensuring it is evenly coated but not dripping. Begin applying the protective finish to each wooden bead in smooth, even strokes. Make sure to cover the entire surface of the bead, including the holes.4. Allow the Finish to Dry
Once you have finished applying the protective finish to all the beads, allow them to dry completely. Follow the instructions on the varnish or sealant bottle for the recommended drying time. It is crucial not to handle the beads until they are fully dry to avoid smudging or damaging the finish.5. Optional Second Coat
Depending on your preference and the level of protection desired, you may choose to apply a second coat of varnish or sealant. This will provide an extra layer of durability to the dyed wooden beads. Allow the beads to dry completely between coats.6. Inspect and Store
After the second coat has dried, inspect the beads to ensure the protective finish is even and properly applied. Look for any areas that may need touch-ups. Once you are satisfied with the results, store the beads in a clean and dry container or display them in your desired manner. Adding a protective finish to your dyed wooden beads is a essential step in maintaining their vibrant color and extending their lifespan. By following these simple steps and using the right materials, you can ensure that your beads remain beautiful and well-protected. Take the time to properly finish your beads, and you will enjoy their beauty for years to come.Creative Ideas for Using Dyed Wooden Beads in DIY Projects
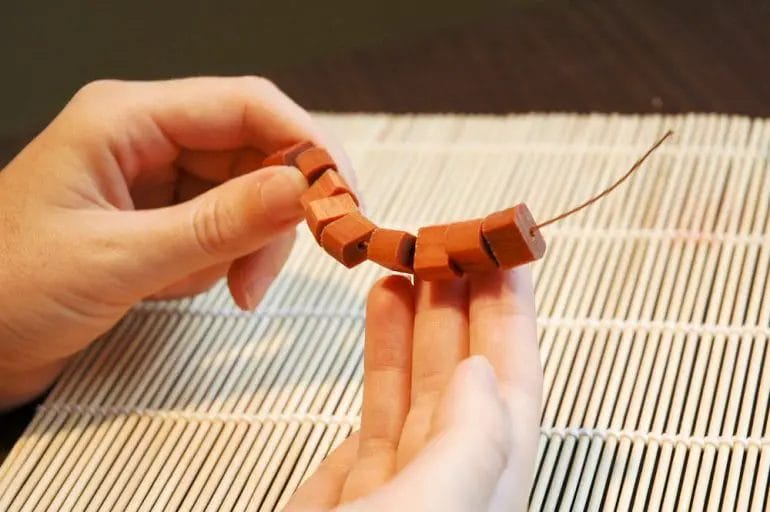
Wooden beads are versatile and can be a great addition to any DIY project. Their natural and rustic appeal adds a unique touch to crafts, jewelry, and home decor. To take things up a notch, you can experiment with dyed wooden beads to add pops of color and create eye-catching designs. In this section, we will explore some creative ideas for using dyed wooden beads in your DIY projects.
1. Macrame Wall Hangings
Macrame wall hangings are a popular trend in home decor, and incorporating dyed wooden beads can elevate their aesthetic appeal. You can use beads of different colors and sizes to create patterns and textures within your macrame design. Whether you’re making a simple wall hanging or a complex geometric pattern, the addition of dyed wooden beads can bring a vibrant and playful touch to your creation.
2. Jewelry Making
Wooden beads are a popular choice for jewelry making due to their lightweight nature and natural charm. By using dyed wooden beads, you can introduce a splash of color to your jewelry designs. Create statement necklaces, bracelets, and earrings using a combination of dyed wooden beads and other materials like metal findings, gemstones, or glass beads. The possibilities are endless, and you can let your creativity shine through.
3. Keychains and Bag Charms
Personalize your keys or add a touch of flair to your bags with dyed wooden bead keychains or bag charms. Choose beads in colors that complement your style or match your bag’s color scheme. You can experiment with different bead sizes, shapes, and colors to create unique combinations. Add charms or tassels for an extra touch of personality. These accessories can be a simple yet stylish way to express your creativity.
4. Home Decor Accents
Wooden beads can also be used to add a decorative touch to your home. Consider using dyed wooden beads as curtain tiebacks, drawer pulls, or embellishments on picture frames or mirrors. You can experiment with various color combinations to match your existing decor or create a contrasting focal point. These small accents can make a big difference in transforming the overall look and feel of a space.
5. Kids Crafts
Dyed wooden beads are not only for adults; they can also be a fun and engaging material for kids’ crafts. Encourage their creativity by providing them with a variety of colored wooden beads and let them create their own jewelry, keychains, or even mini sculptures. This can be a great way to spend quality time together while fostering their artistic abilities.
In summary, dyed wooden beads offer endless possibilities for DIY projects. Whether you’re into macrame, jewelry making, home decor, or kids crafts, incorporating dyed wooden beads can add a vibrant and unique element to your creations. Let your imagination run wild and experiment with different colors, sizes, and patterns to create stunning and personalized pieces that stand out.
FAQs
1. How to dye wooden beads?
To dye wooden beads, first prepare a dye solution using fabric dye or wood stain mixed with water. Then immerse the beads in the dye solution and allow them to soak for the recommended time. Remove the beads from the solution, rinse them with water, and let them dry completely before using or sealing them.
2. Can I use food coloring to dye wooden beads?
Yes, food coloring can be used to dye wooden beads. Mix a few drops of food coloring with water to create a dye solution. Immerse the wooden beads in the solution and let them soak until the desired color is achieved. Rinse and dry the beads before using them.
3. How can I achieve a uniform color when dyeing wooden beads?
To achieve a uniform color when dyeing wooden beads, make sure to stir the dye solution well before immersing the beads. Ensure that all beads are fully submerged in the dye solution and agitate them occasionally to ensure even coloring. Additionally, consider using a dye that is specifically formulated for wood to achieve better results.
Conclusion:
In conclusion, dyeing wooden beads is a fun and creative way to add a pop of color to your jewelry or craft projects. By following the simple steps outlined in this guide, you can easily transform plain wooden beads into vibrant, custom pieces. Remember to choose a dye that is suitable for wood and experiment with different dyeing techniques to achieve unique results. Whether you want a subtle hue or a bold statement shade, the possibilities are endless. So, grab your wooden beads and start dyeing to unleash your creativity and add a personal touch to your next DIY project!