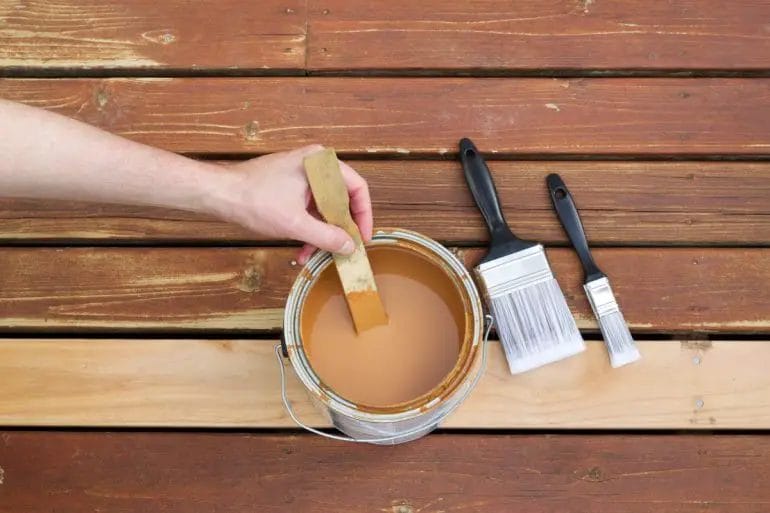
Dealing with wood stain mistakes can be a frustrating experience, but fear not – there are solutions to fix these errors and restore your wood surfaces to their desired finish. Whether it’s blotchy patches, uneven color, or smudges, addressing these issues requires careful consideration and the right techniques.
One common approach involves sanding down the stained surface to remove the existing finish and then reapplying the stain evenly. This helps to create a consistent and uniform appearance. Additionally, using wood conditioners or pre-stain treatments can help prevent uneven absorption and blotchiness.

If the stain mistake is more localized, you may be able to spot-treat the affected area by using sandpaper or a wood stain remover. This allows you to specifically focus on the problem spots without having to redo the entire surface. Remember to match the color and finish of the stain to achieve a seamless result.
For deeper or more stubborn stains, you may need to consider using bleach or oxalic acid solutions to lighten or remove the unwanted color. However, caution should be exercised when working with these chemicals, as they can be harmful if not handled properly.
Prevention is always better than correction, so it’s essential to take precautionary measures when applying wood stain. Test the stain on a small, inconspicuous area before tackling larger surfaces, and always follow the manufacturer’s instructions for best results.
Now that

Expert Tips for Correcting Wood Stain Mistakes
Wood staining can be a rewarding and transformative process that brings out the natural beauty of the wood. However, even the most experienced woodworkers can make mistakes when staining. If you find yourself in a situation where you’ve made a stain mistake, don’t worry – there are several expert tips that can help you correct the problem and achieve the desired finish. In this section, we will discuss some of the most effective techniques for fixing common wood stain mistakes.
1. Sanding
One of the most common methods for correcting wood stain mistakes is sanding. If you’ve applied too much stain, unevenly, or have streaks and blotches, sanding can help you remove the excess stain and even out the color. Start by using a medium-grit sandpaper and gently sand the stained area in the direction of the grain. Be careful not to apply too much pressure as it can damage the wood. Once the excess stain is removed, switch to a finer-grit sandpaper for a smoother finish. Remember to wipe away any dust before reapplying the stain.
2. Stripping
If the wood stain mistake is severe or you want to completely remove the existing stain, stripping is a recommended technique. Stripping involves using a chemical wood stripper to break down and remove the stain from the wood surface. Follow the instructions provided by the manufacturer carefully and apply the stripper using a brush or cloth. Allow the stripper to sit for the recommended time, then use a scraper or steel wool to remove the softened stain. Afterward, clean the wood surface thoroughly and let it dry before applying a new stain.
3. Bleaching
In some cases, you may encounter a wood stain mistake where the color is too dark or doesn’t match your desired finish. In such situations, bleaching can help lighten the wood and remove the unwanted stain. There are two types of bleaching agents commonly used: chlorine bleach and oxalic acid. Chlorine bleach is effective for removing water-based stains, while oxalic acid is suitable for removing oil-based stains. Apply the bleach following the manufacturer’s instructions, and use a cloth or brush to distribute it evenly. Allow the bleach to sit for the recommended time, then thoroughly rinse the wood with water. Let it dry completely before proceeding with staining.
4. Color Matching
If the wood stain mistake is a result of an uneven or mismatched color, you can try color matching techniques to blend the stain and achieve a more uniform appearance. One method is to use a gel stain or a tinted topcoat to adjust the color and create a seamless blend. Start by applying a small amount of the desired stain or topcoat to a test piece of wood or an inconspicuous area. Evaluate the color and adjust as needed until you achieve the desired match. Once you are satisfied, apply the stain or topcoat to the affected area, following the manufacturer’s instructions.
5. Prevention for Future Projects
While knowing how to correct wood stain mistakes is essential, it’s equally important to prevent them from happening in the future. Here are a few tips to help you avoid common staining errors:
- Always prepare the wood surface properly by sanding and cleaning it before staining.
- Test the stain on a small, inconspicuous area or a test piece of wood to ensure it matches your desired finish.
- Apply the stain evenly and wipe off any excess to prevent blotches and streaks.
- Use the right type of brush or applicator for the stain you are using to achieve a smooth and even application.
- Follow the manufacturer’s instructions for drying and curing times to allow the stain to set properly.
In summary, wood stain mistakes can happen to anyone, but they can be corrected with the right techniques. Whether it’s sanding, stripping, bleaching, or color matching, there are solutions for every staining error. By following the expert tips mentioned above and taking preventive measures, you can ensure successful and satisfying wood staining projects.
Easy Steps to Repair Wood Stain Blunders
Wood staining can be a great way to enhance the beauty of your wooden furniture or flooring. However, even the most experienced DIY enthusiasts can make mistakes when it comes to applying wood stains. Whether it’s an uneven application, drips, or blotches, these errors can leave you with less than perfect results. But fear not! In this section, we will guide you through easy steps to repair common wood stain blunders, so you can achieve a flawless finish.
1. Assess the Damage
The first step in repairing a wood stain blunder is to carefully assess the damage. Take a close look at the stained wood surface and identify the specific areas that need attention. Is it an uneven color, drips, or blotches? Understanding the nature of the problem will help you determine the best course of action to fix it.
2. Sand the Surface
Once you have identified the problem areas, it’s time to sand the wood surface. Use sandpaper with a grit suitable for the type of wood and the severity of the stain blunder. Sand in the direction of the grain, applying gentle pressure to avoid damaging the wood. Sanding will remove the existing stain and prepare the surface for a fresh application.
3. Clean and Prep
After sanding, it’s important to thoroughly clean the wood surface to remove any dust, debris, or residue left behind. Use a tack cloth or a slightly damp cloth to wipe down the entire area. Once the surface is clean, allow it to dry completely before proceeding.
4. Apply Stain Corrector
In some cases, simply sanding the surface may not be enough to fix the stain blunder. If you’re dealing with stubborn blotches or color inconsistencies, consider using a stain corrector. These products are specifically designed to even out the color and provide a uniform finish. Follow the instructions on the product packaging to apply the stain corrector evenly over the affected areas.
5. Reapply Wood Stain
Once the stain corrector has dried, it’s time to reapply the wood stain. Choose a high-quality wood stain that matches the desired color and follow the manufacturer’s instructions for application. Use a brush or a clean cloth to apply the stain in smooth, even strokes, going with the grain of the wood. Apply multiple thin coats if necessary, allowing each coat to dry fully before proceeding.
6. Seal and Protect
After the final coat of wood stain has dried, it’s essential to seal and protect the surface. Apply a clear coat or a protective finish over the stained wood to enhance its durability and provide a beautiful luster. Follow the manufacturer’s instructions for the chosen sealant and apply it evenly over the entire surface. Allow it to dry completely before using or placing any objects on the newly stained wood.
Summary
Wood stain blunders can be frustrating, but with these easy steps, you can repair and restore your wood surfaces to their former glory. Remember to assess the damage, sand the surface, clean and prep, apply stain corrector if needed, reapply wood stain, and seal and protect. By following these steps carefully, you can achieve a flawless finish and enjoy the beauty of your wood furniture or flooring for years to come.

Common Wood Stain Mistakes and How to Fix Them
Staining wood can be a rewarding and transformative process that enhances the beauty of your furniture, flooring, or other wooden surfaces. However, it’s important to approach staining with care and precision to avoid common mistakes that can result in less-than-desirable outcomes. In this section, we will discuss some of the most common wood stain mistakes and provide you with tips on how to fix them.
1. Uneven Stain Absorption
One of the most frustrating issues that can arise when staining wood is uneven absorption of the stain. This can lead to blotchy or streaky results, where some areas appear darker or lighter than others. To fix this issue, you can try the following remedies:
- Apply a wood conditioner: Before staining, use a wood conditioner specifically designed to promote more even absorption of the stain. This will help prevent blotching and ensure a more uniform finish.
- Sand the surface: If you’ve already applied the stain and notice uneven absorption, you can sand the surface lightly to remove the excess stain. Then, reapply the stain using a more controlled and even technique.
- Apply multiple coats: Another way to even out the stain is to apply multiple thin coats instead of one thick coat. This allows for better penetration and absorption, resulting in a more consistent color.
2. Blotchy or Dark Spots
Blotchy or dark spots can occur when the wood absorbs the stain unevenly, resulting in areas that appear darker than the rest. To fix this issue, you can try the following solutions:
- Prep the wood properly: Ensure that the wood is clean and free from dirt, grease, or any other contaminants before applying the stain. This will help achieve a more even finish.
- Use a pre-stain wood conditioner: Applying a pre-stain wood conditioner can help prevent blotchy or dark spots by promoting more even absorption of the stain.
- Try gel stain: Gel stains are thicker and less prone to blotching. They can be easier to control and provide a more even finish, especially on difficult-to-stain woods.
3. Overlapping or Drying Too Quickly
When applying stain, it’s essential to work in small sections and avoid overlapping to prevent unsightly lines or streaks. Additionally, if the stain dries too quickly, it can result in a patchy or uneven finish. Here’s how you can address these issues:
- Work in small sections: Divide the surface into manageable sections and apply the stain in one direction. Avoid going back over areas that have already been stained to prevent overlapping.
- Wipe off excess stain: After applying the stain, use a clean cloth to wipe off any excess to ensure an even application. This will also help prevent the stain from drying too quickly.
- Use a slower-drying stain: If you’re struggling with the stain drying too quickly, consider using a slower-drying stain or adding a stain retarder to extend the drying time.
4. Inconsistent Color
Inconsistent color can occur when multiple pieces of wood are being stained, and they end up with noticeably different shades. To achieve a more consistent color, follow these recommendations:
- Choose consistent wood species: If you’re working with multiple pieces of wood, try to select pieces from the same wood species to ensure a more consistent color outcome.
- Test the stain on scraps: Before applying the stain to the main project, test it on scraps of the same wood to see how it looks. This will help you adjust the stain or technique if needed.
- Blend different shades: If you end up with pieces of wood that have different shades, you can try blending the colors using a tinted topcoat or a glaze. This can help create a more cohesive look.
In summary, staining wood can yield beautiful results when done correctly. By avoiding these common wood stain mistakes and implementing the suggested fixes, you can achieve a more professional and visually appealing finish for your wood projects.
5. Foolproof Methods to Rectify Wood Staining Errors
Wood staining is a popular technique used to enhance the beauty of wooden surfaces. It gives a rich, vibrant color and can transform the look of any piece of furniture or flooring. However, staining wood is not always a smooth process, and mistakes can happen. Whether it’s an uneven color distribution or blotchy patches, these errors can be frustrating. But fear not, as there are foolproof methods to rectify wood staining errors. In this section, we will discuss some effective techniques to fix common staining mistakes and restore the desired finish.
1. Sanding
One of the most common staining errors is an uneven or blotchy appearance. This can happen due to the wood’s natural grain or improper application of the stain. Sanding is an excellent technique to rectify this issue. Start by using fine-grit sandpaper and gently sand the stained surface in the direction of the wood grain. This will help remove the excess stain or even out the color. After sanding, wipe away the dust and reapply the stain, ensuring an even and smooth finish.
2. Stripping
If you have applied multiple coats of stain and are unhappy with the final result, stripping is a reliable method to rectify the error. Stripping involves removing the existing stain from the wood surface before applying a new one. There are various stripping products available in the market that can effectively remove the stain without damaging the wood. Follow the manufacturer’s instructions carefully and use a scraper or brush to remove the old stain. Once the surface is stripped, clean it thoroughly, and apply a fresh coat of stain.
3. Bleaching
In some cases, the wood may have a stubborn stain that cannot be removed by sanding or stripping alone. Bleaching is an additional method that can be used to lighten or remove dark stains. There are wood bleach products available specifically for this purpose. Apply the bleach to the stained area following the manufacturer’s instructions. It’s important to test the bleach on a small, inconspicuous area first to ensure it doesn’t cause any damage. After bleaching, neutralize the wood with water, let it dry, and then proceed with staining.
4. Color Correction
If the stained wood has an undesirable color tone, color correction techniques can be employed. For example, if the wood appears too orange, a touch of blue stain can be added to create a more balanced hue. Similarly, if the wood has a reddish tint, a hint of green stain can help neutralize it. Color correction requires careful experimentation and a good understanding of color theory. Test the correction method on a small sample before applying it to the entire surface.
5. Overstaining
Overstaining occurs when the wood absorbs too much stain, resulting in a darker shade than intended. To rectify this error, you can use a solvent-based stain remover or mineral spirits to lighten the stain. Apply the stain remover to a cloth and gently rub it on the overstained area. This will help lift some of the excess stain. Remember to work in small sections and wipe off any residue promptly. After removing the excess stain, you can reapply a lighter coat of stain to achieve the desired color.
In summary, while wood staining errors can be frustrating, there are foolproof methods to rectify them. Whether it’s sanding, stripping, bleaching, color correction, or removing excess stain, these techniques can help you achieve the desired finish. Just remember to take your time, follow the instructions carefully, and test any new products or methods on a small, inconspicuous area before applying them to the entire surface. With a little patience and effort, you can fix wood staining errors and restore the natural beauty of your wooden surfaces.
FAQs
1. How can I fix wood stain mistakes?
To fix wood stain mistakes, you can sand down the wood surface to remove the existing stain. After sanding, clean the surface and apply a new layer of stain, ensuring even coverage. If the mistake is minor, you can also try using a stain marker or touch-up pen to blend and correct the area.
2. What should I do if the wood stain appears blotchy or uneven?
If the wood stain appears blotchy or uneven, it could be due to improper prepping or application. To fix it, you can sand down the wood surface to remove the existing stain. Afterward, make sure to properly clean the surface and apply a pre-stain conditioner to promote even absorption. Finally, reapply the stain in thin, even coats to achieve a consistent finish.
3. How do I remove excess wood stain?
If you have excess wood stain on the surface, you can wipe it away with a clean cloth or rag while the stain is still wet. If the stain has dried, you may need to use a fine-grit sandpaper or a chemical stain remover to remove the excess. Always follow the manufacturer’s instructions and wear protective gear when working with chemical removers.
Conclusion
In conclusion, fixing wood stain mistakes can be a simple process with the right approach. By following the steps mentioned, you can easily correct any errors and achieve the desired finish for your wood projects.
Remember to start by assessing the extent of the mistake and determining if it can be fixed through light sanding or if a complete strip is needed.
Additionally, paying attention to the type of stain used and following manufacturer’s instructions can greatly help in avoiding mistakes in the first place.
With patience and proper technique, you can restore your wood surface to its original beauty and enjoy the satisfaction of a job well done.
