Lighting a wooden wick candle is an easy and enjoyable process that adds a cozy atmosphere to any space. The unique crackling sound and longer burn time of wooden wicks make them a popular choice for candle enthusiasts. To light a wooden wick candle, simply follow these steps:
1. Trim the wick to about ¼ inch before lighting to ensure a clean and even burn.

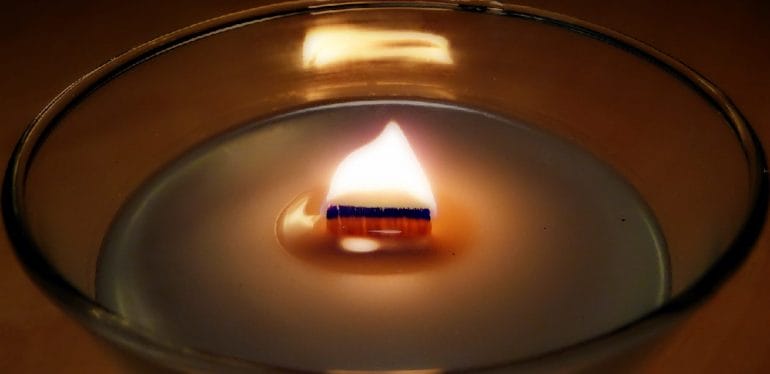
2. Hold the match or lighter to the base of the wick and let it catch fire.
3. Allow the flame to spread across the entire width of the wick, ensuring an even burn.
4. Enjoy the gentle crackling sound and the warm glow of your wooden wick candle.
With these simple steps, you can effortlessly light your wooden wick candle and create a soothing ambiance in your home.
Prepping the Wooden Wick for Lighting
Before you can enjoy the cozy ambiance and crackling sound of a wooden wick candle, it’s important to properly prep the wick for lighting. Taking the time to prepare the wooden wick will ensure a clean and even burn, and will help prolong the life of your candle.
1. Trim the Wick
Start by trimming the wooden wick to a length of about ⅛ inch. This will help the wick ignite more easily and prevent excessive smoke. Use a pair of scissors or wick trimmers to trim the wick, making sure it is evenly cut across.
2. Clear the Wick Channel
Next, check the wick channel in your candle. The wick channel is the groove or depression that runs along the surface of the wax where the wick sits. Make sure the channel is clear of any debris or excess wax that could obstruct the wick from burning properly.
3. Create a Small Well
In order to encourage an even burn, it’s helpful to create a small well around the base of the wick. Use a small utensil or the back of a spoon to gently press the wax around the wick, creating a shallow well. This will allow the wax to pool around the wick and provide a consistent fuel source for the flame.
4. Prime the Wick
Priming the wick is an important step to ensure a successful burn. To prime the wooden wick, simply light the wick and let it burn for a few seconds. This will heat up the wax and establish a good flame. After a few seconds, extinguish the flame and let the wax cool down.
5. Light the Candle
Now that your wooden wick is prepped and ready, it’s time to light your candle. Hold the flame from a lighter or match to the base of the wick and gently tilt it towards the flame. The wick should catch fire and start burning steadily.
6. Monitor the Burn
Once your candle is lit, it’s important to monitor the burn to ensure safety and optimal performance. Make sure the flame is not too high or too low, and adjust as necessary. Keep an eye on the wax pool to prevent it from becoming too deep, as this can drown the wick.
7. Extinguishing the Candle
When you’re ready to extinguish your wooden wick candle, avoid blowing it out as this can cause hot wax to splatter. Instead, use a snuffer or gently press the burning wick into the wax pool, submerging it completely. This will extinguish the flame and help preserve the integrity of the wick for future use.
In summary, prepping the wooden wick for lighting involves trimming the wick, clearing the wick channel, creating a small well, priming the wick, lighting the candle, monitoring the burn, and safely extinguishing the flame. By following these steps, you can enjoy a beautiful and long-lasting wooden wick candle experience.
Lighting Techniques for Wooden Wick Candles
Wooden wick candles have gained popularity in recent years due to their unique crackling sound and aesthetic appeal. These candles are a great addition to any home decor, and they require specific techniques for proper lighting to ensure a pleasant and safe experience. In this section, we will explore some lighting techniques that will help you make the most of your wooden wick candles.
1. Trimming the Wick
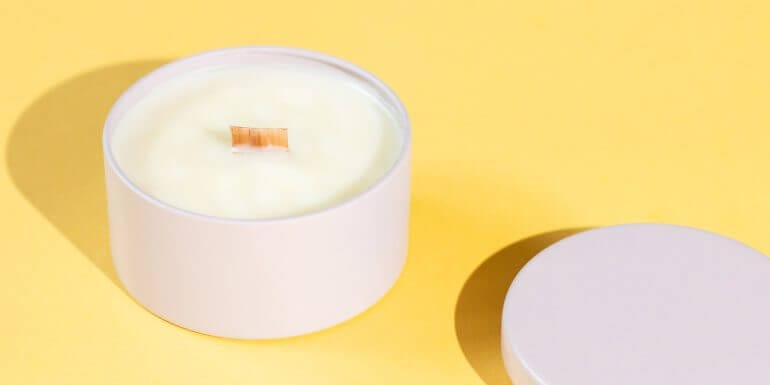
Before you light your wooden wick candle for the first time, it is crucial to trim the wick. Unlike traditional cotton wicks, wooden wicks have a flat shape that requires trimming to prevent excessive flickering and uneven burning. Use a pair of wick trimmers to trim the wick to a length of about 1/8 – 1/4 inch. This will promote a steady flame and prevent the candle from smoking.
2. Preparing the Candle
Prior to lighting the candle, ensure that the wax pool has solidified completely. This will prevent the candle from tunneling and ensure an even burn. Allow the candle to cool and harden for a few hours before attempting to light it again. This step is essential for the longevity of your wooden wick candle.
3. Light the Wick Properly
When lighting a wooden wick candle, it is important to position the flame correctly. Hold the flame at a low angle, just above the wick, and allow it to catch fire. Avoid directly touching the wick with the flame, as this may cause damage to the wick or lead to uneven burning. Patience is key; give the flame a few seconds to ignite the wick properly.
4. Extinguishing the Flame
Extinguishing the flame of a wooden wick candle requires a slightly different approach than traditional cotton wick candles. Instead of blowing out the flame, use a snuffer or dip the wick into the wax pool gently. This method prevents the wick from smoking or smoldering and helps maintain the integrity of the wooden wick for future use.
5. Safety Precautions
While enjoying the ambiance and crackling sound of your wooden wick candle, it is essential to follow some safety precautions:
- Never leave a burning candle unattended. Always extinguish the flame when leaving the room.
- Keep the candle away from flammable objects. Ensure there is enough space around the candle to prevent accidental contact with curtains, papers, or other flammable materials.
- Place the candle on a heat-resistant surface. Wooden wick candles tend to produce more heat than traditional candles. Use a candle holder or a heat-resistant surface to protect your furniture from damage.
- Keep the wick trimmed. Regularly trim the wick to a proper length to prevent excessive flickering and ensure a safe burn.
In Summary
Wooden wick candles offer a unique and cozy ambiance to any space. By following the proper lighting techniques, including trimming the wick, preparing the candle, lighting the wick correctly, and safely extinguishing the flame, you can enjoy the crackling sound and beautiful glow of your wooden wick candle while ensuring a safe and pleasant experience.

Troubleshooting Common Issues When Lighting Wooden Wick Candles
If you’re a fan of candles, you may have come across wooden wick candles. These unique candles offer a soothing crackling sound and a beautiful ambiance. However, like any other type of candle, wooden wick candles may encounter some common issues when it comes to lighting them. In this section, we will discuss these problems and provide troubleshooting tips to help you enjoy your wooden wick candles to the fullest.
1. Difficulty in Lighting the Wick
One common issue with wooden wick candles is difficulty in lighting the wick. Unlike traditional cotton wicks, wooden wicks require a slightly different approach to get them started. Here are a few tips to overcome this problem:
- Trim the wick: Before lighting your wooden wick candle, make sure it is trimmed to around 1/8 inch. If the wick is too long, it may have a harder time catching fire.
- Use a long-reach lighter: Wooden wicks tend to be longer than cotton wicks, so it’s helpful to use a long-reach lighter or matches to reach the wick more easily.
- Hold the flame for longer: When lighting a wooden wick, hold the flame to the wick for a few extra seconds to allow it to catch fire properly.
2. Uneven Burning
Another common issue is uneven burning, where the candle burns unevenly and leaves unused wax along the edges. To troubleshoot this problem, follow these tips:
- Trim the wick: Keeping the wick trimmed to the appropriate length is essential for an even burn. Make sure to trim the wick before each use.
- Allow the wax to melt all the way: To prevent tunneling, ensure that the entire surface of the candle has melted into a pool of liquid wax before extinguishing it. This promotes an even burn for future uses.
- Avoid drafty areas: Drafts can disrupt the burning process and cause uneven burns. Place your wooden wick candle in a draft-free area to ensure an even burn.
3. Excessive Soot or Smoking
If you notice excessive soot or smoking when burning your wooden wick candle, there are a few steps you can take to troubleshoot the issue:
- Trim the wick: A long wick can cause excessive soot and smoking. Trim the wick to the recommended length to avoid this problem.
- Remove debris: Sometimes, debris or charred wood can accumulate on the wick, leading to increased soot production. Use a wick trimmer or a pair of scissors to remove any debris before lighting the candle.
- Burn the candle for shorter durations: If you frequently burn your wooden wick candle for extended periods, it may produce more soot. Try burning it for shorter durations and avoid leaving it unattended.
4. Wick Drowning
Wick drowning occurs when the wax pool covers the wick entirely, making it difficult to relight. To prevent this issue, follow these steps:
- Trim the wick: Ensure that the wick is trimmed to the appropriate length before lighting your wooden wick candle. A longer wick can contribute to wick drowning.
- Allow the wax to melt evenly: To prevent the wick from drowning, make sure to allow the entire surface of the candle to melt into a pool of liquid wax during each use.
- Extinguish and reposition the wick: If the wick is submerged in wax, carefully extinguish the candle and reposition the wick upright. Allow the wax to solidify before relighting the candle.
By following these troubleshooting tips, you can overcome common issues that may arise when lighting wooden wick candles. Remember to always prioritize safety and enjoy the cozy ambiance and soothing crackling sound of your wooden wick candles.
Best Practices for a Long-Lasting and Even Burn with Wooden Wick Candles
If you’re a candle enthusiast, you’ve probably come across wooden wick candles. These unique candles not only add a touch of elegance to any space, but they also create a cozy ambiance with their crackling sound reminiscent of a soothing fireplace. However, to ensure you get the most out of your wooden wick candles, it’s important to follow some best practices for a long-lasting and even burn. In this section, we’ll explore these practices in detail.
1. Trim the Wick
Before lighting your wooden wick candle, it’s crucial to trim the wick to approximately ⅛ to ¼ of an inch. Trimming the wick helps prevent excessive flickering, mushrooming, and uneven burning. A shorter wick ensures a controlled and steady flame, resulting in a longer-lasting burn.
2. Let the Wax Pool
Allowing the wax to pool is an essential step in achieving an even burn with wooden wick candles. When you first light your candle, make sure to let the wax melt and pool across the entire surface. This will prevent tunneling, where the candle burns straight down the middle, leaving wasted wax along the sides. To achieve this, ensure you burn the candle for at least 2-3 hours during the first lighting.
3. Avoid Drafts
Wooden wick candles are sensitive to air flow, so it’s crucial to place them in draft-free areas. Strong drafts can cause the flame to flicker excessively, leading to uneven burning and potential wax spills. Keep your candle away from open windows, air vents, and ceiling fans to maintain a steady and consistent burn.
4. Burn in Increments
For the best burn experience, it’s recommended to burn wooden wick candles in increments of 2-4 hours. This allows the wax to liquefy fully and ensures a consistent burn throughout. Avoid burning the candle for extended periods, as this may result in the wax becoming too hot and potentially damaging the wick.
5. Extinguish Properly
When it’s time to extinguish your wooden wick candle, avoid blowing it out. Blowing may cause the wick to smolder or break off, affecting future burns. Instead, use a candle snuffer or gently press the wooden wick into the melted wax, allowing it to extinguish naturally. This method helps preserve the integrity of the wick and makes relighting easier for your next use.
6. Store Correctly
Proper storage is essential for maintaining the quality of your wooden wick candles. Keep them away from direct sunlight and store them in a cool, dry place. Excessive exposure to sunlight can cause the wax to melt unevenly, while moisture can affect the wooden wick’s performance. By storing your candles correctly, you’ll ensure they stay in pristine condition for extended periods.
7. Enjoy Regularly
Lastly, the best way to ensure a long-lasting and even burn with your wooden wick candles is to enjoy them regularly. Regularly burning your candles prevents the wax from becoming stagnant or developing “memory rings” where the wax only melts to the previous point. So, light up those delightful wooden wick candles, sit back, and relish the cozy atmosphere they create.
By following these best practices, you can maximize the lifespan and enjoyment of your wooden wick candles. From trimming the wick to storing them correctly, each step plays a vital role in achieving a long-lasting and even burn. So, go ahead and indulge in the comforting warmth and crackling sound of wooden wick candles while creating a serene ambiance in your home.
FAQs
1. How do I light a wooden wick candle?
When lighting a wooden wick candle, make sure the wick is trimmed to about 1/8 inch. Use a candle lighter or long match to ignite the wick at the base. Allow the flame to burn for a few seconds before gently blowing it out. This will help the wick to establish a proper burn pool.
2. Why is my wooden wick candle not staying lit?
If your wooden wick candle is struggling to stay lit, it could be due to a few reasons. First, make sure the wick is trimmed to the recommended length of 1/8 inch. Additionally, check for any debris or buildup on the wick that could be obstructing the flame. Finally, ensure that the candle is placed in a draft-free area to prevent the flame from being extinguished.
3. How do I extinguish a wooden wick candle?
To extinguish a wooden wick candle, gently blow out the flame. Avoid using water or any other liquid to put out the candle. After blowing out the flame, ensure that the wick is completely cool to the touch before leaving the candle unattended.
Conclusion
In conclusion, learning how to light a wooden wick candle is a simple but crucial step in ensuring a successful burn and a pleasant ambiance. By following a few easy steps, you can achieve a clean and even burn, as well as extend the life of your candle.
Remember to trim the wick before each use, allowing it to be approximately 1/4 inch in length to prevent excessive smoking and mushrooming. Use a long-handled lighter or matches to avoid burning yourself and gently tilt the flame towards the base of the wick until it ignites.
Once the candle is lit, allow it to burn for at least two hours to ensure a complete melt pool and prevent tunneling. With proper care and attention, your wooden wick candle will provide you with hours of soothing fragrance and cozy ambiance.
