Interested in making your own flute? Look no further! Discover the joy of creating your very own wooden flute with our step-by-step guide. Whether you’re a seasoned woodworker or a beginner looking for a fun project, crafting a flute from wood can be a rewarding experience.
From choosing the right type of wood to shaping and tuning the instrument, we’ll walk you through the entire process. Learn about the different techniques involved, including carving, sanding, and finishing, to bring out the natural beauty of the wood and achieve a harmonious sound.

Not only will you gain a deeper understanding of the flute-making process, but you’ll also have a unique instrument that you can proudly call your own. So, grab your tools and let’s get started on this musical adventure!

Tools and Materials Needed for Making a Wooden Flute
Making a wooden flute requires a few specialized tools and materials to ensure a successful and precise construction process. Whether you are a woodworking enthusiast or a professional flute maker, having the right tools can make a significant difference in the outcome of your project. In this section, we will discuss the essential tools and materials needed for making a wooden flute.
Tools:
- Band saw: A band saw is a crucial tool for accurately cutting the various pieces of the flute, such as the body, headjoint, and foot joint.
- Drill press: A drill press is essential for drilling precise holes in the flute’s body for the keys and tuning mechanisms.
- Router: A router is used for shaping and smoothing the flute’s exterior surface and creating the necessary contours.
- Files and rasps: These tools are used for refining and shaping the interior and exterior surfaces of the flute.
- Sandpaper: Sandpaper of various grits is required for sanding and smoothing the wood surfaces, ensuring a polished finish.
- Clamps: Clamps are necessary for securing the various flute components during the construction process.
- Measuring tools: Measuring tools such as a ruler, calipers, and a protractor are essential for precise measurements and alignment.
- Woodworking vice: A woodworking vice is useful for securing the flute components when working on smaller details or delicate parts.
- Wood carving tools: These tools are necessary for carving intricate designs or patterns on the flute’s body.
- Finishing tools: Brushes, lacquer, oil, or varnish are used for applying the finishing touches to the flute, enhancing its appearance and protecting the wood.
Materials:
Choosing the right type of wood is crucial for the sound quality and durability of the flute. The following are some common types of wood used for making wooden flutes:
- African Blackwood: Renowned for its rich and warm tone, African blackwood is a popular choice among professional flute makers.
- Maple: Maple wood offers a bright and clear tone and is commonly used for flutes.
- Cocobolo: Cocobolo is known for its vibrant color and excellent resonance, making it a favored choice for flute making.
- Bamboo: Bamboo flutes are lightweight and produce a unique, airy sound, often used in traditional and folk music.
In addition to the wood, other materials required for making a wooden flute include:
- Headjoint cork or cork sheet: This material is used to create a secure seal between the headjoint and the flute body.
- Flute keys: Depending on the design and complexity of the flute, various keys, springs, and rods may be needed.
- Binding materials: Binding materials such as thread or wire are used for securing the flute’s components together.
- Glue: Wood glue or epoxy is used for bonding the various parts of the flute together.
Having these tools and materials on hand will ensure that you have everything you need to create a beautiful and functional wooden flute. It is important to invest in high-quality tools and source the best wood available to achieve the desired sound and craftsmanship in your final product.
Step-by-step guide to carving and shaping the flute
Carving and shaping a flute from a solid piece of wood can be a rewarding and fulfilling process. It allows you to create a customized instrument that fits your preferences and style. In this section, we will provide a step-by-step guide on how to carve and shape a flute.
Materials and tools needed
Before you begin, gather the following materials and tools:
- A suitable piece of wood (preferably hardwood)
- A pencil or marker
- A carving knife or chisel
- Sandpaper (various grits)
- A file
- A drill with appropriate drill bits
- Finishing materials (such as oil or varnish)
Step 1: Design your flute
The first step is to design your flute. Decide on the overall length, diameter, and hole placement. Use a pencil or marker to draw the outline of the flute on the wood. This will serve as a guide during the carving process.
Step 2: Carve the rough shape
Using a carving knife or chisel, carefully begin removing excess wood from the flute blank. Start by carving the rough shape of the flute, following the outline you drew in the previous step. Take your time and work gradually, ensuring that you maintain the symmetry and proportions of the flute.
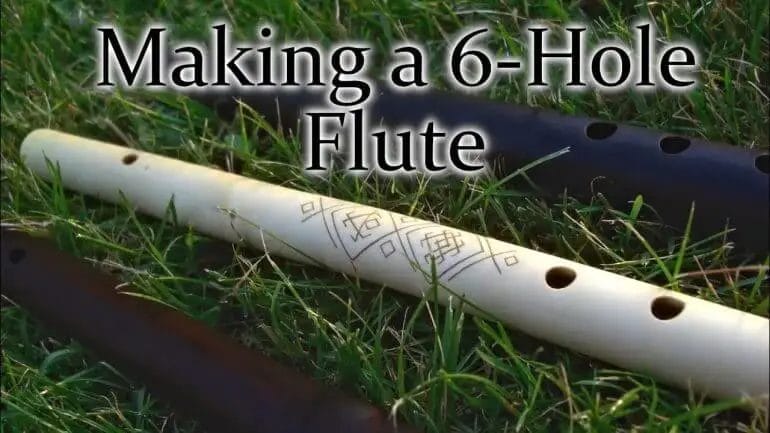
Step 3: Carve the finger holes
Once you have carved the rough shape of the flute, it’s time to carve the finger holes. Use a drill with an appropriate drill bit to create the finger holes at the desired locations. Start with smaller holes and gradually enlarge them until they produce the desired pitch when played.
Step 4: Refine the shape
After carving the finger holes, use a carving knife, file, and sandpaper to refine the shape of the flute. Smooth out any rough edges and contours. Pay attention to the transition between the body and the mouthpiece, ensuring a comfortable and seamless feel when playing.
Step 5: Test and adjust
Once the flute is shaped to your satisfaction, it’s time to test it. Play each finger hole and adjust the size and depth as needed to achieve the desired tone and pitch. Make small adjustments and retest until you are happy with the sound produced by the flute.
Step 6: Finish the flute
Finally, apply a suitable finish to the flute to protect the wood and enhance its appearance. You can choose to use oil, varnish, or any other finish that suits your preference. Apply multiple coats, sanding between each layer, to achieve a smooth and polished finish.
In summary, carving and shaping a flute requires careful attention to detail and patience. By following this step-by-step guide, you can create a beautiful and functional flute that reflects your craftsmanship and musicality.
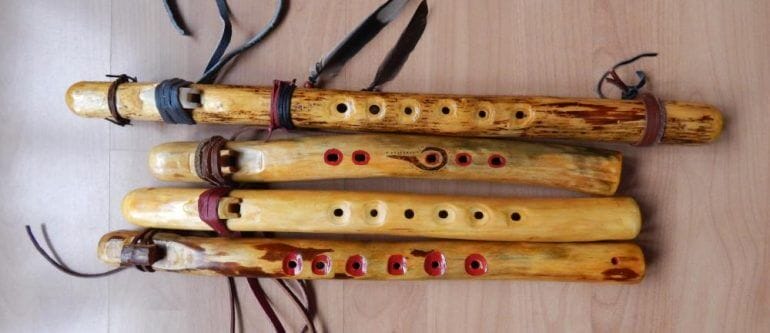
Adding Finger Holes
Once you have crafted a basic wooden flute, the next step is to add finger holes. These holes are essential for producing different notes and melodies. Here is a step-by-step guide on how to add finger holes to your wooden flute:
- Measure and mark the hole positions: Use measuring tape or a ruler to mark the desired positions for the finger holes on your flute. The hole placements will depend on the specific key and tuning you want to achieve. Typically, the first hole is located approximately 1.5 to 2 inches from the top of the flute, and the remaining holes are spaced at specific intervals along the length of the instrument.
- Drill the finger holes: Using an appropriately sized drill bit, carefully drill holes at the marked positions. Start with a smaller drill bit and gradually increase the size until you achieve the desired diameter for each hole. Take care to drill straight and evenly.
- Smooth the edges: Use sandpaper or a file to smooth the edges of the newly drilled holes. This will ensure that your fingers can cover the holes completely and comfortably while playing the flute.
- Test the sound: Once the finger holes are added, test the sound by blowing into the flute and covering/uncovering the holes with your fingers. Adjust the hole sizes if necessary to achieve the desired pitch and tone.
It is important to note that the number and placement of finger holes may vary depending on the type of flute you are making. Traditional flutes, such as the Native American flute, often have a specific hole pattern and spacing that you can research and follow for a more authentic sound.
Tuning Your Wooden Flute
Tuning your wooden flute is a crucial step in ensuring that it produces accurate and harmonious notes. Here are some tips on how to tune your wooden flute:
- Use a tuner: Start by using a digital tuner to determine the current pitch of your flute. Attach the tuner to the end of the flute and blow into the instrument while covering all the finger holes. The tuner will display the note being played, allowing you to assess the initial tuning.
- Adjust the length: To alter the pitch of your flute, you can either shorten or lengthen the overall length of the instrument. Shortening the flute will result in a higher pitch, while lengthening it will lower the pitch. Trim or extend the flute accordingly, making small adjustments at a time and retesting the pitch with the tuner until you achieve the desired tuning.
- Fine-tune with finger hole adjustments: If the overall length adjustment is not enough to fine-tune the flute, you can make slight adjustments to the size and position of the finger holes. This can be done by enlarging or slightly shifting the holes using sandpaper or a file. Be cautious and make small adjustments at a time, as even a slight change can significantly affect the sound produced by the flute.
- Test the sound: After each adjustment, test the sound by playing different notes and melodies on your flute. Listen carefully to ensure that the flute is in tune and that all the notes are in harmony with each other.
Tuning a wooden flute can be a trial-and-error process, especially if you are new to flute making. Take your time, be patient, and make incremental adjustments until you achieve the desired tuning. Remember, each flute is unique, and the tuning process may vary depending on the type of wood used, the flute’s design, and personal preferences.
Tips and Tricks for Finishing and Maintaining Your Homemade Wooden Flute
You’ve successfully crafted your own homemade wooden flute and now you’re eager to play it. But before you start enjoying the soothing melodies, it’s important to ensure that your flute is properly finished and maintained. In this section, we’ll provide you with some essential tips and tricks to help you achieve a beautiful finish and keep your flute in optimal condition.
1. Sanding
Start by sanding the entire surface of your flute using fine-grit sandpaper. This will help to smoothen out any rough edges and imperfections. Make sure to sand in the direction of the grain to avoid damaging the wood. Gradually switch to higher grit sandpaper for a finer finish.
2. Applying a Finish
Once you’ve sanded the flute, it’s time to apply a finish to protect the wood and enhance its natural beauty. There are several options to choose from, such as oils, waxes, and varnishes. Select a finish that suits your preferences and follow the manufacturer’s instructions for application.
If you prefer a more natural look, consider using a wood oil or wax. These finishes provide a protective layer and bring out the wood’s natural grain. Apply the oil or wax evenly using a soft cloth, and let it dry thoroughly before buffing for a smooth and shiny finish.
On the other hand, if you desire a more durable and glossy finish, opt for a varnish. Apply thin coats of varnish using a brush, and allow each coat to dry completely before applying the next. Sand lightly between coats to ensure a smooth finish.
3. Caring for Your Flute
Proper maintenance is crucial to keep your homemade wooden flute in top condition. Here are some important care tips to follow:
- Store your flute in a dry place away from extreme temperatures and direct sunlight to prevent warping or cracking of the wood.
- Regularly clean your flute by gently wiping it with a soft, dry cloth after each use to remove any moisture or residue.
- Avoid exposing your flute to excessive humidity or moisture, as this can cause damage to the wood. If you live in a humid climate, consider using a dehumidifier or storing your flute with desiccant packs.
- Periodically oil the bore of your flute using a specialized bore oil. This helps to maintain the wood’s moisture balance and prevent cracking.
- Inspect your flute regularly for any signs of damage or wear, such as loose keys or cracks. If you notice any issues, consult a professional flute repair technician for proper maintenance and repairs.
4. Playing Techniques
While maintaining your flute is important, it’s equally crucial to develop good playing techniques to ensure optimal sound quality and performance. Here are a few tips:
- Hold the flute with a relaxed and comfortable grip, allowing your fingers to cover the holes fully.
- Practice proper breath control to produce clear and resonant tones. Take long, steady breaths and experiment with different levels of air pressure.
- Explore various fingerings and experiment with different finger positions to achieve different notes and articulations.
- Regularly practice scales and exercises to improve your technique and tone control.
- Consider taking lessons from a professional flute player or joining a flute community to enhance your skills and receive valuable guidance.
With these tips and tricks, you’re well-equipped to finish and maintain your homemade wooden flute. Enjoy the process of crafting and playing your flute, and let the beautiful melodies fill the air!
FAQs
1. How can I make a flute out of wood?
To make a flute out of wood, start by selecting a suitable wood type like bamboo or hardwood. Cut the wood into a cylindrical shape and hollow out the inside. Create finger holes and a mouthpiece. Finally, tune the flute by adjusting the length and size of the holes. Practice and refine as needed.
2. What tools will I need to make a wooden flute?
To make a wooden flute, you will need tools like a saw, knife, chisel, drill, sandpaper, and a file. These tools will help you shape and hollow out the wood, create finger holes, and refine the instrument.
3. Are there any resources or guides available for making a wooden flute?
Yes, there are many resources and guides available online and in books that provide detailed instructions on making a wooden flute. These resources often include measurements, step-by-step instructions, and illustrations to help you create your flute successfully.
Conclusion
In conclusion, making a flute out of wood can be a fulfilling and creative endeavor. By following the necessary steps and techniques, anyone with a passion for music and craftsmanship can create their own unique instrument.
Wooden flutes offer a warm and resonant tone, making them a popular choice among musicians and flute enthusiasts. Additionally, crafting a flute from wood allows for customization and personalization, allowing you to create an instrument that reflects your own style and preferences.
Whether you are a beginner or an experienced woodworker, making a wooden flute can be a rewarding project that combines artistry and music. So, grab your tools, choose the perfect wood, and let your creativity soar as you embark on this delightful woodworking adventure!
