If you are looking for a meaningful and personalized way to honor a loved one, making a wooden cross for their grave can be a beautiful tribute. Crafting a wooden cross allows you to put your love and creativity into a lasting memorial. Whether you choose to carve or construct the cross, it can serve as a symbol of faith, remembrance, and respect. In this guide, we will provide step-by-step instructions on how to make a wooden cross for a grave.
Essential Tools and Materials for Crafting a Wooden Cross
Crafting a wooden cross can be a fulfilling and creative project. Whether you want to make a simple decorative cross or create a personalized gift, having the right tools and materials is essential. In this section, we will discuss the key items you will need to successfully craft a wooden cross.

Tools
- Saw: A saw is one of the most important tools you will need for crafting a wooden cross. You can choose between a hand saw or a power saw depending on your preference and the complexity of the design you have in mind.
- Sandpaper: Sandpaper is necessary to smooth out the rough edges and surfaces of the wooden cross. It helps in achieving a polished and professional finish.
- Drill: If you plan on adding intricate designs or details to your wooden cross, a drill will be needed. It allows you to create holes for decorative elements or to attach other components to the cross.
- Clamps: Clamps are useful for holding the wooden pieces together securely while you work on assembling the cross. They provide stability and ensure accuracy during the crafting process.
- Chisel: A chisel is handy for carving intricate designs or smoothing out rough areas on the wooden cross. It allows you to create fine details and add a personalized touch to your project.
- Ruler and Measuring Tape: Accurate measurements are essential in creating a well-proportioned cross. A ruler and measuring tape will help you mark and cut the wood precisely.
- Gloves and Safety Glasses: Safety should always be a priority when working with tools. Wearing gloves and safety glasses will protect your hands and eyes from potential hazards.
Materials
- Wood: The type of wood you choose will depend on your personal preference, budget, and the desired outcome of your wooden cross. Common choices include pine, oak, or mahogany.
- Wood Glue: Wood glue is essential for joining the different pieces of wood together. It provides a strong bond and ensures the stability of the cross.
- Finishing Materials: Depending on the look you want to achieve, you may need varnish, stain, or paint to finish your wooden cross. These materials add color and protect the wood from damage.
- Decorative Elements: If you want to embellish your cross, you can consider adding decorative elements such as beads, gemstones, or metal accents. These elements can enhance the overall aesthetic of your cross.
- Hanging Hardware: If you plan to display your wooden cross on a wall, you will need hooks or brackets to attach it securely.
By gathering these essential tools and materials, you will be well-equipped to start your wooden cross crafting project. Remember to prioritize safety while working with tools and choose quality materials for a polished final result. With creativity and attention to detail, you can create a beautiful wooden cross that reflects your personal style and craftsmanship.

Step-by-step Guide on Carving and Shaping a Wooden Cross
Carving and shaping a wooden cross can be a rewarding and fulfilling woodworking project. Whether you want to create a decorative piece for your home or a sentimental gift for a loved one, a wooden cross can hold deep meaning and symbolism. In this step-by-step guide, we will walk you through the process of creating a beautifully carved wooden cross.
Materials Needed
- Wood block (preferably hardwood such as maple, cherry, or oak)
- Carving tools (chisels, gouges, and a mallet)
- Sandpaper (various grits)
- Wood finish (such as varnish or wax)
- Protective gear (safety glasses and gloves)
Step 1: Design and Planning
The first step in carving a wooden cross is to design and plan your project. Determine the desired size, shape, and style of the cross. You can find inspiration from existing cross designs or create your own unique design. Sketch your design on paper to visualize the final result.
Step 2: Selecting the Wood
Choose a high-quality wood block for your cross. Hardwoods like maple, cherry, or oak are ideal for carving as they are dense and durable. Ensure that the wood is properly dried to prevent warping or cracking. Cut the wood block into a rough shape that closely matches your design using a saw.
Step 3: Rough Carving
Using a chisel and mallet, begin the rough carving process by removing excess wood from the block. Start with the larger areas and gradually work your way towards the finer details. Take your time and make sure to stay within the lines of your design. Constantly refer to your sketch to ensure accuracy.
Step 4: Refining the Shape
Once the rough carving is complete, switch to smaller carving tools to refine the shape and add more intricate details. Use gouges to create smooth curves and chisels for straight lines. Pay attention to symmetry and balance as you shape the cross.
Step 5: Sanding
After achieving the desired shape, it’s time to sand the wooden cross to a smooth finish. Begin with a coarse grit sandpaper and gradually move to finer grits for a polished look. Sand in the direction of the wood grain to avoid scratches. Remove any sanding dust with a soft cloth.
Step 6: Finishing
Apply a wood finish of your choice to enhance the beauty and protect the wood. Varnish or wax can bring out the natural color and grain pattern. Follow the manufacturer’s instructions for proper application and drying time. Once the finish is dry, give the cross a final polish with a soft cloth.
Step 7: Optional Additions
If desired, you can further personalize your wooden cross by adding additional elements. This could include inlays, carvings, or even a religious symbol such as a crucifix or dove. Let your creativity guide you in this step.
Step 8: Display or Gift
Now that your wooden cross is complete, you can proudly display it in your home or gift it to someone special. Place it on a mantle, hang it on a wall, or use it as a centerpiece for religious ceremonies. Remember, each wooden cross carries its own unique story and significance.
In summary, carving and shaping a wooden cross requires careful planning, patience, and attention to detail. With the right tools and techniques, you can create a beautifully crafted piece that holds both aesthetic and sentimental value. So, grab your woodworking tools, unleash your creativity, and embark on this enriching woodworking journey!

Decorative and Personalized Options for a Wooden Grave Cross
When it comes to honoring the memory of a loved one who has passed away, many people opt for a wooden grave cross as a symbol of remembrance. These crosses not only serve as a marker for the final resting place, but they can also be personalized and adorned with decorative elements that reflect the unique personality and life of the deceased.
1. Custom Engravings
A wooden grave cross can be customized with engravings that showcase the name, birth and death dates, and a thoughtful message or quote. This personal touch provides a lasting tribute to the individual and serves as a reminder of the impact they had on the lives of those they left behind. The engravings can be done using various techniques, such as laser etching or hand carving, depending on the desired style and level of intricacy.
2. Symbolic Designs
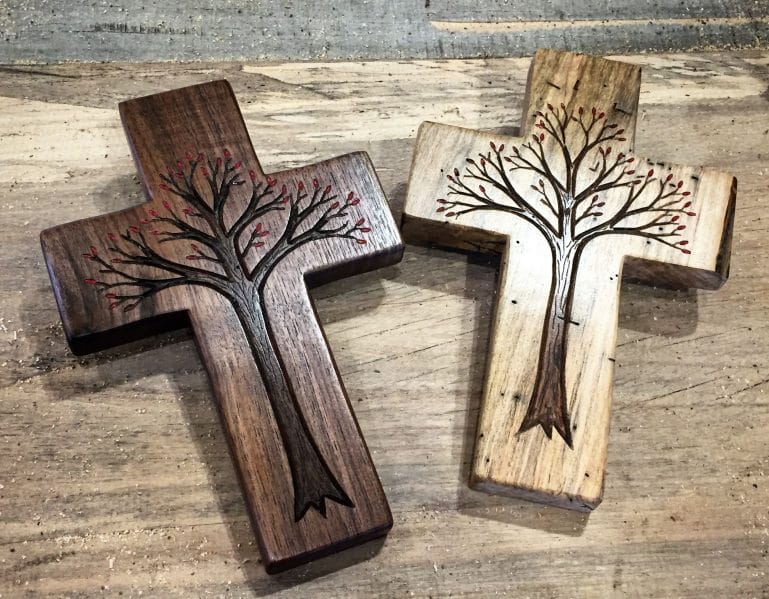
In addition to personalized engravings, wooden grave crosses can be adorned with symbolic designs that hold special meaning for the departed or their family. Common symbols include religious icons like crosses, angels, doves, or hearts. These symbols can represent faith, peace, love, or the hope of an afterlife. Incorporating such designs can bring comfort and a sense of spiritual connection to the memorial site.
3. Decorative Accessories
To further enhance the aesthetic appeal of a wooden grave cross, various decorative accessories can be added. These can include floral arrangements, wreaths, ribbons, or small trinkets that were significant to the deceased. These elements can be changed with the seasons or on special occasions, allowing family and friends to continuously pay their respects and keep the memorial fresh and vibrant.
4. Natural Finishes
When choosing a wooden grave cross, there are different natural finishes available that can complement the overall design. Options may include untreated wood for a rustic and organic look, stained finishes to enhance the grain and color of the wood, or painted finishes that can provide a splash of color and personalization. The choice of finish depends on individual preferences and the desired aesthetic for the memorial site.
5. Size and Shape Variations
Wooden grave crosses come in various sizes and shapes, allowing for customization to suit personal preferences and the space available at the gravesite. Crosses can range from simple and minimalist designs to more ornate and intricate structures. The shape of the cross can also be tailored, with options such as the traditional Latin cross, Celtic crosses, or other symbolic shapes that hold significance to the departed or their family.
6. Weatherproofing and Durability
Since wooden grave crosses are exposed to the elements, it is essential to ensure their longevity and resistance to weather conditions. Opting for treated or weatherproof wood can help protect the cross from rot, warping, and other forms of damage. Additionally, regular maintenance such as sealing or re-staining can extend the lifespan of the cross and preserve its aesthetic appeal for years to come.
In summary, a wooden grave cross provides a meaningful way to remember and honor a loved one. By incorporating custom engravings, symbolic designs, decorative accessories, natural finishes, size and shape variations, and weatherproofing techniques, individuals can create a personalized and visually appealing tribute. These options allow for a unique and heartfelt representation of the life and legacy of the departed, ensuring their memory lives on.
Tips for Preserving and Maintaining the Longevity of a Wooden Grave Cross
Wooden grave crosses are a beautiful and traditional way to commemorate the life of a loved one. Over time, however, the elements can take a toll on the wood, leading to deterioration and decay. To ensure that your wooden grave cross remains in good condition and stands the test of time, here are some essential tips for preserving and maintaining its longevity:
1. Choose the Right Type of Wood
Not all types of wood are suitable for outdoor use and exposure to the elements. When selecting a wooden grave cross, opt for a durable and rot-resistant wood, such as cedar, redwood, or cypress. These types of wood have natural oils that help protect against moisture and insect damage.
2. Apply a Protective Finish
Applying a protective finish to the wooden grave cross can help shield it from the sun’s UV rays, moisture, and other environmental factors. Consider using a clear outdoor sealant or waterproofing paint designed for wood. Apply the finish according to the manufacturer’s instructions, paying extra attention to the areas exposed to rain and direct sunlight.
3. Regularly Clean the Cross
Regular cleaning is essential to remove dirt, bird droppings, and other debris that can accumulate on the wooden surface. Use a mild soap or wood cleaner and a soft cloth to gently wipe down the cross, ensuring you do not scratch or damage the finish. Avoid using harsh chemicals or abrasive materials as they can strip away the protective coating.
4. Avoid Direct Ground Contact
Direct contact with the ground can accelerate the deterioration of the wooden grave cross. To prevent this, place the cross on a solid foundation, such as a concrete slab or a stone base. This will help elevate the cross off the ground and reduce the risk of moisture absorption and rot.
5. Regularly Inspect for Damage
Periodically examine the wooden grave cross for any signs of damage or wear. Look for cracks, loose joints, or areas where the finish may have worn off. Promptly address any issues to prevent further deterioration. Repair loose joints with wood glue and fill cracks with wood filler. Reapply the protective finish as needed to maintain its integrity.
6. Protect from Extreme Weather Conditions
Extreme weather conditions, such as heavy rain, strong winds, and prolonged exposure to direct sunlight, can significantly impact the longevity of a wooden grave cross. Consider providing additional protection by installing a canopy or awning above the cross to shield it from direct rain and sunlight. This will help prevent warping, fading, and other weather-related damage.
7. Regularly Reapply Protective Coating
Over time, the protective coating on the wooden grave cross may wear away. It is important to regularly reapply the protective coating, especially after cleaning or if you notice any signs of wear. This will help maintain the cross’s resistance to moisture, UV rays, and other environmental factors.
8. Handle with Care
When moving or handling the wooden grave cross, ensure proper care to avoid causing any unnecessary damage. Lift and carry the cross using two people to distribute the weight evenly. Avoid dragging the cross across rough surfaces, as this can scratch or chip the wood.
9. Consider Seasonal Storage
If your area experiences harsh winter conditions or other extreme weather, it may be beneficial to consider seasonal storage for the wooden grave cross. This will help protect it from prolonged exposure to freezing temperatures, snow, and ice, which can cause the wood to expand, contract, and potentially crack.
10. Regular Maintenance
Maintaining a wooden grave cross requires regular attention and care. Make it a habit to inspect and clean the cross at least twice a year, ideally in the spring and fall. This will help identify any potential issues early on and ensure that the cross remains in good condition for years to come.
In summary, by following these tips for preserving and maintaining the longevity of a wooden grave cross, you can ensure that it remains a cherished memorial for generations to come. Remember to choose the right type of wood, apply a protective finish, regularly clean and inspect the cross, protect it from extreme weather conditions, handle it with care, and consider seasonal storage if needed. With proper maintenance, your wooden grave cross will continue to honor and commemorate your loved one for years to come.
Frequently Asked Questions (FAQs)
1. How can I make a wooden cross for a grave?
To make a wooden cross for a grave, you will need a wooden board, saw, sandpaper, and paint or stain. Cut the board into a cross shape, sand the edges and surface, then paint or stain it according to your preference. Finally, attach the cross to a stake or stand to ensure stability when placed at the grave.
2. What type of wood is best for making a wooden grave cross?
Hardwoods like oak, cedar, or mahogany are commonly used for making wooden grave crosses. These woods are durable and resistant to rot, making them suitable for outdoor use. Choose a wood type that is sturdy and able to withstand weather conditions in your area.
3. Are there any specific dimensions or designs to follow when making a wooden cross for a grave?
There are no specific dimensions or designs that you must follow when making a wooden cross for a grave. You can choose the size and shape of the cross based on personal preference and cultural or religious traditions. It’s important to consider the stability and durability of the cross to ensure it lasts.
Conclusion
In conclusion, crafting a wooden cross for a grave can be a meaningful and personal way to honor a loved one’s memory. By following the step-by-step instructions provided, you can create a beautiful and lasting tribute. Whether you choose to use reclaimed wood or purchase new materials, the process allows for customization and personalization. Remember to consider the size and design that best reflects the individual’s spirit and beliefs. Creating a wooden cross not only provides solace in the grieving process but also serves as a symbol of love and remembrance for generations to come.
By taking the time to construct a wooden cross with care and attention to detail, you can ensure that it becomes a cherished memorial, offering comfort to those who visit the grave site.