Looking for a creative way to enjoy your smoking experience? Learn how to make a smoking pipe out of wood and elevate your smoking ritual to a whole new level. Crafting your own smoking pipe allows for personalization and the opportunity to create a unique piece that reflects your style and personality. From selecting the perfect wood to carving and finishing techniques, this guide will walk you through the step-by-step process of creating a beautiful and functional wooden smoking pipe.
Discover the satisfaction of transforming a piece of raw wood into a finely crafted smoking pipe that will not only enhance your smoking sessions but also serve as a conversation starter among your friends. With a few simple tools and materials, you can create a one-of-a-kind wooden smoking pipe that fits comfortably in your hand and delivers a smooth and enjoyable smoking experience.
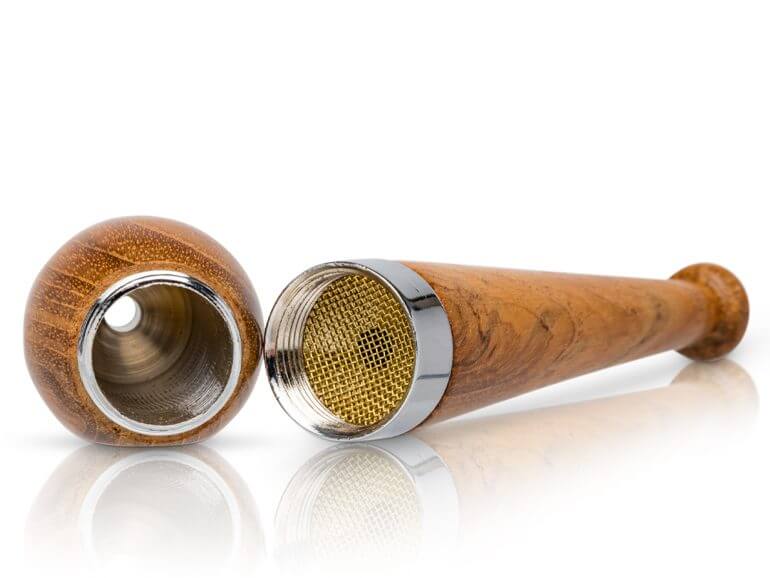
While there are various types of wood suitable for making smoking pipes, it’s important to choose a wood that is durable, heat-resistant, and non-toxic. Popular choices include briar wood, cherry wood, and rosewood, each offering its own unique characteristics and aesthetics. Selecting the right wood will ensure your smoking pipe not only looks appealing but also enhances the taste and aroma of your chosen tobacco blend.
Once you have selected the perfect wood, the next step is to plan your design and shape your smoking pipe. From straight stemmed pipes to classic billiard shapes or more intricate freehand designs, the possibilities are endless. With the right tools

Step-by-Step Guide to Carving a Wooden Smoking Pipe
If you are interested in woodworking and enjoy smoking tobacco, then carving your own wooden smoking pipe can be a rewarding and enjoyable project. In this step-by-step guide, we will walk you through the process of carving a wooden smoking pipe from start to finish. Whether you are a seasoned woodworker or a beginner, this guide will help you create a unique and functional smoking pipe that you can proudly use.
1. Gather the necessary tools and materials
Before you begin carving your wooden smoking pipe, it is important to gather all the necessary tools and materials. Here are some essential items you will need:
- A block of wood (preferably hardwood such as briar or cherry)
- A pipe kit (includes a stem, a tenon, and a pipe bowl)
- Wood carving tools (such as gouges, chisels, and a coping saw)
- Sandpaper or sanding blocks (ranging from coarse to fine grit)
- Finishing materials (such as wax, oil, or stain)
2. Choose a design and mark the pipe
Next, you need to choose a design for your smoking pipe. There are various styles and shapes to choose from, such as billiard, bent, or Dublin. Once you have decided on the design, mark the outline of the pipe on the block of wood using a pencil or a marking tool. This will serve as a guide for the carving process.
3. Rough shaping the pipe
Using a coping saw or a bandsaw, cut out the rough shape of the pipe according to the marked outline. Be careful to follow the lines as accurately as possible. This will form the basic shape of your smoking pipe.
4. Carve the pipe bowl
Now it’s time to carve the pipe bowl. Start by removing excess wood around the rough shape using a gouge or a chisel. Gradually shape the bowl by carving away the wood, keeping in mind the desired depth and thickness. Pay attention to the symmetry and smoothness of the bowl as you carve.
5. Drill the tobacco chamber and air hole
Using a drill press or a hand drill, carefully drill a hole into the bottom of the pipe bowl to create the tobacco chamber. The size of the hole will depend on your personal preference. Additionally, drill a smaller hole through the side of the bowl to create the air hole, which allows for proper airflow during smoking.
6. Shape and attach the stem
Next, shape the stem according to your desired length and style. You can use a sandpaper or a sanding block to gradually shape the stem until it fits comfortably in your mouth. Once the stem is shaped, attach it to the tenon provided in the pipe kit. Make sure it fits securely before moving on to the next step.
7. Finishing touches
After the pipe has been fully assembled, it’s time to add the finishing touches. Use sandpaper or sanding blocks to smooth out any rough edges or imperfections on the pipe. Once the pipe is smooth, you can apply a finish of your choice, such as wax, oil, or stain. This will protect the wood and enhance its natural beauty.
8. Test and enjoy
Before you start using your newly carved wooden smoking pipe, it’s important to test it for functionality. Ensure that the air flows smoothly through the pipe when drawing on it. If everything is in working order, it’s time to load your pipe with your preferred tobacco and enjoy a relaxing smoke!
In summary, carving a wooden smoking pipe is a creative and satisfying woodworking project. By following this step-by-step guide, you can create a unique and functional smoking pipe that reflects your personal style and craftsmanship. Remember to take your time, pay attention to detail, and enjoy the process. Happy carving!
Finishing Techniques for a Polished and Durable Smoking Pipe
When it comes to smoking pipes, the finishing techniques used can greatly affect the overall look, feel, and durability of the pipe. Whether you are a pipe maker or an enthusiast looking to enhance the appearance of your pipe, mastering the art of finishing is essential. In this section, we will explore some of the most popular finishing techniques that can help you achieve a polished and durable smoking pipe.
Sanding
The first step in achieving a smooth and polished finish is sanding the pipe. This process involves using sandpaper or abrasive materials to remove any rough surfaces or imperfections. Start with a coarse grit sandpaper and gradually work your way up to a finer grit for a smoother finish. Sanding not only gives the pipe a polished look but also helps to remove any blemishes or inconsistencies in the wood.
Staining
Staining is a technique used to enhance the color and grain of the wood. There are various types of wood stains available, ranging from oil-based stains to alcohol-based dyes. Before applying the stain, it is important to prepare the pipe by sanding it and ensuring it is clean and free from any dirt or dust particles. Apply the stain evenly using a brush or cloth and allow it to dry completely before moving on to the next step.
Buffing and Polishing
Once the stain has dried, it’s time to buff and polish the pipe to perfection. This step involves using polishing compounds and a buffing wheel to achieve a glossy finish. Start by applying a small amount of polishing compound to the wheel and gently buff the pipe in circular motions. Gradually increase the speed and pressure as you work your way around the pipe. This process helps to remove any remaining scratches, smoothen the surface, and bring out the natural shine of the wood.
Waxing and Oil Finishes
After buffing and polishing, it is recommended to apply a wax or oil finish to protect the pipe and enhance its longevity. Waxing not only adds a layer of protection but also brings out the natural beauty of the wood. Simply apply a thin layer of wax using a soft cloth, allow it to dry, and then buff the pipe to a beautiful sheen. Oil finishes, on the other hand, penetrate the wood and provide a more durable and water-resistant coating. Apply the oil using a brush or cloth, let it soak in, and wipe off any excess.
Final Touches
To complete the finishing process, consider adding any final touches that will enhance the overall aesthetic appeal of the smoking pipe. This could include adding decorative accents such as metal bands or inlays, carving intricate patterns, or even experimenting with different finishes such as a high-gloss or matte finish. These final touches can truly make the pipe stand out and showcase your personal style.
Mastering the art of finishing techniques is vital for creating a polished and durable smoking pipe. By utilizing sanding, staining, buffing, and applying a protective finish, you can transform a simple piece of wood into a work of art. Remember to pay attention to detail and take your time during each step of the finishing process to achieve the best results. So, why wait? Start experimenting with these techniques and create a smoking pipe that not only looks great but also provides an enjoyable smoking experience.
Maintenance Tips for Preserving the Quality of Your Wooden Smoking Pipe
Wooden smoking pipes are not only functional but also beautiful pieces of craftsmanship. To ensure the longevity and optimal performance of your wooden smoking pipe, regular maintenance is essential. In this section, we will discuss some valuable tips and techniques for preserving the quality of your pipe.
Cleaning Your Pipe
Regular cleaning is crucial to remove residue, tobacco buildup, and moisture that can affect both the taste and the lifespan of your wooden smoking pipe. Here are some steps to follow for effective cleaning:
- Disassemble your pipe by removing the stem from the bowl.
- Use a pipe tool or a specialized pipe cleaner to gently scrape off any excess tobacco or residue from the inside of the bowl and stem.
- Run a pipe cleaner dipped in isopropyl alcohol through the stem and the shank to remove any stubborn buildup.
- Once the pipe is clean, allow it to dry completely before reassembling.
Preventing Moisture Damage
Excessive moisture can cause significant damage to your wooden smoking pipe, including swelling and warping of the wood. To prevent moisture-related issues, consider the following tips:
- Never leave your pipe in direct contact with water.
- Avoid blowing into the pipe or inhaling too forcefully, as it can introduce saliva and moisture into the bowl.
- After each smoke, allow your pipe to cool down before cleaning and storing.
- Invest in a pipe stand or rack that allows proper airflow and prevents the pipe from touching any moist surfaces.
Protecting the Finish
The finish on your wooden smoking pipe not only enhances its aesthetic appeal but also provides protection against external elements. To maintain the finish and extend its lifespan, consider the following tips:
- Avoid exposing your pipe to extreme temperatures or direct sunlight for prolonged periods, as it can cause the finish to fade or crack.
- Regularly polish the pipe with a high-quality, non-toxic wax or oil specifically designed for wooden pipes.
- Use a soft, lint-free cloth to apply the wax or oil in gentle circular motions, following the grain of the wood.
- Allow the wax or oil to penetrate the wood and then wipe off any excess with a clean cloth.
Storing Your Pipe
Proper storage is vital for preserving the quality and condition of your wooden smoking pipe. Here are some guidelines for storing your pipe:
- Always store your pipe in a well-ventilated area to prevent the buildup of odors or moisture.
- Use a pipe bag or a dedicated pipe case to protect your pipe from dust, scratches, and accidental damage.
- If you plan to store your pipe for an extended period, make sure it is completely clean and dry to prevent mold or mildew growth.
- Avoid storing your pipe near sources of heat or strong odors, as they can affect the wood and the flavor of your tobacco.
In Summary
Proper maintenance is key to preserving the quality and lifespan of your wooden smoking pipe. Regular cleaning, preventing moisture damage, protecting the finish, and proper storage are essential practices to ensure optimal performance and enjoyment from your pipe for years to come.
Exploring Different Designs and Styles of Wooden Smoking Pipes
Wooden smoking pipes have been used for centuries as a traditional and stylish way to enjoy tobacco. With their natural beauty and craftsmanship, wooden pipes have a timeless appeal. Whether you are a seasoned pipe connoisseur or just starting out, exploring the different designs and styles of wooden smoking pipes can be an exciting journey.
1. Classic Shapes:
One of the most common designs of wooden smoking pipes is the classic shape. These pipes have a simple and elegant design, often featuring a straight stem and a bowl with a rounded or flat bottom. Classic shapes include the Billiard, the Dublin, and the Bulldog. These designs are preferred by many pipe enthusiasts for their timeless appeal and ease of use.
2. Freehand Pipes:
For those who prefer a more unique and artistic design, freehand pipes offer a wide range of options. These pipes are handcrafted by skilled artisans and often feature irregular shapes and intricate carvings. The organic and asymmetrical designs of freehand pipes make each piece a work of art. These pipes are perfect for collectors or those who appreciate the craftsmanship and creativity involved in pipe making.
3. Churchwardens:
Churchwarden pipes are known for their long and slender stems, reminiscent of the pipes seen in period dramas and fantasy movies. These pipes offer a cooler smoke due to the extended stem, allowing the smoke to travel a greater distance before reaching the mouthpiece. Churchwardens are often made from high-quality woods such as briar or rosewood and bring a touch of elegance and sophistication to any pipe collection.
4. Rusticated Pipes:
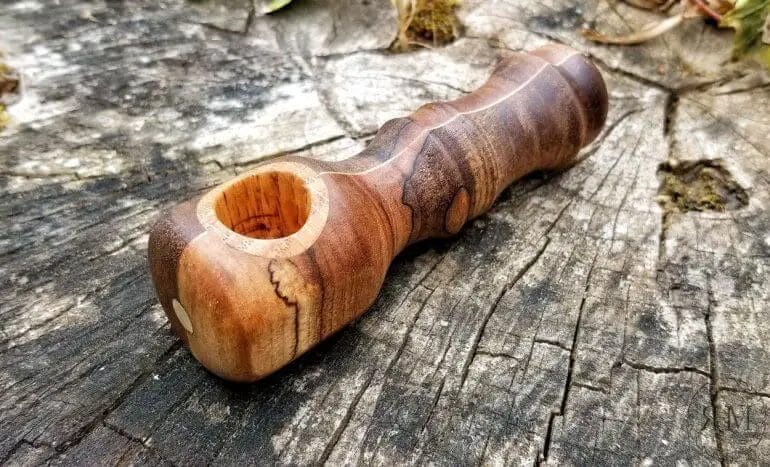
Rusticated pipes feature a textured, rustic finish on the bowl, creating a unique and rugged appearance. This finish is achieved through various techniques, such as carving or sandblasting the wood. The rough texture not only adds visual interest but also provides a better grip while holding the pipe. Rusticated pipes are favored by those who appreciate a more tactile experience and a distinctive look.
5. Exotic Woods:
Wooden smoking pipes can be made from a variety of woods, each with its own unique characteristics. Exotic woods such as ebony, olive wood, or morta (a fossilized bog oak) offer a luxurious and exotic appeal. These woods often have beautiful grain patterns and can enhance the overall aesthetic of the pipe. Smoking a pipe made from an exotic wood adds a touch of sophistication and exclusivity to the experience.
6. Hybrid Pipes:
Hybrid pipes combine different materials, such as wood and metal or wood and acrylic, to create a modern and innovative design. These pipes offer a contemporary twist to traditional wooden pipes and often incorporate features such as interchangeable bowls or filters for a customizable smoking experience. Hybrid pipes are popular among those who appreciate the fusion of traditional craftsmanship with modern technology.
In summary, exploring the different designs and styles of wooden smoking pipes can be a fascinating journey for pipe enthusiasts. From classic shapes to freehand designs, churchwardens to rusticated pipes, there is a wide range of options to suit every taste. Whether you appreciate traditional elegance or prefer a more unique and artistic design, wooden pipes offer a timeless and enjoyable smoking experience.
Frequently Asked Questions
1. How can I make a smoking pipe out of wood?
To make a smoking pipe out of wood, you will need a block of suitable wood, a drill, a wood carving tool, and sandpaper. Start by drilling a bowl-sized hole and a smaller hole for the stem. Carve the shape of the pipe, smooth the rough edges, and sand it down. Finally, seal the wood with a food-safe finish.
2. What types of wood are suitable for making smoking pipes?
Some commonly used woods for making smoking pipes include briar wood, rosewood, olive wood, and cherry wood. These types of wood are heat-resistant, durable, and produce a pleasant smoking experience. It’s important to choose hardwoods that are free from toxic substances or chemical treatments.
3. Are there any safety considerations when making a smoking pipe out of wood?
When making a smoking pipe out of wood, it’s essential to ensure the wood is untreated and free from toxic substances. Avoid woods with high resin content as they can release harmful fumes when heated. Additionally, always use appropriate protective gear, such as goggles and a dust mask, when carving and sanding the wood to avoid inhalation of wood dust.
Conclusion
In conclusion, crafting a smoking pipe out of wood is a unique and fulfilling DIY project for tobacco enthusiasts. By using simple tools and following proper techniques, you can create a customized pipe that reflects your style and preferences. Whether you’re a beginner or an experienced woodworker, making your own pipe allows you to enjoy the process of creating something functional and artistic.
With the right skills and materials, you can fashion a pipe that not only looks good but also enhances your smoking experience. Remember to choose a suitable wood type, shape the pipe to ensure a comfortable grip, and finish it with a non-toxic coating to protect it from heat and moisture.
So, why settle for a store-bought pipe when you can showcase your creativity and craftsmanship by making your own unique smoking pipe out of wood? Get started on your woodworking journey today and enjoy the satisfaction of smoking from a handcrafted masterpiece.
