Are you looking to give your dark wood a lighter and brighter look? If so, you’ve come to the right place. We have some simple and effective solutions to transform your dark wood into a lighter shade, bringing a fresh and modern feel to your space.
One method to lighten dark wood is by using a wood bleach. This chemical treatment helps to remove the pigments that darken the wood, resulting in a lighter appearance. However, caution should be taken when using bleach, as it can be harmful if not used properly.

Sanding is another technique that can be used to lighten dark wood. By sanding the surface of the wood, you can remove the top layer and expose the lighter wood underneath. This can be a time-consuming process, but the end result is often worth the effort.
If you prefer not to use chemicals or sanding, you can consider using a wood stain stripper. This product works by breaking down the old stain or finish on the wood, allowing it to be easily wiped away. Once the old stain is removed, you can apply a lighter stain or finish to achieve the desired look.
Another option to lighten dark wood is by using a technique called pickling. This involves applying a thin layer of white or light-colored paint or stain to the wood and then wiping it away, leaving a subtle lightened effect. It’s a great way to add a touch of vintage or rustic charm to your
Using Chemical Strippers for Lightening Dark Wood
Dark wood can add a touch of elegance to any space, but sometimes you may want to lighten or remove the dark stain to achieve a different look. One effective method to accomplish this is by using chemical strippers. Chemical strippers are powerful solvents that dissolve the existing finish, allowing you to remove the dark stain and reveal the lighter wood beneath. In this section, we will explore the step-by-step process of using chemical strippers to lighten dark wood.
Materials You Will Need
Before you begin, gather the following materials:
- Chemical stripper
- Protective gloves, goggles, and a face mask
- Old paintbrush or sponge
- Plastic or metal scraper
- Steel wool or sandpaper
- Clean cloth
- Mineral spirits or denatured alcohol
- Wood conditioner (optional)
- Wood stain or finish
Step-by-Step Guide
Follow these steps to effectively lighten dark wood using chemical strippers:
- Prepare the Work Area: Start by preparing the work area. Ensure good ventilation by opening windows or using fans. Lay down a drop cloth or plastic sheeting to protect the surrounding surfaces.
- Put on Protective Gear: Chemical strippers can be harsh on the skin and respiratory system, so it’s essential to wear protective gloves, goggles, and a face mask.
- Apply the Chemical Stripper: Using an old paintbrush or sponge, generously apply the chemical stripper onto the dark wood surface. Ensure complete coverage and let it sit for the recommended time mentioned on the product’s instructions.
- Scrape off the Old Finish: Once the stripper has loosened the old finish, use a plastic or metal scraper to gently scrape off the softened finish. Be cautious not to scratch or damage the wood underneath.
- Remove Residual Finish: After scraping off the bulk of the old finish, use steel wool or sandpaper to remove any remaining residue. This step helps smoothen the wood surface.
- Clean the Wood: Wipe down the wood surface with a clean cloth dampened with mineral spirits or denatured alcohol. This step ensures that any leftover residue is removed.
- Condition the Wood (optional): If desired, apply a wood conditioner to the stripped surface. This step helps ensure that the wood accepts the stain or finish evenly.
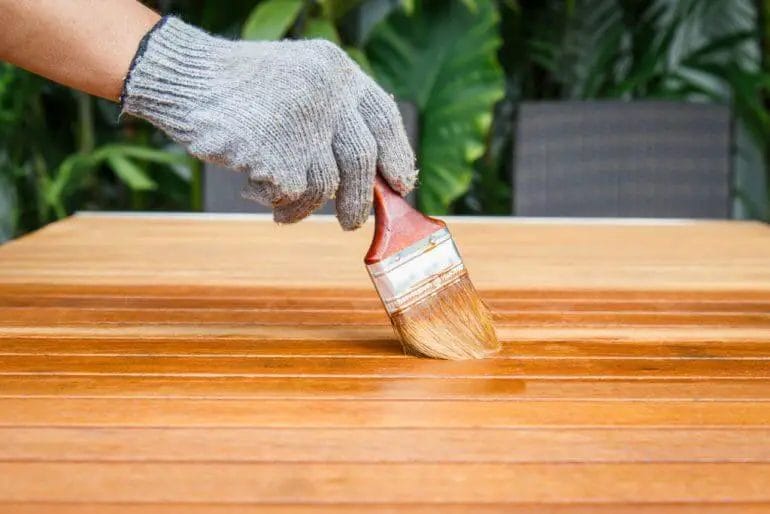
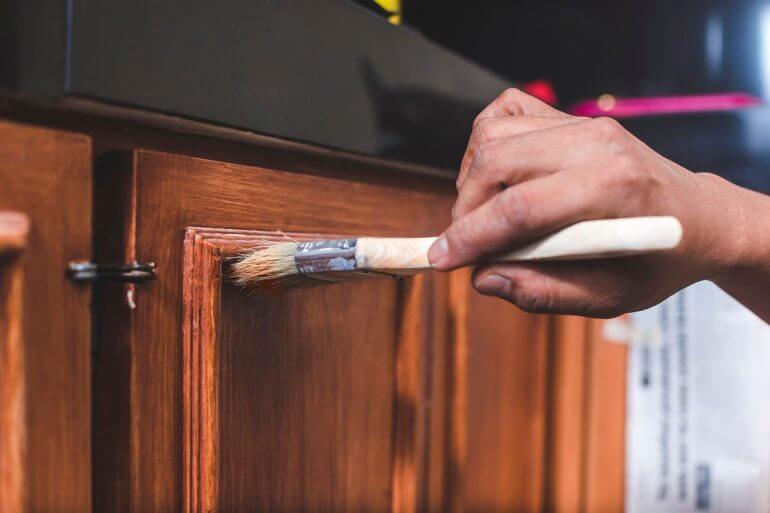
- Apply Wood Stain or Finish: Once the wood is clean and dry, apply your chosen wood stain or finish according to the manufacturer’s instructions. Follow the recommended drying time and apply additional coats, if necessary, to achieve the desired lightness.
By following the above steps carefully, you can effectively lighten dark wood using chemical strippers. Remember to keep safety in mind at all times and work in a well-ventilated area. Take your time and be patient with the process to achieve the best results.
Techniques for Sanding Dark Wood to Make it Lighter
Dark wood can add a touch of elegance and richness to any space. However, there may be instances where you want to lighten the color of your dark wood furniture or flooring. Sanding is a popular and effective technique for achieving this goal. In this section, we will explore different techniques for sanding dark wood to make it lighter.
1. Determine the Depth of the Dark Stain
Before you begin sanding, it’s important to determine the depth of the dark stain on your wood. If the stain is only on the surface, sanding alone may suffice. However, if the stain has penetrated deep into the wood, you may need to consider more intensive techniques such as bleaching.
2. Gather the Necessary Tools
To get started, gather the necessary tools for the sanding process. You will need:
- Sanding block or electric sander
- Sandpaper (starting with a coarse grit and progressing to a finer grit)
- Dust mask
- Safety goggles
- Drop cloth or plastic sheeting to protect the surrounding area
- Vacuum cleaner or dust brush
3. Prep the Area
Before you begin sanding, it’s essential to prep the area to minimize dust and debris. Start by placing a drop cloth or plastic sheeting under the piece of furniture or in the room where you’ll be sanding. This will make the cleanup process much easier. Additionally, wearing a dust mask and safety goggles will help protect you from wood particles.
4. Start with Coarse Grit Sandpaper
Begin the sanding process by using a coarse grit sandpaper to remove the top layers of the dark stained wood. Sand in the direction of the grain, applying firm pressure but being careful not to damage the wood. Remember to sand evenly to avoid creating uneven spots.
5. Progress to Finer Grit Sandpaper
Once you have removed the dark stain with the coarse grit sandpaper, switch to a finer grit sandpaper to smooth out the wood surface. Repeat the sanding process, gradually moving to a finer grit until you achieve the desired lightness. This step is crucial for achieving a smooth and even finish.
6. Clean Up the Dust
After sanding, it’s important to clean up the dust and wood particles. Use a vacuum cleaner or a dust brush to remove the debris from the sanded area. Pay attention to corners and crevices, as dust tends to accumulate in these areas. Make sure the surface is completely free of dust before proceeding to the next step.
7. Apply a Wood Finish
Once the wood is sanded and dust-free, you can apply a wood finish to protect and enhance the appearance of the lighter wood. Choose a finish that complements your desired aesthetic, such as clear lacquer, varnish, or wood stain. Apply the finish according to the manufacturer’s instructions, using a brush or a cloth.
8. Allow Sufficient Drying Time
After applying the wood finish, allow sufficient drying time before using or placing any items on the newly sanded and finished wood. Follow the manufacturer’s instructions to ensure that the finish cures properly.
9. Maintain and Protect the Lighter Wood
Once you have achieved the desired lighter color, it’s important to take steps to maintain and protect the wood. Avoid placing hot objects directly on the surface and use coasters or placemats to protect against spills and scratches. Regularly clean the wood with a non-abrasive cleaner and avoid using harsh chemicals that may damage the finish.
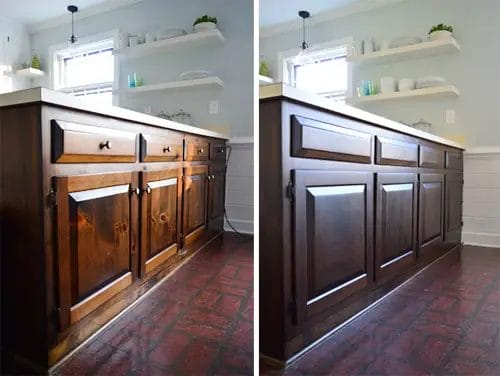
In summary, sanding dark wood to make it lighter is a process that requires careful preparation, the right tools, and attention to detail. By following these techniques, you can transform your dark wood into a lighter, more vibrant piece that fits your desired aesthetic.
The Art of Bleaching Dark Wood for a Lighter Look
Dark wood furniture can add a touch of elegance and sophistication to any space, but sometimes you may find yourself wanting a lighter and brighter look. Instead of replacing your furniture or going through the hassle of painting, bleaching dark wood can be a great solution. It not only transforms the look of your furniture but also allows the wood grain to shine through. In this section, we will explore the art of bleaching dark wood and guide you through the process.
Understanding the Bleaching Process
Bleaching wood involves removing the natural color pigments present in the wood to achieve a lighter tone. It is a chemical process that breaks down the color compounds and lightens the overall appearance of the wood. It is important to choose the right type of bleach for your specific wood type and desired outcome. There are two main types of wood bleach: oxygen bleach and chlorine bleach.
Oxygen Bleach
Oxygen bleach, also known as wood bleach powder, is a gentle and environmentally friendly option for bleaching wood. It utilizes hydrogen peroxide as the active ingredient, which reacts with the pigments in the wood to lighten the color. Oxygen bleach is safe to use on all types of wood and is less likely to damage the wood fibers. It is recommended for lighter bleaching effects.
Chlorine Bleach
Chlorine bleach, on the other hand, is a more aggressive option that should be used with caution. It contains sodium hypochlorite as the active ingredient and is known for its powerful bleaching properties. Chlorine bleach is not suitable for all types of wood and can potentially damage the wood fibers and weaken the structure if not used properly. It is typically used for more dramatic and complete color removal.
Preparing the Wood Surface
Before starting the bleaching process, it is crucial to prepare the wood surface properly. Here are the steps to follow:
- Begin by removing any existing finish or coating on the wood. This can be done using a paint stripper or sanding the surface.
- Once the surface is free from any coatings, sand the wood to remove any imperfections or scratches. Start with a coarse-grit sandpaper and gradually move to finer-grit sandpaper for a smooth finish.
- Clean the wood surface thoroughly to remove any dust or debris. You can use a tack cloth or a damp cloth for this purpose.
Applying the Bleach
Now that your wood surface is properly prepared, it’s time to apply the bleach. Here are the steps to follow:
- Put on protective gloves and eyewear to ensure your safety during the process.
- Prepare the bleach according to the manufacturer’s instructions. This may involve mixing the powder with water or using the bleach directly.
- Apply the bleach evenly onto the wood surface using a brush or sponge. Make sure to cover all areas that you want to lighten.
- Allow the bleach to sit on the wood for the recommended time specified by the manufacturer. This can range from a few minutes to several hours, depending on the type of bleach and the desired effect.
- Once the desired lightness is achieved, rinse the wood surface thoroughly with clean water to neutralize the bleach. This step is crucial to prevent any further bleaching or damage to the wood.
- Allow the wood to dry completely before moving on to the next step.
Finishing the Wood
After bleaching, the wood may appear lighter and washed out. To restore its natural beauty and protect the surface, it is important to apply a finish. Here are some options:
- Clear Varnish: Consider using a clear varnish to enhance the wood’s natural color and protect it from stains and scratches.
- Wood Stain: If you want to add a touch of color to the bleached wood, you can apply a wood stain of your choice. Make sure to choose a stain that complements the overall aesthetic.
- Sealer: A wood sealer can be used to seal the wood and provide additional protection. It helps to prevent moisture damage and extends the lifespan of the furniture.
By following the art of bleaching dark wood, you can achieve a lighter and brighter look for your furniture. Remember to choose the right type
Staining Techniques to Lighten Dark Wood
Dark wood can add a touch of elegance and sophistication to any space. However, there are times when you may want to lighten the color of your dark wood furniture or flooring to match the overall aesthetic of your home. Thankfully, there are several staining techniques that can help you achieve this desired result. In this section, we will explore some effective staining techniques to lighten dark wood.
1. Bleaching
Bleaching is one of the most common techniques used to lighten dark wood. It involves the use of a bleaching agent to remove the natural color of wood. Before bleaching, it is important to sand the surface of the wood to remove any existing finish or stain. Once the surface is prepared, the bleaching agent can be applied using a brush or sponge. Different types of bleaching agents are available, including chlorine bleach, oxalic acid, and hydrogen peroxide. It is essential to follow the instructions provided by the manufacturer and wear protective gear when working with bleaching agents.
2. Pickling
Pickling is another popular technique that can lighten dark wood while maintaining its natural grain. This technique involves the application of a pickling solution, which is essentially a thinned, water-based paint or stain. The pickling solution is applied with a brush or sponge and then wiped off with a cloth, allowing the solution to settle into the wood grain. This process creates a subtle, whitewashed effect, giving the wood a lighter appearance. Pickling can be done on raw or previously stained wood surfaces, making it a versatile technique.
3. Toning
Toning is a staining technique that involves adding a tinted or colored stain to the existing finish or stain of the wood. This technique is particularly useful when you want to lighten dark wood without completely removing the existing color. Toning can be achieved by using a transparent or semi-transparent stain that is lighter than the current color of the wood. The stain is applied using a brush or cloth, allowing it to penetrate the wood and alter its color. Toning not only lightens the wood but also adds depth and character to its appearance.
4. Sanding and Refinishing
If you prefer a more natural and organic approach to lighten dark wood, sanding and refinishing can be an effective technique. This method involves sanding the surface of the wood to remove the existing finish or stain, exposing the raw wood underneath. Once the surface is sanded, a lighter stain or clear finish can be applied to give the wood a lighter appearance. Sanding and refinishing not only lightens the wood but also helps to restore its natural beauty.
5. Lime Washing
Lime washing is a traditional technique that can give dark wood a beautiful, weathered look. This technique involves the application of a mixture of lime and water to the surface of the wood. The lime wash creates a translucent layer that allows the natural grain of the wood to show through while lightening its color. Lime washing is typically used on raw wood surfaces and can be customized by adjusting the concentration of lime and water.
In summary, there are several staining techniques available to lighten dark wood. Whether you choose to bleach, pickle, tone, sand and refinish, or lime wash, each technique offers its own unique approach to achieving a lighter wood color. Remember to prepare the wood surface properly before applying any staining technique and always follow the manufacturer’s instructions for best results. By employing these techniques, you can transform your dark wood furniture or flooring into a lighter, more visually appealing asset in your home.
FAQs
1. How can I make darker wood lighter?
To make darker wood lighter, you can use bleach or a chemical wood stripper to remove the existing finish. Sanding the wood surface can also help lighten the color. Once the desired shade is achieved, apply a lighter stain or finish to the wood.
2. Can I lighten wood without removing the existing finish?
No, to lighten wood, it is necessary to remove the existing finish or stain before applying a lighter shade. This allows the new finish to be absorbed into the wood and give a lighter appearance. Attempting to lighten wood without removing the finish may result in an uneven or undesirable outcome.
3. Are there any natural methods to lighten wood?
Yes, there are some natural methods to lighten wood. One method is to expose the wood to direct sunlight, which can naturally bleach the wood over time. Another method is to use a mixture of vinegar and water, applying it to the wood and allowing it to sit for a while before wiping it off. However, these natural methods may take longer to achieve desired results compared to chemical methods.
Conclusion
In conclusion, transforming darker wood into a lighter shade is achievable with the right techniques and products. By sanding the surface to remove the existing finish, you can effectively expose the natural wood grain. Applying a wood bleach or a light-colored wood stain can further lighten the wood tone. Additionally, using a quality wood conditioner before painting or staining can provide a more uniform finish. Remember to always test any products on a small, inconspicuous area before applying them to the entire surface. With patience and proper execution, you can successfully transform darker wood into a lighter and more visually appealing shade.
