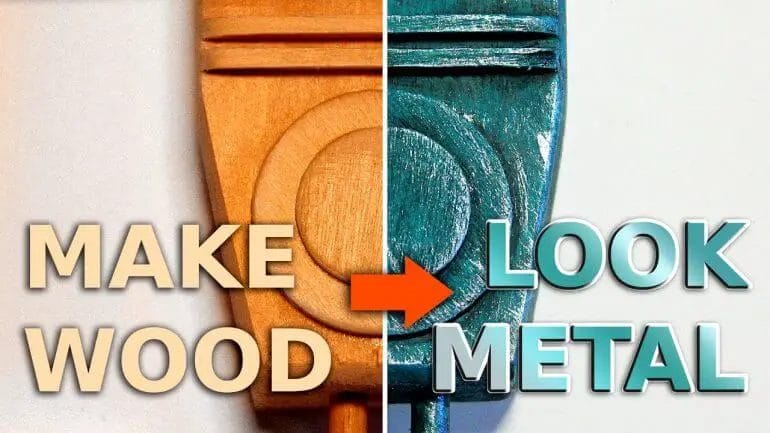
Looking to give your metal surfaces a warm and rustic touch? Learn how to make metal look like wood with these simple and creative techniques. Whether you want to create a faux wood finish on furniture, accessories, or even outdoor structures, this guide will show you step-by-step how to achieve the natural and timeless look of wood on metal surfaces. Discover the secrets to transforming cold and shiny metal into a warm and inviting wood-like texture that will add character and charm to any space.
Creating a Rustic Wood Effect on Metal Objects
Have you ever wanted to give your metal objects a unique and rustic look? Well, you’re in luck! In this section, we will explore a creative technique that allows you to achieve a rustic wood effect on metal objects. This process can be used to transform various items like furniture, decor pieces, and more. So, let’s dive in and learn how to create this stunning effect.

Materials Needed
Before we get started, let’s gather the materials needed for this project. You will need:
- Basecoat paint – choose a color that resembles wood, such as brown or tan
- Topcoat paint – select a darker shade that complements the basecoat
- Paintbrushes – make sure to have both a large and small brush for different areas
- Sandpaper – various grits for distressing and smoothing
- Wood grain tool – a rubber or plastic tool that creates a wood grain pattern
- Clear sealant – to protect the finished piece
Step 1: Prepare the Surface
Start by preparing the metal surface you want to transform. Clean it thoroughly using soap and water to remove any dirt or debris. Dry it completely before moving on to the next step.
Step 2: Apply the Basecoat
Apply the basecoat paint to the metal object using a paintbrush. Make sure to cover the entire surface evenly. Allow the paint to dry completely according to the manufacturer’s instructions.
Step 3: Sand and Distress
Once the basecoat is dry, use sandpaper to distress the surface of the metal. Focus on areas that would naturally wear over time, such as edges and corners. This will add to the rustic appeal of the finished piece. Wipe away any dust or debris from sanding before proceeding.
Step 4: Apply the Topcoat
Now it’s time to apply the topcoat paint. Using a small brush, create random brush strokes in the desired direction of the wood grain. This will mimic the look of wood. Allow the paint to dry completely.
Step 5: Create Wood Grain Texture
To achieve a realistic wood effect, use a wood grain tool to create texture on the surface. Gently drag the tool along the painted metal, following the natural wood grain pattern. Experiment with different angles and pressure to achieve the desired effect. Let it dry completely before moving on to the next step.
Step 6: Distress and Sand Again
If you want to enhance the distressed look, you can repeat the sanding process on the wood grain textured surface. Focus on areas that would typically wear down over time, such as the edges and corners. Wipe away any dust before proceeding to the final step.
Step 7: Seal the Surface
To protect the newly created rustic wood effect, apply a clear sealant to the entire surface. This will seal in the paint and provide durability. Follow the manufacturer’s instructions for drying time and additional coats if necessary.
In Summary
By following these steps, you can easily create a rustic wood effect on metal objects. With just a few materials and some patience, you can transform any metal item into a unique and eye-catching piece. Whether you’re upcycling old furniture or adding a rustic touch to new decor, this technique is sure to impress. So, gather your materials and get ready to unleash your creativity!
Transforming Metal into a Natural Wood Grain Look
Metal furniture and decor items can add a sleek and modern touch to any space. However, if you prefer a more natural and rustic aesthetic, you can transform your metal pieces into a stunning wood grain look. This technique allows you to achieve the warmth and charm of wood while retaining the durability and versatility of metal. In this section, we will explore the step-by-step process of transforming metal into a natural wood grain look.Materials Needed
To successfully achieve the wood grain effect on metal, you will need the following materials:- Metal furniture or decor item
- Primer suitable for metal
- Base coat paint in a color similar to your desired wood tone
- Wood grain tool or graining comb
- Wood stain in your chosen wood color
- Clear topcoat or sealer
- Paintbrushes and foam rollers
- Painter’s tape
- Sandpaper or sanding block
- Clean cloth or rag
- Drop cloths or newspaper to protect your work area
Step-by-Step Process
- Prepare the Surface: Start by cleaning the metal surface to remove any dirt, grease, or rust. Use sandpaper or a sanding block to create a slightly rough texture that will help the primer adhere better. Clean the surface again to ensure it is free from any debris.
- Apply Primer: Apply a coat of primer suitable for metal surfaces to ensure proper adhesion of subsequent layers of paint. Use a paintbrush or foam roller to apply an even layer of primer. Allow it to dry completely according to the manufacturer’s instructions.
- Apply Base Coat: Choose a base coat paint in a color similar to your desired wood tone. Apply the base coat paint using a paintbrush or foam roller, ensuring even coverage across the entire surface. Let it dry completely before moving on to the next step.
- Create Wood Grain Texture: Once the base coat is dry, it’s time to create the wood grain texture. Use a wood grain tool or graining comb to achieve the desired pattern. Drag the tool or comb through the wet paint in long, even strokes to mimic the natural grains of wood. Experiment with different techniques and pressures to achieve the desired effect.
- Apply Wood Stain: After achieving the wood grain texture, allow the base coat to dry completely. Then, apply wood stain in your chosen wood color using a paintbrush or sponge. Work in small sections, allowing the stain to penetrate the grooves and crevices created by the wood grain tool. Wipe off any excess stain with a clean cloth or rag before it dries.
- Seal the Finish: To protect the wood grain effect and ensure longevity, apply a clear topcoat or sealer. This will also provide a smooth and polished finish. Follow the manufacturer’s instructions for application, including the recommended drying time between coats.
- Finishing Touches: Once the clear topcoat is dry, inspect the surface for any imperfections or uneven spots. Touch up as needed with additional wood stain or topcoat. Remove any painter’s tape used to protect certain areas.
Easy Steps to Achieve a Wood Texture on Metal
Creating a wood texture on metal can be a fun and creative way to add a unique look to your projects. Whether you want to give a rustic touch to a piece of furniture or add depth to a metal art piece, achieving a wood texture on metal is easier than you might think. In this section, we will outline the step-by-step process to help you achieve a stunning wood texture on metal.
Materials You Will Need:
- Metal surface (such as a steel sheet or furniture piece)
- Paint primer
- Wood grain tool
- Base coat paint (preferably a light color)
- Wood stain or glaze
- Paintbrushes or foam brushes
- Clear coat sealant
- Painter’s tape (optional)
Step 1: Prepare the Metal Surface
Begin by preparing the metal surface you will be working on. Ensure that it is clean and free from any dust, dirt, or grease. Use a mild detergent and water to remove any surface contaminants. Once the surface is clean, dry it thoroughly.
Step 2: Apply a Primer
Next, apply a paint primer to the metal surface. The primer will help the paint adhere better and provide a smooth base for the wood texture. Use a paintbrush or foam brush to evenly apply the primer. Allow the primer to dry completely before moving on to the next step.
Step 3: Apply the Base Coat
Once the primer is dry, apply a base coat of paint to the metal surface. Choose a light color that will serve as the background for your wood texture. This could be a light brown, beige, or even a pale gray. Use a paintbrush or foam brush to apply the base coat evenly. Allow the base coat to dry completely.
Step 4: Create the Wood Texture
Now comes the fun part – creating the wood texture on the metal surface. Using a wood grain tool, gently drag it along the surface to create the appearance of wood grain. You can experiment with different pressures and angles to achieve the desired texture. Be sure to work in small sections to maintain control over the pattern.
If you don’t have a wood grain tool, you can also use a small brush or even a toothpick to create the grain pattern. Simply dip the brush or toothpick in a darker paint color (such as brown or black) and lightly drag it across the surface in a wavy motion, mimicking the natural grain of wood.
Step 5: Apply Wood Stain or Glaze
To enhance the wood texture and add depth, apply a wood stain or glaze over the painted surface. This will give the appearance of aged or weathered wood. Choose a stain or glaze that complements the base coat color. Use a clean brush or foam brush to apply the stain or glaze, following the wood grain pattern. Allow it to dry according to the manufacturer’s instructions.
Step 6: Seal and Protect
Finally, seal and protect your wood texture on metal by applying a clear coat sealant. This will help prevent any chipping or peeling and ensure the longevity of your project. Follow the instructions on the sealant for proper application and drying times.
Optional: If you want to create a more realistic look, you can use painter’s tape to mask off certain areas and create the appearance of wood planks or panels.
Summary
By following these easy steps, you can achieve a stunning wood texture on metal surfaces. From furniture to art pieces, this technique allows you to add a unique and rustic touch to your projects. Remember to prepare the metal surface, apply a primer and base coat, create the wood texture using a wood grain tool or other tools, apply a wood stain or glaze for added depth, and seal and protect your work with a clear coat sealant. Get creative and have fun with this process to achieve beautiful wood-like finishes on metal.
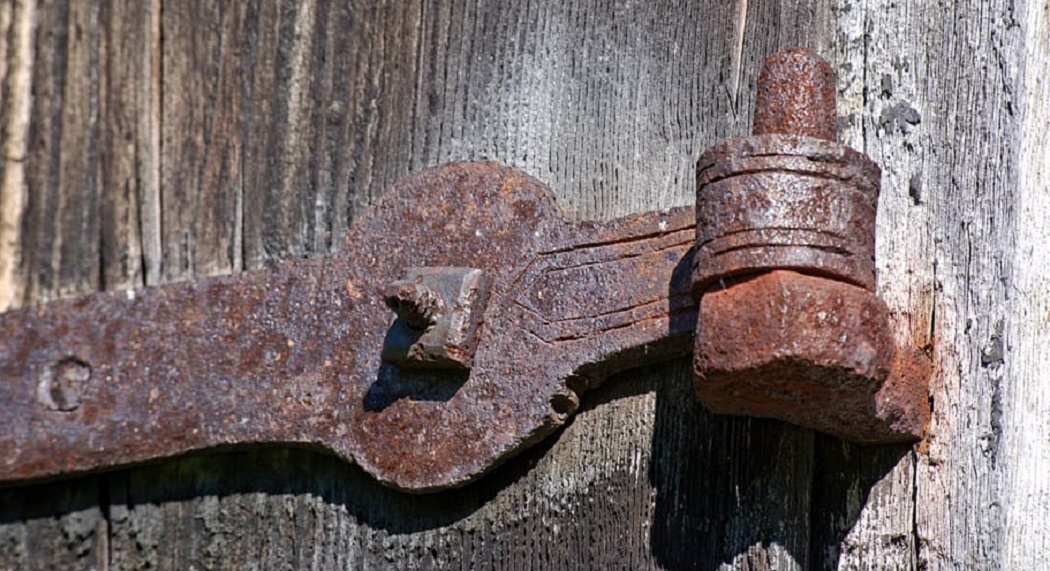
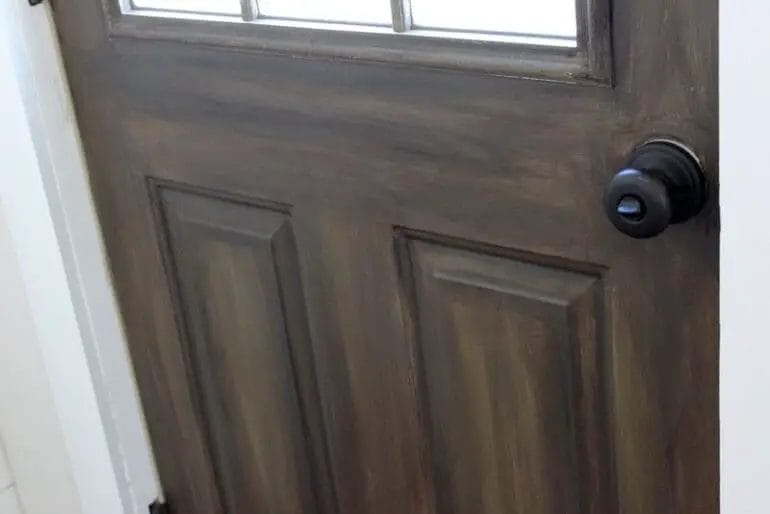
Achieving a Wood-Like Finish on Metal Objects
Metal objects are a popular choice for various applications due to their durability and strength. However, sometimes you may want to add a touch of warmth and elegance to these metallic surfaces. One way to achieve this is by creating a wood-like finish on metal objects. In this section, we will explore different methods and techniques that can be used to transform the appearance of metal objects into a realistic wood finish.1. Faux Wood Grain Painting
Faux wood grain painting is a technique that mimics the natural grain patterns found in wood. This method involves layering different paint colors to create the illusion of wood texture. Here are the steps to achieve this effect:- Prepare the Surface: Start by cleaning the metal object to remove any dirt or grease. Sand the surface lightly to create a smooth base for the paint.
- Apply Base Coat: Choose a base color that resembles the wood tone you want to achieve. Apply this color evenly over the entire surface of the metal object and let it dry completely.
- Create a Wood Grain Pattern: Use a wood graining tool or a small brush to create the grain pattern. Dip the tool or brush into a darker shade of paint and drag it along the surface in long, curved strokes to create the appearance of wood grain. Vary the pressure and direction of the strokes to add realism to the pattern.
- Layer Different Colors: To enhance the depth and dimension of the wood grain, use a dry brush technique. Dip a dry brush into a lighter or darker shade of the base color and lightly brush it over the surface in a random pattern. This will create highlights and shadows, giving the illusion of a textured wood surface.
- Finish with a Protective Coating: Once the paint has dried completely, apply a clear protective coating to seal the finish and protect it from wear and tear.
2. Wood Veneer Overlay
Another method to achieve a wood-like finish on metal objects is by using wood veneer overlays. Wood veneer is a thin layer of real wood that can be applied to the surface of the metal object to give it the appearance of solid wood. Here are the steps to apply wood veneer overlays:- Clean and Prepare the Surface: Remove any dirt or grease from the metal object and sand the surface lightly to create a smooth base.
- Measure and Cut the Veneer: Measure the dimensions of the metal object and cut the wood veneer to match those dimensions. Make sure to leave a slight overhang on all sides for trimming later.
- Apply Adhesive: Apply a wood veneer adhesive to the back of the veneer and to the surface of the metal object. Follow the manufacturer’s instructions for the specific adhesive being used.
- Position and Press the Veneer: Carefully position the veneer onto the metal object, aligning it properly. Use a roller or a clean cloth to press the veneer firmly onto the surface, ensuring good adhesion.
- Trim and Finish: Once the adhesive has dried, use a sharp utility knife to trim off the excess veneer. Sand the edges lightly to smooth them out. Apply a clear protective coating to enhance the wood-like appearance and protect the surface.
3. Wood Grain Vinyl Wrap
Wood grain vinyl wrap is a self-adhesive material that can be applied to metal objects to give them a wood-like finish. This method is relatively quick and easy compared to other techniques and provides excellent results. Here’s how to achieve a wood grain finish using vinyl wrap:- Clean the Surface: Ensure that the metal object is clean and free from any dust or debris.
- Measure and Cut the Vinyl Wrap: Measure the dimensions of the metal object and cut the vinyl wrap to match those dimensions, leaving a slight overhang for trimming.
- Peel and Apply: Peel off the backing from the vinyl wrap and carefully apply it to the metal surface, starting from one end and gradually smoothing it out as you go. Use a squeegee or a clean cloth to press out any bubbles or wrinkles.
- Trim the Excess: Once the vinyl wrap is applied, use a sharp utility knife to trim off the excess material along the edges of the metal object.
FAQs
How can I make metal look like wood?
To make metal look like wood, you can use a faux wood grain technique. Start by applying a base coat of paint that matches the desired wood color. Once it dries, use a wood graining tool to create the grain pattern by dragging it through a glaze or darker paint. Allow it to dry completely before applying a protective topcoat.
What materials do I need to make metal look like wood?
To make metal look like wood, you will need the following materials: metal surface, sandpaper, primer, paint (base color and wood grain color), glaze or darker paint, a wood graining tool, and a protective topcoat.
Is it possible to make metal look like wood?
Yes, it is possible to make metal look like wood. By using specific paint techniques like faux wood grain, you can create a realistic wood appearance on a metal surface. The key is to choose the right colors and use the wood graining tool to create the desired grain pattern.
Conclusion
In conclusion, transforming metal to resemble wood can be achieved through various techniques and finishes, offering endless possibilities for reimagining furniture, fixtures, and decor. By using faux wood grain techniques, such as painting, staining, or glazing, along with wood-like textures and patterns, you can create a convincing wood-like appearance on metal surfaces. Additionally, the use of wood grain vinyl wraps or realistic wood-printed films can provide a quick and durable solution. Remember to choose the right tools and materials for your desired outcome, and experiment with different finishes and colors to achieve the most authentic wood look on your metal objects.