Are you interested in the art of woodworking and want to learn how to make a wood barrel? Crafting a wood barrel can be a fulfilling project that combines both functionality and beauty. Whether you want to create a rustic decor piece or need a barrel for practical purposes, this guide will provide you with step-by-step instructions on how to make your own wooden barrel.
When it comes to making a wood barrel, the first step is to choose the right type of wood. Opt for a hardwood such as oak or maple that is known for its durability and resistance to moisture. Additionally, ensure that the wood is properly seasoned to avoid any warping or cracking in the future.

Next, you’ll need to gather the necessary tools and materials. This includes a saw, chisel, drill, mallet, wooden dowels or metal hoops, and waterproof glue. Additionally, consider using a barrel-making kit or template to ensure accurate measurements and a seamless construction process.
Start by cutting the wood staves to the desired length and angle, making sure that they fit together snugly. To create the curved shape of the barrel, use a chisel and mallet to shape the staves. Once the shape is achieved, drill holes along the edges of each stave, and insert the wooden dowels or metal hoops to hold the barrel together.
Finally, apply a waterproof glue to the joints to increase the barrel’s structural integrity and
Essential Tools and Materials for Barrel Making
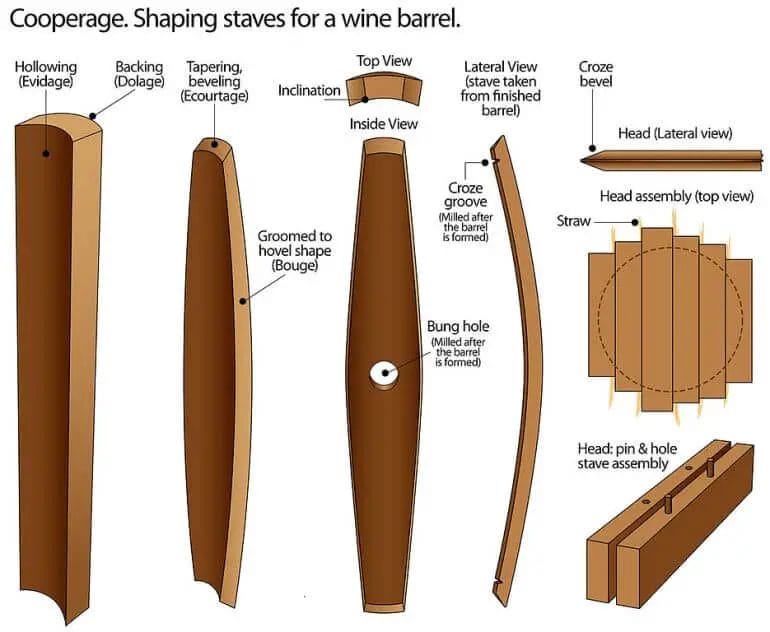
Barrel making, also known as cooperage, is an age-old craft that involves constructing wooden barrels for various purposes such as aging and storing wine, whiskey, and other spirits. In order to successfully create a barrel, there are several essential tools and materials that are required. In this section, we will discuss these tools and materials in detail.
Tools
1. Adze: An adze is a curved tool used for shaping the staves (wooden planks that form the sides of the barrel) by removing excess wood and creating a smooth curve. It is an essential tool for cooperage.
2. Croze: A croze is a specialized tool used to cut a groove into the inside of the barrel staves to accommodate the barrel head. This groove ensures a secure fit for the barrel head.
3. Jointer Plane: A jointer plane is used to smooth the surfaces of the staves and ensure a tight, seamless fit when the barrel is assembled. It is an important tool for achieving precision in barrel making.
4. Mallet: A mallet is a hammer-like tool used to strike the adze or the croze. It provides the necessary force to shape the wood and create the required cuts and grooves.
5. Compass: A compass is used to mark and measure the curvature of the barrel staves. It helps ensure that each stave is shaped correctly and fits together seamlessly.
6. Spokeshave: A spokeshave is a handheld tool with a blade used for shaping the staves and removing excess wood. It allows for greater control and precision in barrel making.
Materials
1. Wood: The primary material used for barrel making is wood. Oak is the most commonly used wood due to its durability, strength, and ability to impart desirable flavors to the aging spirits. Other types of wood such as cherry, chestnut, and maple can also be used.
2. Metal Hoops: Metal hoops are used to reinforce and hold the barrel staves together. They provide stability and prevent the barrel from coming apart under pressure. Hoops can be made of stainless steel or galvanized steel.
3. Barrel Head: The barrel head is a circular piece of wood that forms the top or bottom of the barrel. It is typically made of the same type of wood as the staves and is carefully crafted to fit securely into the groove cut by the croze.
4. Barrel Bungs: Barrel bungs are small wooden plugs used to seal the bungholes in the barrel. These bungholes are essential for filling and emptying the barrel, as well as for sampling and testing the contents.
5. Barrel Wax: Barrel wax is applied to the exterior of the barrel to protect the wood from moisture and maintain its integrity. It helps prevent leakage and extends the lifespan of the barrel.
In summary, barrel making requires a range of specialized tools and materials to create functional and aesthetically pleasing barrels. From shaping the staves to securing the hoops, each tool and material plays a crucial role in the process. Mastering the use of these tools and selecting the right materials is key to producing high-quality barrels for the aging and storing of spirits.
Step-by-Step Guide to Constructing a Wood Barrel
Wood barrels are not only functional but also add a rustic charm to any space. Whether you want to use them for storage or as decorative pieces, constructing a wood barrel can be a rewarding project. In this section, we will provide you with a step-by-step guide on how to construct a wood barrel.
Materials Needed:
- Wooden staves
- Barrel hoops
- Wood glue
- Clamps
- Hammer
- Nails
- Sandpaper
- Saw
- Drill
- Wood stain or sealant
- Brush or rag
Step 1: Prepare the Staves
Start by cutting the wooden staves to the desired length. The length will depend on the size of the barrel you want to construct. Make sure to cut an equal number of staves.
Step 2: Shape the Staves
Using a saw, shape one end of each stave into a curve. This will help create the characteristic barrel shape. You can use a template or draw the curve freehand.
Step 3: Assemble the Staves
Apply wood glue to the edges of each stave and carefully join them together, forming a circle. Use clamps to hold the staves in place while the glue dries.
Step 4: Attach the Hoops
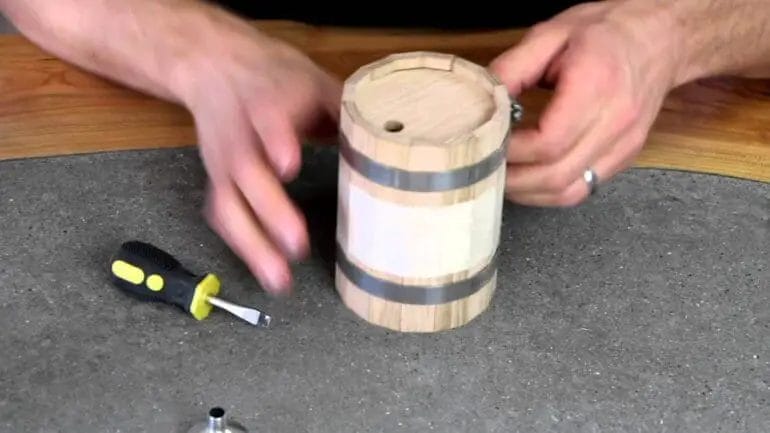
Once the glue has dried, it’s time to attach the barrel hoops. Place the hoops around the barrel and use a hammer and nails to secure them in place. Start with the top hoop and work your way down.
Step 5: Sand and Finish
Using sandpaper, smooth out any rough edges or surfaces. This will give the barrel a polished look. After sanding, you can choose to stain or seal the wood to enhance its durability and appearance. Apply the stain or sealant using a brush or rag, following the manufacturer’s instructions.
Step 6: Optional Accessories
If desired, you can add additional accessories to the wood barrel, such as handles or a spigot for easy pouring. This step is optional but can add functionality to your barrel.
Step 7: Enjoy Your Wood Barrel
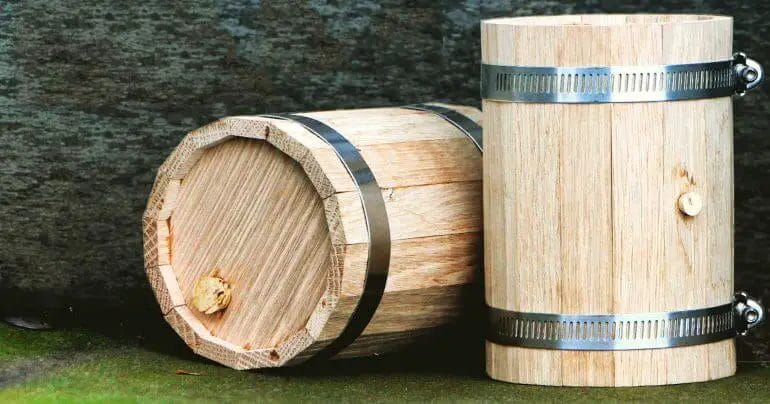
Once the finish has dried, your wood barrel is ready to be used or displayed. Fill it with your desired items or place it in your preferred location, and enjoy the rustic charm it brings.
In summary, constructing a wood barrel is a step-by-step process that involves cutting and shaping the staves, assembling them into a circle, attaching the hoops, sanding, and finishing the barrel. With a bit of patience and the right materials, you can create a beautiful wood barrel that adds a touch of rustic elegance to your space.
Applying the Finishing Touches: Staining and Sealing
Once you have completed the woodworking project and achieved the desired shape and smoothness, it’s time to apply the finishing touches. Staining and sealing your woodwork not only enhances its appearance but also protects it from damage and moisture. In this section, we will guide you through the process of staining and sealing your woodwork to achieve a professional-looking finish.
1. Choosing the Right Stain
The first step in the staining process is selecting the right stain for your woodwork. Stains come in different shades and types, including oil-based and water-based stains. Consider the color and opacity you want to achieve and test a small area of the wood with different stains to see how they interact with the wood’s natural color. Once you have chosen the stain, gather the necessary materials, including stain, brush or cloth, and protective gloves.
2. Preparing the Wood for Staining
Before applying the stain, it’s important to prepare the wood surface properly. Start by sanding the wood with a fine-grit sandpaper to remove any imperfections and create a smooth surface. Make sure to sand in the direction of the wood grain to avoid scratching the surface. Once you have sanded the wood, remove any dust or debris using a brush or tack cloth.
3. Applying the Stain
Now it’s time to apply the stain to the wood surface. Dip a brush or cloth into the stain and start applying it in the direction of the wood grain. Work in small sections, ensuring even coverage. It’s important to follow the instructions on the stain container regarding the application technique and drying time. Some stains require multiple coats for a darker color, while others may require wiping off the excess stain after a certain period.
4. Allowing the Stain to Dry
After applying the stain, allow it to dry completely before proceeding to the next step. The drying time can vary depending on the type of stain and environmental conditions. Make sure to place the wood in a well-ventilated area and avoid touching or disturbing it while it dries. It’s recommended to wait at least 24 hours before applying the sealer.
5. Sealing the Wood
Once the stain has dried, it’s time to seal the wood to protect it from moisture and other potential damage. Select a suitable sealer based on the type of wood and the desired level of protection. There are various options available, including polyurethane, lacquer, and shellac. Using a brush or roller, apply the sealer evenly on the wood surface, following the manufacturer’s instructions. Allow the sealer to dry completely between coats, and apply multiple coats for enhanced protection.
6. Sanding and Buffing (Optional)
If you want to achieve a smoother and more polished finish, you can sand the sealed wood lightly using fine-grit sandpaper. Gently sand the surface in the direction of the wood grain to avoid scratches. After sanding, use a soft cloth or buffing pad to buff the surface, creating a smooth and glossy finish.
7. Final Inspection
Once you have completed the staining and sealing process, carefully inspect the woodwork for any imperfections or missed spots. Touch up any areas that require additional staining or sealing. Take your time to ensure that the woodwork looks flawless before considering it finished.
In summary, staining and sealing your woodwork is an essential step in achieving a professional and durable finish. By selecting the right stain, preparing the wood properly, and applying the stain and sealer correctly, you can enhance the beauty of your woodworking project while protecting it from the elements. Remember to follow the manufacturer’s instructions and take your time to achieve the desired results. With proper staining and sealing techniques, your woodwork will have a long-lasting and stunning appearance.
Maintenance and Care Tips for Your Wood Barrel
Wood barrels are not only functional but also add a touch of elegance to any space. Whether you use them for aging wine, spirits, or as decorative pieces, it’s important to properly maintain and care for your wood barrel to ensure its longevity and optimal performance. In this section, we will provide you with some essential maintenance and care tips to keep your wood barrel in top condition.
1. Cleaning
Regular cleaning is crucial to prevent the buildup of residue and maintain the flavor integrity of your barrel-aged beverages. Here’s how you can effectively clean your wood barrel:
- Empty the barrel and rinse it with hot water to remove any remaining liquid.
- Fill the barrel with a cleaning solution specifically designed for wood barrels or use a mixture of hot water and citric acid.
- Seal the barrel and gently shake it to ensure the cleaning solution reaches all surfaces.
- Let the solution sit in the barrel for the recommended time (usually 24-48 hours).
- Empty the cleaning solution and rinse the barrel thoroughly with hot water.
- Allow the barrel to air dry completely before storing or reusing it.
2. Conditioning
Wood barrels can dry out over time, leading to leakage and compromised flavor profiles. Conditioning the barrel helps to maintain its moisture content and prevent drying. Follow these steps to properly condition your wood barrel:
- Fill the barrel with hot water and let it sit for a few hours or overnight to allow the wood to absorb the moisture.
- Empty the water and rinse the barrel with a small amount of the beverage you plan to age in it (wine, whiskey, etc.) to infuse the wood with the desired flavors.
- Seal the barrel and store it horizontally to prevent any leakage.
3. Storage
Proper storage is crucial to maintain the quality and longevity of your wood barrel. Consider the following tips for storing your barrel:
- Avoid storing your barrel in extreme temperatures or direct sunlight, as this can cause the wood to expand, contract, or crack.
- Store the barrel horizontally to ensure the liquid remains in contact with the wood, preventing leakage and maintaining the desired flavors.
- Regularly inspect the barrel for any signs of damage or leakage. If you notice any issues, take immediate steps to address them to prevent further damage.
- Keep the barrel in a well-ventilated area to prevent the growth of mold or mildew.
4. Refurbishing
Over time, the wood in your barrel may become worn or develop leaks. Refurbishing the barrel can help extend its lifespan. If you encounter any issues, consider the following options:
- For small leaks, you can seal them using food-grade wax or barrel wax.
- If the barrel is severely damaged or the leaks persist, you may need to consult a professional cooper to repair or replace the damaged parts.
5. Rotating and Sampling
Rotating and sampling the contents of your wood barrel is essential to ensure even aging and monitor the flavor development. Here’s how you can effectively rotate and sample your barrel-aged beverages:
- Regularly rotate the barrel to ensure the liquid comes into contact with all surfaces of the wood.
- Take periodic samples to taste and monitor the flavor progression. This will help you determine the ideal aging time for your specific beverage.
- Keep detailed records of the sampling process to track the aging and flavor profiles over time.
In summary, proper maintenance and care are essential to prolong the life of your wood barrel and ensure the best possible aging results. Regular cleaning, conditioning, and storage in suitable conditions will help maintain the wood’s integrity and prevent leaks. Refurbishing, if necessary, can address any issues that arise. By following these maintenance tips, you can continue to enjoy the unique flavors and aesthetic appeal of your wood barrel for years to come.
FAQs
1. How do I make a wooden barrel?
To make a wooden barrel, you will need wooden staves, metal hoops, a mallet, a chisel, and wood glue. First, assemble the staves by gluing them together, then secure them with metal hoops using a mallet. Finally, shape the top and bottom of the barrel with a chisel to form the necessary openings.
2. What type of wood is best for making a wooden barrel?
The best type of wood for making a wooden barrel is oak, as it is durable, water-resistant, and imparts a desirable flavor to the contents. Other suitable wood options include cherry, cedar, and chestnut.
3. Can a wooden barrel be used for storing liquids?
Yes, wooden barrels can be used for storing liquids. However, it is important to seal the barrel properly to prevent leakage. Coating the interior with a food-safe sealant or using a plastic liner can also help ensure the barrel is suitable for liquid storage.
Conclusion
In conclusion, learning how to make a wood barrel can be a rewarding and fulfilling craft. By following proper techniques and using quality materials, one can create a sturdy and durable barrel. Whether you are interested in making a barrel for storing wine, aging spirits, or simply as a decorative piece, the process requires patience, precision, and attention to detail. Remember to choose the right type of wood, properly shape and assemble the staves, and ensure a tight seal to prevent any leaks. With practice and experience, you can master the art of barrel making and create beautiful and functional wooden barrels.
