Are you interested in learning how to make beautiful and functional wooden spoons?
If so, you’ve come to the right place! In this guide, we will provide you with step-by-step instructions on how to transform a piece of wood into a stunning and practical spoon.

From selecting the right type of wood to shaping, sanding, and finishing techniques, we will cover everything you need to know to create your very own wooden spoons.
Whether you’re a woodworking enthusiast or simply enjoy the satisfaction of crafting something by hand, making wooden spoons is a rewarding and fulfilling experience.
So, let’s dive in and discover the art of making wooden spoons!
Choosing the Right Wood for Your Wooden Spoon
In this section, we will discuss the importance of choosing the right wood for your wooden spoon. When it comes to crafting a functional and durable kitchen utensil, the type of wood you use can make all the difference. Let’s explore some popular wood options and their unique characteristics.
1. Maple Wood
Maple wood is a popular choice for wooden spoons due to its strength and durability. It is a dense and tight-grained wood that resists staining and absorbs minimal moisture. Maple is also prized for its natural antimicrobial properties, making it a hygienic option for food preparation. The light color of maple wood adds an elegant touch to any kitchen.
2. Walnut Wood
Walnut wood is known for its rich, dark brown color and beautiful grain patterns. It is a hardwood that is highly resistant to warping and cracking, making it a reliable choice for wooden spoons. Walnut wood is also naturally antibacterial, making it safe for food contact. Additionally, the natural oils in walnut wood provide a smooth and polished finish.
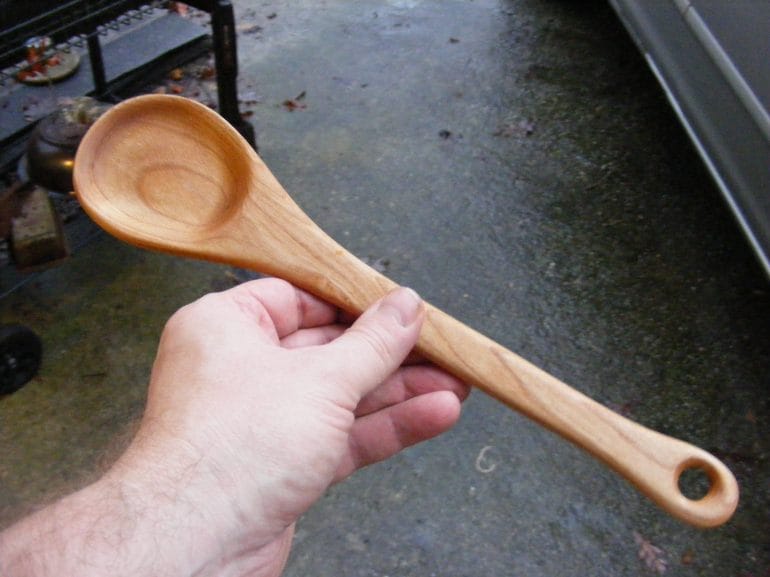
3. Cherry Wood
Cherry wood is a popular choice among woodworkers and artisans due to its warm, reddish-brown color. It has a straight grain and a smooth texture, making it easy to carve and shape into spoons. Cherry wood is also known for its durability and resistance to moisture, making it suitable for kitchen use. Its natural luster and rich tones make cherry wood spoons aesthetically pleasing as well.
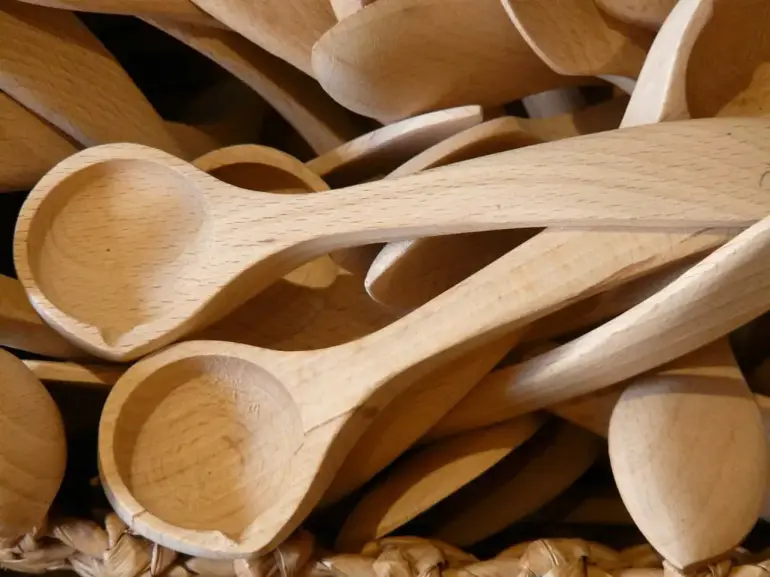
4. Beech Wood
Beech wood is another common wood used for crafting wooden spoons. It has a pale cream color and a straight grain, making it visually appealing. Beech wood is durable and resistant to breaking, making it ideal for kitchen utensils. It is also easy to work with, allowing for intricate designs and detailed carving.
5. Olive Wood
Olive wood is a unique and beautiful option for wooden spoons. It has a distinctive grain pattern with rich, warm hues ranging from golden brown to darker shades. Olive wood is hard, dense, and highly resistant to odors and stains. It is also naturally antibacterial, making it a healthy choice for food preparation. The natural oils in olive wood give it a smooth and polished finish.
When selecting wood for your wooden spoon, it’s important to consider factors such as strength, durability, resistance to moisture, and natural antimicrobial properties. Each wood type has its own unique characteristics and visual appeal, allowing you to choose a wooden spoon that not only functions well but also enhances the aesthetics of your kitchen. Take your time to explore different wood options, and select the one that best suits your personal preferences and cooking needs.

Step-by-Step Guide to Carving a Wooden Spoon
If you enjoy woodworking and want to add a unique touch to your kitchen utensils, carving a wooden spoon can be a rewarding project. Not only does it allow you to create a functional piece of art, but it also provides a great opportunity to develop your carving skills. In this step-by-step guide, we will walk you through the process of carving a wooden spoon from start to finish.
Materials and Tools Needed
Before diving into the carving process, gather all the necessary materials and tools. Here’s what you’ll need:
- A suitable wood block: Choose a hardwood such as cherry, walnut, or maple, which are sturdy and easy to carve.
- A pencil or marker: Use it to sketch the outline of your spoon on the wood block.
- A carving knife: Invest in a quality carving knife with a sharp blade that allows for precise cuts.
- A coping saw: This tool will help you remove excess wood and shape the rough outline of the spoon.
- Sandpaper: Different grits of sandpaper will be needed to smooth the surface of your spoon.
- A wood finish: Apply a food-grade finish, such as mineral oil or beeswax, to protect and enhance the beauty of the wood.
Step 1: Design and Mark the Spoon’s Shape
The first step is to design your spoon’s shape. Using a pencil or marker, draw the outline of the spoon on the wood block. Consider the size, curvature, and handle length based on your personal preference.
Step 2: Rough Out the Shape
With the coping saw, carefully cut around the outline of the spoon, removing the excess wood. Take your time and follow the marked lines as closely as possible.
Step 3: Carve the Bowl
Using the carving knife, start shaping the bowl of the spoon. Begin with small, shallow cuts and gradually deepen them. Pay attention to the curvature and symmetry of the bowl.
Step 4: Shape the Handle
Carve the handle of the spoon to your desired thickness and shape. Smooth out any rough edges or irregularities as you go.
Step 5: Refine and Sand the Surface
Once you are satisfied with the overall shape of the spoon, use sandpaper to smooth the surface. Start with a coarse grit sandpaper and gradually move to finer grits for a polished finish.
Step 6: Apply a Finish
After sanding, wipe off any dust and apply a food-grade finish to protect the wood and bring out its natural beauty. Follow the manufacturer’s instructions for the specific finish you choose.
Step 7: Enjoy Your Handcrafted Wooden Spoon
Allow the finish to dry completely before using your handcrafted wooden spoon. Whether you use it for cooking or simply as a decorative piece, take pride in your creation.
In summary, carving a wooden spoon is a gratifying woodworking project that allows you to combine functionality with artistic expression. With the right tools and materials, and by following this step-by-step guide, you can create a one-of-a-kind wooden spoon that will be cherished for years to come.
Tips and Tricks for Sanding and Smoothing your Spoon
When it comes to crafting wooden spoons, sanding and smoothing the surface is an essential step to achieve a polished final product. Not only does it enhance the look and feel of the spoon, but it also ensures a comfortable and functional utensil. In this section, we will discuss some helpful tips and tricks for sanding and smoothing your spoon.
1. Start with the Right Grit
Before diving into sanding, it’s important to choose the right grit sandpaper. For initial shaping and removing larger imperfections, start with a lower grit such as 80 or 120. As you progress and the surface becomes smoother, move on to higher grits like 220 or 320. Finish off with an even finer grit like 400 or 600 for a silky smooth finish.
2. Sand with the Grain
Always sand your wooden spoon with the grain to prevent any irregularities or scratches. Sanding against the grain can result in tear-outs and an uneven surface. Follow the natural flow of the wood and use long, smooth strokes to achieve the best results.
3. Use Sanding Blocks
To maintain a consistent pressure and avoid uneven sanding, it’s recommended to use sanding blocks. These blocks provide a flat, even surface for sanding and make it easier to navigate curved or irregular shapes. Wrap the sandpaper around the block and sand in a back-and-forth motion for a uniform finish.
4. Pay Attention to Detail
While sanding, pay attention to the small details of your spoon. Use your fingertips to feel for any rough spots or imperfections that may have been missed. Take your time and be thorough, as these small details contribute to the overall quality and comfort of the spoon.
5. Wet Sanding for an Extra Smooth Finish
If you’re aiming for an exceptionally smooth surface, consider wet sanding. Wet sanding involves using water or a lubricant like mineral oil to keep the sandpaper moist while sanding. This helps to reduce friction and results in a finer finish. Remember to let the spoon dry completely before applying any finishes or oils.
6. Protect Your Hands
Sanding can be a tough task on your hands, so don’t forget to protect them. Wear gloves to prevent splinters and to keep your hands comfortable during the process. Additionally, consider using a sanding sponge or sanding mesh for those hard-to-reach areas, as they provide a better grip and reduce hand fatigue.
7. Clean and Seal the Spoon
After sanding, it’s essential to thoroughly clean the spoon to remove any dust or debris. You can use a soft brush or a cloth to wipe away the particles. Once the spoon is clean and dry, you can apply a food-safe finish or sealant to protect and enhance the wood. Be sure to follow the manufacturer’s instructions for a proper application.
8. Final Touches
Lastly, inspect your spoon for any remaining imperfections or rough spots. If necessary, go over those areas with a higher grit sandpaper or sanding sponge. Once you are satisfied with the smoothness and finish, your spoon is ready to be used or displayed!
In summary, sanding and smoothing your wooden spoon is a crucial step in achieving a beautifully crafted utensil. By following these tips and tricks, you can ensure a polished, comfortable, and functional spoon that will be a joy to use in the kitchen.
5. Finishing Touches: How to Treat and Seal your Wooden Spoon
After carving and sanding your wooden spoon, it’s important to apply a finish to protect the wood and enhance its natural beauty. Treating and sealing your wooden spoon will help prevent it from cracking, warping, and absorbing liquids or odors. Here are some steps to follow for a professional-looking finish:
1. Choose the Right Finish
There are several types of finishes you can use for your wooden spoon, each with its own advantages and considerations:
- Mineral Oil: Food-safe and easy to apply. It moisturizes the wood, bringing out its natural color. However, it requires regular reapplication.
- Beeswax: Also food-safe and provides a natural, matte finish. It creates a protective barrier, but it may require occasional reapplication as well.
- Linseed Oil: A popular choice for wooden spoons. It enhances the natural grain of the wood and provides a durable finish. However, it takes longer to dry and may have a strong odor.
2. Prepare the Spoon
Before applying any finish, make sure your wooden spoon is clean and dry. Remove any dust or debris from the surface, as it can affect the quality of the finish. You can use a soft cloth or a brush to gently wipe the spoon.
3. Apply the Finish
Using a clean cloth or brush, apply a thin and even coat of your chosen finish to the entire surface of the spoon, including the handle and bowl. Make sure to get into all the nooks and crannies. Allow the first coat to soak into the wood for a few minutes.
4. Let it Dry
After the first coat has soaked in, wipe off any excess finish with a clean cloth. Place the spoon on a drying rack or a piece of parchment paper to allow it to dry completely. The drying time will depend on the type of finish used, so refer to the manufacturer’s instructions.
5. Sand and Repeat
Once the first coat is dry, lightly sand the surface of the spoon with fine-grit sandpaper. This will help create a smooth finish and remove any raised wood fibers. Wipe away any dust and apply a second coat of finish following the same process. Repeat this step for additional coats, depending on the desired level of protection and sheen.
6. Final Touches
After applying all the coats and allowing the final one to dry, give your wooden spoon a final sanding with ultra-fine grit sandpaper to achieve a silky smooth finish. Wipe away any dust particles and admire your beautifully finished wooden spoon.
7. Maintenance
To keep your wooden spoon looking its best, it’s important to maintain the finish. Avoid soaking the spoon in water for extended periods, as it can cause the wood to swell and potentially damage the finish. Instead, wash it by hand with mild soap and warm water, and promptly dry it afterwards. Reapply a thin coat of your chosen finish periodically to keep the wood moisturized and protected.
In summary, treating and sealing your wooden spoon is essential for its longevity and functionality. By choosing the right finish, properly preparing the spoon, and applying multiple coats, you can create a durable and beautiful finish that will make your wooden spoon a cherished kitchen tool for years to come.
Frequently Asked Questions
Q: How can I make wooden spoons?
To make wooden spoons, start by selecting a hardwood like maple or cherry. Use a band saw or a coping saw to cut out the rough shape of the spoon. Carve the spoon using a carving knife and sand it smooth. Finish it with food-safe oil or beeswax for a polished look.
Conclusion
In conclusion, learning how to make wooden spoons is a rewarding and fulfilling craft that allows you to create functional and beautiful kitchen utensils. By following the step-by-step process and using the right tools and materials, you can create unique spoons that reflect your personal style and craftsmanship.
Woodworking not only enhances your creativity but also provides a sense of satisfaction as you witness your creation taking shape. Whether you are a beginner or an experienced woodworker, the joy of crafting handmade wooden spoons is boundless.
So, pick up your tools, select your favorite wood, and embark on this journey of creating timeless kitchen essentials.