Want to give your garage door a rustic, natural look without the hefty price tag of real wood? Learn how to paint your garage door to look like wood and enhance the curb appeal of your home. With the right materials and a few clever techniques, you can achieve a stunning wood finish that is durable and cost-effective.
Creating a faux wood finish on your garage door involves several steps, including proper surface preparation, choosing the right colors, and applying the paint in a way that mimics the natural grain and texture of wood. By using specialized tools and techniques, you can achieve a realistic wood grain effect that will fool even the most discerning eye.

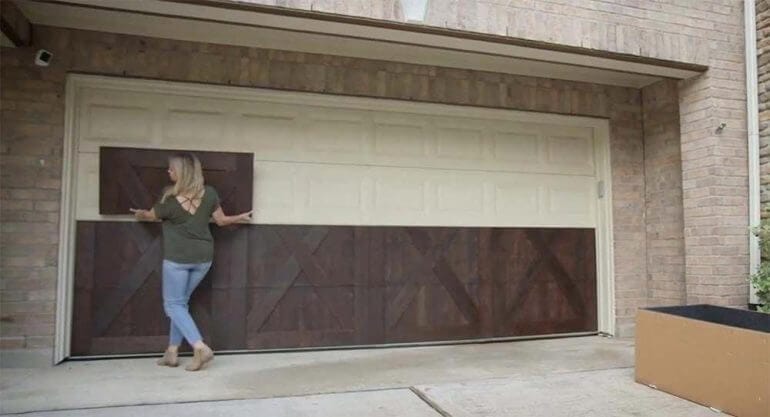
Start by thoroughly cleaning and sanding your garage door to ensure proper paint adhesion. Next, apply a base coat of primer to create a smooth, even surface. Once the primer has dried, it’s time to apply the base color that will serve as the background for your faux wood finish.
Now comes the fun part – creating the wood grain effect. Using a wood graining tool or a simple paintbrush, carefully apply a darker shade of paint in a grain-like pattern. The key is to vary the pressure and direction of your strokes to mimic the natural knots and lines found in real wood.
After the faux wood grain has dried, you can further enhance the realistic look by adding highlights and lowlights with different shades of paint. Use a small brush to
Choosing the right colors and materials for a realistic wood effect on your garage door
When it comes to enhancing the curb appeal of your home, one area that often gets overlooked is the garage door. While a functional garage door is essential, adding some aesthetic value can greatly improve the overall look of your property. One popular and timeless option for garage doors is a wood effect finish. However, not everyone wants the maintenance and cost associated with real wood. In this section, we will explore how you can achieve a realistic wood effect on your garage door by choosing the right colors and materials.
1. Selecting the base color
The first step in achieving a realistic wood effect on your garage door is selecting the right base color. This color will serve as the foundation for your wood effect finish. Opting for a neutral or earthy tone is a good starting point, as it provides a natural backdrop for the wood grain pattern and helps create a cohesive look with the rest of your home’s exterior. Some popular base colors for wood effect garage doors include beige, tan, and light brown.
2. Choosing the wood grain pattern
Once you have chosen the base color, the next step is selecting the wood grain pattern. This pattern is what gives your garage door the realistic appearance of wood. There are various wood grain patterns available, ranging from traditional to contemporary styles. It’s essential to consider the architectural style of your home when choosing the wood grain pattern, as you want the garage door to harmonize with the overall design. Common wood grain patterns include oak, mahogany, cedar, and pine.
3. Opting for high-quality materials
To achieve a truly realistic wood effect on your garage door, it’s important to choose high-quality materials that can withstand the elements. While real wood may be a classic choice, it requires regular maintenance and is susceptible to rot and warping over time. An excellent alternative is to opt for composite or vinyl materials. These materials are designed to mimic the texture and appearance of wood without the need for extensive upkeep. They are also more durable and resistant to fading, ensuring that your garage door maintains its realistic wood effect for years to come.
4. Considering additional details
When aiming for a realistic wood effect on your garage door, it’s crucial to pay attention to the smaller details. Opt for hardware such as handles, hinges, and decorative straps that complement the wood effect finish. Choosing the right window style and design can also enhance the overall appearance of your garage door. Additionally, adding a protective clear coat can help prolong the life of your garage door and maintain the wood effect finish.
5. Professional installation and maintenance
Finally, to ensure the best results, it’s essential to hire a professional for the installation of your wood effect garage door. Professionals have the expertise and tools required to achieve a seamless and realistic finish. Additionally, regular maintenance such as cleaning and applying protective coatings will help preserve the wood effect and prevent any damage.
In summary, choosing the right colors and materials is crucial in achieving a realistic wood effect on your garage door. By selecting a suitable base color, wood grain pattern, and high-quality materials, you can enhance the overall aesthetic of your home. Paying attention to additional details and opting for professional installation and maintenance will ensure that your garage door maintains its realistic wood effect for years to come.
Step-by-step guide to preparing and priming your garage door for a wood-like finish
Are you looking to give your garage door a fresh, wood-like finish? With proper preparation and priming, you can achieve a beautiful wood look for your garage door. In this guide, we will take you through the step-by-step process to prepare and prime your garage door for a wood-like finish.
Materials you will need:
- Tape measure
- Sandpaper (various grits)
- Paint scraper
- Power washer or hose with spray nozzle
- Bucket with mild detergent
- Primer
- Paintbrush
- Paint roller
- Exterior paint in the desired wood color
- Drop cloths or plastic sheeting
- Painter’s tape
Step 1: Measure and clean the garage door
Start by measuring the dimensions of your garage door. This will help you determine the amount of primer and paint you will need. Next, clean the surface of the garage door using a power washer or a hose with a spray nozzle. Remove any dirt, dust, and loose paint using a paint scraper.
Step 2: Sand the garage door
Using sandpaper of various grits, sand the entire surface of the garage door. This will create a rougher texture and help the primer adhere better. Make sure to sand any areas with peeling or flaking paint until the surface is smooth.
Step 3: Clean the garage door again
After sanding, clean the garage door once again to remove any dust or debris. Fill a bucket with mild detergent and water, and use a sponge or cloth to scrub the surface. Rinse thoroughly and allow the garage door to dry completely.
Step 4: Tape off surrounding areas
To protect the surrounding areas from primer and paint, use painter’s tape to tape off any windows, door handles, and other fixtures. Cover the floor with drop cloths or plastic sheeting to catch any drips or spills.
Step 5: Apply primer
Using a paintbrush or paint roller, apply a coat of primer to the garage door. Make sure to cover the entire surface evenly. Allow the primer to dry completely according to the manufacturer’s instructions.
Step 6: Sand the primed surface
Once the primer is dry, lightly sand the surface with fine-grit sandpaper. This will create a smoother surface for the final paint coat.
Step 7: Apply the final coat of paint
Using a paintbrush or paint roller, apply the final coat of exterior paint in the desired wood color. Work in small sections, making sure to blend the paint evenly. Allow the paint to dry completely between coats.
Step 8: Remove tape and drop cloths
Once the final coat of paint is dry, carefully remove the painter’s tape and drop cloths. Clean up any stray paint or debris.
Step 9: Enjoy your wood-like garage door finish
With proper preparation and priming, you have successfully transformed your garage door into a wood-like finish. Step back and admire the beautiful new look of your garage door!
In summary, preparing and priming your garage door for a wood-like finish requires measuring and cleaning the door, sanding the surface, applying primer and a final coat of paint, and removing tape and drop cloths. With attention to detail and patience, you can achieve a stunning wood-like finish for your garage door.
Applying the Base Coat and Creating Wood Grain Patterns on Your Garage Door
If you want to give your garage door a unique and natural look, creating a wood grain effect is a great option. Not only does it enhance the appearance of your door, but it also adds character and charm to your home’s exterior. In this section, we will guide you through the process of applying a base coat and creating wood grain patterns on your garage door.
Materials You Will Need
- Paint sprayer or paintbrush
- Exterior paint in desired colors
- Wood grain rocker tool
- Plastic drop cloths
- Sandpaper
- Tack cloth
- Painter’s tape
- Paint tray
Step 1: Prepare the Surface
Before you begin, make sure your garage door is clean and free from any dirt or debris. Use a mild detergent and water to wash the surface, and then rinse thoroughly. Allow the door to dry completely before proceeding.
Step 2: Sand the Door
Using sandpaper, lightly sand the entire surface of the garage door. This will create a slightly rough texture, allowing the paint to adhere better. Once you have finished sanding, use a tack cloth to remove any dust or particles.
Step 3: Apply the Base Coat
Choose a base color for your garage door. This can be a shade of brown, tan, or any other color that resembles wood. Using a paint sprayer or a paintbrush, apply an even coat of the base color to the entire surface of the door. Make sure to cover all areas, including the edges and corners. Allow the base coat to dry completely.
Step 4: Create Wood Grain Patterns
Once the base coat is dry, it’s time to create the wood grain effect. Start by choosing a darker shade of paint that complements the base color. Pour a small amount of the darker paint into a paint tray.
Using a wood grain rocker tool, dip the edge into the darker paint and start creating the grain patterns on the door. Move the tool in a curved or wavy motion, applying varying pressure to achieve different grain effects. Repeat this step until you have covered the entire surface of the door.
Step 5: Blend the Grain Patterns
To enhance the natural look of the wood grain, use a dry paintbrush to gently blend and soften the grain patterns. This will create a more realistic and textured appearance.
Step 6: Optional Finishing Touches
If desired, you can add additional details to your garage door to enhance the wood grain effect. For example, you can use a small brush to add knots or natural imperfections to mimic real wood.
Step 7: Allow the Paint to Cure
After you have finished creating the wood grain patterns, allow the paint to cure according to the manufacturer’s instructions. This may take several hours or days, depending on the type of paint used.
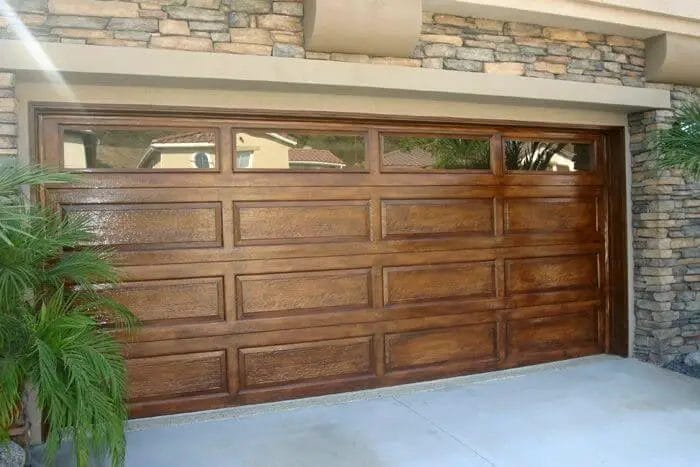
In summary, applying a base coat and creating wood grain patterns on your garage door is a relatively simple and affordable way to transform its appearance. With the right materials and techniques, you can achieve a realistic and natural-looking wood grain effect that will enhance the overall curb appeal of your home.
Sealants and Protective Coatings for a Long-Lasting Wood Look on Your Garage Door
Having a wood garage door adds a touch of elegance and natural beauty to your home. However, wood is prone to damage and deterioration over time due to exposure to the elements. To ensure that your wood garage door retains its pristine appearance and lasts for years to come, it is essential to use sealants and protective coatings specifically designed for wood.
1. Why use sealants and protective coatings?
Sealants and protective coatings create a barrier between the wood surface and external factors like moisture, UV rays, and temperature changes. By applying these products, you can prevent water infiltration, minimize the effects of sun exposure, and protect the wood from cracking, warping, and fading.
2. Types of sealants and protective coatings
There are various types of sealants and protective coatings available in the market. It is important to choose the right product based on your specific needs and the type of wood used for your garage door. Here are some commonly used options:
- Clear sealants: These sealants provide a transparent protective layer that enhances the natural beauty of the wood while offering excellent weather resistance.
- Stains: Stains not only protect the wood but also add color and depth to the garage door. They come in a wide range of shades, allowing you to customize the look of your wood door.
- Polyurethane: Polyurethane coatings provide a durable, glossy finish that offers superior protection against moisture and UV rays. They are ideal for areas with high exposure to sunlight.
- Waterproof coatings: These coatings are specifically designed to prevent water damage and are recommended for garage doors located in regions with heavy rainfall or high humidity.
3. Steps to apply sealants and protective coatings
Proper application of sealants and protective coatings is essential to achieve optimal results. Follow these steps to ensure a long-lasting wood look on your garage door:
- Clean the surface: Thoroughly clean the wood surface to remove any dirt, debris, or existing coatings. Use a mild detergent and a soft brush to scrub the door gently.
- Prepare the surface: Sand the wood surface lightly to smooth out any imperfections. This step helps the sealant or coating adhere better to the door.
- Apply the sealant or coating: Follow the manufacturer’s instructions for application. Use a brush or roller to evenly coat the wood surface. Ensure thorough coverage for maximum protection.
- Allow drying and curing: Let the sealant or coating dry completely according to the recommended drying time. Avoid using or exposing the door to water or sunlight during this period.
- Apply additional layers (if required): Depending on the type of product used, you may need to apply multiple coats for added protection and durability. Follow the manufacturer’s guidelines for the number of recommended coats.
- Maintain regularly: To extend the lifespan of your wood garage door, regularly inspect the surface and perform touch-ups as needed. Clean the door periodically and reapply the sealant or coating when necessary.
4. Benefits of using sealants and protective coatings
By using sealants and protective coatings on your wood garage door, you can enjoy the following benefits:
- Enhanced durability: Sealants and coatings protect the wood from moisture, sun damage, and other external factors, extending the lifespan of your garage door.
- Prolonged wood appearance: These products help maintain the natural beauty of the wood, preventing fading, discoloration, and weathering.
- Easier maintenance: Sealed and coated wood surfaces are easier to clean and maintain. You can simply wipe off dirt and debris without worrying about damage.
- Cost-effective: Investing in sealants and protective coatings can save you money in the long run by reducing the need for repairs or premature replacement of your garage door.
5. Conclusion
In summary, sealing and protecting your wood garage door with the right products is crucial for maintaining its beauty and longevity. Choose the appropriate sealant or coating based on your needs and follow the recommended application steps. By doing so, you can enjoy a long-lasting wood look on your garage door while protecting it from the elements for years to come.
FAQs
Q: How can I paint a garage door to look like wood?
To paint a garage door to look like wood, you will need to follow these steps:
- Prepare the garage door by cleaning it and removing any existing paint or stains.
- Apply a base coat of primer to the door.
- Use a wood graining tool or a brush to create wood grain patterns on the door.
- Apply a base coat of paint in a color that matches the wood tone you desire.
- Once the base coat is dry, use a combination of darker and lighter shades to create depth and texture.
- Finish with a protective clear coat for durability.
Q: What materials do I need to paint a garage door to look like wood?
To paint a garage door to look like wood, you will need the following materials:
- Cleaning supplies (soap, water, scrub brush)
- Sandpaper or a sanding block
- Primer
- Paint brushes or rollers
- Wood graining tool or brushes
- Base coat paint in desired wood color
- Darker and lighter shades of paint for creating depth
- Clear coat for protection
Q: Can I paint a metal garage door to look like wood?
Yes, you can paint a metal garage door to look like wood by following the same steps as painting a wooden garage door to look like wood. However, it is important to choose paint and materials that are specifically designed forConclusion:
Wrapping Up
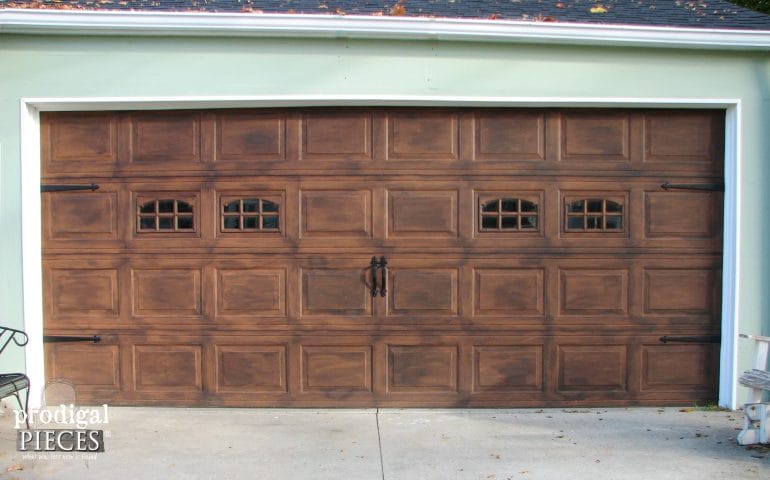
In conclusion, transforming your garage door to look like wood can add a touch of elegance and natural beauty to your home’s exterior. By following the step-by-step process of painting and faux finishing, you can achieve a realistic wood grain effect that is both durable and cost-effective. Remember to properly prepare the surface, choose the right colors and tools, and layer different stains to create depth and variation. With some patience and creativity, you can enjoy the sophisticated look of a wooden garage door without the expense and maintenance of real wood. So go ahead, give your garage door a stunning makeover and enhance the overall curb appeal of your home.