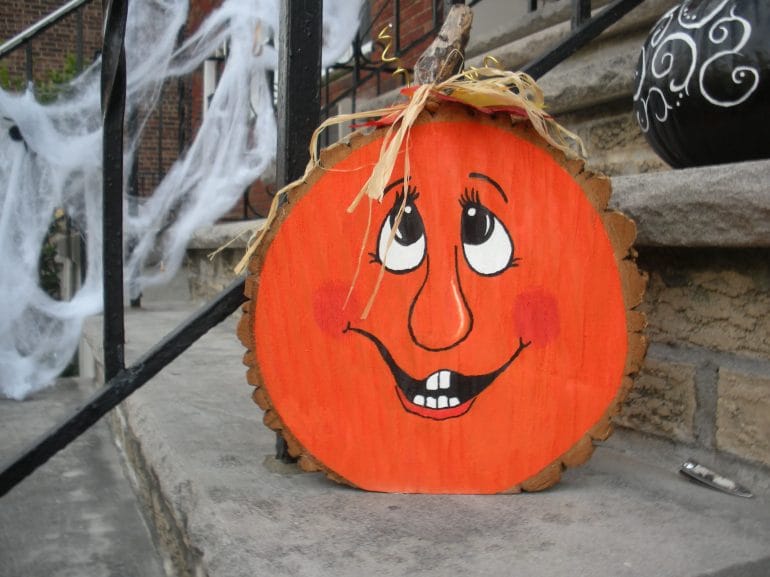
Looking to add some festive flair to your fall decor? Learn how to paint a wood pumpkin with our simple and creative tutorial. Whether you’re a seasoned crafter or just starting out, this DIY project is perfect for adding a touch of autumn to your home. Discover the step-by-step process and unleash your creativity as you transform a plain wooden pumpkin into a work of art. Get ready to impress your friends and family with your newfound painting skills!

Preparing the Wood Surface for Painting
Before you start painting on wood, it is essential to properly prepare the surface for optimal results. Preparing the wood surface ensures that the paint adheres well and provides a smooth and durable finish. Here are some steps to follow:

Clean the Wood Surface
The first step in preparing the wood surface for painting is to clean it thoroughly. Remove any dust, dirt, or grime by using a mild detergent solution and a soft sponge or cloth. Gently scrub the surface in a circular motion, paying attention to any crevices or intricate details.
After cleaning, rinse the wood surface with clean water and allow it to dry completely. Ensure that there is no moisture left on the surface before proceeding to the next step.
Repair Any Damages
Inspect the wood surface for any damages such as cracks, holes, or dents. It is essential to repair these imperfections before painting to achieve a smooth and flawless finish. Fill the cracks or holes with wood filler using a putty knife. Smooth out the filler and let it dry according to the manufacturer’s instructions.
Once the filler is dry, sand the repaired areas with fine-grit sandpaper until they are smooth and level with the rest of the surface. This ensures a seamless appearance when the paint is applied.
Sand the Surface
Sanding the wood surface is crucial for creating a smooth and even base for the paint. Use medium-grit sandpaper to gently sand the entire surface in the direction of the wood grain. This helps remove any roughness, bumps, or imperfections on the surface.
After sanding, clean the surface with a tack cloth or a damp cloth to remove any sanding dust. Ensure that the surface is completely clean and dry before moving on to the next step.
Prime the Wood
Priming the wood surface is highly recommended, especially if you are painting bare wood or using a light-colored paint. Primer helps the paint adhere better and provides a consistent base for the paint color.
Choose a primer specifically designed for wood surfaces and apply it evenly using a brush or roller. Follow the manufacturer’s instructions for drying time and apply a second coat if necessary. Allow the primer to dry completely before applying the paint.
Apply the Paint
Finally, it’s time to apply the paint to the prepared wood surface. Select a high-quality paint suitable for wood and the desired finish. Use a brush or roller to apply the paint in smooth and even strokes, following the wood grain.
Apply multiple thin coats rather than a single thick coat to achieve a professional-looking finish. Allow each coat to dry completely before applying the next one. Sand lightly between coats if needed.
Summary
Properly preparing the wood surface for painting is essential to achieve a smooth and long-lasting finish. Clean the surface, repair any damages, sand the surface, prime it, and then apply the paint in multiple thin coats. By following these steps, you can ensure that your painted wood surfaces look beautiful and stand the test of time.
Selecting the Perfect Paint Colors for Your Wood Pumpkin
Painting a wood pumpkin can be a fun and creative way to decorate your home for the fall season. Whether you prefer a traditional orange pumpkin or want to experiment with different colors, choosing the right paint colors is essential for achieving the desired look. In this section, we will guide you through the process of selecting the perfect paint colors for your wood pumpkin.
1. Consider the Overall Theme
Before choosing the paint colors for your wood pumpkin, consider the overall theme or style you want to achieve. Are you going for a classic, rustic look or a more modern and vibrant design? Understanding the theme will help you narrow down the color options and create a cohesive look.
2. Embrace Traditional Fall Colors
If you’re aiming for a traditional fall look, embrace warm and earthy colors such as orange, brown, and yellow. These colors not only capture the essence of the season but also complement the natural wood texture of your pumpkin. Consider using different shades of these colors to create depth and dimension.
3. Experiment with Non-Traditional Colors
If you want to break away from tradition and add a unique twist to your wood pumpkin, don’t be afraid to experiment with non-traditional colors. Consider using shades of deep red, burgundy, or even purple to create a bold and unexpected look. These colors can add a touch of sophistication to your pumpkin decor.
4. Create a Color Palette
To ensure a harmonious and visually pleasing result, it’s important to create a color palette before painting your wood pumpkin. Select a main color that will be the dominant shade on your pumpkin, and then choose a few complementary or contrasting colors to add interest and variety.
5. Test the Colors
Before committing to a specific color combination, it’s always a good idea to test the colors on a small area of your wood pumpkin. This will give you an idea of how the colors look when applied and allow you to make any necessary adjustments before painting the entire pumpkin.
6. Consider the Surrounding Decor
When selecting paint colors for your wood pumpkin, take into consideration the surrounding decor and color scheme of your home. You want your pumpkin to complement and enhance the overall aesthetic of the space. If you have a neutral color scheme, consider using a pop of vibrant color on your pumpkin to create a focal point.
7. Think About Texture and Finish
The texture and finish of your wood pumpkin can also affect how the paint colors appear. If you have a smooth and polished pumpkin, the colors may appear more vibrant and glossy. On the other hand, if you have a rustic or distressed pumpkin, the colors may appear more muted and worn. Consider these factors when selecting your paint colors.
8. Get Creative with Patterns and Designs
Don’t limit yourself to solid colors. You can get creative with patterns and designs to make your wood pumpkin truly unique. Consider using stencils, tape, or freehand painting techniques to create stripes, polka dots, or even intricate designs. This will add visual interest and make your pumpkin stand out.
In summary, selecting the perfect paint colors for your wood pumpkin involves considering the overall theme, embracing traditional or non-traditional colors, creating a color palette, testing the colors, considering the surrounding decor, thinking about texture and finish, and getting creative with patterns and designs. By following these tips, you’ll be able to create a stunning wood pumpkin that adds a touch of autumn charm to your home.
4. Techniques for Painting a Wood Pumpkin: Tips and Tricks
If you’re looking to add a festive touch to your home decor, painting a wood pumpkin can be a fun and creative project. Whether you’re a seasoned artist or a novice painter, there are various techniques you can use to achieve unique and eye-catching designs. In this section, we’ll explore some tips and tricks to help you create a stunning painted wood pumpkin.
Gather Your Materials
Before you begin painting, make sure you have all the necessary materials on hand. This will ensure a smooth and successful painting process. Here are some items you’ll need:
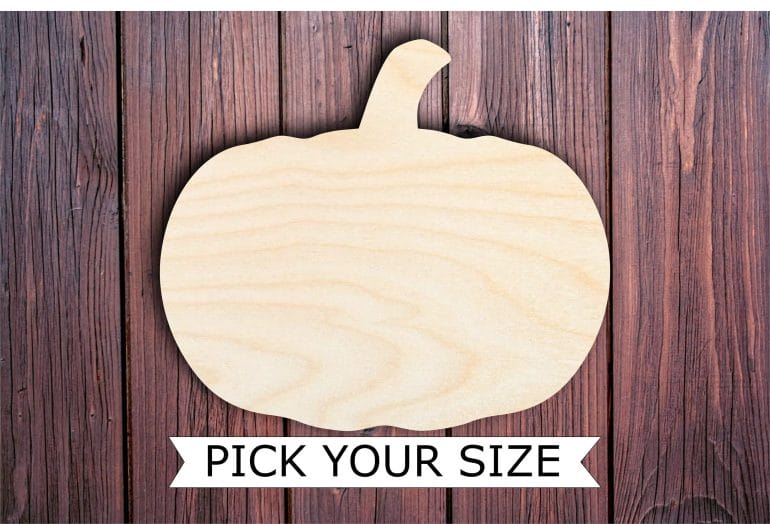
- A wooden pumpkin cutout
- Acrylic paints in various colors
- Paintbrushes of different sizes
- Painter’s tape
- Palette or disposable plates for mixing paints
- Water and a cloth for cleaning brushes
- Varnish or sealant (optional)
Prepare Your Surface
Start by preparing your wooden pumpkin cutout for painting. If the surface is rough, sand it down gently to create a smooth canvas for your artwork. Wipe away any dust or debris with a cloth.
Choose Your Design
Now comes the fun part – deciding on a design for your wood pumpkin. You can go for a traditional pumpkin look or get creative with patterns, textures, or even themed designs. Look for inspiration online or in magazines, or let your imagination run wild!
Prime the Surface
Before you start painting, it’s a good idea to apply a layer of primer to the wooden pumpkin. This will help the paint adhere better and ensure a more vibrant and long-lasting finish. Use a brush or a foam roller to apply a thin, even coat of primer and let it dry completely.
Layer Your Colors
When it comes to painting your wood pumpkin, layering your colors can add depth and dimension to your design. Start with a base color and let it dry before adding additional layers. Use a smaller brush for intricate details and a larger brush for broader strokes.
Add Textures and Patterns
To make your wood pumpkin truly stand out, consider adding textures or patterns to your design. You can use a sponge or a stencil to create interesting effects. Experiment with different techniques and tools to achieve the desired look.
Use Painter’s Tape
If you want to create clean, crisp lines or separate different areas of your design, painter’s tape can be a handy tool. Apply the tape to the areas you want to protect and paint over it. Once the paint is dry, carefully remove the tape to reveal sharp edges.
Add Finishing Touches
Once you’re satisfied with your painted wood pumpkin, you can add some finishing touches to enhance its appearance. Consider applying a coat of varnish or sealant to protect the paint and give it a glossy or matte finish. You can also embellish your pumpkin with glitter, ribbons, or other decorative elements.
Clean and Store Your Brushes
After you’ve completed your painting project, it’s important to clean your brushes properly to ensure their longevity. Rinse them thoroughly with water and gentle soap, then reshape the bristles and let them air dry. Store your brushes in a clean and dry place for future use.
In summary, painting a wood pumpkin can be a delightful way to showcase your creativity and add a personal touch to your home decor. By following these techniques and incorporating your own artistic flair, you can create beautiful and unique painted wood pumpkins that will impress your family and friends.
Adding Finishing Touches to Your Wood Pumpkin: Stencils, Designs, and More
Now that you have successfully carved and painted your wood pumpkin, it’s time to add those final details that will make your creation truly unique and eye-catching. Adding stencils, designs, and other finishing touches will take your wood pumpkin to the next level and make it stand out from the rest. In this section, we will explore different techniques and ideas to help you transform your wood pumpkin into a masterpiece.
1. Stencils
Using stencils is a popular and easy way to add intricate designs to your wood pumpkin. Stencils are available in various shapes and patterns, allowing you to create detailed and precise designs without the need for advanced artistic skills. Here’s how you can incorporate stencils into your wood pumpkin project:
- Select a stencil design that complements the theme or style of your wood pumpkin. There are countless options available, from spooky Halloween motifs to elegant fall foliage.
- Position the stencil on the desired area of your wood pumpkin. Secure it in place with tape or adhesive to prevent any movement during the painting process.
- Using a sponge brush or stencil brush, gently dab the paint over the stencil. Make sure to apply an even layer of paint to ensure crisp and clean lines.
- Once the paint is completely dry, carefully remove the stencil to reveal your beautifully designed wood pumpkin.
Stencils offer endless possibilities for creativity. You can experiment with different colors, layer multiple stencils, or even combine stenciling with other techniques such as hand-painting for a truly personalized look.
2. Hand-Painted Designs
If you prefer a more freehand approach, hand-painted designs can add a touch of artistic flair to your wood pumpkin. Whether you’re a seasoned painter or a beginner, here are some tips to help you create stunning hand-painted designs:
- Plan your design: Before picking up the paintbrush, it’s a good idea to sketch out your design on paper. This will help you visualize how it will look on your wood pumpkin and allow you to make any necessary adjustments.
- Use the right tools: Invest in quality brushes suitable for the size and detail of your design. Fine-tipped brushes are ideal for intricate patterns, while larger brushes can be used for broader strokes or backgrounds.
- Start with a base coat: Apply a base coat of paint in a color that complements your overall design. This will provide a solid foundation and make your painted design more vibrant.
- Take your time: Painting can be a relaxing and enjoyable process, so don’t rush. Take breaks if needed and allow each layer of paint to dry before adding additional details.
- Add embellishments: To make your design truly unique, consider adding embellishments such as glitter, rhinestones, or beads. These small touches can add a touch of sparkle and dimension to your wood pumpkin.
Remember, there are no rules when it comes to hand-painted designs. Let your creativity flow and don’t be afraid to experiment with different techniques and styles.
3. Natural Elements
For a rustic and organic look, consider incorporating natural elements into your wood pumpkin. Here are a few ideas to get you started:
- Dried leaves: Collect colorful fall leaves and use Mod Podge or a similar adhesive to attach them to your wood pumpkin. This will add texture and bring a touch of nature to your creation.
- Raffia or twine: Wrap raffia or twine around the stem of your wood pumpkin for a rustic, farmhouse-inspired look.
- Pinecones or acorns: Glue small pinecones or acorns onto your wood pumpkin to create a whimsical woodland theme.
- Burlap or fabric: Cut out shapes from burlap or fabric and attach them to your wood pumpkin for a cozy and textured appearance.
These natural elements not only add visual interest but also evoke the essence of autumn, making your wood pumpkin a true representation of the season.
4. Personalized Details
Adding personalized details to your wood pumpkin can create a sentimental and heartfelt touch. Consider the following ideas:
- Names or initials: Paint or carve names or initials onto your wood pumpkin to create a personalized gift or decoration.
FAQs
1. How do I paint a wood pumpkin?
To paint a wood pumpkin, start by sanding the surface to ensure smoothness. Then, apply a coat of primer to improve paint adhesion. Once dry, apply your desired base color and let it dry completely. Use a smaller brush or sponge to add details and accents. Finally, seal the paint with a clear topcoat for durability.
2. What type of paint should I use for a wood pumpkin?
For painting a wood pumpkin, it’s recommended to use acrylic paint. Acrylic paint is versatile, dries quickly, and provides good coverage. It comes in a wide range of colors and finishes, allowing you to achieve the desired look easily. You can also use craft paints or spray paints specifically designed for wood surfaces.
3. Can I use regular paint on a wood pumpkin?
While regular paint can be used on a wood pumpkin, it is not ideal. Regular paint may not adhere as well to the wood surface and may require multiple coats for adequate coverage. It may also chip or peel over time. It is best to use paints specifically formulated for wood or craft projects for the best results.
Conclusion
In conclusion, painting a wood pumpkin can be a fun and creative way to add a festive touch to your home decor. By following the steps outlined in this guide, you can easily transform a plain wooden pumpkin into a stunning piece of art. Remember to prepare the wood surface properly, choose the right type of paint for durability, and use a variety of techniques like stenciling, shading, and highlighting to bring your wood pumpkin to life. Whether you prefer a traditional or a more whimsical design, painting a wood pumpkin allows you to showcase your artistic skills and create a unique decoration that will be admired by all.