Putting together a wooden bed frame and headboard can be a fun and rewarding DIY project that adds a touch of rustic charm to your bedroom. Whether you’re a seasoned DIY enthusiast or a novice, this step-by-step guide will help you assemble your wooden bed frame and headboard with ease, ensuring a sturdy and stylish addition to your sleep space. With a few basic tools and a little patience, you’ll have your dream bed ready in no time.
The first step in assembling your wooden bed frame and headboard is to gather all the necessary tools and materials. You’ll typically need a hammer or rubber mallet, a screwdriver or drill, screws, and any other hardware supplied with your bed frame and headboard kit. Make sure to read the instructions provided by the manufacturer carefully, as they may have specific requirements or recommendations for assembly.

Start by laying out all the components of your bed frame and headboard, ensuring that everything is present and in good condition. It’s a good idea to organize the components and hardware by type, so you can easily locate them when needed. Take a moment to familiarize yourself with the different parts and their functions, as this will make the assembly process smoother.
Begin by assembling the basic frame of the bed, following the instructions provided. This usually involves connecting the side rails and the footboard or headboard using screws or other fasteners. Use a level to ensure that the bed frame is straight
Step-by-Step Assembly Guide for a Wooden Bed Frame and Headboard
Building your own wooden bed frame and headboard can be a rewarding and cost-effective project. Not only will it give you a sense of accomplishment, but it will also allow you to customize the design to match your personal style. In this guide, we will take you through the step-by-step process of assembling a wooden bed frame and headboard.
Materials Needed
Before you begin, make sure you have all the necessary materials and tools. Here is a list of what you will need:
- Wooden planks
- Screws
- Drill
- Screwdriver
- Tape measure
- Pencil
- Sandpaper
- Wood stain or paint (optional)
- Paintbrush (if using stain or paint)
Step 1: Measurements and Cutting
Start by measuring the size of your mattress. This will determine the dimensions of your bed frame. Mark the measurements on your wooden planks and use a saw to cut them accordingly.
Step 2: Frame Assembly
Lay out the wooden planks for the frame on a flat surface. Connect the corners by pre-drilling holes and then secure them with screws. Make sure the frame is sturdy and square.
Step 3: Headboard Construction
For the headboard, measure and cut the wooden planks to the desired height and width. Arrange them vertically or horizontally, depending on the design you prefer. Use screws to attach the planks together.
Step 4: Attaching the Headboard to the Frame
Position the headboard against the frame and align it properly. Pre-drill holes through the headboard and into the frame, then secure them together with screws.
Step 5: Finishing Touches
Once the assembly is complete, sand the entire wooden bed frame and headboard to smooth out any rough edges. You can also apply wood stain or paint to enhance the appearance. Allow it to dry completely before placing your mattress on the frame.
Summary
By following this step-by-step assembly guide, you can create a beautiful and sturdy wooden bed frame and headboard. Remember to measure carefully, use the right tools, and take your time during each step. With a little patience and creativity, you can enjoy a custom-made bed that perfectly fits your style and comfort.

Tips for Ensuring Stability and Durability of Your DIY Bed Frame and Headboard
If you love woodworking and enjoy the challenge of building your own furniture, creating a DIY bed frame and headboard can be a rewarding project. However, it’s important to ensure that your creation is not only aesthetically pleasing but also stable and durable. Here are some tips to help you achieve a sturdy and long-lasting bed frame and headboard:
1. Choose the Right Materials
The first step in building a durable bed frame and headboard is selecting the right materials. Opt for high-quality hardwood such as oak, maple, or birch, as these woods are known for their strength and durability. Avoid using softwoods like pine, as they may not withstand the test of time.
2. Use Proper Joinery Techniques
When constructing your bed frame and headboard, it’s crucial to use proper joinery techniques to ensure stability. Dovetail joints, mortise and tenon joints, and dowel joints are some of the recommended methods for connecting the various components of your furniture. These joints provide optimal strength and prevent wobbling or loosening over time.
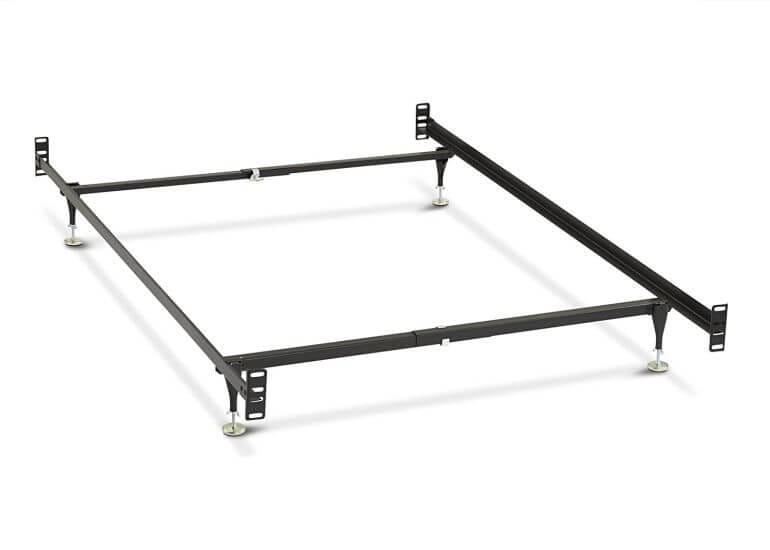
3. Reinforce with Metal Brackets
In addition to using traditional joinery techniques, reinforcing your bed frame and headboard with metal brackets can add extra stability. Metal corner brackets or L-shaped brackets can be used to reinforce the joints and prevent any potential weak points. Make sure to select sturdy brackets that are appropriate for the size and weight of your bed.
4. Consider Adding Support Beams
To enhance the stability of your DIY bed frame, consider adding support beams across the width of the bed. These beams distribute the weight evenly and prevent sagging or bowing of the mattress and frame. You can attach the support beams to the side rails or use additional legs in the center for added reinforcement.
5. Properly Secure the Headboard
When attaching the headboard to the bed frame, it’s essential to securely fasten it to ensure stability. Depending on the design of your headboard, you can use bolts, screws, or metal brackets to attach it firmly to the frame. Make sure to align the headboard with the frame and evenly distribute the weight to prevent any tilting or movement.
6. Sand and Finish the Wood
After constructing the bed frame and headboard, it’s important to sand the wood surfaces to create a smooth finish. Sanding removes any rough edges or imperfections and prepares the wood for staining or painting. Applying a protective finish, such as polyurethane or varnish, can also enhance the durability of your furniture by protecting it from scratches and moisture.
7. Regular Maintenance
Lastly, to ensure the long-term stability and durability of your DIY bed frame and headboard, it’s essential to perform regular maintenance. Check for any loose joints or screws and tighten them as needed. Inspect the wood for any signs of wear or damage, and address any issues promptly to prevent further deterioration.
By following these tips, you can create a DIY bed frame and headboard that not only adds character to your bedroom but also withstands the test of time. Remember to prioritize stability and durability throughout the construction process, and enjoy the satisfaction of sleeping on a bed that you built with your own hands.
Adding a Personal Touch: Creative Ideas for Customizing Your Wooden Bed Frame and Headboard
When it comes to decorating your bedroom, your bed frame and headboard play a key role in creating a personalized and inviting space. While there are countless options available in the market, customizing your wooden bed frame and headboard can elevate the overall look and feel of your bedroom. In this section, we will explore some creative ideas to add a personal touch to your wooden bed frame and headboard.
1. Paint it Your Favorite Color
One of the simplest yet effective ways to customize your wooden bed frame and headboard is by painting it in your favorite color. Whether you prefer a vibrant shade or a soothing pastel, a fresh coat of paint can instantly transform the look of your bed. Consider using a high-quality paint suitable for wooden surfaces and apply it using a brush or roller for a smooth finish. Don’t be afraid to get creative and experiment with different colors or even try a two-tone effect by painting the frame and headboard in contrasting hues.
2. Add Upholstered Panels
If you want to make your bed frame and headboard more comfortable and luxurious, consider adding upholstered panels. This can be done by attaching foam padding and fabric to the wooden surface. Choose a fabric that complements your bedroom decor and opt for a padding thickness that provides adequate comfort. Upholstered panels not only add a touch of elegance but also make your bed more inviting and cozy.
3. Incorporate Carvings or Engravings
Add a touch of uniqueness and sophistication to your wooden bed frame and headboard by incorporating carvings or engravings. This can be done by hiring a professional woodworker or using DIY carving tools. Choose a design that resonates with your personal style and preferences, such as intricate floral patterns, geometric shapes, or even your initials. Carvings or engravings add a timeless charm to your bed and make it a focal point in your bedroom.
4. Install Decorative Hardware
An easy and affordable way to customize your wooden bed frame and headboard is by installing decorative hardware. Switching out the standard knobs or handles with unique and eye-catching ones can instantly enhance the overall aesthetic appeal of your bed. Look for hardware options that complement the style of your bed frame and headboard, whether it’s vintage-inspired brass handles, sleek modern knobs, or rustic iron pulls.
5. Attach a Canopy
If you want to create a dreamy and romantic atmosphere in your bedroom, consider attaching a canopy to your wooden bed frame. Canopies not only add a touch of elegance but also provide privacy and create a cozy sanctuary. You can choose a flowing fabric in a color that complements your bedroom decor and drape it over the top of your bed frame. Alternatively, you can opt for a ready-made canopy attachment that easily attaches to the frame of your bed.
6. Incorporate LED Lighting
To create a warm and inviting ambiance, consider incorporating LED lighting into your wooden bed frame and headboard. You can install LED strips along the edges of the frame or attach LED wall sconces to the headboard. This will not only provide functional lighting for reading or working in bed but also add a touch of modernity and sophistication to your bedroom.
7. Add Decorative Pillows or Cushions
Enhance the comfort and style of your wooden bed frame and headboard by adding decorative pillows or cushions. Choose a variety of sizes, textures, and patterns that complement your bedroom decor. Arrange them in an aesthetically pleasing manner, mixing and matching different colors and prints. This will not only make your bed more inviting but also add a personal touch and make it a focal point in your bedroom.
In summary, customizing your wooden bed frame and headboard is a great way to infuse your personal style into your bedroom decor. Whether through paint, upholstery, carvings, or decorative accessories, there are plenty of creative ideas to make your bed truly unique. So unleash your creativity and transform your bed into a stunning centerpiece that reflects your individuality and enhances the overall ambiance of your bedroom.
Maintaining and Caring for Your Wooden Bed Frame and Headboard for Longevity
A wooden bed frame and headboard can add a touch of elegance and warmth to any bedroom. However, like any other piece of furniture, they require proper maintenance and care to ensure their longevity. With the right techniques and regular upkeep, you can keep your wooden bed frame and headboard looking beautiful for years to come. In this section, we will discuss some essential tips on how to maintain and care for your wooden bed frame and headboard.
1. Regular Dusting and Cleaning
One of the easiest ways to keep your wooden bed frame and headboard in good condition is by regularly dusting and cleaning them. Dust and debris can accumulate on the surface, making the wood look dull and dirty. Use a soft cloth or feather duster to remove the dust from the surface of the bed frame and headboard regularly. For more thorough cleaning, you can use a mild wood cleaner or a mixture of warm water and mild dish soap. Apply the cleaner to a soft cloth and gently wipe the surface. Avoid using abrasive cleaners or harsh chemicals that can damage the wood.
2. Protect from Moisture
Wood is susceptible to damage from moisture, so it’s essential to protect your wooden bed frame and headboard from excessive humidity and water. Avoid placing your bed near windows or in areas prone to moisture, such as bathrooms or kitchens. If you live in a humid climate, consider using a dehumidifier in your bedroom to reduce moisture levels. In case of spills or accidents, clean them up immediately to prevent the wood from absorbing moisture and causing damage.
3. Avoid Direct Sunlight
Direct sunlight can cause the wood to fade and lose its original color over time. To prevent this, avoid placing your wooden bed frame and headboard in direct sunlight or in areas where they are exposed to prolonged sunlight. If you have no choice but to place them near a window, use curtains or blinds to block the sunlight during the day.
4. Use Furniture Polish or Wax
To maintain the natural beauty and shine of your wooden bed frame and headboard, consider using furniture polish or wax. These products help nourish the wood, prevent it from drying out, and create a protective layer that enhances its appearance. Before applying any polish or wax, make sure to clean the surface thoroughly and follow the manufacturer’s instructions.
5. Check for Loose Joints and Tighten Screws
Over time, the joints of your wooden bed frame can become loose, and screws may need tightening. Regularly inspect your bed frame and headboard for any signs of loose joints or squeaky parts. Use a screwdriver or an appropriate tool to tighten any loose screws or connectors. This will not only prevent further damage but also ensure the stability and safety of your bed.
6. Protect with Mattress Pads or Covers
To prevent any accidental spills or stains from reaching your wooden bed frame and headboard, consider using mattress pads or covers. These protective layers will act as a barrier between the mattress and the wood, ensuring that any liquids or stains can be easily cleaned without damaging the surface.
7. Avoid Weight Overload
Wooden bed frames and headboards are designed to support the weight of the mattress and the sleeper. However, excessive weight or pressure can cause them to weaken or break. Avoid jumping or placing heavy objects on the bed frame or headboard to prevent damage. If you need additional support, consider using a box spring or adding extra support slats.
In summary, proper maintenance and care are crucial to keeping your wooden bed frame and headboard in excellent condition for years to come. Regular dusting and cleaning, protecting from moisture and sunlight, using furniture polish or wax, checking for loose joints, using mattress pads or covers, and avoiding weight overload are essential steps to maintain the beauty and longevity of your wooden bed frame and headboard. By following these tips, you can enjoy your wooden bed for a lifetime.
Frequently Asked Questions (FAQs)
1. How do I assemble a wooden bed frame and headboard?
Begin by laying out all the components and reading the assembly instructions. Start with attaching the side rails to the headboard and footboard using screws or bolts. Then, connect the support slats or metal frame to the side rails. Finally, finish by securing any additional pieces, such as center support legs, according to the instructions provided.
2. What tools will I need to assemble a wooden bed frame and headboard?
You will typically need a screwdriver or an electric drill with screwdriver bits, as well as a wrench or socket set to tighten any bolts or nuts. It’s also helpful to have a rubber mallet or hammer for gently tapping pieces together. Check the assembly instructions for any specific tools required.
3. Can I assemble a wooden bed frame and headboard by myself, or do I need help?
While it is possible to assemble a wooden bed frame and headboard by yourself, it is often helpful to have a second person to assist with holding and aligning parts during assembly. Additionally, some larger or more complex bed frames may require two people for safe and efficient assembly. Consider your own capabilities and the size of the bed frame before deciding to assemble it alone.
Conclusion
In conclusion, putting together a wooden bed frame and headboard can be a rewarding DIY project that allows you to customize your bedroom with a personal touch. By following the step-by-step instructions provided in this guide, you can easily assemble a sturdy and stylish bed frame that will provide a comfortable and aesthetically pleasing addition to your bedroom.
Remember to gather all the necessary tools and materials before you start, and take your time to ensure each step is done correctly. Whether you are a seasoned handyman or a beginner, assembling a wooden bed frame and headboard is a manageable task that will bring beauty and functionality to your sleeping space.
So why not give it a try? With a little effort and the right instructions, you’ll soon be enjoying the satisfaction of a well-built bed frame and headboard that will enhance the ambiance of your bedroom for years to come.