If you’re faced with the task of removing buried nails from wood, we understand the frustration it can cause. These hidden nails can be a real challenge to extract without damaging the wood surface. However, with the right tools and techniques, you can safely and effectively remove these buried nails. In this guide, we’ll walk you through the step-by-step process of removing buried nails from wood, ensuring a smooth and flawless finish.
First, it’s crucial to select the appropriate tools for the job. A good pair of high-quality pliers or a nail puller will be your best bet. These tools offer a firm grip and leverage, making it easier to extract the nails without causing further damage to the wood.

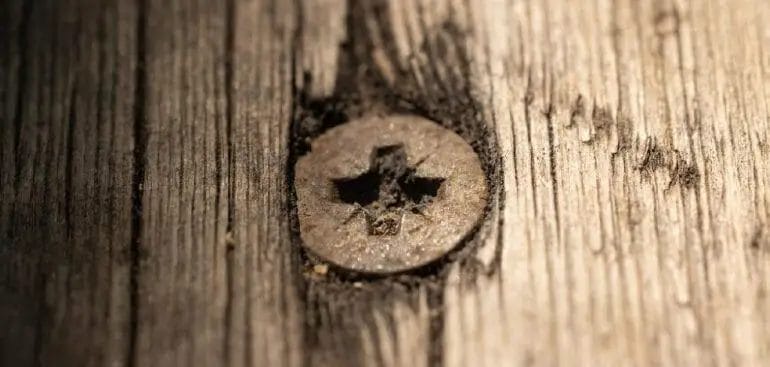
Now that you have your tools ready, begin by locating the buried nails by running your fingers or a scraper along the wood surface. Once you’ve identified the nails’ position, use the pliers or nail puller to grip the nail firmly, as close to the wood surface as possible.
With a firm grip on the nail, apply steady pressure and gently rock the nail back and forth to loosen it from the wood fibers. Avoid excessive force, as this can cause the wood to splinter or crack. Work patiently and gradually until the nail becomes loose enough to pull out.
When pulling out the nail, use slow and controlled movements to avoid any sudden jerks that could damage the wood. As you remove
Step-by-step guide to safely remove buried nails from wood
If you are working with wood, you may come across situations where nails are buried within the material. Removing these nails safely is important to prevent injury and damage to your tools and materials. In this step-by-step guide, we will walk you through the process of safely removing buried nails from wood.
Materials you will need:
- Safety goggles
- Work gloves
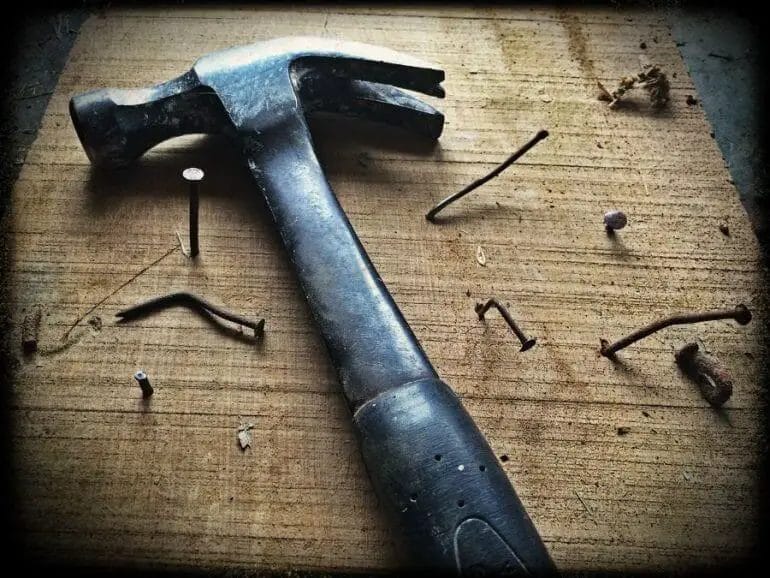
- Claw hammer
- Nail punch
- Chisel
- Wood filler
- Sandpaper
- Paint or stain (optional)
Step 1: Preparation
Before you begin, put on your safety goggles and work gloves to protect your eyes and hands. Make sure you have all the necessary tools nearby for easy access.
Step 2: Assess the situation
Examine the wood surface to locate any hidden nails. Look for small indentations or cracks in the wood that may indicate the presence of a nail.
Step 3: Use the claw hammer
If the nail is partially exposed, you can use the claw hammer to carefully pry it out. Place the claw of the hammer under the nail head and apply gentle pressure to lift it out of the wood. Be cautious to avoid damaging the wood surface.
Step 4: Nail punch method
If the nail is buried deeper in the wood, you can use a nail punch to drive it below the surface. Position the nail punch on the nail head and gently tap it with a hammer until the nail is below the wood surface. This will prevent the nail from interfering with your work or causing any harm.
Step 5: Chisel method
In some cases, the nail may be too difficult to remove with a nail punch. In such situations, you can use a chisel to carefully cut around the nail. Position the chisel near the nail head and strike it gently with a hammer to create a small groove. Continue chiseling around the nail until you can easily pull it out.
Step 6: Fill and sand
After removing the nail, you may notice a small hole or indentation in the wood. To fix this, apply wood filler to the hole and smooth it out with a putty knife. Allow the filler to dry according to the manufacturer’s instructions. Once dry, use sandpaper to smooth the surface and prepare it for finishing.
Step 7: Finishing touch (optional)
If desired, you can paint or stain the repaired area to match the rest of the wood surface. Follow the instructions on the paint or stain product for best results. Allow the finish to dry completely before using or handling the wood.
Summary
Removing buried nails from wood requires caution and the right tools. By following this step-by-step guide, you can safely remove buried nails and restore the wood surface to its original condition. Remember to wear appropriate safety gear and take your time to ensure a successful and injury-free nail removal process.
Tips for Ensuring Minimal Damage When Removing Buried Nails from Wood
Removing buried nails from wood can be a delicate task, especially if you want to minimize any damage to the wood surface. Whether you are renovating an old piece of furniture or salvaging reusable wood from a demolition project, here are some helpful tips to ensure minimal damage when removing buried nails from wood:
1. Safety First
Before attempting to remove any nails, it is important to prioritize your safety. Wear protective gloves to protect your hands from potential injuries. Additionally, use safety goggles to shield your eyes from flying wood chips or nail fragments during the removal process.
2. Assess the Nail Placement
Take a close look at the wood surface to identify the location of the buried nails. Use a flashlight to provide better visibility, especially if the nails are not easily visible. Assessing the nail placement will help you plan your nail removal strategy and minimize any potential damage.
3. Choose the Right Tools
Using the appropriate tools is crucial for ensuring minimal damage when removing buried nails from wood. There are several tools that can make the task easier, such as:
- Nail Pullers: Nail pullers, also known as nail extractors or cats paws, are specialized tools designed to grip and extract nails from wood surfaces. They provide better control and minimize the risk of damaging the surrounding wood.
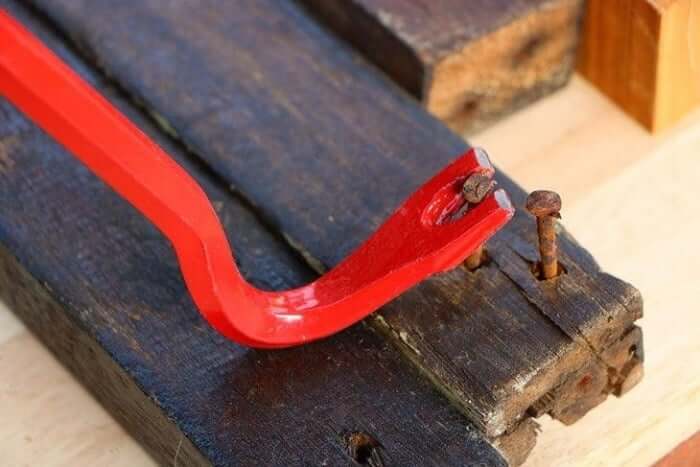
- Pry Bars: Pry bars, also known as crowbars or wrecking bars, can be effective for removing larger nails. However, caution must be exercised to avoid damaging the wood surface.
- Needle-Nose Pliers: Needle-nose pliers can be useful for removing smaller nails or nails located in tight spaces. They provide precision and control when extracting nails.
4. Start with the Right Technique
Once you have identified the nail placement and selected the appropriate tools, it’s time to start removing the buried nails. Here are some techniques that can help minimize damage:
- Tapping Method: Gently tap the nail head with a hammer to expose a small portion of the nail shank. This will provide a better grip for your chosen tool.
- Rocking Method: After tapping the nail head, use a nail puller or pry bar to rock the nail back and forth. This will gradually loosen the nail from the wood, minimizing the force required for removal.
- Twisting Method: If the nail is particularly stubborn, you can try twisting it using pliers or a pry bar. This rotating motion can help break the nail free from its embedded position.
5. Apply Pressure Gradually
When removing buried nails, it’s important to apply pressure gradually to avoid causing excessive damage to the wood surface. Applying too much force all at once can lead to splintering or cracking. Instead, apply steady and controlled pressure to extract the nail without causing unnecessary harm.
6. Fill and Sand the Holes
After successfully removing the buried nails, you may notice small holes or indentations in the wood. To restore the appearance of the wood surface, fill the holes with wood filler or putty that matches the color of the wood. Once the filler is dry, sand the area until it is smooth and level with the surrounding wood.
7. Protect the Wood
To prevent future nail damage or burying accidents, consider applying a protective finish or sealer to the wood surface. This will help safeguard the wood from potential harm and make the removal of future nails easier.
In summary, removing buried nails from wood requires a delicate approach to minimize damage. Prioritize safety, choose the right tools, assess the nail placement, and apply the appropriate techniques. Remember to fill and sand any resulting holes and protect the wood for future use. By following these tips, you can successfully remove buried nails while preserving the integrity of the wood.
Alternative methods to remove buried nails from wood without damaging the surface
When working with wood, it’s not uncommon to come across buried nails that need to be removed. However, removing these nails without damaging the surface of the wood can be a challenge. Fortunately, there are several alternative methods that can help you successfully extract those nails without causing any harm. In this section, we will explore some effective techniques to safely remove buried nails from wood.
1. Prying with a Nail Puller
One of the most straightforward methods to remove buried nails is by using a nail puller. This tool is specifically designed to grip and extract nails without causing damage to the wood. To use a nail puller, position the tool’s claws around the head of the nail and apply leverage to pull it out slowly and steadily. This method is effective for nails that are not deeply embedded in the wood.
2. Utilizing a Nail Punch
If the nails are flush with the surface of the wood or only slightly buried, a nail punch can be a useful tool. A nail punch is a slender metal rod with a pointed end that allows you to drive the nail further into the wood. By doing so, you can create a small hole that can be filled later. Once the nail is recessed, you can use a putty knife or a chisel to remove the remaining protrusion.
3. Using a Nail Claw
A nail claw is another handy tool for removing buried nails without damaging the wood’s surface. It features a curved shape with a V-shaped notch, which allows the claw to grip the nail securely. Insert the claw around the nail head and gently pry it out using a hammer or a wrench. This method works best for nails that are slightly buried or have a visible head.
4. Applying Heat
In some cases, heat can be an effective way to remove buried nails. By using a heat source such as a heat gun or a propane torch, you can expand the metal around the nail, making it easier to pull out. Be cautious when applying heat to avoid scorching or damaging the wood. Once the metal has expanded, use a pair of pliers or a nail puller to extract the nail.
5. Freeing Nails with Lubricants
If the buried nails are corroded or stuck, applying a lubricant can loosen them up, making removal easier. Lubricants such as penetrating oil or WD-40 can help dissolve rust and reduce friction. Apply the lubricant around the nail and let it sit for a few minutes to allow it to penetrate. Use a nail puller or claw to extract the nail once it has been loosened.
6. Cutting and Pulling
For nails that are deeply embedded or inaccessible, cutting and pulling may be the best option. Use a reciprocating saw or a hacksaw to cut the nail as close to the wood’s surface as possible. Once the nail is cut, use pliers or a pry bar to pull out the remaining portion. Fill the hole left by the cut nail with wood putty or a suitable filler.
In summary, removing buried nails from wood without damaging the surface can be achieved through various alternative methods. Whether you choose to pry with a nail puller, utilize a nail punch, use a nail claw, apply heat, free nails with lubricants, or resort to cutting and pulling, it’s important to exercise caution and select the method that suits the specific situation. By employing these techniques, you can successfully remove buried nails and preserve the integrity of the wood.
Precautions and Safety Measures to Consider When Removing Buried Nails from Wood
When working with wood, it is common to come across buried nails that need to be removed. While removing nails can be a straightforward task, it is important to follow certain precautions and safety measures to prevent any accidents or injuries. In this section, we will discuss some important steps to ensure your safety while removing buried nails from wood.
1. Wear Protective Gear
Prior to removing buried nails, it is essential to wear appropriate protective gear to minimize the risk of injury. This includes wearing safety goggles to protect your eyes from flying wood chips and nails, as well as gloves to protect your hands from sharp objects. Additionally, consider wearing sturdy boots to protect your feet in case you accidentally step on a nail.
2. Inspect the Wood Surface
Before attempting to remove a buried nail, thoroughly inspect the wood surface to identify any potential hazards. Look for any damaged or rotten wood that may make the removal process more challenging. It is important to ensure that the wood is stable and secure to avoid any accidents during the nail removal process.
3. Use the Right Tools
Using the appropriate tools for nail removal is crucial to ensure both efficiency and safety. Start by using a metal detector or magnet to locate the buried nails. Once you have identified their positions, use a claw hammer or pry bar to carefully extract the nails. Avoid using excessive force, as this can cause the wood to splinter or crack.
4. Work in a Well-Ventilated Area
When removing buried nails from wood, it is important to work in a well-ventilated area to avoid inhaling potentially harmful dust particles. If possible, perform the task outdoors or open windows and doors to improve air circulation. Consider using a dust mask to further protect yourself from inhaling any dust or debris.
5. Secure the Wood Properly
Before attempting to remove a buried nail, ensure that the wood is securely clamped or held in place. This will prevent any unexpected movement or slipping, reducing the risk of injury. Use clamps or vises to hold the wood firmly and keep your hands at a safe distance from the area where the nail will be extracted.
6. Work Slowly and Carefully
When removing a buried nail, it is important to work slowly and carefully to minimize the risk of accidents. Apply steady pressure when using a hammer or pry bar to extract the nail, taking care not to lose your grip or slip. Avoid rushing the process, as this can lead to mistakes and potential injuries.
7. Dispose of Nails Properly
Once you have successfully removed the buried nails from the wood, it is important to dispose of them safely. Do not leave the nails lying around, as they can pose a hazard to others. Consider using a container or a dedicated disposal bin to collect the nails and dispose of them in accordance with local regulations.
In summary, removing buried nails from wood requires caution and adherence to certain safety measures. By wearing protective gear, inspecting the wood surface, using the right tools, working in a well-ventilated area, securing the wood properly, working slowly and carefully, and disposing of the nails properly, you can ensure a safe and successful nail removal process.
FAQs
1. How can I remove buried nails from wood?
To remove buried nails from wood, you can use a few different methods. One option is to use a nail punch to drive the nail further into the wood, below the surface. Then, you can use a pry bar or pliers to pull the nail out. Alternatively, you can use a nail extractor tool specifically designed for removing nails.
2. Are there any precautions I should take when removing buried nails?
Yes, it’s important to wear protective gloves and goggles to prevent injury while removing buried nails. Additionally, be cautious of splintering wood and ensure that the surrounding area is clear of any obstacles that could cause accidents. Take your time and use the appropriate tools for the job to avoid any mishaps.
3. Can I reuse the wood after removing the buried nails?
In most cases, yes. After removing the buried nails, you can usually reuse the wood. However, it’s recommended to inspect the wood for any damage caused by the nails or the removal process. If the wood is structurally compromised, it may not be suitable for reuse and should be replaced.
Conclusion
In conclusion, removing buried nails from wood can be a challenging task, but with the right techniques and tools, it can be accomplished effectively. By following the steps outlined in this guide, including using a nail puller or pry bar, protecting the wood surface, and taking proper safety precautions, you can safely and efficiently remove nails from wood without causing any damage. Remember to take your time and exercise patience when working on this task to avoid any accidents or mishaps. With practice and experience, you’ll become more adept at removing buried nails from wood and improving the condition of your wooden surfaces.
