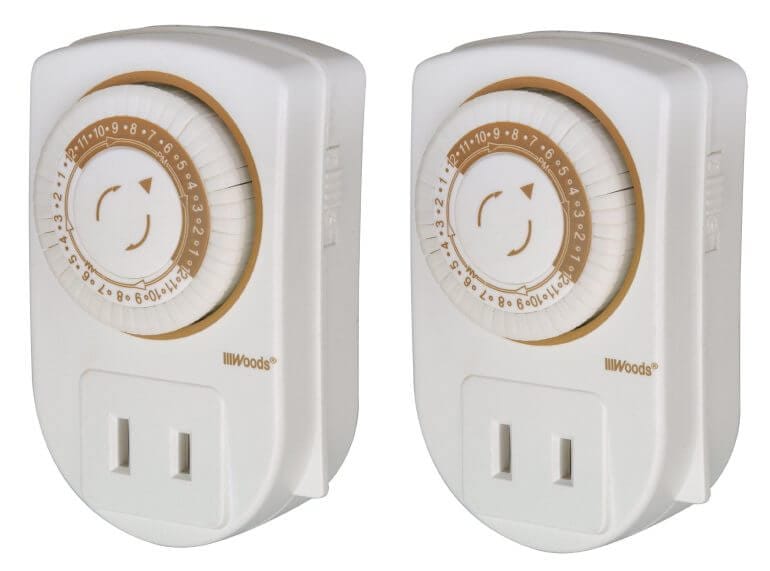
Setting a woods timer is a quick and easy way to automate your electrical devices, saving you time and energy. Whether you want to control your outdoor lights or appliances, a woods timer can help simplify your life. By following a few simple steps, you’ll be able to set up and program your timer in no time. In this guide, we’ll walk you through the process of setting up your woods timer and customizing it to suit your specific needs. Let’s get started!
Mastering the Art of Setting a Woods Timer: A Step-by-Step Guide
Setting a woods timer may seem like a daunting task for some, but with the right knowledge and guidance, it can be a simple and straightforward process. In this section, we will provide you with a step-by-step guide on how to master the art of setting a woods timer.

Step 1: Familiarize Yourself with the Woods Timer
Before you begin setting the timer, it is important to familiarize yourself with its features and functions. Take a look at the user manual or any accompanying documentation to understand the various buttons, settings, and modes available on the timer. This will help you navigate through the process more easily.
Step 2: Determine the Purpose of the Timer
Next, determine the purpose for which you are setting the woods timer. Are you looking to automate your outdoor lights, control your irrigation system, or schedule the operation of any other electrical devices? Understanding the specific purpose will help you choose the appropriate settings and modes on the timer.
Step 3: Set the Date and Time
Once you have familiarized yourself with the timer and determined its purpose, it’s time to set the date and time. Many woods timers come with a built-in clock feature, allowing you to sync it with the current date and time. Follow the instructions provided in the user manual to set the correct date and time on the timer.
Step 4: Program the Timer
After setting the date and time, it’s time to program the timer according to your specific needs. Most woods timers have multiple programming options, such as setting specific on/off times, creating custom schedules, or even setting up different programs for different days of the week.
Start by selecting the desired day or days of the week for which you want to program the timer. Then, choose the on and off times for each programmed day. Some timers allow you to set multiple on/off cycles throughout the day, while others may have a simpler on/off option.
Follow the instructions in the user manual to input the desired settings and program the timer accordingly. Make sure to double-check your entries before finalizing the programming to avoid any errors.
Step 5: Test and Adjust the Timer
Once you have programmed the timer, it is important to test it to ensure that it is functioning correctly. Activate the timer and observe whether the connected electrical devices turn on and off according to your programmed settings.
If any adjustments are needed, refer back to the user manual to make the necessary changes. This may involve reprogramming certain settings, adjusting the on/off times, or modifying the overall schedule. Repeat the testing process until you are satisfied with the timer’s performance.
Step 6: Maintain and Update the Timer
Setting a woods timer is not a one-time task. It requires regular maintenance and updates to ensure its smooth operation. Keep an eye on the battery life of the timer and replace the batteries as needed to avoid any disruptions in its functioning.
Additionally, periodically review your programmed settings and schedules to accommodate any changes in your routine or external factors. For example, you may need to adjust the timer to account for daylight saving time or seasonal variations in lighting requirements.
In summary, mastering the art of setting a woods timer involves familiarizing yourself with the timer, determining its purpose, setting the date and time, programming it according to your needs, testing and adjusting as necessary, and maintaining and updating it over time. By following this step-by-step guide, you can easily set up and optimize your woods timer for efficient and convenient operation.

Time-Saving Hacks for Setting up Your Woods Timer
Setting up a woods timer can be a time-consuming task if you’re not familiar with the process. However, there are several time-saving hacks that can help you streamline the setup process and get your woods timer up and running in no time. In this section, we will explore some of these hacks and provide step-by-step instructions to help you set up your woods timer efficiently.
1. Read the Instruction Manual
The first step in setting up your woods timer is to carefully read the instruction manual that comes with it. This manual contains important information about the timer’s features and functions, as well as detailed instructions on how to set it up correctly. By familiarizing yourself with the manual, you can avoid common mistakes and save time troubleshooting later on.
2. Gather the Necessary Tools
Before you begin setting up your woods timer, gather all the necessary tools and equipment. This may include a screwdriver, wire strippers, electrical tape, and any other tools specified by the instruction manual. Having everything ready beforehand will save you time searching for tools during the setup process.
3. Choose the Right Location
Next, choose the right location for your woods timer. Consider factors such as proximity to the power source, accessibility, and visibility. Ideally, the timer should be placed in a dry location away from direct sunlight and extreme temperatures. Taking the time to choose the right location initially will save you from having to relocate the timer later on.
4. Prepare the Wiring
Before connecting the woods timer, prepare the wiring according to the instructions provided. This may involve stripping the ends of the wires, connecting the wires to the appropriate terminals, and securing them with electrical tape. Properly preparing the wiring beforehand will make the setup process smoother and more efficient.
5. Follow the Step-by-Step Instructions
Once you have all the necessary tools and have prepared the wiring, follow the step-by-step instructions provided in the manual to connect and program your woods timer. Take your time to carefully follow each instruction, ensuring that you make the correct connections and settings. By following the instructions closely, you can avoid time-consuming mistakes and ensure that your woods timer functions properly.
6. Test and Adjust
After setting up your woods timer, it is important to test it to ensure that it is working correctly. Follow the testing instructions provided in the manual and verify that the timer activates and deactivates according to the programmed settings. If any adjustments are needed, refer to the manual for guidance on how to make changes to the timer’s settings.
7. Seek Professional Assistance if Needed
If you encounter any difficulties during the setup process or are unsure about any steps, it is always a good idea to seek professional assistance. Electricians or experienced individuals in the field can provide valuable guidance and save you time and frustration. Remember, safety should always be your top priority when working with electrical devices.
In summary, setting up a woods timer doesn’t have to be a time-consuming task. By following these time-saving hacks and carefully reading the instruction manual, you can streamline the setup process and get your woods timer up and running efficiently. Remember to gather the necessary tools, choose the right location, prepare the wiring, and follow the step-by-step instructions. Test the timer and make adjustments if necessary, and seek professional assistance if needed. With these hacks, you’ll be able to set up your woods timer quickly and hassle-free.

Pro Tips for Efficiently Setting Your Woods Timer
Setting up a woods timer can be a great way to automate your outdoor lighting and improve convenience and security. Whether you are a seasoned user or new to using a woods timer, these pro tips will help you set it up efficiently and make the most of its features.
1. Read the Instruction Manual
The first step to setting up your woods timer is to thoroughly read the instruction manual. This will give you a complete understanding of its features, programming options, and any special considerations. Familiarize yourself with the different buttons, functions, and programming modes.
2. Choose the Right Location
Before installing your timer, carefully choose the right location for it. Make sure it is protected from direct sunlight and harsh weather conditions. It is also important to ensure that the timer is easily accessible for future adjustments or programming changes.
3. Set the Current Time
Start by setting the current time on your woods timer. Most timers have a built-in clock that allows you to set the exact time. Use the instructions provided in the manual to adjust the time accurately.
4. Determine the On and Off Times
Decide on the specific times you want your outdoor lights to turn on and off. Consider your daily routine and outdoor lighting needs. Set the on and off times accordingly using the programming options available on your woods timer.
5. Take Advantage of Timer Modes
Many woods timers offer different modes to suit various lighting needs. Explore the available options such as dusk-to-dawn mode, random mode, or custom scheduling. These modes can enhance security by creating the illusion of occupancy even when you’re away from home.
6. Consider Seasonal Adjustments
Keep in mind the changing seasons and adjust your timer settings accordingly. As daylight hours vary, you may need to update the on and off times or switch to a different mode. This will ensure your outdoor lights continue to operate effectively throughout the year.
7. Test and Fine-Tune
After setting up your woods timer, it’s vital to test and fine-tune the settings. Observe the functionality of the timer and make any necessary adjustments to ensure it is operating as desired. This step will help you avoid any surprises or inconveniences in the future.
8. Regularly Maintain Your Timer
Make it a habit to regularly maintain your woods timer. Clean it periodically to remove any dirt or debris that may interfere with its performance. Check the batteries and replace them if necessary to ensure uninterrupted functionality.
9. Keep the Manual Handy
Keep the instruction manual in a safe and easily accessible place. It serves as a valuable resource for troubleshooting, reprogramming, or making any future adjustments to your woods timer. Refer to it whenever you need assistance or guidance.
By following these pro tips, you can efficiently set up your woods timer and enjoy the convenience and security it offers. Take advantage of its features and customize it to suit your specific outdoor lighting needs. With proper maintenance and occasional adjustments, your woods timer will continue to serve you well for years to come.
Troubleshooting Common Issues When Setting a Woods Timer
Setting up a woods timer can be a great way to automate your outdoor lighting and ensure that it turns on and off at the right times. However, like any electronic device, you may encounter some common issues along the way. In this section, we will discuss troubleshooting tips for common problems that you may face when setting up a woods timer.
1. Timer Not Turning On
If your woods timer is not turning on at the designated time, there could be a few reasons for this issue. First, check if the timer is correctly plugged into an electrical outlet and that the outlet has power. You can do this by plugging in another device to the same outlet and seeing if it works. If the outlet is functional, the next step is to ensure that the timer is set to the correct time and that the on/off settings are programmed correctly. Double-check the settings and make necessary adjustments if needed.
Another possible reason for the timer not turning on could be a faulty timer switch. In this case, you may need to replace the switch or the entire timer unit if the switch is integrated into it. Consult the product manual or contact the manufacturer for guidance on how to replace the switch or the timer unit.
2. Timer Not Turning Off
If your woods timer is not turning off at the designated time, there are a few potential causes for this issue. Firstly, check if the timer’s override switch is in the correct position. The override switch allows you to manually turn the timer on or off, bypassing the programmed settings. Make sure that the switch is in the “Auto” or “Timer” position for the programmed settings to take effect.
Another reason for the timer not turning off could be an issue with the internal mechanism. If the timer’s internal gears or components are damaged or worn out, it may not be able to accurately control the on/off timing. In this case, you may need to replace the timer unit entirely.
3. Timer Display Not Working
If the display on your woods timer is not working or showing any information, there might be a problem with the power supply or the battery. Some woods timers rely on batteries to maintain the time and settings, even when unplugged. Check if the battery needs to be replaced and if there are any loose connections or corrosion that could be affecting the power supply.
Additionally, ensure that the timer is properly plugged into a functional electrical outlet. If the outlet is working fine, but the display still doesn’t show any information, there may be an internal issue with the timer’s circuitry. In this case, contacting the manufacturer for further assistance or considering a replacement may be necessary.
4. Timer Not Keeping Accurate Time
If your woods timer is not keeping accurate time, it can be frustrating as it may not turn on or off at the desired times. One possible reason for this issue is a weak or dying battery. Check if the battery needs to be replaced and ensure that it is properly connected.
Another factor that can affect the timer’s accuracy is power fluctuations. If the electrical supply in your area is unstable, it can interfere with the timer’s internal clock and cause it to lose or gain time. In such cases, using a surge protector or a voltage regulator can help stabilize the power supply and improve the timer’s accuracy.
5. Timer Programming Difficulties
Setting up a woods timer can sometimes be confusing, especially if you are not familiar with the programming process. If you are facing difficulties in programming the timer, refer to the product manual for step-by-step instructions. The manual usually provides clear guidelines on how to set the time, program the on/off settings, and make other adjustments specific to your woods timer model.
If the manual does not provide sufficient guidance or you are still struggling with the programming process, consider reaching out to the manufacturer’s customer support for assistance. They will be able to provide you with personalized guidance or troubleshooting tips based on your specific timer model.
In summary, troubleshooting common issues when setting up a woods timer requires checking the power supply, verifying correct settings, inspecting the timer components, and referring to the product manual for guidance. By following these troubleshooting tips, you can resolve most problems and enjoy the benefits of an automated outdoor lighting system.
FAQs
1. How do I set a woods timer?
To set a Woods timer, follow these steps:
1. Press the “Reset” button to clear any previous settings.
2. Use the “Mode” button to select the desired timer mode (e.g., on/off, countdown, etc.).
3. Press the “Set” button and use the arrow keys to adjust the hours and minutes.
4. Press the “Set” button again to confirm the time.
5. Finally, press the “On” or “Off” button to activate the timer.
2. How do I program a Woods timer for multiple daily settings?
To program a Woods timer for multiple daily settings, follow these steps:
1. Press the “Prog” button to enter programming mode.
2. Use the arrow keys to select the desired day or group of days.
3. Press the “Set” button and use the arrow keys to set the start and end time for that day/group.
4. Repeat steps 2-3 for other days/groups as needed.
5. Press the “Prog” button again to exit programming mode.
6. Finally, press the “On” or “Off” button to activate the programmed settings.
3. What should I do if my Woods timer is not working properly?
If your Woods timer is not working properly, try the following troubleshooting steps:
1. Ensure the timer is properly plugged into a functioning outlet.
2. Check the batteries (if applicable) and replace them if necessary.
3. Make sure the timer settings are
Conclusion
In conclusion, setting up a woods timer is a simple and effective way to automate your lighting or electronic devices. By following a few easy steps, you can enjoy the convenience of scheduled on/off times, energy savings, and added security in your home or office.
Remember to read the instructions manual provided by the manufacturer for specific guidelines on setting up your woods timer. Take the time to understand the different programming options and features available, such as customizable schedules, countdown timers, and random modes.
Once you have mastered the basics, experimenting with different settings and programming options can help you optimize your woods timer to suit your specific needs and lifestyle. Enjoy the benefits of a well-timed and energy-efficient environment with your new woods timer!
