Wood veneer is a popular choice for furniture and cabinetry, but over time, it can become damaged or worn. If you’re looking to repair wood veneer, there are a few simple steps you can take to restore its beauty and functionality.
First, assess the extent of the damage. If there are small chips or cracks, you can use wood filler to fill in the gaps. Sand the area smooth and blend the color to match the surrounding veneer. For more extensive damage, consider replacing the veneer entirely.

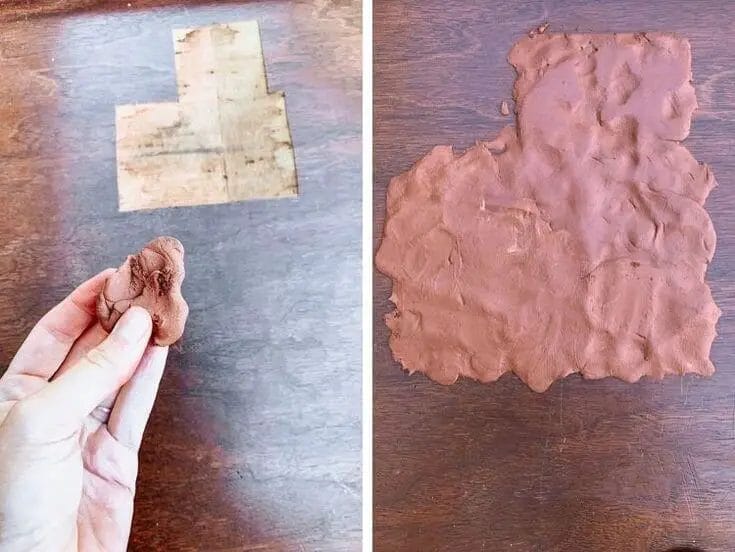
To replace the veneer, carefully remove the damaged section using a sharp utility knife or chisel. Cut a new piece of veneer to fit, ensuring it matches the grain and color of the existing veneer. Apply adhesive to the back of the new veneer and carefully press it into place.
Once the new veneer is secure, use a veneer roller or a block of wood covered with a soft cloth to apply even pressure and ensure a strong bond. Allow the adhesive to dry fully before sanding and finishing the repaired area.
By following these steps, you can restore the beauty of your wood veneer furniture or cabinetry and extend its lifespan. Whether it’s a small repair or a complete replacement, with a little patience and attention to detail, you can achieve professional-looking results.
Tools and Materials Needed for Wood Veneer Repair
In order to successfully repair wood veneer, you will need to gather the necessary tools and materials. These items will help you in the process of removing damaged veneer and replacing it with new veneer, restoring the beauty and functionality of your wooden furniture. Here is a list of essential tools and materials:
Tools:
- Utility knife or veneer saw
- Small chisel
- Sandpaper (various grits)
- Hot glue gun
- Iron (for heat activated glue)
- Wood glue
- Clamps
- Paint brush
- Putty knife
- Wood filler
- Hammer
Materials:
- Wood veneer sheets
- Stain or paint (matching the existing finish)
- Shellac or varnish
- Wax or polish
- Masking tape
- Lint-free cloth
Having these tools and materials readily available before starting the wood veneer repair project will save you time and ensure a smoother process. Each tool and material has a specific purpose in the repair process, allowing you to achieve professional-looking results.
The utility knife or veneer saw will be used to carefully remove the damaged veneer from the surface of the wood. It is essential to be precise and avoid damaging the surrounding wood. The small chisel might be needed to remove any stubborn pieces of veneer or adhesive.
Sandpaper of various grits is necessary for smoothing the surface of the wood and preparing it for the new veneer. It helps in achieving a seamless transition between the old and new veneer.
The hot glue gun and iron (for heat activated glue) are used to attach the new veneer to the wood surface. The hot glue gun allows for quick and secure bonding, while the iron helps in activating the adhesive on the veneer sheet.
Wood glue is necessary for any additional bonding required during the repair process. It provides a strong and durable hold between the layers of wood.
Clamps are essential for holding the veneer in place while the glue dries. They ensure a tight and secure bond between the veneer and the wood.
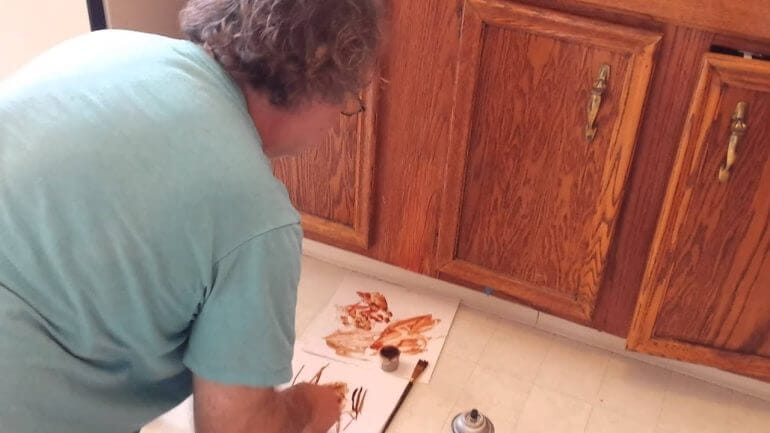
A paintbrush is used for applying stain or paint to the repaired area, matching it with the existing finish of the furniture. Shellac or varnish is then applied to protect the wood and enhance its appearance.
A putty knife and wood filler are used to fill any gaps or imperfections in the repaired area. This step ensures a smooth and seamless finish.
A hammer might be needed to gently tap down any raised edges or bumps in the veneer after it has been glued and clamped.
Once the repair is complete, it is important to apply wax or polish to the entire piece of furniture to maintain its shine and protect the wood from moisture and wear.
Masking tape can be helpful in securing the veneer during the repair process and preventing any accidental damage.
Finally, a lint-free cloth is essential for wiping away any excess glue, stain, or varnish, leaving behind a clean and pristine surface.
By having these tools and materials ready, you will be well-prepared for any wood veneer repair project, ensuring a successful and professional result.

Steps to Repair Small Chips and Cracks in Wood Veneer
Wood veneer is a thin layer of wood that is used to cover surfaces such as furniture, cabinets, and doors. Over time, veneer can chip or crack, which can be unsightly and compromise the integrity of the wood. Repairing small chips and cracks in wood veneer is a relatively simple process that can be done at home with a few basic tools and materials. In this section, we will outline the steps you can follow to successfully repair small chips and cracks in wood veneer.
1. Clean the damaged area
The first step in repairing wood veneer is to clean the damaged area. Use a soft cloth or sponge dampened with warm water and a mild detergent to gently wipe away any dirt, debris, or grease from the surface. Make sure to dry the area thoroughly before proceeding to the next step.
2. Assess the damage
Once the area is clean, carefully examine the extent of the damage. Determine whether you are dealing with a small chip or a crack. A chip is a piece of veneer that has completely come off, while a crack is a separation in the veneer that is still attached to the surface. Understanding the type of damage will help you choose the appropriate repair method.
3. Repair a small chip
If you are dealing with a small chip, you can use wood filler to fill in the missing piece. Start by applying a small amount of wood filler to the damaged area with a putty knife. Smooth out the filler and remove any excess. Allow the filler to dry completely, and then sand it down to match the surrounding surface. Finish off by applying a coat of clear finish or varnish to protect the repaired area.
4. Repair a crack
If you have a crack in the veneer, you will need to use a different approach to repair it. Start by gently pressing the crack together to align the edges as closely as possible. Apply a small amount of wood glue to the crack and use a clamp to hold the veneer in place while the glue dries. Once the glue is dry, remove the clamp and sand the repaired area to create a smooth surface. Apply a clear finish or varnish to protect the repaired area.
5. Touch up the repaired area
After completing the repair, you may find that the repaired area does not perfectly match the surrounding wood. To blend the repaired area with the rest of the veneer, you can use a wood stain or marker that matches the color of the wood. Apply the stain or marker to the repaired area and gently blend it with the surrounding veneer. Allow the stain or marker to dry completely before applying a clear finish or varnish.
6. Prevent future damage
To prevent future chips and cracks in the wood veneer, it is important to take proper care of the furniture or surface. Avoid placing hot objects directly on the veneer, as this can cause damage. Use coasters or placemats to protect the surface from spills and scratches. Regularly clean and maintain the veneer by dusting and polishing it with a gentle wood cleaner.
In summary, repairing small chips and cracks in wood veneer can be done at home with a few simple steps. By following these steps, you can restore the appearance and integrity of the veneer, ensuring the longevity of your furniture or surface.
Techniques for Repairing Large Areas of Damaged Wood Veneer
In this section, we will explore various techniques for repairing large areas of damaged wood veneer. Whether your wood furniture has suffered from water damage, scratches, or other types of wear and tear, these methods will help restore the beauty and integrity of the wood veneer.
1. Removing the Damaged Veneer
The first step in repairing large areas of damaged wood veneer is to remove the damaged portion. Start by applying heat to the damaged area using a clothes iron or a heat gun. The heat will soften the adhesive that holds the veneer to the wood surface. Gently lift the damaged veneer using a putty knife or a scraper, ensuring not to damage the underlying wood surface.
After removing the damaged veneer, inspect the wood surface for any remaining adhesive residue or rough spots. Use sandpaper or a scraper to smooth out the surface, preparing it for the new veneer.
2. Applying New Wood Veneer
Once the damaged veneer has been removed and the wood surface prepared, it’s time to apply the new wood veneer. Measure the dimensions of the area that needs to be covered and cut a piece of veneer slightly larger than the measured dimensions.
Apply adhesive to both the back of the veneer and the prepared wood surface. Place the veneer onto the wood surface, aligning the grain pattern if necessary. Use a roller or a block of wood to apply pressure evenly across the veneer, ensuring a tight bond between the veneer and the wood surface.
3. Trimming and Finishing
After the adhesive has dried and the new veneer is securely attached, trim the excess veneer using a utility knife or a veneer trimming tool. Be careful to make clean, straight cuts to achieve a professional-looking finish.
Once the excess veneer has been trimmed, sand the edges of the veneer to smooth out any roughness and blend it seamlessly with the surrounding wood surface. Use fine-grit sandpaper and work in small, circular motions to achieve a smooth finish.
4. Staining and Sealing
If necessary, you can stain the new veneer to match the color of the existing wood. Choose a wood stain that closely matches the original color and apply it evenly across the veneer using a brush or a sponge. Allow the stain to dry completely before applying a protective sealer.
Finish the repair by applying a clear coat of sealant to protect the veneer from future damage. Choose a sealant specifically designed for wood surfaces and follow the instructions on the product for best results.
5. Buffing and Polishing
Once the sealant has dried, use a soft cloth or a buffer to buff the repaired area, giving it a smooth and glossy finish. This step will help blend the repaired section with the rest of the wood surface, making the repair virtually unnoticeable.
In summary, repairing large areas of damaged wood veneer involves removing the damaged veneer, applying new veneer with adhesive, trimming and finishing the edges, staining and sealing, and finally buffing and polishing the repaired area. With these techniques, you can restore the beauty of your wood furniture and enjoy it for years to come.
Tips for Preventing Wood Veneer Damage in the Future
Wood veneer is a popular choice for adding a touch of elegance and natural beauty to furniture and interiors. However, like any other material, wood veneer is susceptible to damage if not properly cared for. To help you avoid costly repairs and maintain the pristine condition of your wood veneer, here are some essential tips to prevent wood veneer damage in the future.
1. Avoid Exposure to Direct Sunlight
Direct sunlight can cause wood veneer to fade and discolor over time. To prevent this, position your furniture away from windows or use curtains and blinds to block out the sun’s rays. If you have no choice but to place your furniture in a sunlit area, consider using UV-protective film on the windows to minimize the damage caused by UV radiation.
2. Use Coasters and Mats
Accidental spills can be a common cause of wood veneer damage. To prevent moisture from seeping into the veneer and causing warping or bubbling, always use coasters under glasses and mats under hot dishes or plates. This will help protect the surface from heat and liquid damage.
3. Clean Regularly and Gently
Regular cleaning is essential to keep your wood veneer looking its best. However, it’s important to avoid harsh or abrasive cleaners that can damage the surface. Instead, opt for a soft, lint-free cloth or a microfiber cloth dampened with mild soapy water. Gently wipe the veneer in the direction of the wood grain to avoid scratches.
4. Avoid Excessive Moisture and Humidity
Excessive moisture and humidity can cause wood veneer to swell and warp. To prevent this, avoid placing wood veneer furniture in areas with high humidity, such as bathrooms or kitchens. Use a dehumidifier in humid environments to maintain a stable moisture level. Additionally, wipe up any spills immediately to prevent prolonged exposure to moisture.
5. Protect from Scratches and Impact
Wood veneer is prone to scratches and impact damage, especially in high-traffic areas. To prevent this, use protective pads or felt under heavy objects such as lamps, vases, and decorative items. Avoid dragging or sliding objects across the veneer surface to prevent scratches. Regularly inspect and repair any minor scratches or dents to prevent further damage.
6. Maintain Proper Temperature
Extreme temperature fluctuations can cause wood veneer to expand and contract, leading to cracking or splitting. To maintain the integrity of the veneer, avoid placing furniture in close proximity to heat sources such as radiators or fireplaces. Additionally, use a humidifier in dry environments to prevent excessive drying of the veneer.
7. Use Protective Finishes
Applying protective finishes such as varnish or lacquer can provide an extra layer of protection to your wood veneer furniture. These finishes can help prevent moisture penetration and provide resistance against scratches and stains. However, it’s important to follow the manufacturer’s instructions and reapply the finish as needed to maintain its effectiveness.
8. Handle with Care
Lastly, be mindful when moving or handling wood veneer furniture. Lift and carry the pieces instead of dragging or pushing them across the floor. Use caution when assembling or disassembling furniture to avoid any accidental damage to the veneer surface.
By following these tips, you can ensure that your wood veneer furniture retains its beauty and durability for years to come. Proper care and maintenance will go a long way in preventing wood veneer damage and preserving the natural elegance of your furniture.
FAQs
Q: How can I repair wood veneer?
To repair wood veneer, start by cleaning the damaged area and removing any loose or flaking veneer. Apply wood glue to the exposed surface and carefully press the veneer back into place. Use a weight or clamp to hold it down until the glue dries. If necessary, you can also use a wood filler to fill in any gaps or cracks before sanding and refinishing the repaired area.
Q: Can I repair a deep scratch on wood veneer?
Yes, deep scratches on wood veneer can be repaired. Fill the scratch with wood filler, matching the color as closely as possible. Smooth the filler with a putty knife, let it dry, and sand it down until it is level with the surface. Finish by applying a touch-up stain or paint to blend it with the surrounding area.
Q: How do I fix a blister on wood veneer?
To fix a blister on wood veneer, use a sharp utility knife to create a small incision on the blister. Inject wood glue into the incision using a syringe or small brush, then press the blister down firmly. Wipe away any excess glue and place a weight or clamp over the repaired area until it dries.
Conclusion
In conclusion, repairing wood veneer can be a simple and cost-effective solution to restoring the beauty of your furniture or surfaces. By following the steps outlined in this guide, you can successfully repair minor damages such as chips, cracks, or loose veneer. Remember to use the right tools and materials, and take your time to ensure a seamless finish. Whether you’re a DIY enthusiast or a professional woodworker, learning how to repair wood veneer can save you money and help prolong the lifespan of your furniture. So don’t let damaged veneer bring down the appearance of your beloved pieces, take action and bring them back to their former glory.
