A router is a tool that carves intricate shapes in wood. For the purposes of this article, we will focus on two types of routers: trim routers and plunge routers.
A trim router is best for making decorative cuts around the edge of a board, such as when you are separating boards with a dado cutting bit to make shelves. And a plunge router is better at cutting out larger pieces from the middle or insides of boards, such as when you want to create an opening for your electrical outlets.
Choosing which type to use depends on what you’re trying to accomplish with your project! This article will discuss the differences between plunge and trim routers. So, keep in touch!
Difference Between Trim Router and Plunge Router
When you are building or remodeling, there are a lot of decisions to make. One decision that many woodworkers face is whether they have to use a trim router or plunge router.
Both are types of routers that can be used to cut or shape materials such as wood, but they each have their own advantages & disadvantages. Let’s get in detail!
Where to Use
Trim router (also known as a palm wood router) is a handheld tool that has a small base and cutting radius. It’s designed to make precise cuts, especially in smaller pieces of wood.
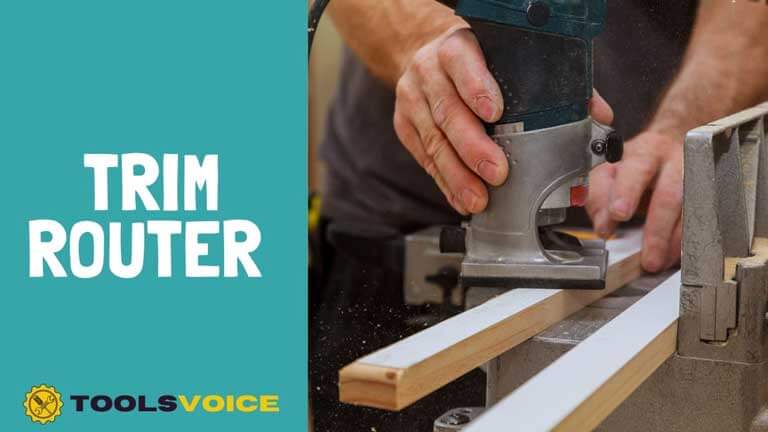
The trim router is perfect for smaller pieces of trim, such as baseboards, window and door casings, crown molding, and chair rails. They’re also good for creating decorative edges on panels and furniture, installing quarter-rounds, and placing bullnoses.
Moreover, Trim routers are a great choice for routing out door hinges and carving wooden signs. These routers typically have smaller motors than plunge routers, so they don’t work as well for through-cuts or heavy stock. However, they’re easier to control and can produce a more delicate edge.
The plunge router, on the other hand, is a larger tool that is used for more heavy-duty work.

Plunge routers are one of the most versatile types of routers available. This is a tool that is used for a variety of purposes, such as trimming and shaping wood or flattening wood slabs.
Additionally, plunge routers are great for making circular cuts in wood and creating dadoes, rabbets & dovetails. It can also be used for mortising and inlaying or decorative routing. Just be sure to read the instructions that come with your router and use caution when routing. You don’t want to damage your project or yourself.
Power
The trim router typically has a small motor that runs between 10000 and 35000 revolutions per minute (RPM) with a power rating of around ½ to 1-¼ HP. This is a smaller tool with less power than the plunge router.
It’s common to experience kickback (when the wood catches and the bit kicks up) with this type of tool when you want to make deep or wide cuts. This can result in accidents that damage your project and hurt you. So, without proper skill and experience, using a trim router on tougher materials can be dangerous.
On the other hand, the plunge router has a motor that runs anywhere from 8000 to 25000 RPM with a power rating of around 1-¼ to 3-¼ horsepower. This is more powerful than the trim router and can handle through-cuts as well as rougher surfaces without kickback.
Weight
The trim router weighs in at around 3 to 7 pounds, making it easy to hold with one hand. It also has a small base that lets you maneuver it into tight spaces.
The lighter-weight design of a trim router makes it easier for you to make delicate cuts in smaller or thinner materials without too much fatigue from holding up its weight.
However, the plunge router is much heavier and weighs about 10 to 20 pounds. This can make it more difficult to handle, especially if you’re not used to using this tool. The larger base of the tool can also make it difficult to handle around tight spaces.
So, if you’re looking for something that’s easy to move around, the trim router would be a better choice. On the other hand, the plunge router is designed to be strong enough to help you cut through thicker material (and do it quickly).
If you’ll be working on heavier or rougher projects, then investing in a heavy-duty tool like the plunge router will make your job easier.
Price Range
The price of each tool varies based on brand, model, and features.
Trim routers typically cost less than plunge routers. The trim router costs around $50 to $200, making it a more affordable option for those who are just starting out in woodworking. It’s also a good option if you only have occasional routing needs.
So, if you’re looking to save some money but still want a good quality tool, the trim router would be a better option.
The plunge router is more expensive and typically costs anywhere from $100 to $350. This makes it an investment for those who have been working with wood for a while and need a tool that can handle more heavy-duty projects.
The plunge router is a more versatile tool, so it can be used for a wider variety of projects. If you’ll be doing a lot of routing work, then this might be the best option for you.
But even if you’re not sure what type of routing you’ll be doing, it’s a good idea to invest in the plunge router because you never know when its power and versatility will come in handy.
Range of Functionality
Trim routers have a depth scale that ranges from about ¼ to ½ inches, which allows you to cut through smaller or thinner pieces of material quickly and easily. You can also adjust the height of this router for more versatility.
On the other hand, plunge routers have a depth scale that ranges from about ¾ to almost two inches. This is great for making deeper cuts quickly and smoothly.
N.B:- Both types of router depth adjustment scales can be range from ¼ to 2 inches or even more. For enhancing versatility, the manufacturing company implements this feature on every single type of router they made.
Routers Design
A trim router has an open-ended base for ease of use on projects with backsplashes, shelves, or other obstructions. It can also be used as a hand-held tool after being mounted on different bases.
The plunge router has two handles and almost always comes with a fixed base, but it also has a mechanism (usually a spring) that allows the base to be lowered so that the bit can be plunged into the workpiece.
The key to routing with this type of tool is in the depth mechanism, which may be a simple thumbwheel that locks into place at each increment on the scale.
Related Questions:
Can you use a trim router as a plunge router?
Yes, you can! For this, you will need the plunge base separately. But the problem is to find the base that will fit perfectly on your trim router. Plus, it also required skill and practice to use this technique.
Can you use a plunge router for edges?
Yes, it is possible to use a plunge router for edging by adjusting the cutting depth. And you can mount a flush trim bit in an accessory so that the radius cuts up against surfaces such as doors or cove molding.
To make decorative edges, you can use a router edge guide with the plunge router. Just set the depth of cut and make a smooth, even cut.
Wrap UP!
The plunge router vs trim router decision comes down to what you’ll be using the tool for. If you need to do a lot of heavy-duty routing, then the plunge router is your best bet. But if you’ll be doing more detailed work or smaller projects, go with the trim router.
Trim routers and plunge routers both offer different features that can improve the way you work with wood. Some features to consider include: adjustable speed, dust collection systems, easy-to-use depth adjustment system (for plunging), an LED light for better visibility in dark spaces or small corners, variable speeds/heat control setting for more flexible routing, and soft-grip handles for better grip.
Whichever tool you choose, make sure to read the manufacturer’s instructions carefully and practice on some scrap wood before starting on your actual project. With a little bit of practice, you’ll be routing like a pro in no time!
