Yes, you can paint treated wood to enhance its appearance and protect it from the elements. Treated wood, also known as pressure-treated wood, is often used for outdoor projects like decking, fences, and pergolas. The treatment process involves applying chemicals to the wood to make it resistant to rot, decay, and insect damage. Before painting treated wood, it’s important to allow it to weather and dry out for a few months to ensure proper adhesion of the paint. Additionally, using a high-quality primer and paint specifically meant for outdoor use will help ensure long-lasting results.

The Best Paints for Treated Wood: A Comprehensive Guide
Treated wood is a popular choice for outdoor projects due to its durability and resistance to rot and decay. However, to protect it from harsh weather conditions and enhance its appearance, it is important to apply the right paint. With so many options available in the market, choosing the best paint for treated wood can be overwhelming. In this guide, we will discuss the top paints that are specifically designed to provide long-lasting protection and enhance the beauty of treated wood.

1. Exterior Latex Paint
Exterior latex paint is an excellent choice for painting treated wood surfaces. It is water-based, fast-drying, and provides a smooth and durable finish. Latex paint is easy to apply and clean up, making it a convenient option for DIY enthusiasts.
When purchasing exterior latex paint, look for a product that is specially formulated for outdoor use and provides UV protection. This will ensure that the paint maintains its color and does not fade over time. Additionally, opt for a paint that offers resistance against mildew and mold, as these can be common issues in outdoor environments.
2. Solid Color Stain
If you still want the natural wood grain to show through while providing a protective layer, solid color stain is a great alternative to traditional paint. Solid color stains penetrate the wood, providing long-lasting protection against moisture, UV rays, and other damaging elements.
One of the advantages of using solid color stain is that it does not require a primer, saving you time and effort. Additionally, it is available in a wide range of colors, allowing you to choose the shade that complements your outdoor space. Remember to select a stain that is specifically formulated for treated wood to ensure optimal performance.
3. Oil-Based Paint
Oil-based paint is known for its durability and ability to provide a smooth finish. It is an excellent choice for high-traffic areas such as decks and fences. Oil-based paints create a hard protective layer that resists cracking, peeling, and fading, even in extreme weather conditions.
When using oil-based paint on treated wood, it is important to properly prepare the surface by sanding and cleaning it. This will help the paint adhere better and ensure long-lasting results. Additionally, consider using a primer before applying the oil-based paint to further enhance its durability.
4. Acrylic Paint
Acrylic paint is another popular option for painting treated wood. It is water-based, quick-drying, and offers excellent color retention. Acrylic paint is available in a wide variety of colors and finishes, allowing you to achieve the desired look for your outdoor project.
When choosing acrylic paint for treated wood, opt for a product that is labeled as exterior-grade and provides UV protection. This will ensure that the paint withstands the elements and maintains its color over time. Additionally, select a paint that offers resistance against mildew and mold to prevent any potential issues.
5. Epoxy Paint
Epoxy paint is a highly durable and long-lasting option for painting treated wood. It creates a hard and resistant surface that can withstand heavy foot traffic, making it ideal for decks and porches.
Before applying epoxy paint, it is crucial to properly prepare the wood surface by cleaning and sanding it. This will ensure proper adhesion and prevent peeling or chipping. Epoxy paint is available in various colors and finishes, allowing you to achieve a professional and attractive look for your outdoor project.
When it comes to painting treated wood, choosing the right paint is essential to achieve a long-lasting and visually appealing finish. Exterior latex paint, solid color stain, oil-based paint, acrylic paint, and epoxy paint are among the top options for treating and protecting wood surfaces. Each type of paint has its own advantages, so consider the specific needs of your project before making a decision. With the right paint and proper preparation, you can ensure that your treated wood looks great and withstands the test of time.
Step-by-Step Guide to Painting Treated Wood Like a Pro
If you have treated wood surfaces that need a fresh coat of paint, it’s important to follow the right steps to ensure a professional-looking finish. Painting treated wood requires some preparation and specific techniques to ensure that the paint adheres properly and lasts for a long time. In this section, we will provide you with a step-by-step guide on how to paint treated wood like a pro.
1. Clean the Surface
The first step in painting treated wood is to clean the surface thoroughly. Remove any dirt, dust, or debris using a stiff brush or a pressure washer. Make sure to pay attention to any crevices or hard-to-reach areas. If there are any stains or mildew, use a mixture of water and mild detergent to scrub them away.
2. Sand the Wood
After cleaning the surface, use sandpaper to smooth out the wood and provide a better surface for the paint to adhere to. Start with a coarse-grit sandpaper and gradually move to a finer grit. Sand in the direction of the wood grain to avoid leaving visible marks. Be sure to remove any sanding dust with a tack cloth or a damp cloth.
3. Apply a Primer
Applying a primer is crucial when painting treated wood. It helps to seal the wood and create a smooth base for the paint. Choose a primer that is specifically designed for use on treated wood. Apply the primer evenly using a brush or a roller, following the manufacturer’s instructions. Allow the primer to dry completely before proceeding to the next step.
4. Choose the Right Paint
When selecting paint for treated wood, it’s important to choose one that is suitable for exterior use and can withstand harsh weather conditions. Look for a paint that is specifically formulated for use on wood and provides protection against UV rays, moisture, and mold. Oil-based paints are generally recommended for their durability.
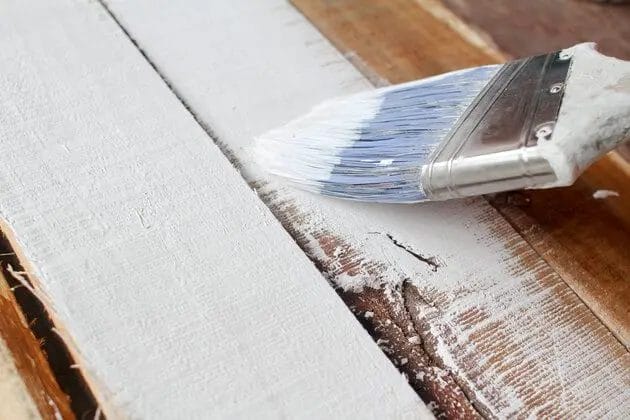
5. Apply the Paint
Before applying the paint, stir it thoroughly to ensure an even consistency. Use a brush or a roller to apply the paint in long, smooth strokes, following the grain of the wood. Start from the top and work your way down, overlapping each stroke slightly. Apply multiple thin coats rather than one thick coat for a better finish. Allow each coat to dry completely before applying the next one.
6. Finishing Touches
Once you have finished painting the treated wood, inspect the surface for any drips or uneven areas. If necessary, lightly sand the surface and touch up those areas with paint. Make sure to follow the drying and curing times recommended by the paint manufacturer. Finally, clean your tools with the appropriate solvent or water to maintain their longevity.
In summary, painting treated wood requires proper preparation, including cleaning the surface, sanding, and applying a primer. Choosing the right paint and applying it correctly will ensure a professional-looking finish. Following this step-by-step guide will help you achieve long-lasting and visually appealing results when painting treated wood.

Tips for Choosing Colors and Finishes for Painted Treated Wood
When it comes to painting treated wood, choosing the right colors and finishes is essential to enhance its appearance and protect it from the elements. Whether you are painting a deck, fence, or any other outdoor structure, here are some valuable tips to help you make the right choices:
1. Consider the Style and Surroundings
Before selecting a color for your treated wood, take a moment to consider the overall style and surroundings of your outdoor space. Think about the existing color palette and architectural features in the area. For a cohesive look, choose a color that complements the surroundings and blends well with the overall design aesthetic.
2. Test Different Colors
It’s always a good idea to test different colors on a small, inconspicuous area of the wood before committing to a final color. This allows you to see how the color will look against the treated wood and in natural light. Consider testing a few different shades to find the one that best suits your preference and enhances the beauty of the wood.
3. Opt for Lighter Shades in Hot Climates
If you live in a hot climate where the sun is intense, it is advisable to choose lighter shades for your painted treated wood. Light colors tend to reflect heat better than darker colors, helping to prevent the wood from absorbing excessive warmth. This can minimize the risk of warping or cracking due to heat exposure.
4. Consider Maintenance and Longevity
When choosing a finish for your painted treated wood, consider the maintenance requirements and the longevity of the finish. Some finishes may require regular upkeep, such as reapplication or cleaning, while others offer long-term protection with minimal maintenance. Consider your lifestyle and how much time you are willing to invest in maintaining the wood to make an informed decision.
5. Prioritize Protection
One of the primary purposes of painting treated wood is to protect it from weathering and decay. Therefore, prioritize finishes that offer excellent protection against moisture, UV rays, and other environmental factors. Look for finishes with waterproofing properties, UV inhibitors, and mildew resistance to ensure long-lasting durability of your painted treated wood.
6. Consult a Professional
If you are unsure about the best colors and finishes for your painted treated wood, don’t hesitate to consult a professional. A paint specialist or a contractor with expertise in wood finishes can provide valuable insights and help you make informed decisions. They can recommend suitable products and techniques that will ensure the best results for your project.
In summary, choosing the right colors and finishes for painted treated wood is crucial for both aesthetic appeal and protection. Consider the style and surroundings, test different colors, opt for lighter shades in hot climates, prioritize maintenance and longevity, prioritize protection, and consult a professional if needed. Following these tips will help you achieve beautiful and long-lasting results for your painted treated wood projects.
How to Properly Prepare Treated Wood for Painting
Painting treated wood can be a great way to enhance its appearance and protect it from the elements. However, before you begin painting, it is important to properly prepare the wood to ensure optimal results. In this section, we will outline the step-by-step process of preparing treated wood for painting.
1. Clean the Wood Surface
The first step in preparing treated wood for painting is to clean the surface thoroughly. Use a mild detergent and water solution to remove any dirt, grime, or grease from the wood. You can scrub the surface with a soft brush or use a pressure washer for larger areas. Rinse the wood thoroughly and allow it to dry completely before proceeding to the next step.
2. Sand the Surface
Next, you’ll need to sand the surface of the treated wood to create a smooth and even base for the paint. Start by using a coarse-grit sandpaper (around 80-120 grit) to remove any rough areas, splinters, or imperfections. Then, switch to a finer-grit sandpaper (around 220 grit) to further smooth the surface. Be sure to sand along the grain of the wood to avoid causing any damage. Once you’ve finished sanding, wipe away any dust with a clean cloth.
3. Apply a Primer
Applying a primer is essential when painting treated wood. It helps to seal the wood and provide a better bonding surface for the paint. Choose a high-quality exterior primer that is suitable for use on treated wood. Use a brush or roller to apply a thin and even coat of primer to the entire surface. Allow the primer to dry completely according to the manufacturer’s instructions.
4. Fill in Cracks and Holes
If there are any cracks, holes, or imperfections on the wood surface, it’s important to fill them in before painting. Use a wood filler or putty that is specifically designed for outdoor use. Apply the filler using a putty knife, making sure to smooth it out and remove any excess. Allow the filler to dry completely and then sand it lightly to create a smooth finish.
5. Choose the Right Paint
When it comes to choosing the paint for your treated wood, opt for a high-quality exterior paint that is specifically formulated for use on wood surfaces. Look for paint that is water-resistant, UV-resistant, and provides long-lasting durability. Consider the color, finish, and texture you desire for your project. Apply the paint using a brush, roller, or spray, following the manufacturer’s instructions for application and drying times.
6. Apply Multiple Coats
To achieve a professional and long-lasting finish, it is recommended to apply multiple coats of paint. Most paints will require at least two coats for optimal coverage and protection. Allow each coat to dry completely before applying the next one. Sand lightly between coats to ensure a smooth surface.
7. Protect and Maintain
Once you have finished painting the treated wood, it’s important to protect and maintain the surface to ensure its longevity. Consider applying a clear sealer or varnish to provide an extra layer of protection against moisture and UV rays. Regularly inspect the painted surface for any signs of damage or wear and touch up as needed.
In summary, preparing treated wood for painting involves cleaning the surface, sanding, applying a primer, filling in cracks, choosing the right paint, applying multiple coats, and protecting the finished surface. By following these steps and using high-quality materials, you can achieve a beautiful and durable painted finish on your treated wood.
FAQs
Can I paint treated wood?
Yes, you can paint treated wood. However, it is recommended to wait for the wood to dry completely before painting. Additionally, you should use a high-quality primer specifically designed for treated wood to ensure proper adhesion of the paint.
Conclusion:
In conclusion, painting treated wood is definitely possible and can be a great way to enhance its appearance and protect it from the elements. Painting treated wood not only adds a decorative touch, but it also helps to extend its lifespan by preventing moisture penetration and minimizing the risk of decay and rot.
However, it is essential to follow the proper steps to ensure a successful paint job on treated wood. This includes cleaning and preparing the surface, choosing the right type of paint and primer, and applying multiple coats for optimal coverage and durability.
By taking the necessary precautions and using high-quality materials, you can transform your treated wood into a beautifully painted surface that will stand the test of time.
