If you’ve accidentally left burn marks on your wooden furniture or flooring, don’t panic! There are effective methods to remove those unsightly marks and restore the natural beauty of your wood.
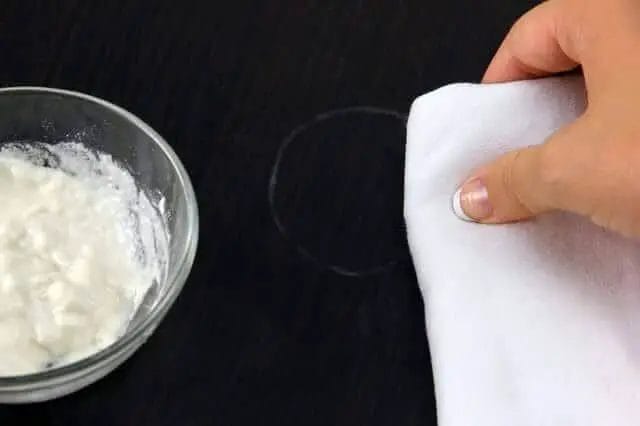
One of the easiest ways to remove burn marks from wood is by using a mixture of baking soda and water. Create a paste and gently rub it onto the burn mark. Let it sit for a few minutes before wiping it away with a damp cloth. Repeat the process if necessary.

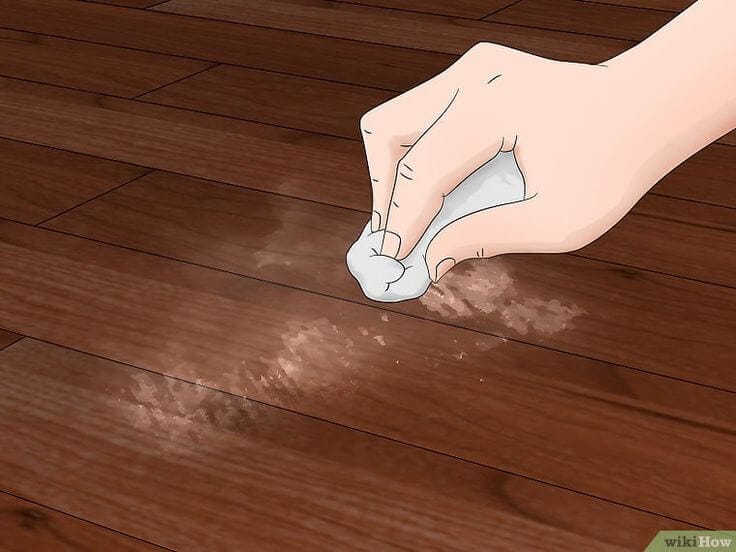
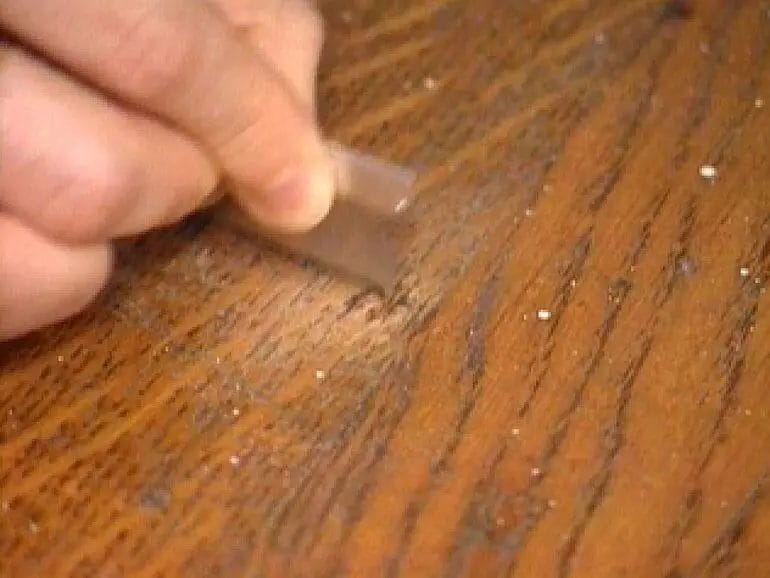
If the burn mark is more stubborn, you can try using a fine-grit sandpaper to gently sand away the damaged area. Be sure to sand in the direction of the wood grain to avoid further damage. After sanding, wipe away any dust and apply a wood polish or conditioner to restore the shine.
Another effective method is using a mixture of equal parts vinegar and olive oil. Apply the mixture onto a soft cloth and gently rub it onto the burn mark. This solution helps to lift the burn mark while nourishing the wood. Once the mark is removed, wipe away any excess oil with a clean cloth.
For deeper burn marks, you may consider using a wood filler. Select a filler that matches the color of your wood and apply it to the damaged area. Smooth it out with a putty knife and allow it to dry. Once dry, sand the area lightly and apply a wood stain or sealant to blend it with the surrounding wood
Effective Ways to Remove Burn Marks from Wood Surfaces
If you are a homeowner, it is not uncommon to come across burn marks on your wooden surfaces. These unsightly marks can be caused by hot objects, such as a cigarette or a hot pan, accidentally coming into contact with the wood. Fortunately, there are several effective methods that you can use to remove burn marks from wood surfaces. In this section, we will discuss some of these methods in detail.
1. Sanding
Sanding is one of the most common and effective ways to remove burn marks from wood surfaces. To start, you will need sandpaper with a grit of 120 or higher. Begin by gently sanding the burn mark in the direction of the wood grain. Be careful not to apply too much pressure, as this can damage the surface of the wood. Continue sanding until the burn mark is no longer visible. Once you have finished sanding, wipe away any dust with a clean cloth or vacuum.
2. Baking Soda
Baking soda is another effective remedy for removing burn marks from wood surfaces. Create a paste by mixing baking soda with water until it forms a thick consistency. Apply the paste to the burn mark and gently rub it in a circular motion using a soft cloth. Allow the paste to sit for a few minutes, then wipe it away with a clean, damp cloth. Repeat this process until the burn mark is completely gone. Finally, wipe the area clean with a dry cloth.
3. Hydrogen Peroxide
Hydrogen peroxide can also be used to remove burn marks from wood surfaces. Start by applying a small amount of hydrogen peroxide to a clean cloth or sponge. Gently rub the cloth or sponge over the burn mark, being careful not to scrub too hard. Allow the hydrogen peroxide to sit on the burn mark for a few minutes, then wipe it away with a clean, damp cloth. Repeat this process until the burn mark is no longer visible. Finish by wiping the area clean with a dry cloth.
4. Vinegar and Olive Oil
A mixture of vinegar and olive oil can work wonders when it comes to removing burn marks from wood surfaces. Start by mixing equal parts vinegar and olive oil in a small bowl or container. Dip a clean cloth into the mixture and gently rub it onto the burn mark in a circular motion. Continue rubbing until the burn mark begins to fade. Once the mark is no longer visible, wipe away any remaining mixture with a clean, damp cloth. Finally, wipe the area clean with a dry cloth.
5. Lemon Juice
Lemon juice is a natural and effective solution for removing burn marks from wood surfaces. Squeeze fresh lemon juice onto a clean cloth and gently rub it onto the burn mark. Allow the lemon juice to sit on the burn mark for a few minutes, then wipe it away with a clean, damp cloth. Repeat this process until the burn mark is completely gone. Finish by wiping the area clean with a dry cloth.
In summary, burn marks on wood surfaces can be unsightly, but they can be effectively removed using various methods. Whether you choose to sand the burn mark, use baking soda, hydrogen peroxide, vinegar and olive oil, or lemon juice, it is important to follow the instructions carefully and be patient. By following these steps, you can restore the beauty of your wooden surfaces and eliminate burn marks with ease.
Expert Tips for Removing Burn Marks on Unfinished Wood
If you have a piece of unfinished wood that has been marred by burn marks, don’t worry! There are several expert tips and techniques that you can try to remove those unsightly marks and restore the natural beauty of the wood. In this section, we will explore some effective methods that can help you get rid of burn marks on unfinished wood.
1. Sanding
Sanding is the most common and effective method for removing burn marks on unfinished wood. Start by using a fine-grit sandpaper, such as 180 or 220 grit, and gently sand the burned area in the direction of the wood grain. Be sure to sand the surrounding area as well to achieve a uniform finish. Gradually increase the grit of the sandpaper until the burn mark is no longer visible.
2. Vinegar and Baking Soda
If sanding alone doesn’t remove the burn mark completely, you can try using a mixture of vinegar and baking soda. Create a paste by combining equal parts of vinegar and baking soda until it forms a thick consistency. Apply the paste to the burn mark and let it sit for a few hours. Then, gently scrub the area with a soft cloth or sponge. Rinse with water and dry the wood thoroughly.
3. Hydrogen Peroxide
Hydrogen peroxide is another effective option for removing burn marks on unfinished wood. Apply a small amount of hydrogen peroxide to the burn mark and let it sit for a few minutes. The peroxide will help to lighten the mark and make it less noticeable. Afterward, wipe the area clean with a damp cloth and allow it to dry.
4. Steel Wool and Lemon Juice
If the burn mark is stubborn and still visible after trying other methods, you can try using a mixture of steel wool and lemon juice. Moisten a piece of fine-grade steel wool with lemon juice and gently rub the burn mark in a circular motion. Be careful not to scrub too hard, as this may damage the wood’s surface. Once the burn mark is removed, wipe the area clean with a damp cloth and dry it thoroughly.
5. Touch-up Stick or Stain
If all else fails and the burn mark is still visible, you can try using a touch-up stick or stain specifically designed for wood. Choose a color that matches the natural tone of the wood and apply it directly to the burn mark using a small brush or cloth. Allow the touch-up product to dry completely before applying a protective finish, such as wax or polyurethane.
In summary, removing burn marks from unfinished wood is possible with the right techniques and products. Whether you choose to sand, use vinegar and baking soda, hydrogen peroxide, steel wool and lemon juice, or a touch-up stick, make sure to take your time and be gentle to avoid causing further damage to the wood. By following these expert tips, you can restore the beauty of your unfinished wood and enjoy it for years to come.
DIY Home Remedies to Remove Burn Stains from Wood Furniture
Wood furniture adds a touch of elegance and warmth to any home. However, accidents happen, and one common mishap is accidentally burning the surface of the wood furniture. Whether it’s from a hot pan, a cigarette, or a candle, burn stains can be unsightly and ruin the appearance of your beloved furniture. But don’t worry, there are several do-it-yourself (DIY) remedies that can help you remove burn stains from wood furniture and restore its beauty.
1. Sanding Technique
One effective method to remove burn stains from wood furniture is the sanding technique. However, this method is suitable for minor burn marks that haven’t deeply penetrated the wood. Start by lightly sanding the affected area with fine-grit sandpaper. Gently rub the sandpaper in a circular motion until the stained surface becomes smooth and the burn mark diminishes. After sanding, wipe away any dust or debris with a soft cloth. To maintain the original finish, apply a wood polish or wax to the treated area.
2. Vinegar and Olive Oil Mixture
If the burn stain is more stubborn or has penetrated deeper into the wood, you can try a mixture of vinegar and olive oil. Create a solution by mixing equal parts of white vinegar and olive oil. Dip a soft cloth into the mixture and rub it gently over the burn stain. The acidity of the vinegar helps to break down the burn mark, while the olive oil moisturizes and nourishes the wood. Afterward, wipe the area with a clean cloth to remove any excess solution and buff the wood to restore its shine.
3. Lemon Juice and Baking Soda Paste
Lemon juice and baking soda are common household ingredients that can also work wonders on burn stains. Create a paste by mixing equal parts of lemon juice and baking soda. Apply the paste to the burn stain and gently rub it in with a soft cloth. Let the paste sit on the stain for a few minutes, allowing the acidic properties of the lemon juice to break down the burn mark. Then, using a damp cloth, wipe away the paste and polish the wood using a wood polish or wax.
4. Hydrogen Peroxide and Toothpaste
If the burn stain persists, you can try a combination of hydrogen peroxide and toothpaste. First, apply a small amount of toothpaste directly onto the burn stain. Then, pour some hydrogen peroxide over the toothpaste. Gently rub the mixture into the stain using a soft cloth. The toothpaste helps to lift the burn mark while the hydrogen peroxide aids in lightening stubborn stains. Once the stain starts to fade, remove the mixture using a damp cloth and polish the wood to restore its shine.
5. Steel Wool and White Vinegar
For more severe burn stains that have deeply penetrated the wood, steel wool and white vinegar can come to the rescue. Moisten a piece of steel wool with white vinegar and gently rub it over the burn stain. The abrasive nature of the steel wool combined with the acidity of the vinegar helps to remove the burn mark. However, be cautious not to apply excessive pressure, as it can damage the wood surface. Afterward, wipe away any residue with a damp cloth and apply a wood polish or wax to protect the wood.
Summary
Accidental burn stains on wood furniture can be distressing, but with these DIY home remedies, you can effectively remove them and restore the beauty of your furniture. Whether you choose the sanding technique, vinegar and olive oil mixture, lemon juice and baking soda paste, hydrogen peroxide and toothpaste combination, or the steel wool and white vinegar method, always remember to be gentle and cautious to avoid further damage. Enjoy the process of rejuvenating your wood furniture and admire the stunning results.
Professional Techniques for Restoring Wood Surfaces Damaged by Burn Marks
If you have a wooden surface that has been damaged by burn marks, whether it’s a tabletop, flooring, or furniture, it can be disheartening to see the damage. However, there are professional techniques that can help restore the wood surface and make it look as good as new. In this section, we will explore some of these techniques in detail.
1. Assess the Damage
The first step in restoring a wood surface damaged by burn marks is to assess the extent of the damage. This will help determine the best approach for restoration. Minor burn marks may only require surface-level treatment, while deeper burns may require more extensive restoration.
To assess the damage, carefully examine the burn marks and determine how deep they go into the wood. If the burn marks are only on the surface, they can often be sanded down and treated easily. However, if the burn marks have penetrated deeper into the wood, additional steps may be necessary.
2. Sanding the Surface
Once you have assessed the damage, the next step is to sand the surface of the wood. This will help remove the burned or charred areas and prepare the surface for treatment. Start by using a coarse-grit sandpaper to remove the top layer of the damaged wood.
As you sand, be sure to follow the grain of the wood to avoid creating any visible scratches. Gradually switch to finer-grit sandpaper to achieve a smooth and even surface. Take your time during this step to ensure that the surface is thoroughly sanded.
3. Applying Wood Filler
If the burn marks have created deep indentations in the wood, you may need to use wood filler to fill in the gaps. Wood filler is a putty-like substance that can be applied to the damaged areas to level them with the rest of the surface.
Before applying the wood filler, make sure the surface is clean and free of any dust or debris. Apply the wood filler using a putty knife, making sure to fill in the burn marks completely. Allow the wood filler to dry according to the manufacturer’s instructions.
4. Sanding and Smoothing
Once the wood filler has dried, it’s time to sand and smooth the surface again. Use a fine-grit sandpaper to gently sand the filled areas, blending them seamlessly with the rest of the surface. This step will help achieve a smooth and uniform finish.
Be careful not to sand too aggressively, as this can remove the wood filler and create unevenness. Take your time and periodically check the surface to ensure that it is smooth and level.
5. Staining and Finishing
After sanding and smoothing the surface, it’s time to apply a stain and finish to restore the natural beauty of the wood. Choose a stain color that closely matches the rest of the wood, and apply it evenly using a clean cloth or brush.
Allow the stain to dry completely before applying a protective finish, such as varnish or polyurethane. The finish will seal the wood and protect it from further damage, while also enhancing its appearance.
6. Regular Maintenance
Once you have successfully restored the wood surface damaged by burn marks, it’s important to practice regular maintenance to keep it looking its best. Avoid placing hot objects directly on the surface to prevent future burn marks.
Use coasters or trivets under hot dishes or pans and avoid dragging sharp objects across the surface. Regularly clean and dust the surface to keep it free from dirt and debris.
Summary
Restoring wood surfaces damaged by burn marks is possible with professional techniques. Assess the damage, sand the surface, apply wood filler if needed, sand and smooth again, stain and finish, and practice regular maintenance to ensure the longevity of the restored wood surface. By following these steps, you can bring back the beauty of your damaged wood surfaces and enjoy them for years to come.
FAQs
1. How can I remove burn marks from wood?
To remove burn marks from wood, start by sanding the area lightly with fine-grit sandpaper to remove the charred surface. Then, mix equal parts vinegar and olive oil and apply it to the burn mark. Let it sit for a few hours before wiping off the excess mixture. Repeat if necessary and finish by applying wood polish or wax for a smooth finish.
2. Can I remove burn marks from wood with bleach?
No, using bleach is not recommended for removing burn marks from wood. Bleach can discolor the wood and damage its natural finish. It is best to use gentle methods like sanding and applying a mixture of vinegar and oil to effectively remove burn marks without causing further damage.
3. Are there any commercial products available for removing burn marks from wood?
Yes, there are commercial products specifically designed to remove burn marks from wood. Look for wood stain removers or wood burn mark removers in hardware stores or online. Follow the instructions provided with the product for the best results.
Conclusion
In conclusion, removing burn marks from wood can be a challenging task. However, with the right techniques and tools, it is possible to restore the natural beauty of the wood surface. Whether it’s using sandpaper, wood filler, or a heat gun, each method has its own benefits and considerations. Remember to always test a small, inconspicuous area before applying any treatments to avoid further damage. Additionally, taking preventive measures such as using coasters, trivets, or protective finishes can help avoid future burn marks on wood surfaces. With patience and proper care, you can successfully eliminate burn marks and enjoy the renewed beauty of your wood pieces.