Yes, you can paint engineered wood to transform its appearance and add a personal touch to your furniture or flooring. Painting engineered wood offers versatility and allows you to customize the color and style to match your aesthetic preferences.
Before painting, it’s important to properly prepare the surface by sanding and cleaning it to ensure good paint adhesion. You can use a high-quality primer designed for use on engineered wood to create a smooth and durable base for the paint.

When choosing paint, opt for a type that is suitable for wood surfaces and offers good coverage and durability. Apply the paint in thin, even coats, allowing each coat to dry completely before applying the next one. Finish with a clear topcoat to protect the paint and enhance its longevity.
Remember to follow the manufacturer’s instructions and recommendations when painting engineered wood to achieve the best results. With the right preparation and technique, painting can breathe new life into your engineered wood and make it look as good as new.
Benefits of Painting Engineered Wood
Painting engineered wood can offer a variety of benefits. Here are some key advantages:
- Enhanced Aesthetic Appeal: Painting engineered wood gives you the opportunity to customize the appearance of your surfaces. You can choose from a wide range of colors and finishes to match your desired style.
- Protection from Wear and Tear: By applying paint to engineered wood, you create a protective barrier that helps prevent scratches, stains, and other forms of damage. This can significantly extend the lifespan of your wood surfaces.
- Improved Durability: Engineered wood can be more susceptible to moisture and temperature changes compared to other materials. However, painting it can provide an extra layer of protection, making it more durable and resistant to warping or swelling.
- Easy Maintenance: Painted surfaces are generally easier to clean and maintain compared to bare wood. With a simple wipe-down, you can remove dirt, dust, and stains, keeping your engineered wood surfaces looking fresh and new.
Steps to Paint Engineered Wood
Painting engineered wood requires proper preparation and technique. Here is a step-by-step guide:
- Clean the Surface: Start by thoroughly cleaning the engineered wood surface. Remove any dirt, grease, or residues using a mild detergent and water. Ensure that the surface is completely dry before proceeding.
- Sand the Surface: Use fine-grit sandpaper to lightly sand the surface of the engineered wood. This helps create a smooth and even texture, allowing the paint to adhere better. Wipe away any dust generated during sanding.
- Apply Primer: Before painting, apply a coat of primer specifically designed for engineered wood. This helps to seal the surface, enhance adhesion, and prevent the paint from soaking into the wood excessively.
- Choose the Paint: Select a high-quality paint suitable for use on engineered wood. Acrylic latex or oil-based paints are commonly used for this purpose. Consider factors such as color, finish, and durability when choosing the paint.
- Apply the Paint: Using a brush or roller, apply the paint evenly over the primed surface. Work in long, smooth strokes, and make sure to cover the entire area. Allow the first coat to dry completely before applying additional coats if needed.
- Finish with a Topcoat: To further protect the painted surface and add a sheen or satin finish, consider applying a clear topcoat. This will provide extra durability and make the surface easier to clean.
Tips for Painting Engineered Wood
Here are some additional tips to ensure a successful painting process:
- Proper Ventilation: When painting indoors, ensure good ventilation to prevent the buildup of fumes. Open windows or use fans to circulate the air.
- Follow Manufacturer’s Instructions: Always refer to the specific instructions provided by the paint and primer manufacturers. This will ensure that you apply the products correctly for optimal results.
- Test in an Inconspicuous Area: Before painting the entire surface, test the paint and primer on a small, inconspicuous area. This will help you assess the adhesion and compatibility of the products with the engineered wood.
- Use Proper Tools: Choose high-quality brushes or rollers designed for the type of paint you are using. This will ensure a smooth application and even coverage.
- Allow Sufficient Drying Time: Follow the recommended drying time between coats and before subjecting the painted surface to regular use. This will prevent premature damage or smudging of the paint.
In summary, painting engineered wood surfaces can provide numerous benefits, including enhanced aesthetic appeal, protection from wear and tear, improved durability, and easy maintenance. By following the proper steps and using the right materials, you can achieve a beautiful and long-lasting finish. Remember to clean and prep the surface, apply primer, choose high-quality paint, and finish with a topcoat for added protection. With these tips in mind, you can confidently paint your engineered wood surfaces and transform their look.
Best Paints for Engineered Wood
When it comes to painting engineered wood surfaces, choosing the right paint can make a significant difference in terms of durability and finish. Engineered wood, also known as composite wood or man-made wood, is a popular choice for furniture, cabinetry, and flooring due to its versatility and cost-effectiveness.
However, not all paints are suitable for painting engineered wood. It is essential to select a paint that adheres well to the surface, provides excellent coverage, and offers long-lasting protection. In this section, we will explore some of the best paints available for painting engineered wood surfaces.
1. Acrylic Paint
Acrylic paint is a versatile option for painting engineered wood. It offers excellent adhesion, durability, and color retention. Acrylic paint is available in a wide range of colors and finishes, including gloss, satin, and matte. It dries quickly and is resistant to fading, cracking, and peeling. Additionally, acrylic paint is water-based, making it easy to clean up with soap and water.
2. Latex Paint
Latex paint is another popular choice for painting engineered wood surfaces. It is water-based and offers good adhesion and flexibility. Latex paint is available in various finishes, including flat, eggshell, satin, and semi-gloss. This type of paint dries quickly and is easy to clean up. It is also resistant to fading, cracking, and yellowing over time.
3. Oil-Based Paint
Oil-based paint is known for its durability and smooth finish. It provides excellent adhesion and coverage when painting engineered wood surfaces. Oil-based paint takes longer to dry compared to acrylic and latex paints but offers a hard and durable finish. It is resistant to scratches, stains, and water damage. However, oil-based paint has a strong odor and requires mineral spirits for clean-up.
4. Chalk Paint
Chalk paint has gained popularity in recent years due to its unique matte finish and ease of application. It adheres well to engineered wood surfaces and requires minimal surface preparation. Chalk paint is available in a wide range of colors and can be distressed or sealed with wax for added protection. It is also water-based and easy to clean up.
5. Spray Paint
Spray paint is an excellent option for painting smaller engineered wood surfaces or intricate details. It provides a smooth and even finish and allows for quick and effortless application. Spray paint is available in various colors and finishes, including metallic and high-gloss. It is important to use spray paint in a well-ventilated area and follow the manufacturer’s instructions for best results.
Choosing the best paint for painting engineered wood surfaces is crucial to achieve a durable and professional-looking finish. Acrylic, latex, oil-based, chalk, and spray paint are all viable options depending on your preferences and the specific project requirements. Consider factors such as adhesion, durability, drying time, and ease of clean-up when selecting the paint for your engineered wood surfaces. Follow the manufacturer’s instructions for proper application and maintenance to ensure long-lasting results.
Preparing Engineered Wood for Painting
Properly preparing the surface is crucial for achieving a smooth and long-lasting paint job on engineered wood.
Engineered wood, also known as composite wood, is a popular choice for many homeowners due to its durability and affordability. Whether you have engineered wood furniture, cabinets, or flooring, painting it can give it a fresh new look. However, before you start painting, it’s important to properly prepare the surface to ensure that the paint adheres well and provides a flawless finish.
Clean the Surface
The first step in preparing engineered wood for painting is to clean the surface thoroughly. Use a mild detergent mixed with warm water to remove any dirt, dust, or grease that may be on the surface. Scrub the surface gently with a soft cloth or sponge, paying attention to any areas that may be more heavily soiled.
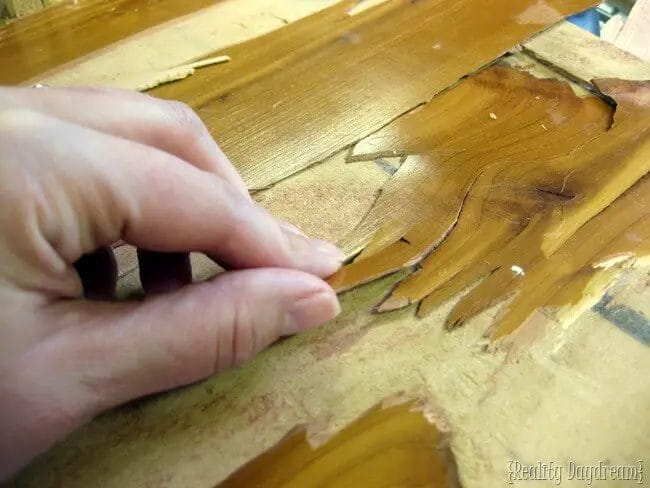
Repair Any Damages
Inspect the surface of the engineered wood for any damages such as scratches, dents, or chips. Fill in any holes or cracks with a wood filler and smooth it out using a putty knife. Allow the filler to dry completely and then sand it down until it is level with the rest of the surface. This will ensure a seamless appearance once the paint is applied.
Sand the Surface
To create a smooth and even surface, it is important to sand the engineered wood. Start by using a medium-grit sandpaper and sand in the direction of the wood grain. This will help to remove any rough spots or imperfections. Once the surface is smooth, switch to a fine-grit sandpaper and lightly sand the entire surface. This will create a slightly rough texture that will help the paint adhere better.
Prime the Surface
Applying a primer is an essential step in preparing engineered wood for painting. Primer helps to seal the surface, preventing any stains or tannins from bleeding through the paint. It also provides a smooth base for the paint to adhere to, ensuring a more durable finish. Use a high-quality primer specifically designed for use on engineered wood and apply it evenly using a brush or roller.
Apply the Paint
Once the primer is dry, it’s time to apply the paint. Choose a high-quality paint that is suitable for use on engineered wood. Use a brush or roller to apply an even coat of paint, working in the direction of the wood grain. Allow the paint to dry completely before applying additional coats, if necessary. If desired, you can also apply a clear topcoat to protect the paint and provide added durability.
Final Touches
After the paint has dried, inspect the surface for any imperfections or uneven areas. Touch up any areas that need attention with a small brush. If necessary, lightly sand any rough spots or drips and apply another coat of paint. Once you are satisfied with the finish, allow the paint to cure fully before placing any objects or furniture back onto the surface.
In summary, properly preparing engineered wood for painting involves cleaning the surface, repairing any damages, sanding the surface, priming it, applying the paint, and making any final touches. By following these steps, you can achieve a smooth and long-lasting paint job on your engineered wood surfaces.
Step-by-Step Guide to Painting Engineered Wood
Painting engineered wood can be a great way to refresh the look of your furniture or flooring. Whether it’s a worn-out piece of furniture or outdated flooring, a fresh coat of paint can breathe new life into it. However, it’s important to follow the right process to ensure a smooth and long-lasting finish. In this guide, we will outline the step-by-step process of painting engineered wood, including priming, painting, and sealing.
Step 1: Prepare the Surface
The first step in painting engineered wood is to prepare the surface. Start by cleaning the surface thoroughly to remove any dirt, dust, or grease. Use a mild detergent and water solution to clean the surface, and then rinse it off with clean water. Once the surface is clean, allow it to dry completely.
Step 2: Sand the Surface
After the surface is dry, use a fine-grit sandpaper to gently sand the engineered wood. Sanding helps to create a smooth surface and improves paint adhesion. Be sure to sand in the direction of the wood grain to avoid damaging the surface. After sanding, wipe away any dust with a clean cloth.
Step 3: Apply Primer
Priming is an important step as it helps the paint adhere better and provides a uniform base for the paint. Choose a primer suitable for engineered wood and apply it to the surface using a brush or roller. Follow the manufacturer’s instructions for drying time.
Step 4: Paint the Surface
Once the primer is dry, it’s time to paint the surface. Select a paint color and type that is suitable for engineered wood. Using a brush or roller, apply the paint in even strokes, following the direction of the wood grain. Apply multiple thin coats for best results, allowing each coat to dry before applying the next.
Step 5: Seal the Surface
After the paint has dried completely, seal the surface to protect the paint and provide a durable finish. Choose a polyurethane or varnish specifically made for painted surfaces. Apply the sealant using a brush or roller, following the manufacturer’s instructions for drying time and application method.
Step 6: Finishing Touches
Once the sealant has dried, inspect the painted surface for any imperfections or unevenness. If necessary, lightly sand the surface with a fine-grit sandpaper and apply another coat of sealant. Finally, clean up your painting tools and enjoy your newly painted engineered wood.
In summary, painting engineered wood involves preparing the surface, sanding, priming, painting, sealing, and adding finishing touches. By following this step-by-step guide, you can achieve a professional-looking paint job that will refresh the look of your furniture or flooring.
Tips for Achieving a Professional Finish
When it comes to painting engineered wood, achieving a professional-looking finish is essential to enhance the overall appearance of your project. Whether you are painting furniture, cabinets, or any other engineered wood surface, following expert tips and techniques can make a significant difference in the final result. In this section, we will discuss some valuable tips that will help you achieve that desired professional finish.
1. Choose the Right Tools
Using the correct tools is crucial when painting engineered wood. Investing in high-quality brushes and rollers will ensure smooth and even application of the paint. Synthetic brushes are ideal for water-based paints, while natural bristle brushes work well with oil-based paints. Additionally, selecting the right roller nap thickness is important depending on the texture of your engineered wood surface.
2. Prepare the Surface
To achieve a professional finish, it is essential to properly prepare the surface before painting. Start by cleaning the surface thoroughly to remove any dirt, dust, or grease. Sanding the surface with fine-grit sandpaper will help in creating a smooth and even base for the paint. Fill any dents, cracks, or imperfections with wood filler and ensure that it is properly sanded down for a seamless finish.
3. Apply Primer
Priming the engineered wood surface before painting is highly recommended. A good quality primer will improve paint adhesion and help in achieving a more even and durable finish. Apply the primer evenly using a brush or roller, and allow it to dry completely before moving on to the next step.
4. Use Multiple Coats
When painting engineered wood, applying multiple coats of paint is key to achieving a professional finish. Start with a thin and even base coat, allowing it to dry completely before applying subsequent coats. Each coat should be applied in the same direction to ensure a consistent finish. Sand lightly between coats to remove any imperfections and create a smooth surface.
5. Pay Attention to Drying Time
Allowing adequate drying time between coats is essential for a professional-looking finish. Follow the instructions provided by the paint manufacturer to determine the drying time required. Rushing the process can lead to uneven drying, which may affect the final result. Patience is key when it comes to achieving a flawless finish.
6. Finishing Touches
Once you have applied the final coat of paint, give it ample time to dry before adding any finishing touches. If desired, you can further enhance the professional look by applying a clear topcoat or protective finish. This will not only add durability but also give a smooth and polished appearance to your painted engineered wood surface.
By following these expert tips and techniques, you can successfully achieve a professional-looking finish when painting engineered wood. Remember to choose the right tools, properly prepare the surface, apply primer, use multiple coats of paint, pay attention to drying time, and add finishing touches to complete the process. With patience and attention to detail, you can elevate the overall appearance of your project and enjoy a professional finish that will impress.
Maintenance and Care of Painted Engineered Wood
Painted engineered wood surfaces add a touch of elegance and beauty to any space. Whether it’s your kitchen cabinets, furniture, or flooring, it’s important to properly care for and maintain these surfaces to ensure their longevity. By following a few simple steps, you can keep your painted engineered wood looking brand new for years to come.
Cleaning
Regular cleaning is essential to maintain the appearance of painted engineered wood surfaces. Start by removing any loose dirt or debris using a soft-bristle brush or a dry cloth. Avoid using abrasive materials that can scratch the paint. Once the surface is free from loose dirt, use a mild soap or a non-abrasive cleaner mixed with warm water to gently clean the painted surface. Apply the cleaner to a soft cloth or sponge, and then wipe the surface in a circular motion. Rinse thoroughly with clean water and dry with a soft cloth.
It’s important to note that excessive moisture can damage painted engineered wood, so avoid using excessive water or soaking the surface. Additionally, always test any cleaning product on a small, inconspicuous area before using it on the entire surface to ensure compatibility and avoid any potential damage.
Avoid Harsh Chemicals
When cleaning painted engineered wood surfaces, it’s crucial to avoid harsh chemicals that can damage the paint or the wood underneath. Avoid using bleach, ammonia, or any abrasive cleaners that contain chemicals. These can cause discoloration, fading, or even stripping of the paint. Instead, opt for mild cleaners specifically formulated for painted surfaces or consult the manufacturer’s recommendations.
Protective Measures
To protect your painted engineered wood surfaces from scratches and dents, it’s essential to take preventive measures. Place protective pads or coasters under heavy objects such as furniture legs to prevent them from scratching the surface. Use placemats and coasters to protect the painted surface from spills and heat. Avoid dragging heavy objects across the painted surface to prevent any damage.
When it comes to flooring, use rugs or mats in high-traffic areas to minimize wear and tear. Make sure to choose mats that are non-slip and have a non-abrasive backing to avoid any damage to the painted surface. Regularly clean these mats to prevent dirt or debris from accumulating and scratching the paint.
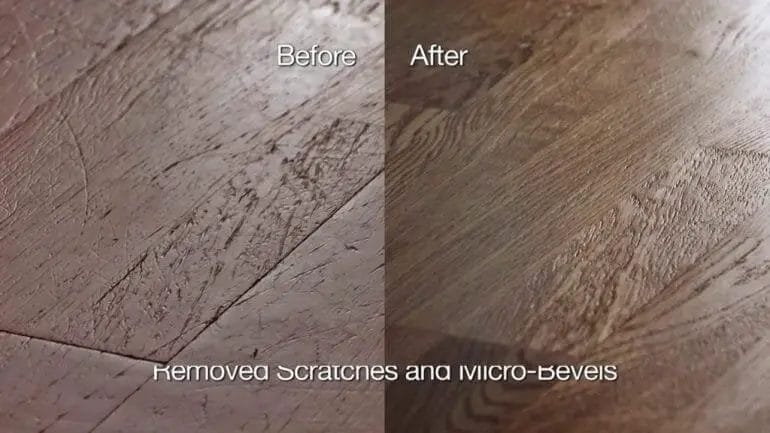
Touch-Up and Repairs
Over time, painted engineered wood surfaces may develop minor scratches or chips. It’s important to address these issues promptly to prevent further damage and maintain the overall appearance. For minor scratches, you can use touch-up paint provided by the manufacturer. Apply a small amount of touch-up paint to the affected area using a fine brush or a cotton swab, following the manufacturer’s instructions.
If the damage is more significant, such as a chip or deep scratch, it’s recommended to consult a professional for repairs. They have the expertise and tools to properly repair and refinish painted engineered wood surfaces, ensuring a seamless and long-lasting result.
In summary, proper care and maintenance are essential for keeping your painted engineered wood surfaces looking their best. Regular cleaning using mild cleaners, avoiding harsh chemicals, and taking preventive measures to protect the surface can go a long way in preserving its beauty and longevity. Additionally, addressing minor damages promptly and seeking professional help for more significant repairs will help maintain the overall appearance and ensure the continued enjoyment of your painted engineered wood surfaces.
Can you paint engineered wood?
Yes, you can paint engineered wood. However, it is important to properly prepare the surface by cleaning, sanding, and priming it before applying paint. Use a high-quality paint and follow the manufacturer’s instructions for the best results.
Conclusion:
In conclusion, while there may be some debate about whether or not you can paint engineered wood, the general consensus is that it is indeed possible. Painting engineered wood can be a great way to refresh the appearance of furniture, flooring, or other surfaces made from this material. However, it is important to properly prepare the surface and use the right type of paint and primer for optimal results. Before painting, make sure to clean and sand the surface to promote adhesion. Additionally, using a high-quality paint specifically designed for wood can help ensure a long-lasting and professional-looking finish.
In summary, with the right techniques and materials, painting engineered wood can be a viable option for transforming the look of your interior. So, get creative and indulge in the joy of giving a fresh coat of paint to your engineered wood pieces!