Looking to make a wood spear? Whether you’re an outdoor enthusiast or a survivalist, creating your own wood spear can be a valuable skill to possess. A wood spear can be a useful tool for hunting, fishing, or self-defense in the wild. In this guide, we will provide you with step-by-step instructions on how to make a strong and sturdy wood spear using basic tools and materials.
To start, you will need to choose a hardwood that is both strong and flexible, such as oak or hickory. Next, gather the necessary tools, including a sharp knife, a saw, and a sturdy branch that is about six feet long and three inches in diameter.
Begin by removing any branches or leaves from the chosen branch. Use the saw to cut the branch to your desired length, keeping in mind that a longer spear will provide greater reach. Once cut, use the knife to strip the bark from the branch, smoothing the surface.
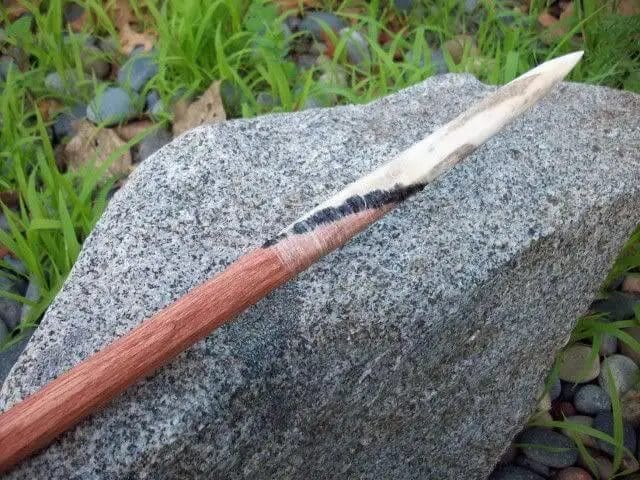
Next, at the thicker end of the branch, carefully carve a pointy tip using the knife. Make sure to create a sharp point that is suitable for piercing and hunting. It is also important to shape the opposite end of the spear into a comfortable grip by removing any rough edges.
After shaping the spear, take some time to sand the surface using sandpaper or a rough stone. This helps to smooth out any remaining imperfections and makes the spear more comfortable to

Tools and Materials Required for Making a Wood Spear
When it comes to making a wood spear, having the right tools and materials is crucial. In this section, we will discuss the essential items you will need to successfully craft your own wooden spear.
1. Wood
The first and most important material you’ll need is a suitable piece of wood. Wood spears are often made from hardwoods such as oak, hickory, or ash, as they are durable and strong. Look for a straight, sturdy piece of wood that is at least six feet long.
2. Cutting Tools
To shape the wooden spear, you will need a few cutting tools, including:
- Hand Saw: A hand saw will help you trim the wood to the desired length.
- Carving Knife: A sharp carving knife will be used for carving and shaping the spearhead and handle.
- Wood Chisels: Chisels will be useful for removing excess wood and creating precise cuts.
3. Sandpaper
After shaping the wood, sandpaper is essential for smoothing the surface of the spear. It will remove any rough edges and create a polished finish.
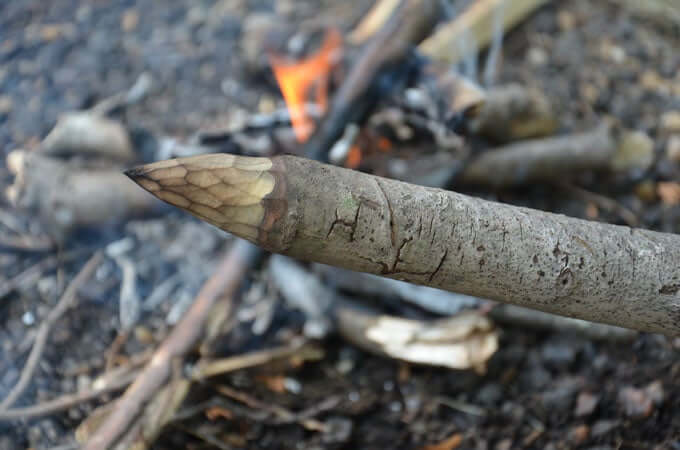
4. Fire
If you want to harden the wooden spear, fire can be used. By heating the spearhead over an open flame, the wood will become stronger and more resistant to breakage.
5. Cordage
For attaching the spearhead to the handle, you will need strong cordage. Natural materials like rawhide, sinew, or strong plant fibers can be used for this purpose.
6. Optional: Decorative Elements
If you want to add a personal touch to your wood spear, you can consider adding decorative elements such as feathers, beads, or leather wraps. These can enhance the appearance and make the spear more visually appealing.
7. Safety Equipment
Lastly, don’t forget about safety. When working with cutting tools, it’s crucial to protect yourself. Ensure you have the following safety equipment:
- Safety Glasses: Safety glasses will protect your eyes from flying wood chips or debris.
- Gloves: Wearing gloves will provide a better grip and protect your hands from cuts or splinters.
With these tools and materials at hand, you are ready to embark on the journey of making your own wood spear. Remember to prioritize safety throughout the process and enjoy the satisfaction of creating your own functional tool.
Step-by-Step Guide to Carving and Shaping a Wood Spear
Carving and shaping a wood spear can be a rewarding and practical project for anyone interested in primitive weaponry or traditional crafts. Whether you are an experienced woodworker or a beginner looking for a new challenge, this step-by-step guide will walk you through the process of creating your very own wood spear.
Materials Needed:
- A suitable piece of wood (preferably hardwood)
- Measuring tape
- Pencil or marker
- Wood carving tools (e.g., carving knife, gouges, chisels)
- Sandpaper or sanding block (various grits)
- Protective gloves and eyewear
- Wood finish (optional)
Step 1: Selecting the Wood
The first step in carving a wood spear is to select a suitable piece of wood. Hardwoods like oak, ash, or hickory are ideal for this purpose as they are strong and durable. Choose a straight and relatively knot-free section of the wood that is about 5-6 feet in length.
Step 2: Marking the Design
Using a measuring tape, mark the desired length of the spear on the wood. Then, measure about 10-12 inches from one end of the wood and make a second mark. This shorter section will become the spearhead.
Step 3: Carving the Spearhead
Put on your protective gloves and eyewear before starting this step. Begin by carving away the excess wood around the second mark to create a rough triangular shape. Gradually refine the shape using a carving knife or gouges. Take your time and make sure to create a sharp point at the tip of the spearhead.
Step 4: Shaping the Shaft
Once the spearhead is carved, it’s time to shape the shaft. Starting from the opposite end of the spearhead, use a carving knife or chisels to remove excess wood and create a smooth, tapered shape. Work your way from the thicker end to the thinner end, ensuring a consistent diameter along the entire length of the shaft.
Step 5: Finishing Touches
After shaping the spearhead and shaft, use sandpaper or a sanding block to smooth out any rough edges or imperfections. Begin with a coarse grit sandpaper and gradually move to finer grits for a polished finish. If desired, apply a wood finish such as varnish or oil to enhance the appearance and protect the wood.
Step 6: Testing and Adjusting
Once your wood spear is complete, it’s important to test its functionality. Take it outside and practice throwing it at a safe target to ensure stability and accuracy. If necessary, make any adjustments to the spearhead or shaft to improve its performance.
Summary
Carving and shaping a wood spear is a rewarding process that allows you to create a functional and impressive weapon. Following this step-by-step guide, you can confidently embark on this project and enjoy the satisfaction of crafting your own wood spear.
Remember to always prioritize safety by wearing protective gear and using sharp tools responsibly. With practice and patience, you can master the art of wood spear carving and create a unique piece of craftsmanship.
Adding Finishing Touches: Tips for Sharpening and Polishing a Wood Spear
Once you have crafted a wood spear, it is essential to give it the finishing touches to ensure its functionality and aesthetic appeal. Sharpening and polishing the spear not only enhances its cutting ability but also improves its overall appearance. In this section, we will discuss some valuable tips and techniques for sharpening and polishing a wood spear.
1. Choosing the Right Tools
Before you begin the sharpening and polishing process, it is crucial to gather the necessary tools. You will need the following items:
- Sandpaper: Choose sandpaper with varying grits, such as coarse, medium, and fine. This will allow you to work through different stages of the sharpening and polishing process.
- Whetstone: A whetstone is a sharpening tool used to refine the blade’s edge and remove any burrs.
- Polishing Compound: This compound helps achieve a smooth and glossy finish on the spear.
- Protective Gear: Wear safety goggles and gloves to protect yourself during the sharpening and polishing process.
2. Sharpening the Spear
The first step in sharpening a wood spear is to refine the blade’s edge. Follow these steps:
- Sanding: Start by using coarse sandpaper to remove any rough edges or splinters from the spear’s blade. Work your way up to finer grits, ensuring a smooth surface.
- Beveling: Use a whetstone to create a beveled edge on the spear. Hold the whetstone at a slight angle and move it along the blade’s edge in a controlled motion. Repeat this process until you achieve the desired sharpness.
- Removing Burrs: After beveling, inspect the blade for any burrs or rough spots. Gently run the whetstone along the edge to eliminate these imperfections.
3. Polishing the Spear
Polishing the wood spear adds a beautiful finish and protects the wood. Here’s how you can do it:
- Applying Polishing Compound: Take a small amount of polishing compound and apply it to a clean cloth. Rub the compound onto the spear’s surface in circular motions, covering the entire area.
- Buffing: Using a separate clean cloth, buff the spear’s surface to distribute the polishing compound evenly and to achieve a lustrous shine.
- Finishing Touches: Inspect the spear for any uneven areas or missed spots. If necessary, repeat the application of polishing compound and buffing process until you are satisfied with the result.
4. Applying Protective Coating
To further protect your wood spear and enhance its longevity, consider applying a protective coating. You can use varnish, lacquer, or a wood sealant to shield the wood from moisture and environmental damage. Follow the instructions provided by the manufacturer for proper application.
5. Maintenance and Care
To keep your wood spear in optimal condition, it is important to maintain and care for it properly. Here are a few maintenance tips:
- Store the spear in a cool, dry place to prevent warping or damage.
- Regularly inspect the spear for any signs of wear or damage, such as cracks or splintering. Repair or replace any damaged parts as needed.
- When not in use, keep the spear covered or wrapped to protect it from dust and debris.
- Periodically reapply a protective coating to maintain the spear’s appearance and durability.
In summary, sharpening and polishing a wood spear is a vital step in its completion. By following the proper techniques and using the right tools, you can achieve a sharp, polished, and visually appealing spear. Remember to prioritize safety and maintenance to ensure the longevity of your wood spear.
Safety Precautions and Best Practices for Using a Wood Spear
Using a wood spear can be an effective and efficient tool for various purposes, including hunting, fishing, or even self-defense. However, it is important to prioritize safety when handling and using a wood spear, as it can be a potentially dangerous weapon if not used correctly. In this section, we will discuss some essential safety precautions and best practices that you should follow when using a wood spear.
1. Proper Training and Knowledge
Before using a wood spear, it is crucial to have proper training and knowledge about its safe handling and usage. Familiarize yourself with the correct techniques for gripping the spear, throwing or thrusting it, and retrieving it. Understanding the fundamentals will help minimize the risk of accidents and improve your overall performance.
2. Inspect the Wood Spear
Prior to using a wood spear, always inspect it thoroughly for any signs of damage, such as cracks, splinters, or weakened areas. If you notice any issues, do not use the spear, as it could break or shatter during use, potentially causing harm. Regularly check the condition of the spear and replace it if necessary.
3. Use a Proper Grip
When handling a wood spear, ensure you have a firm and proper grip. Hold the spear firmly in your hand, with a secure and comfortable grip that allows for controlled movements. Avoid gripping the spear too tightly, as it can lead to muscle fatigue and lack of control. Practice different grip techniques to find the one that works best for you.
4. Clear and Open Space
Always use a wood spear in a clear and open space, away from any obstacles or people. This will help prevent accidental injuries to yourself or others. Make sure there is enough room for you to maneuver the spear safely without hitting anything or anyone unintentionally.
5. Maintain Focus and Concentration
When using a wood spear, it is essential to maintain focus and concentration throughout the entire process. Avoid distractions and stay focused on your target or task at hand. This will help ensure accurate aim and controlled movements, minimizing the risk of accidents or mishaps.
6. Wear Protective Gear
To further enhance your safety, consider wearing appropriate protective gear when using a wood spear. This may include gloves, eye protection, and even a helmet, depending on the nature of your activity. Protective gear can help mitigate potential injuries in case of accidental contact or mishandling of the spear.
7. Do Not Aim at People or Animals
Never aim or throw a wood spear at another person or animal, unless it is necessary for self-defense in a life-threatening situation. Using a wood spear irresponsibly can cause severe injuries or even fatalities. Always prioritize safety and ensure you have a clear target or objective in mind when using a wood spear.
8. Proper Storage and Maintenance
After using a wood spear, clean it thoroughly and store it appropriately in a safe and secure location. Avoid leaving the spear exposed to harsh elements or extreme temperatures, as it can weaken the wood or cause damage over time. Regularly maintain and inspect the spear to ensure its continued safety and effectiveness.
In summary, using a wood spear can be a valuable tool, but it requires responsible and safe handling. By following these safety precautions and best practices, you can minimize the risk of accidents and injuries while maximizing the utility and performance of your wood spear.
FAQs
Q: How to make a wood spear?
To make a wood spear, first, find a sturdy piece of wood that is about 5 to 7 feet long. Sharpen one end of the wood to a point using a knife or any sharp object. You can also harden the tip by heating it over a fire. Make sure to practice caution when handling sharp objects and fire.
Conclusion
In conclusion, learning how to make a wood spear can be a valuable survival skill and a fun woodworking project. By following the steps outlined in this guide, you can create a sturdy and effective tool for hunting, fishing, or self-defense.
Remember to choose a suitable wood and sharpen the spearhead properly for optimal performance. Practice and refinement will further improve your craftsmanship and accuracy, making you a formidable spear maker.
Whether you are an outdoor enthusiast, a bushcraft enthusiast, or simply interested in honing your woodworking skills, creating a wood spear is an enjoyable and rewarding endeavor. So grab your tools, gather some wood, and start crafting your own wooden spear today!